How to Install MySQL on Windows
In this post, you’ll learn how to install a MySQL database on Windows and connect to it using MySQL Workbench.
Let’s get started.

Download MySQL Installer
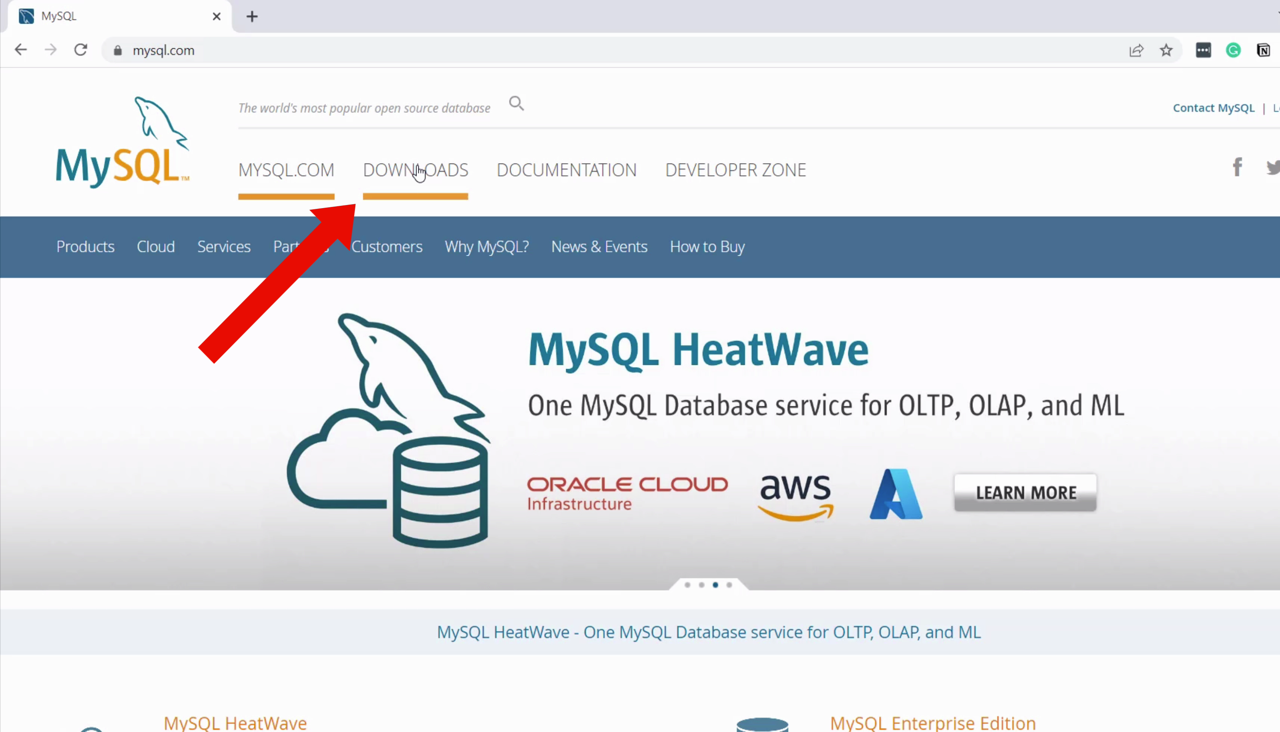
The first step is to visit the MySQL website at mysql.com.
Once this page loads, click on Downloads at the top.
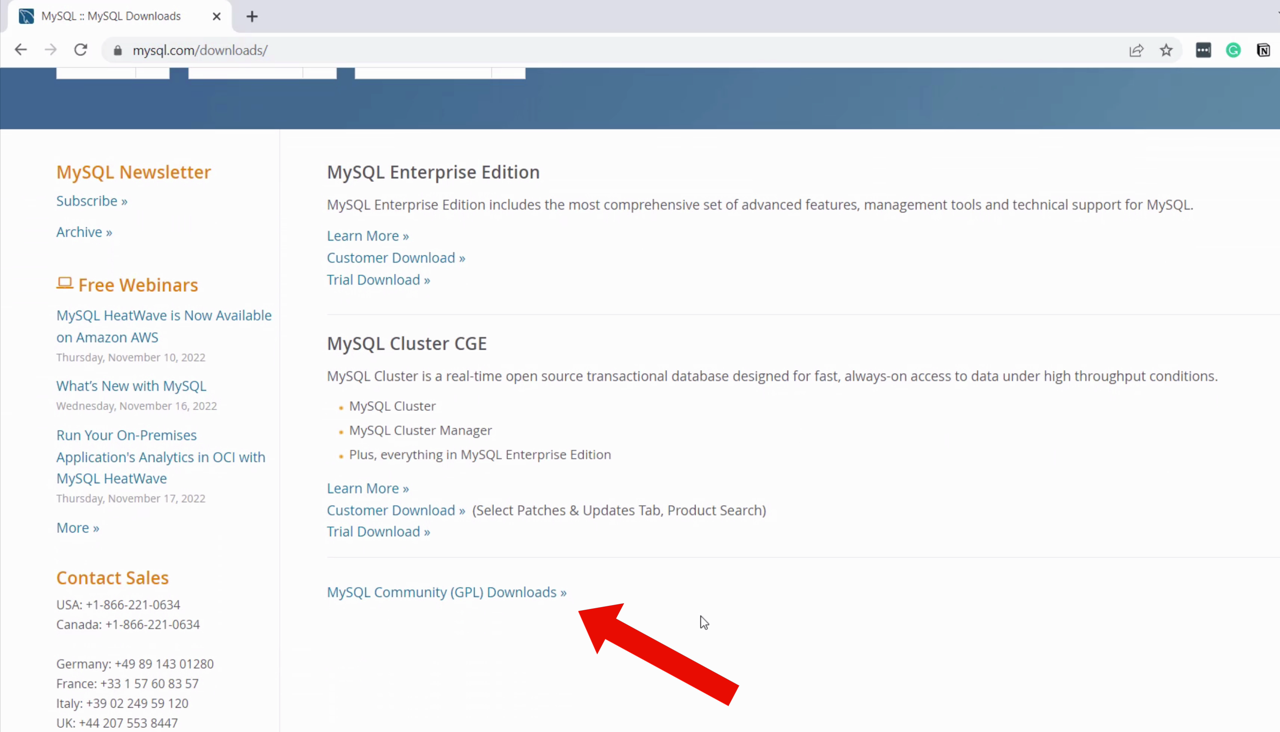
There are a few versions available on this page. Scroll down a little and click on MySQL Community GPL Downloads.
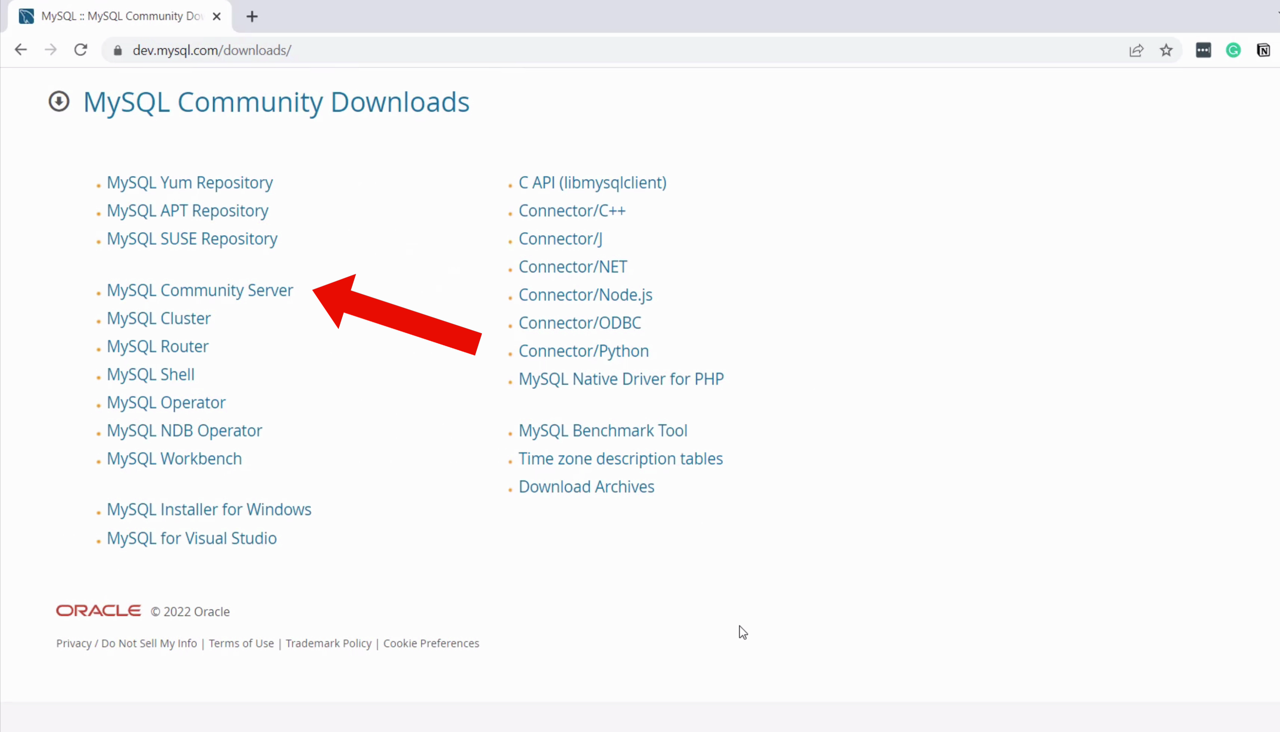
On this page, click on the MySQL Community Server. This is the free version that you can use.
On this Community Server page, it shows the latest version of MySQL, which as of today is 8.0.31.
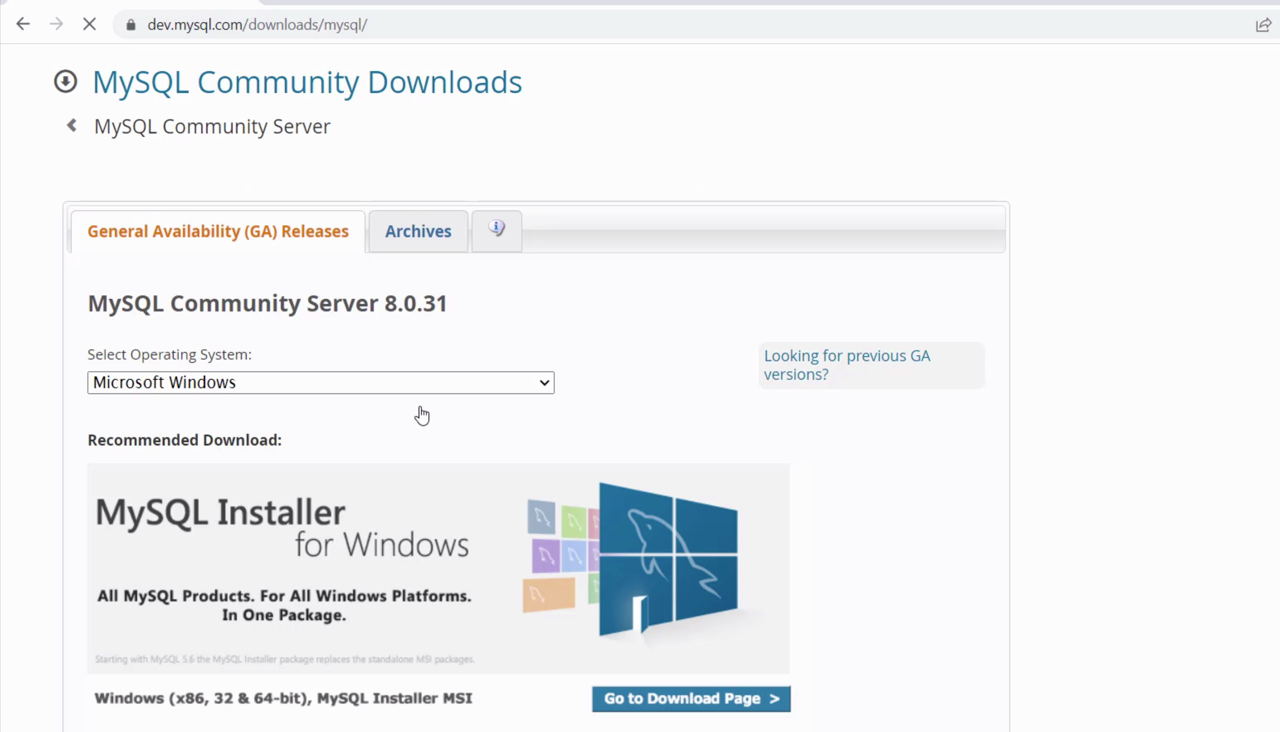
The operating system is detected automatically as Microsoft Windows.
Click on the big MySQL Installer for Windows image here. This will download an installer file that lets you install a range of tools along with the database and is pretty easy to use.
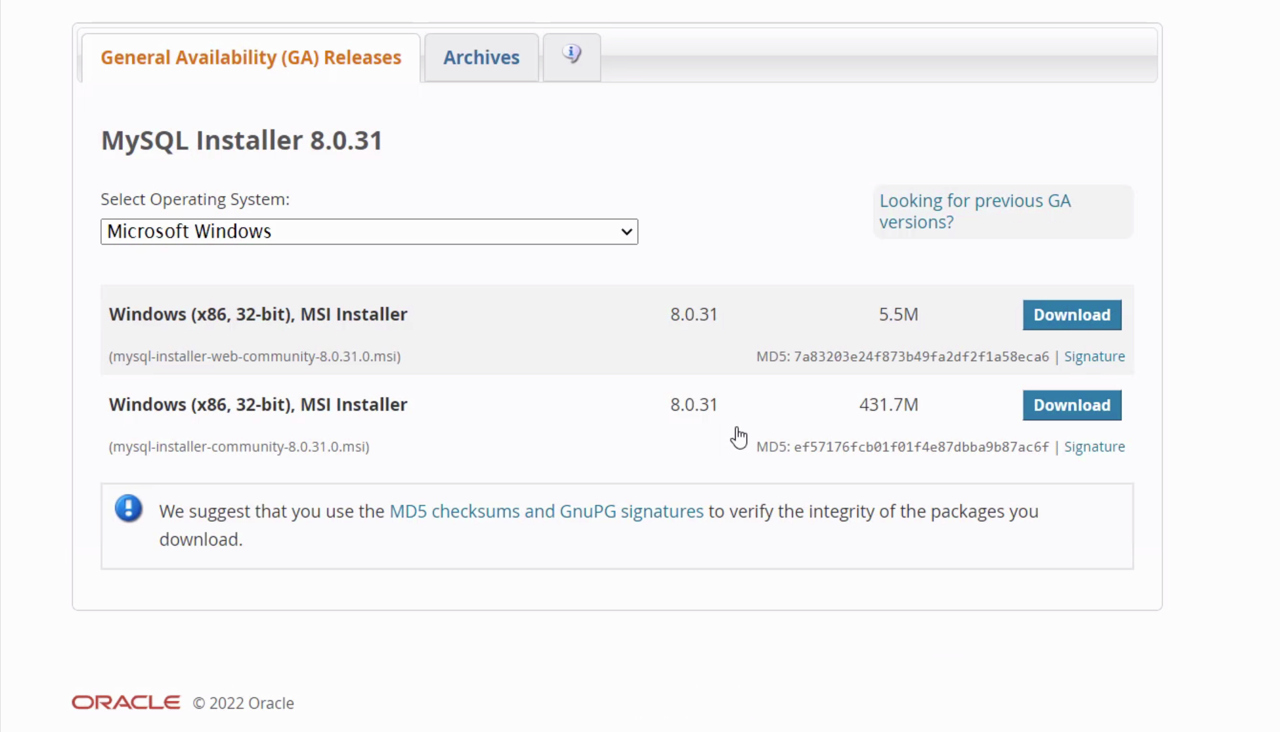
Now, on the MySQL Installer page, click on the first Download button.
On the next page, you’ll be asked to create or log in to your Oracle account, because Oracle owns MySQL. This is optional, so you can just click on “No thanks, just start my download” at the bottom.
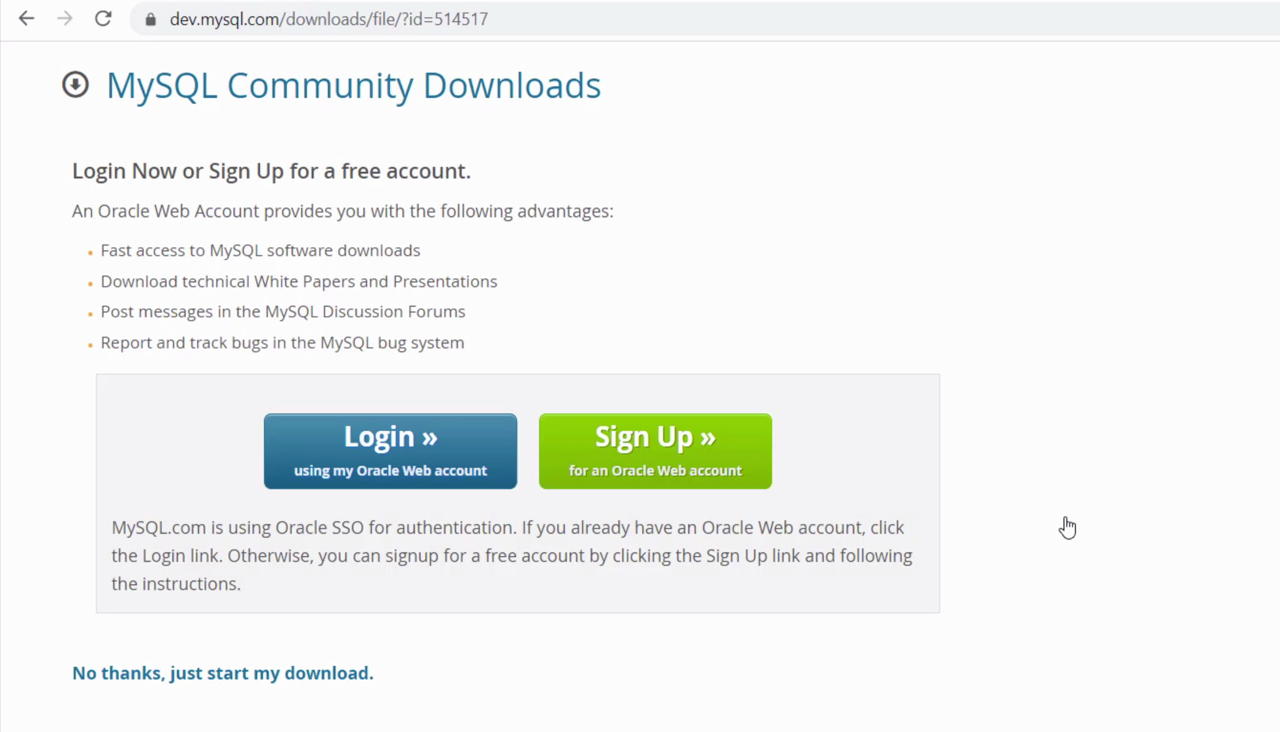
The installation file will begin downloading. It’s a small file because it’s only the installer, and the full database will be installed when you open this file and complete the wizard.
Install MySQL
Once the file is downloaded, open it.
It will spend a few moments loading. If you see any Windows messages about allowing the installer to make changes, click Yes.
The MySQL Installer will then load. The first page will let you choose your setup type.
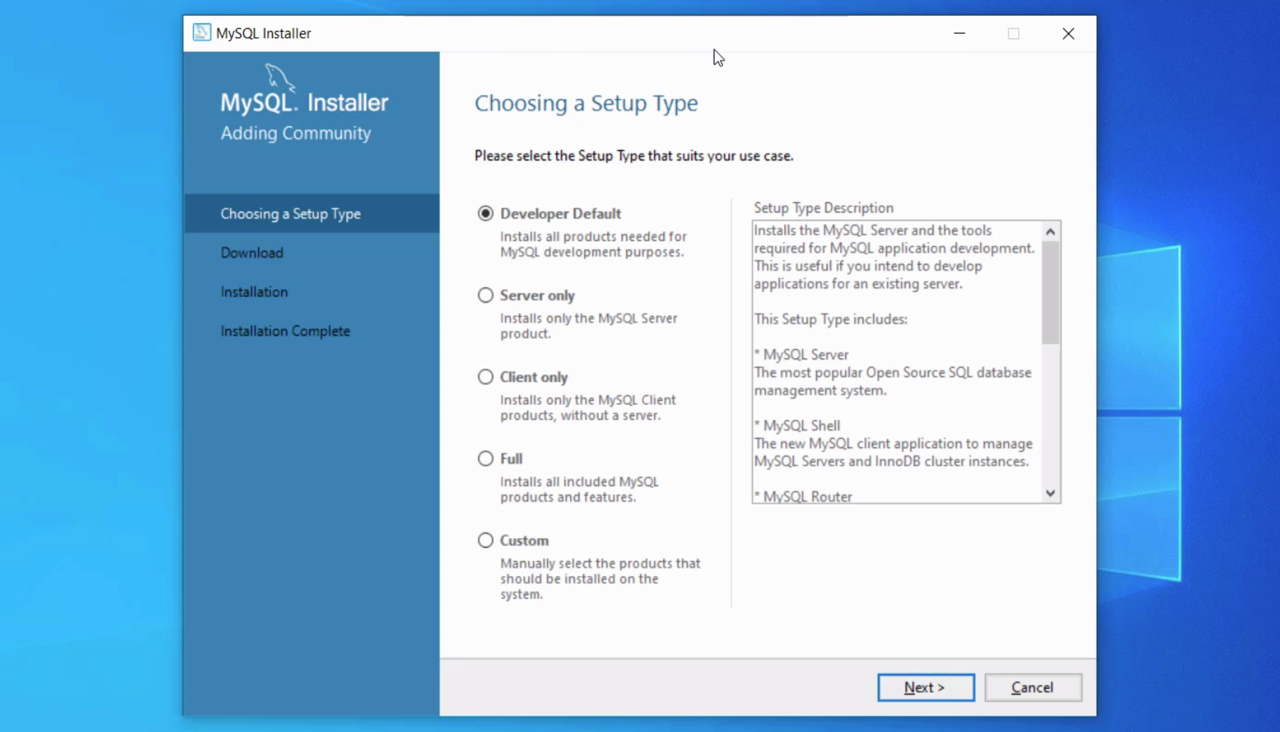
There are a few predefined setups here, and there’s a Custom option at the bottom if you want more control. For this example, we’ll leave it as Developer Default. The two things we need are MySQL Server and MySQL Workbench, both of which are included in this.
So, leave Developer Default selected and click Next.
On the next screen, you’ll see a list of products in the installer that have requirements before they can be used, and that my computer does not meet. In this example, we can see that MySQL for Visual Studio, and the Connector Python need to be addressed. Your list may be different, or you might not see this at all.
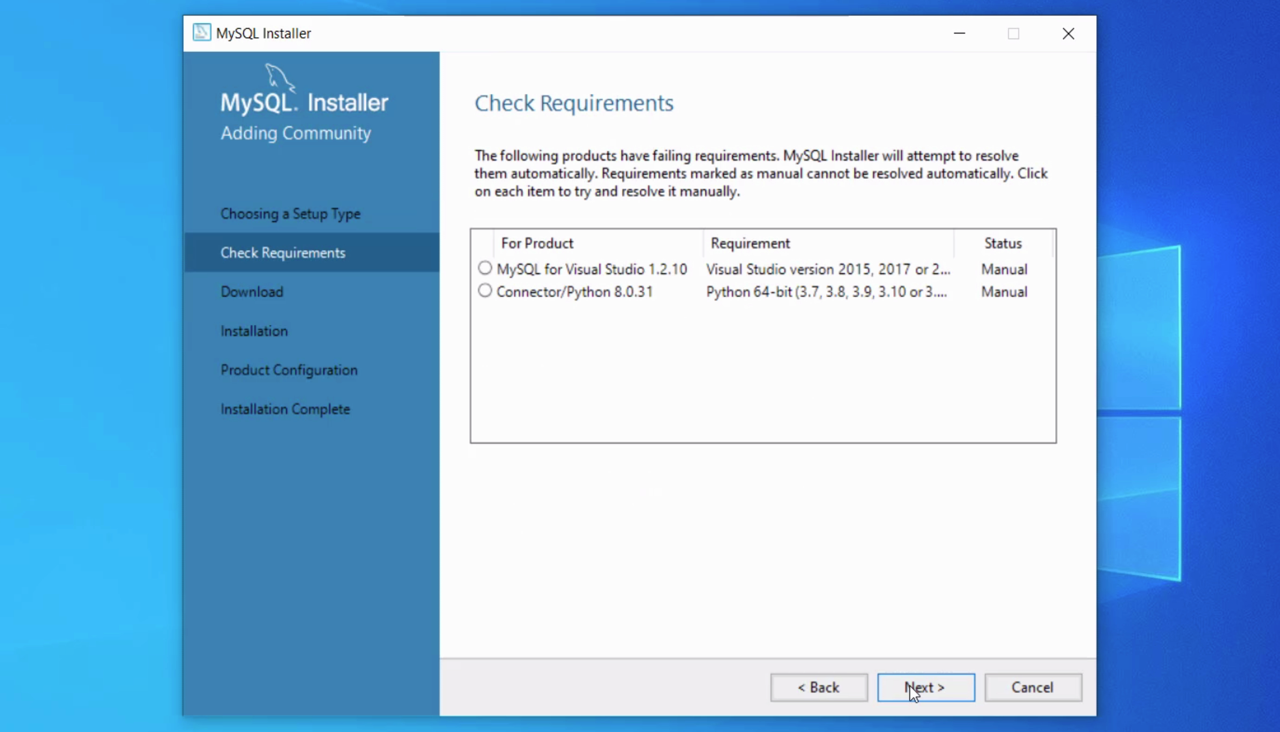
Click Next to attempt to resolve the issues.
In my installation, it tells me that one or more product requirements have not been satisfied. This is OK though, because we don’t need to use either of those products for our database.
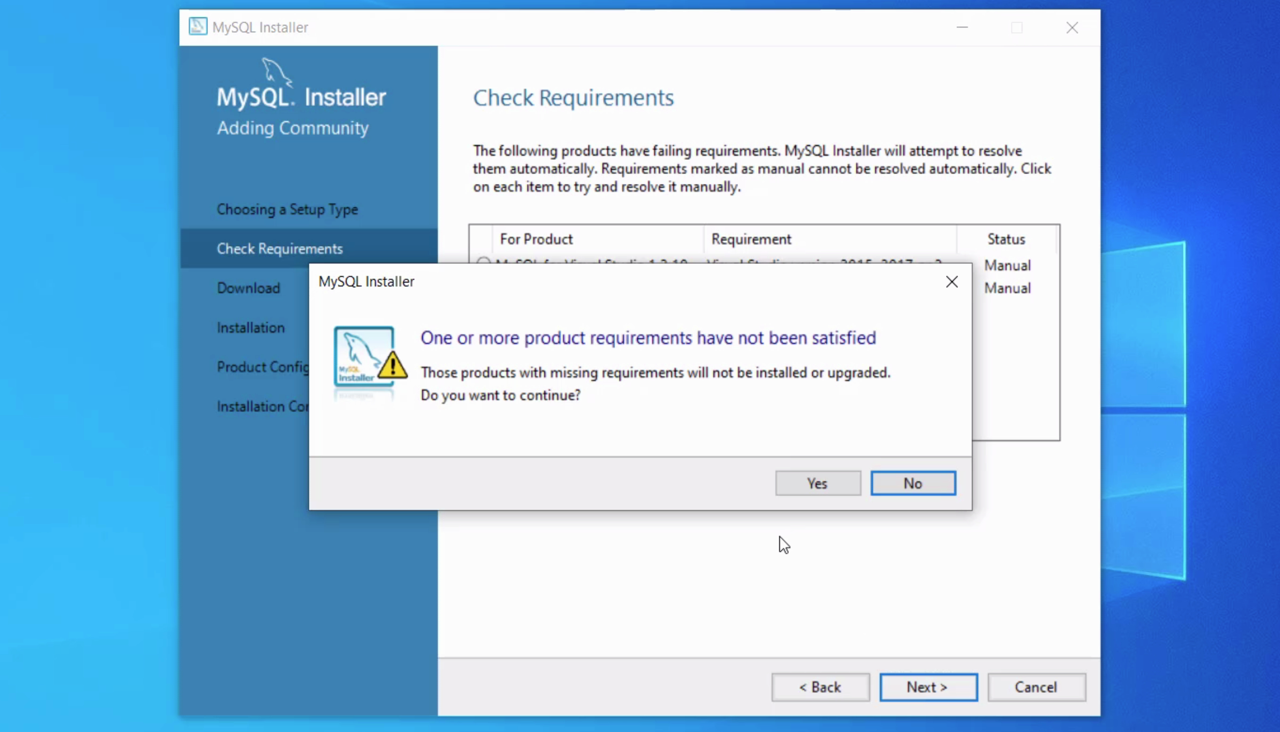
Click Yes to continue.
On the Download screen that appears next, it lists all of the components and their status of “Ready to download”. Click the Execute button to start the download.
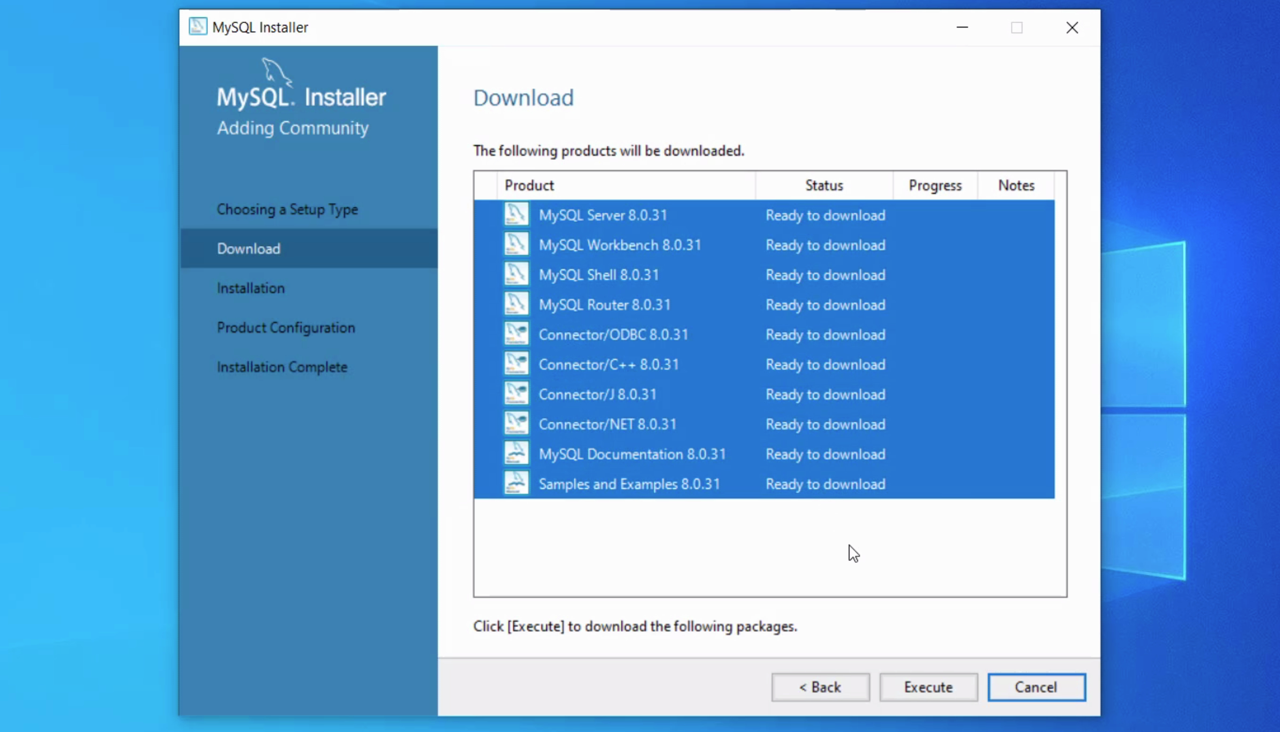
The components will begin downloading, which for me took a few minutes.
Once the downloads have finished, click Next.

The Installation screen is shown, with all components showing as Ready to Install. Click Execute.
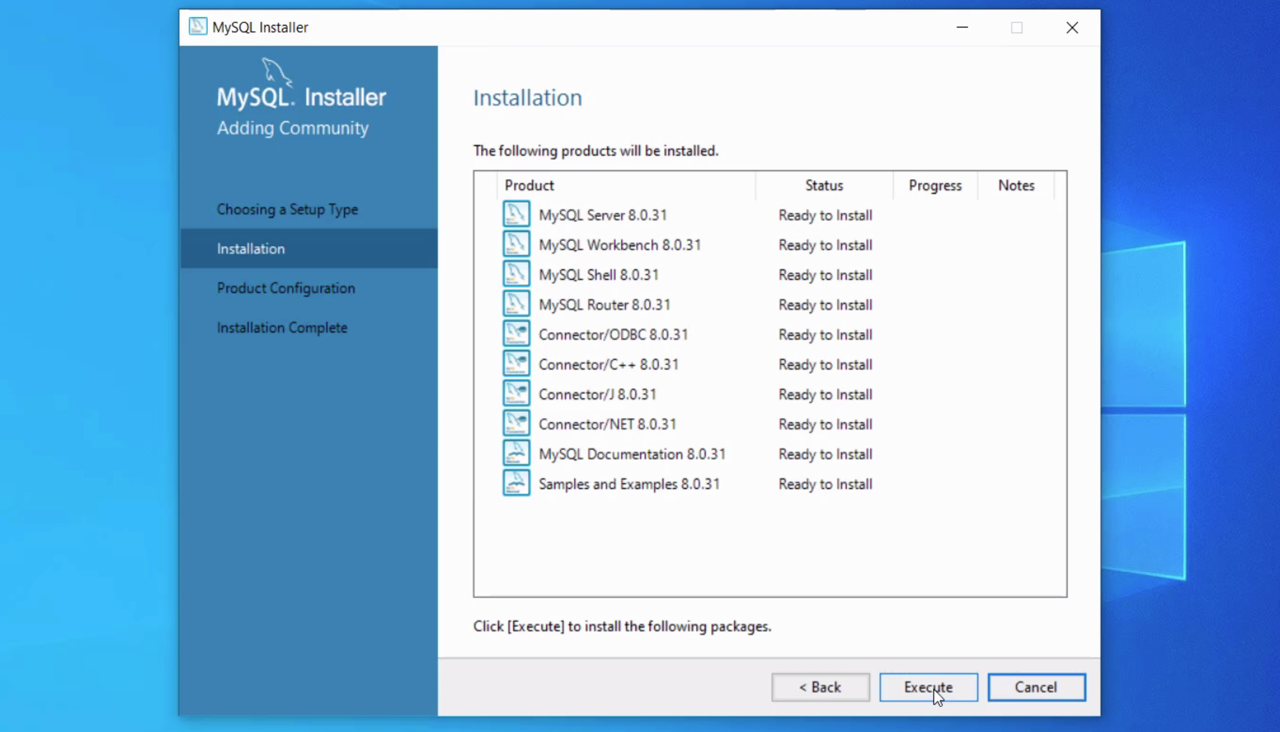
The components will then be installed.
After a few moments, they will all be installed.
Click Next.
Configure MySQL
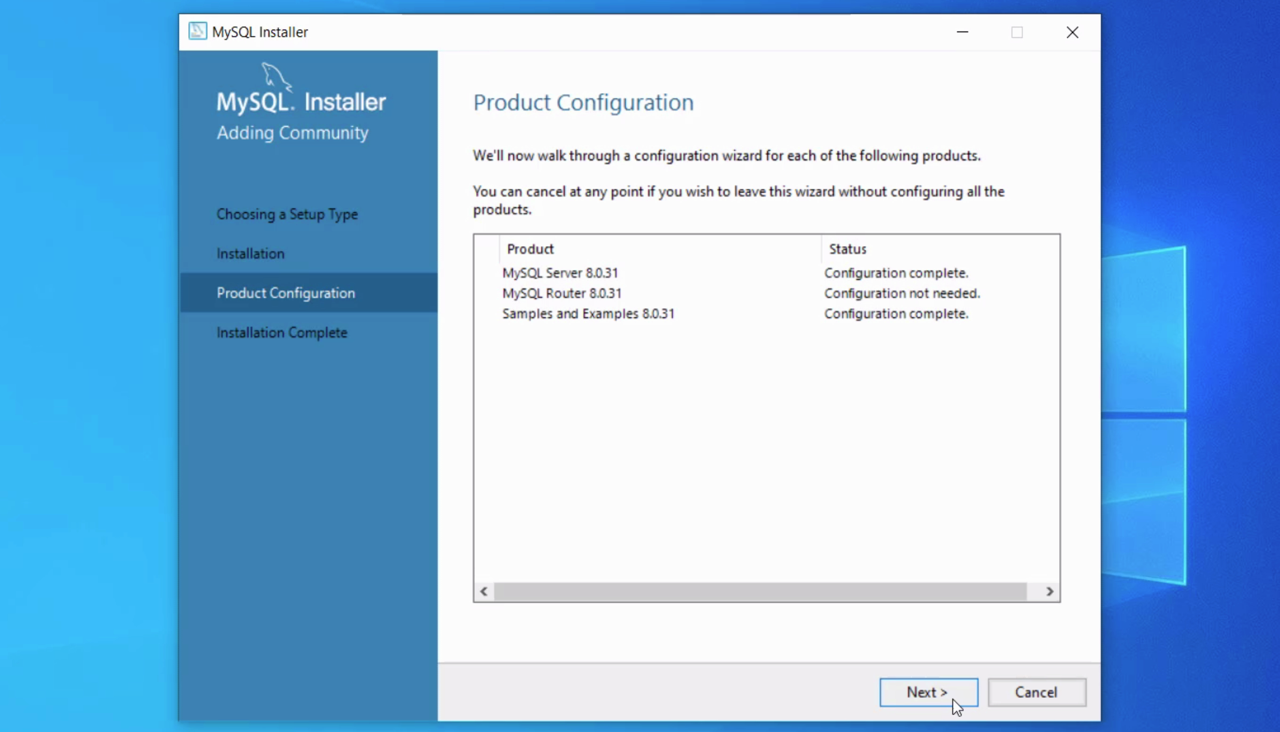
You’ll then see the Product Configuration screen.
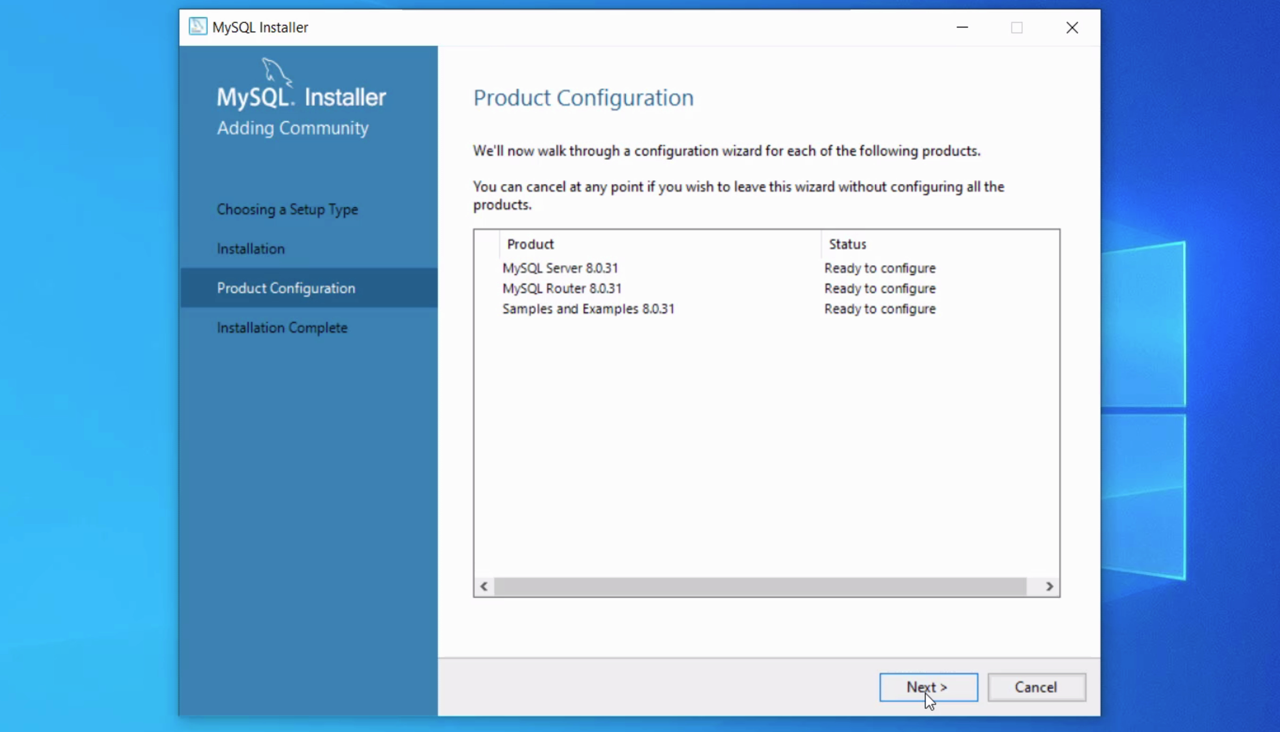
As we chose the Developer Default setup, there are three things to configure. The first one is the MySQL Server which is the main thing we will use. The other two will be pretty quick to configure.
So, click Next.
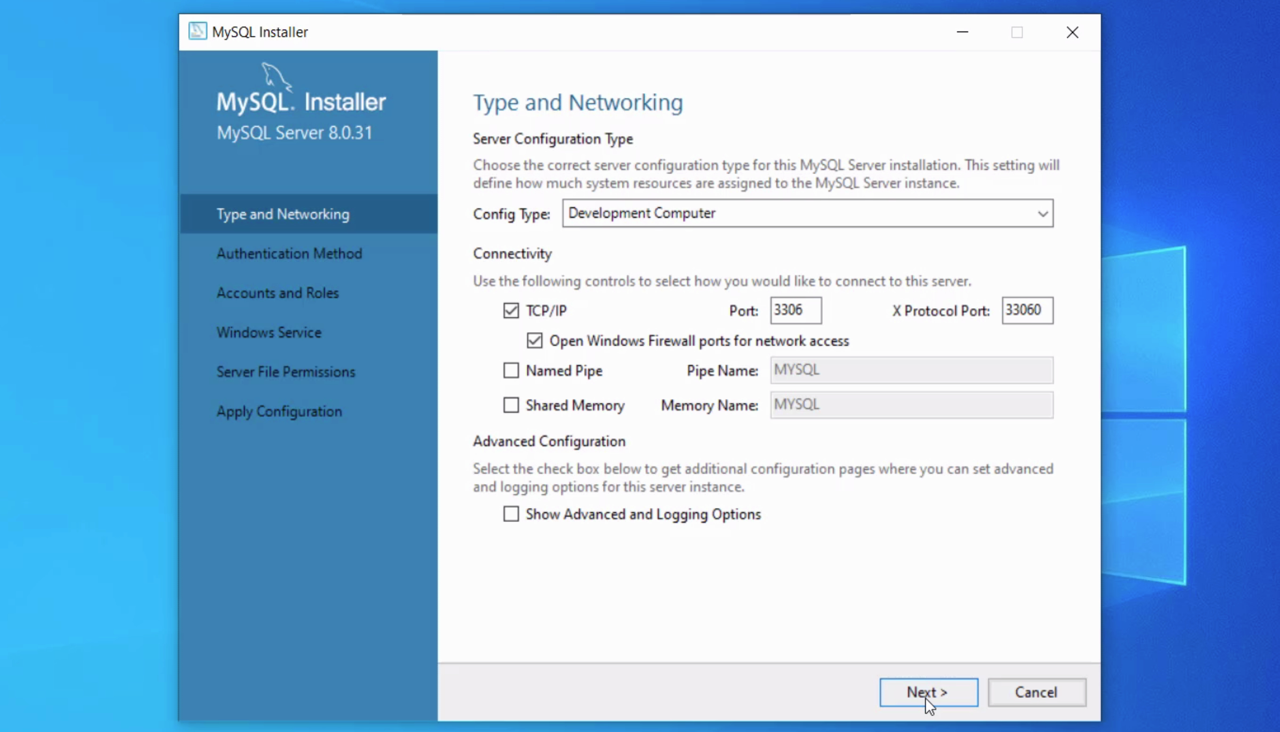
On the Type and Networking screen, there is a range of settings you can set, with many of them prefilled. Leave them as the default, and click Next.
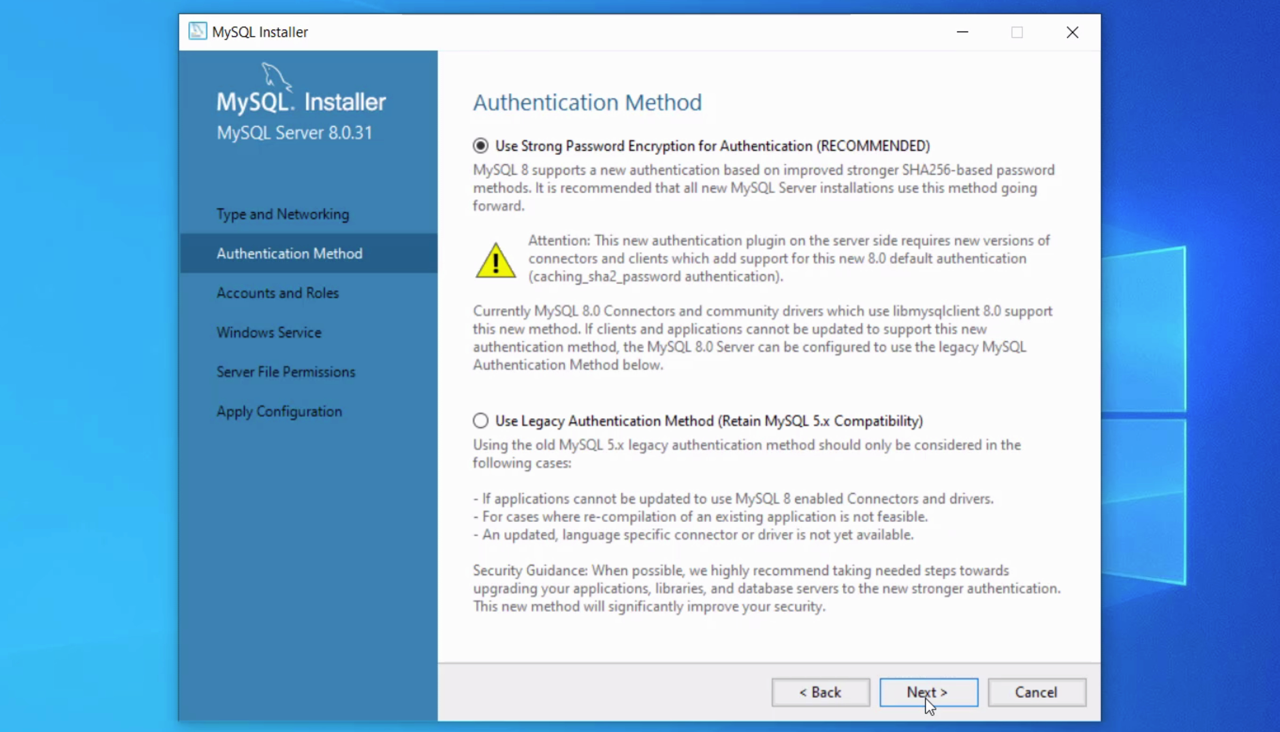
On the Authentication Method page, you can leave the default option of Use Strong Password Encryption. This is the recommended option. Click Next.
On the Accounts and Roles page, you can enter a password for the root account. This is the password you will use to connect to the database, so remember what you type here. I’ll enter a simple password, and the screen tells me it’s a weak password. You may want to consider entering a stronger password if you see this.
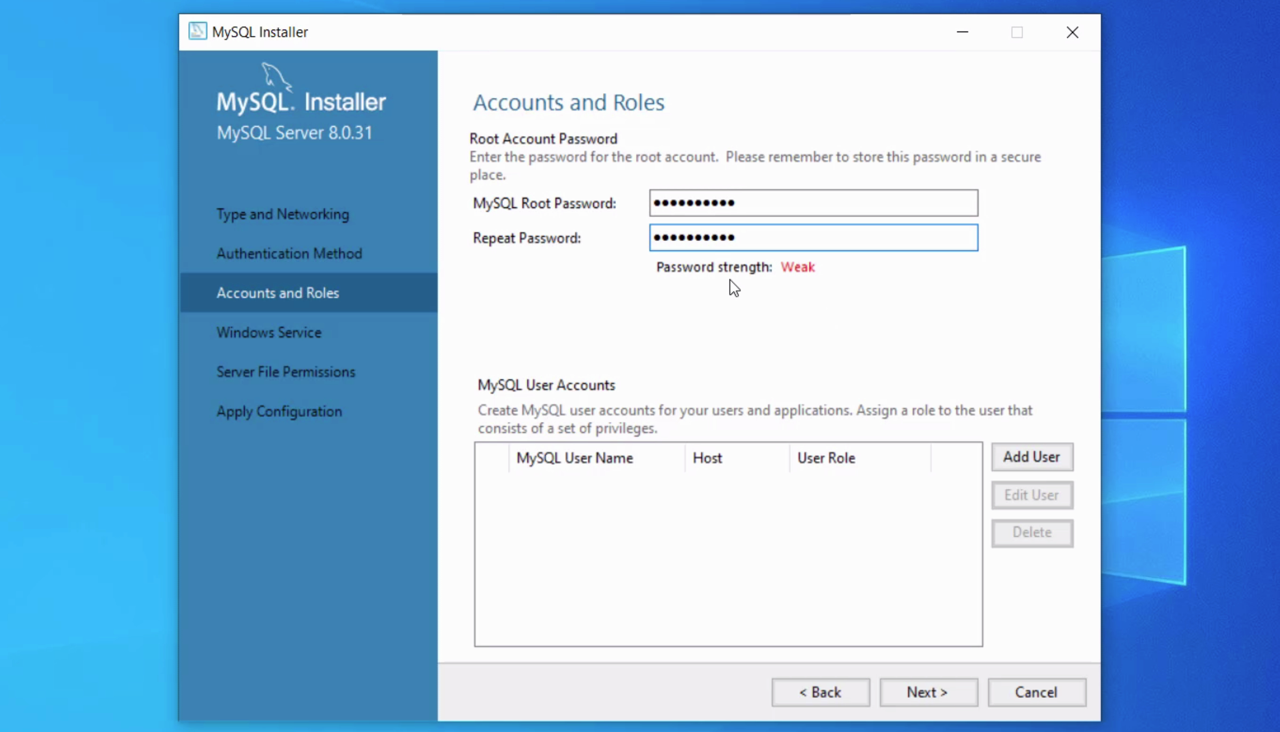
Further down on this screen, you can add new user accounts and roles. This is a handy feature of the installer and means you don’t need to use the root account for everything. For now, we will skip this, but you can set up an account here if you like.
On the Windows Service screen, you can leave all of the default values selected. One thing to notice here is the option for “Start the MySQL Server at system startup” is checked, so if you restart your computer, it will run automatically.
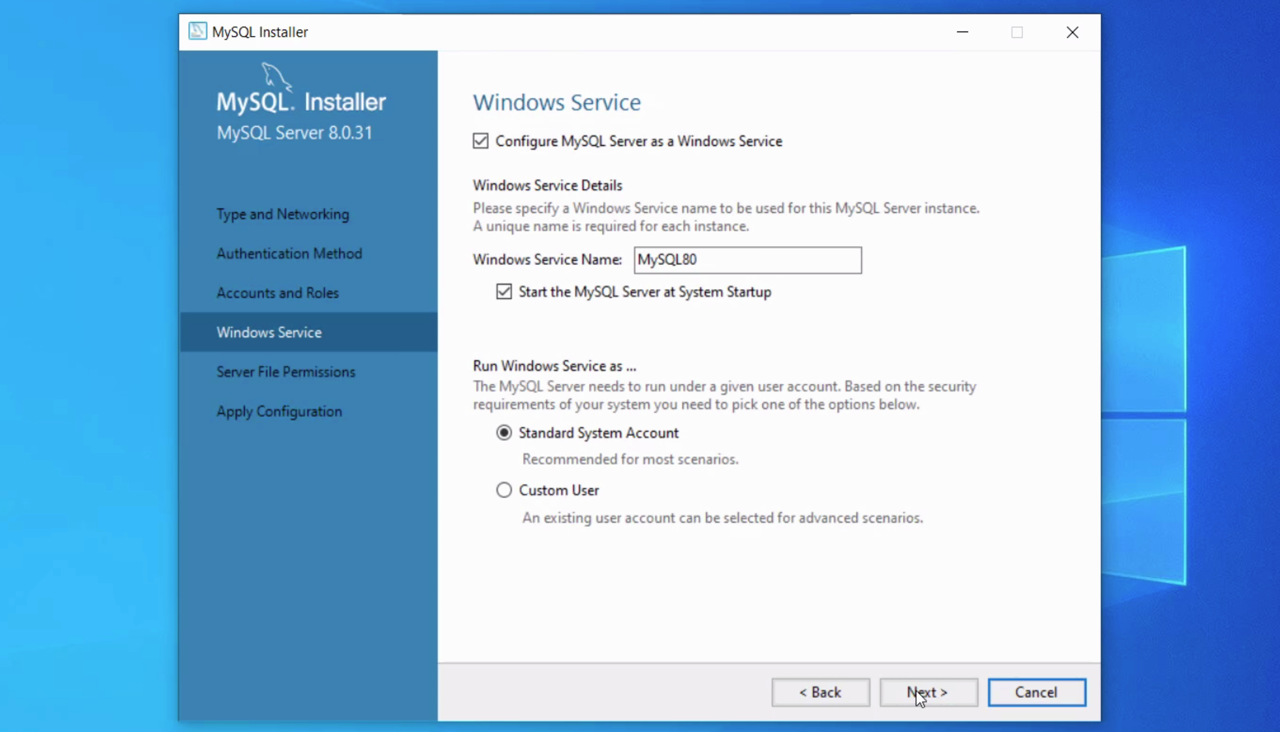
Click Next.
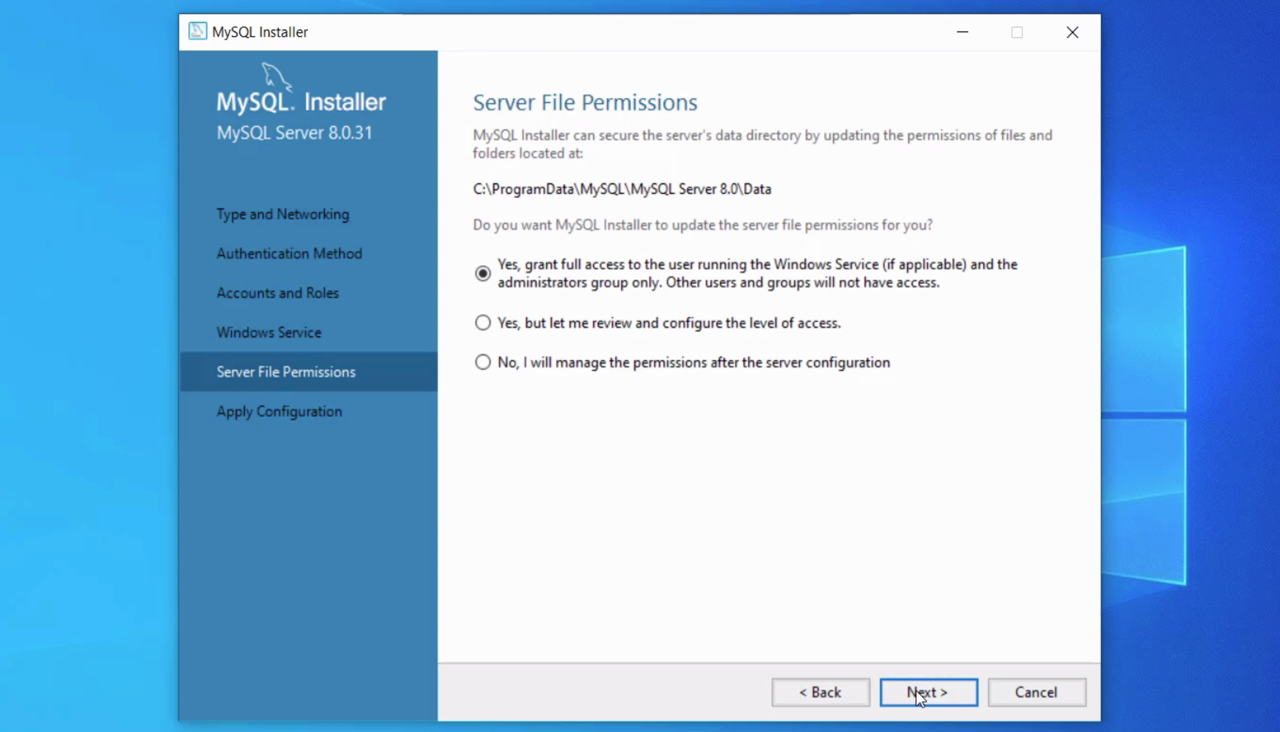
On the Server File Permissions screen, leave the default option and click Next.
On the Apply Configuration screen, click Execute. The settings you have selected will be applied.
After a moment it will be completed. Click Finish.
Configure Other Components
You’ll be taken back to the Product Configuration screen. The MySQL Server has been configured. Let’s proceed with the next two.
Click Next.
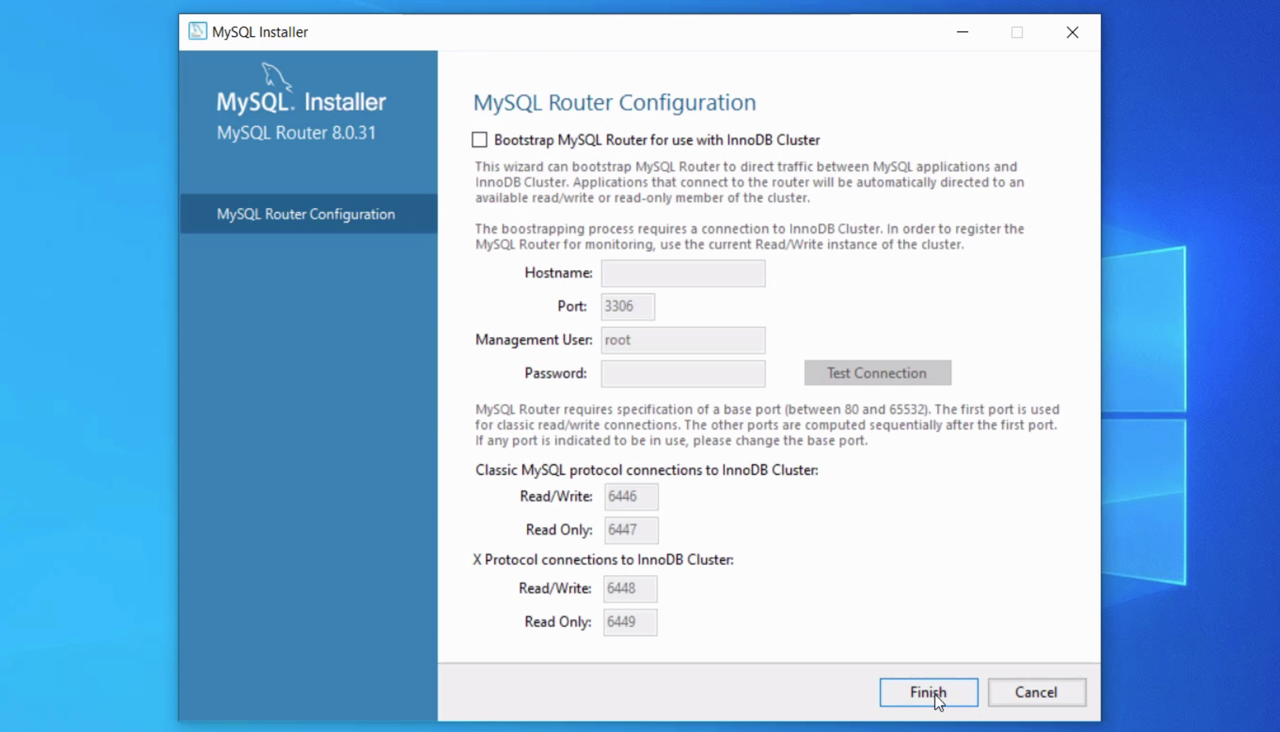
On the MySQL Router Configuration, you can leave the default values and click Finish.
Back on the Product Configuration screen, we can see the second item is complete. Click Next.
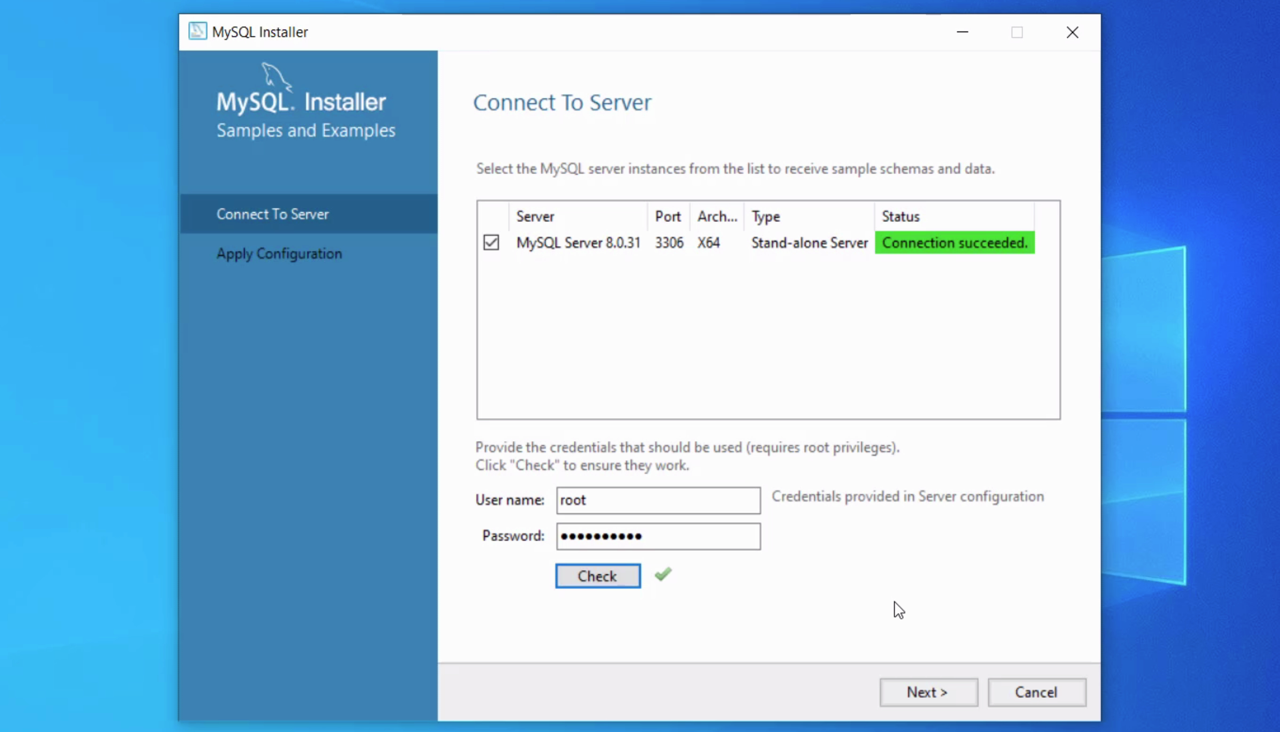
This last option will let us set up the sample databases. On the Connect to Server screen, enter the root password you used earlier in the setup, and click Check. If it’s correct, you’ll see a green tick and a green box on the top of the screen. Click Next.
On the Apply Configuration page, click Execute to set up the databases. After a few moments, this step will be complete.
Then, click Finish.
On the Product Configuration screen, all items are completed. Click Next.
On the Installation Complete screen, there are two checkboxes to notice. You can start MySQL Workbench after setup, and start the MySQL Shell after setup.
For this video, we’ll just use MySQL Workbench, but we’ll leave them both selected and then just close the shell so you can see what it looks like. If you want, you can unselect the checkboxes.
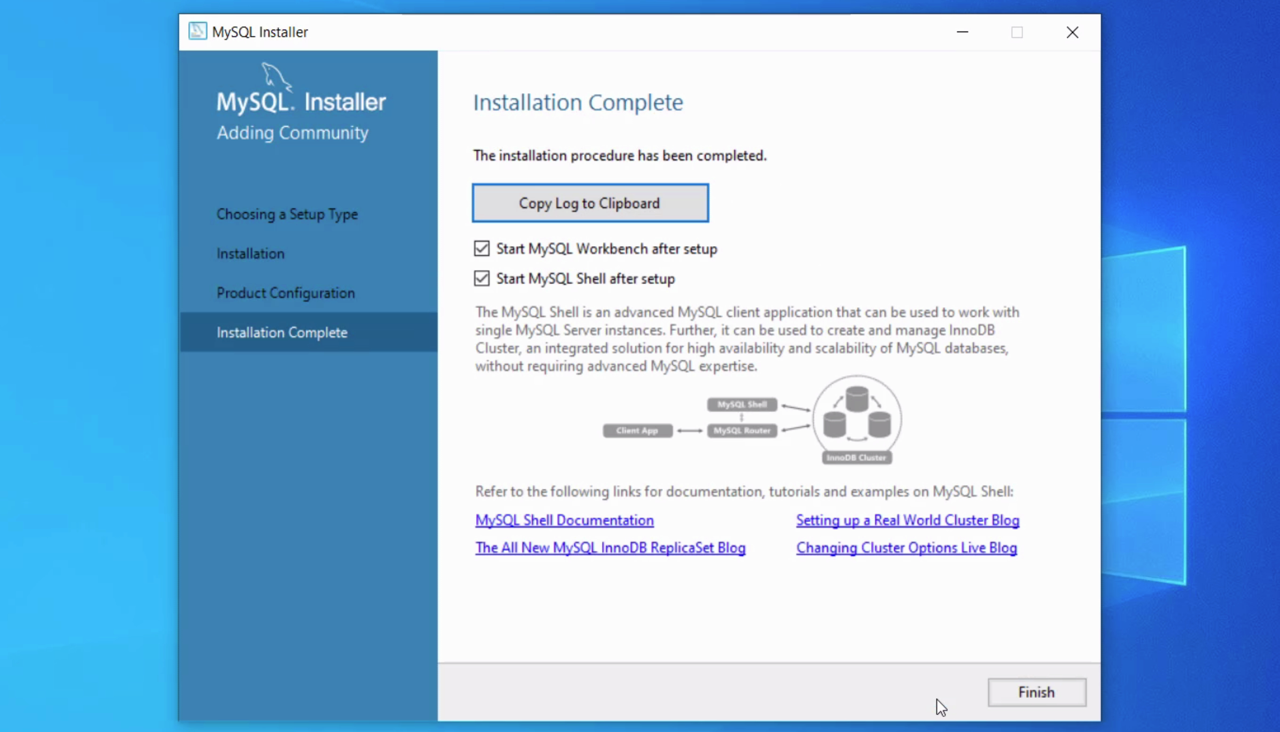
Click Finish. MySQL is now installed on your computer!
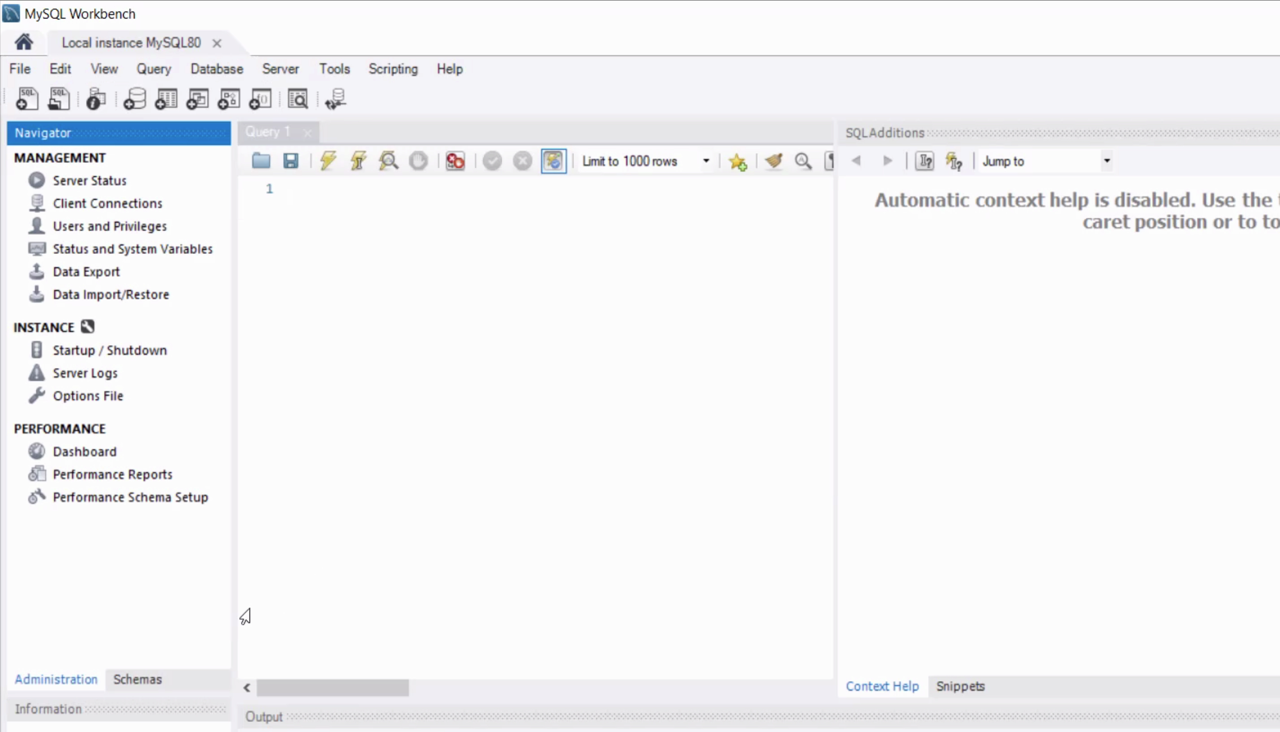
Connect Using MySQL Workbench
Now let’s connect to the database to test that it’s running correctly. We’ll do this in MySQL Workbench, which has been opened automatically. If it’s not open, you can run it from the Start menu.
We can see the main screen of MySQL Workbench here.
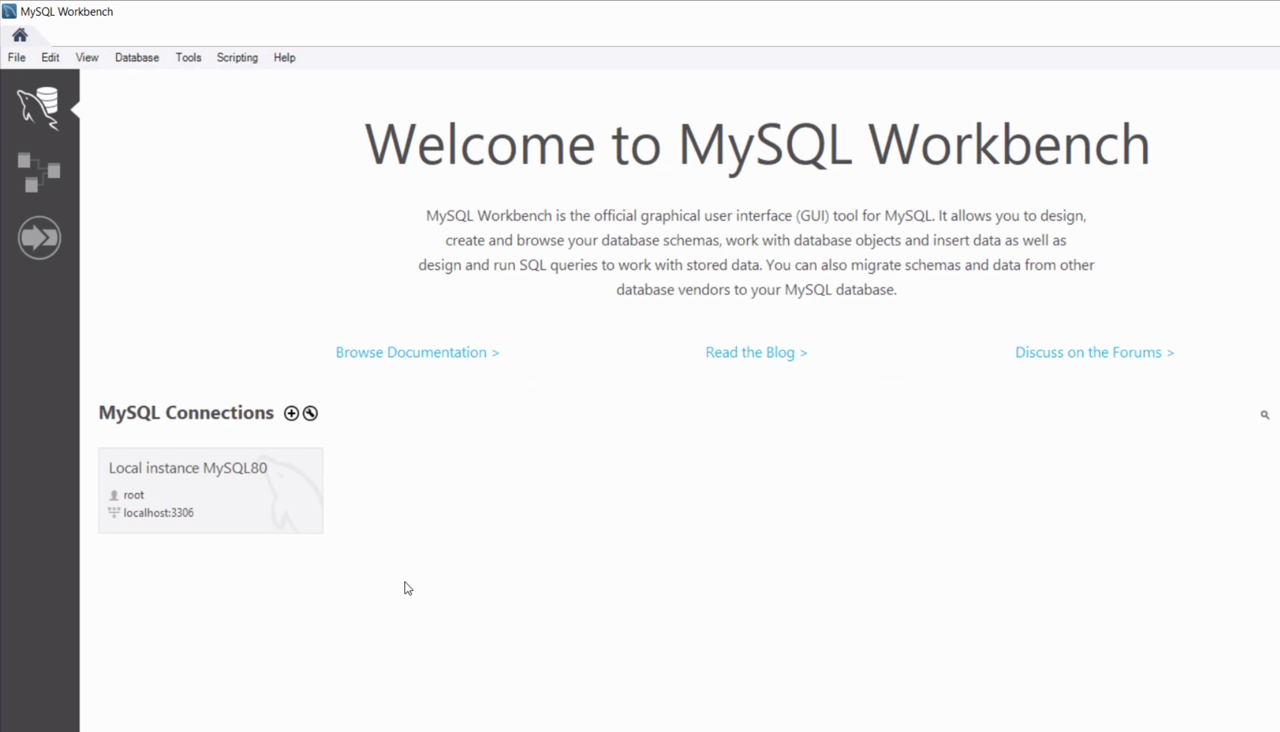
A connection has already been created, called Local Instance MySQL80. If you don’t have a connection here, you can click on the plus button next to MySQL Connections.
If you want to see the details of the connection, you can right-click on the connection and select Edit Connection.
The connections window appears. This shows the information for the connection: the host name, the port, username, and so on.
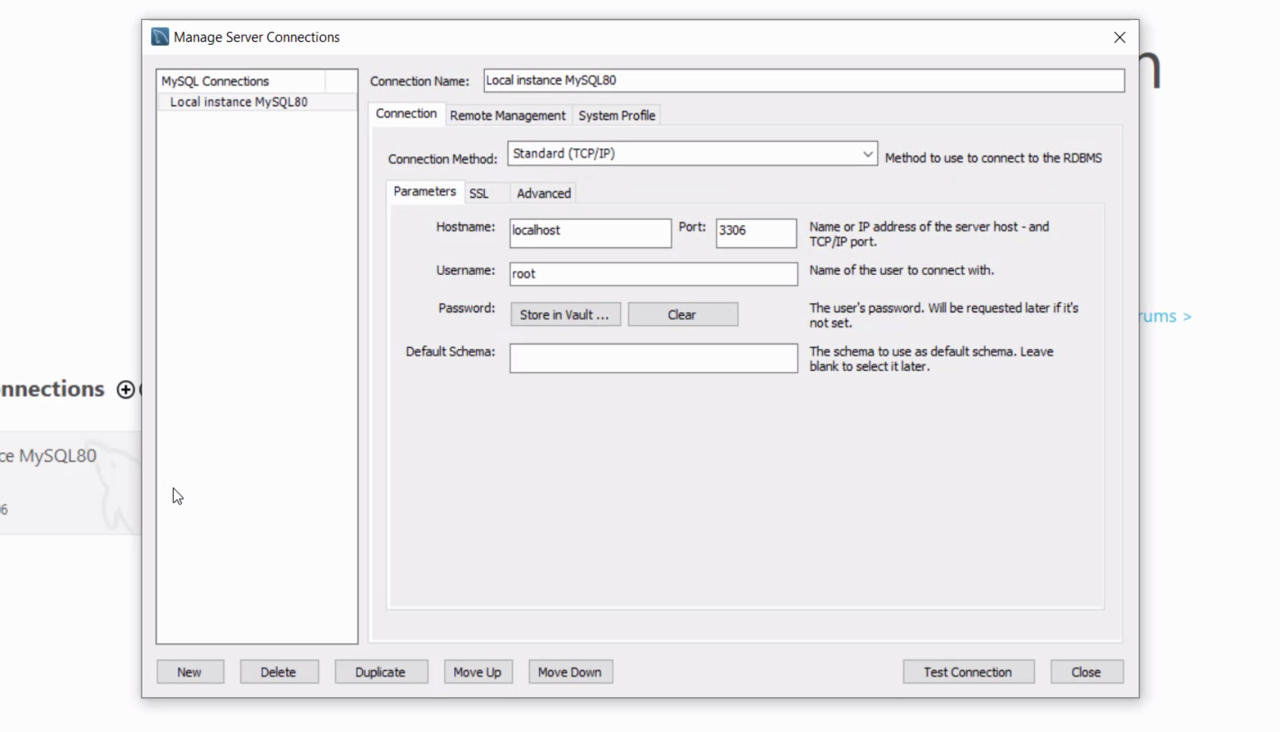
We can test the connection details by clicking Test Connection.
You’ll be asked to enter your password. This is the password you entered during the installation process. Enter it here.
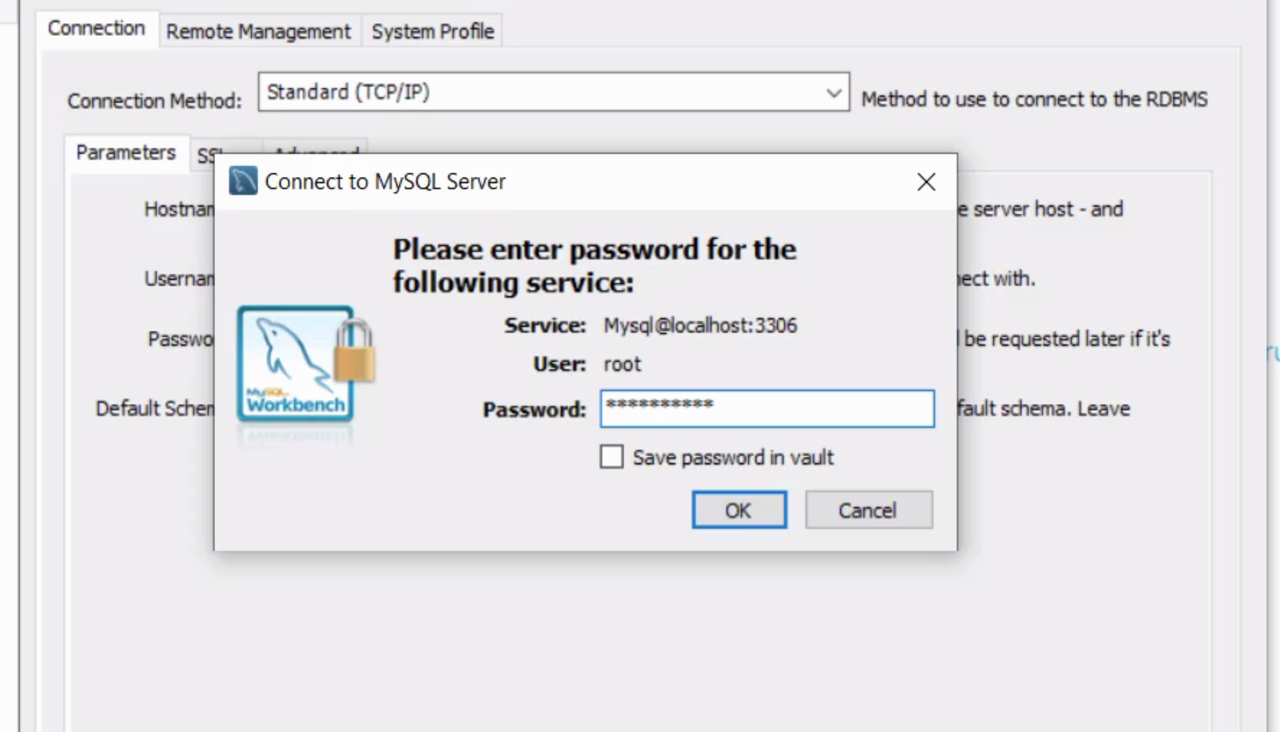
Check the box labelled “Save password in vault”, if you want to save this password in the MySQL Workbench vault so you don’t need to enter it every time you connect. Click OK.
If the password is correct, it should say “Successfully made the MySQL Connection”.
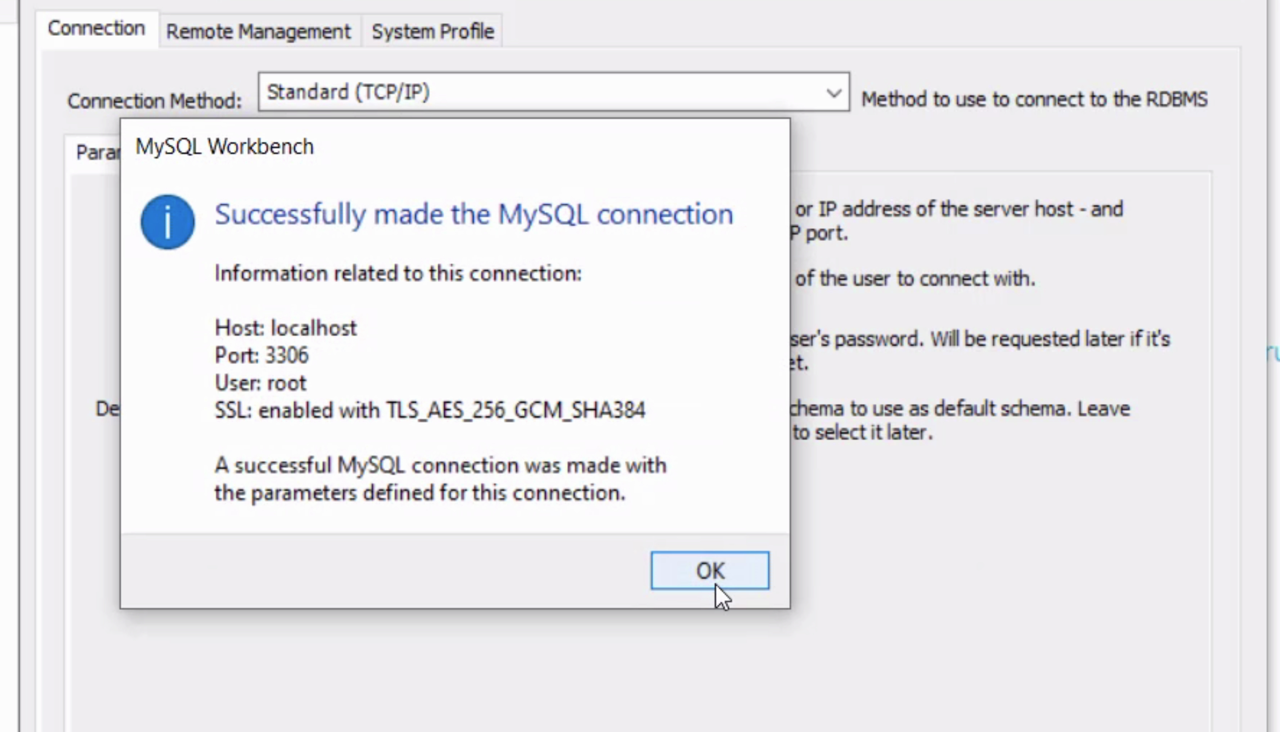
Click OK, then Close on the connection window.
To connect to the database, click on the connection box on the main screen here. After a few seconds, you will be connected to the database. You can now start working with your MySQL database!