How to Import a CSV using MySQL Workbench
Are you working on a MySQL database and need to import CSV data?
I'll show you how to do this in MySQL Workbench in this guide.

Prerequisites
To use the MySQL Workbench import CSV process, you'll need a few things:
- Access to the MySQL database.
- MySQL Workbench
- A CSV file to import
You won't need to have a table created, but you can create one before importing the CSV. The process I'll show you will allow you to create a new table when importing a CSV or use an existing table.
Personally, I like to import the CSV into a new table, then update column names and data types if needed. But it's up to you and depends on your data.
Let's take a look at how to import a CSV in MySQL.
Steps
Here's how to import a CSV file using MySQL Workbench:
- Connect to your database.
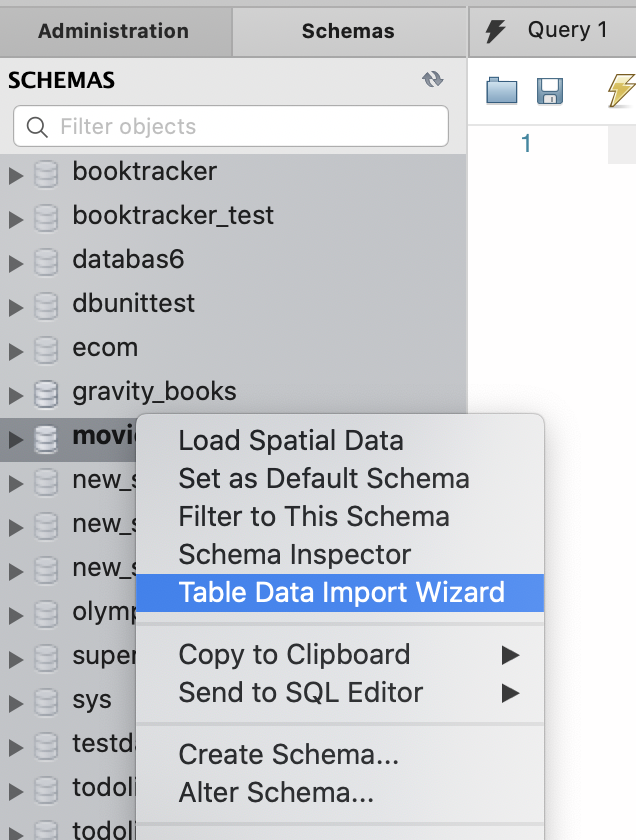
- Right-click on the database and select Table Data Import Wizard.
- Select your CSV file.
- Select an existing table or enter a name for a new table.
- Configure the import settings (data types, line separator, etc).
- Finish the process.
Let's look into these in more detail.
Our CSV file is a small file with some product data in it, just for demonstration purposes:
1id,product_name,price
21,Couch,100
32,Chair,50
43,Table,40
I'll try a larger CSV file at the end of this guide and measure the performance, as you're probably importing a file with more than 3 rows.
Step 1: First, open MySQL Workbench and connect to your database. Your window should look like the one below. These are from MySQL Workbench on macOS, but the Windows version looks very similar.
Step 2: Right-click on the database you want to import data into and select Table Import Wizard. There's no need to select a specific table from the Tables list.
You'll see the Table Data Import wizard.
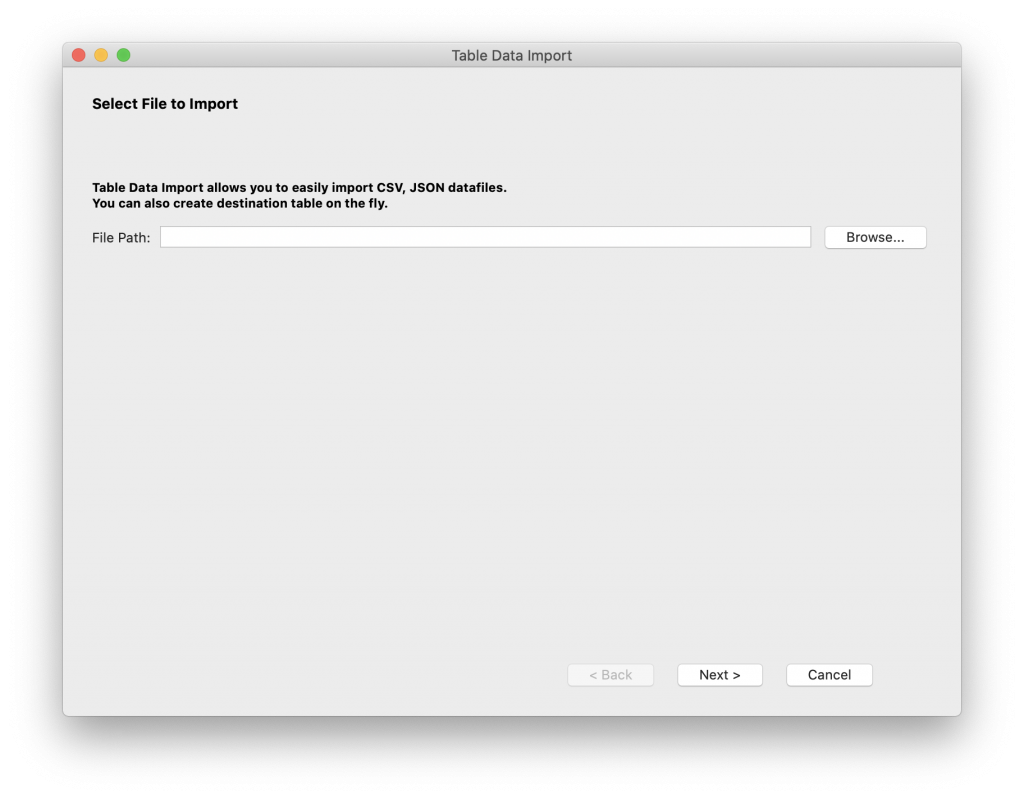
Step 3: Select the CSV you want to import by clicking the Browse button.
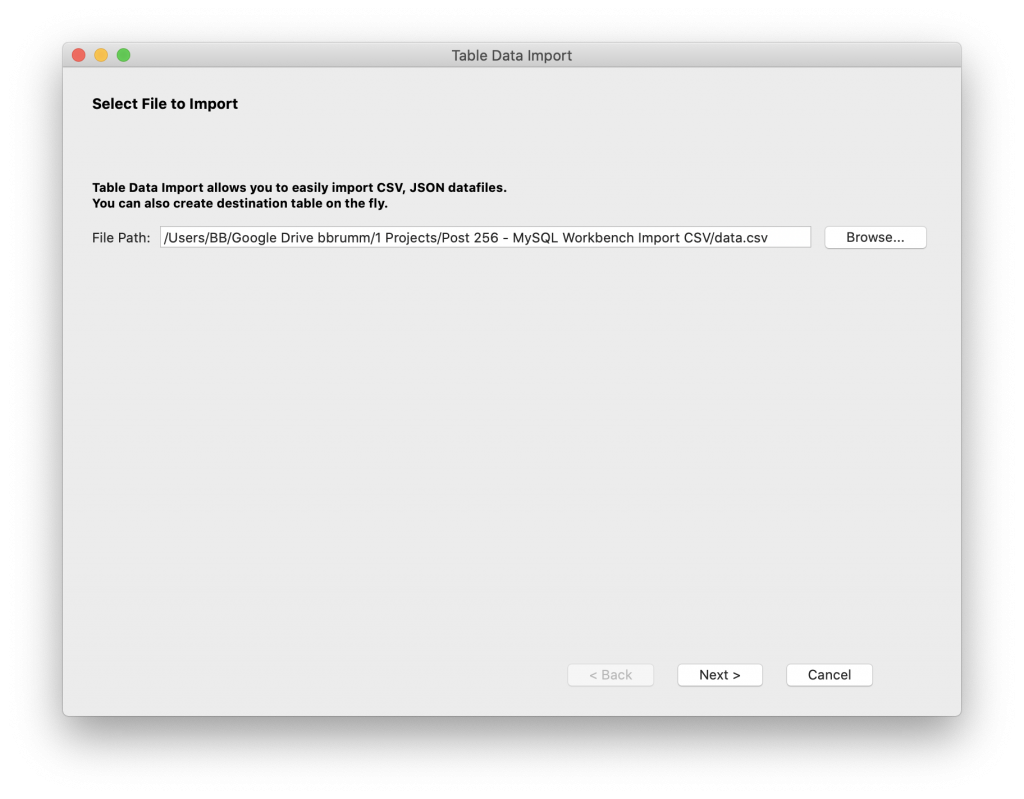
Step 4: Click Next. You'll then see the Select Destination screen.
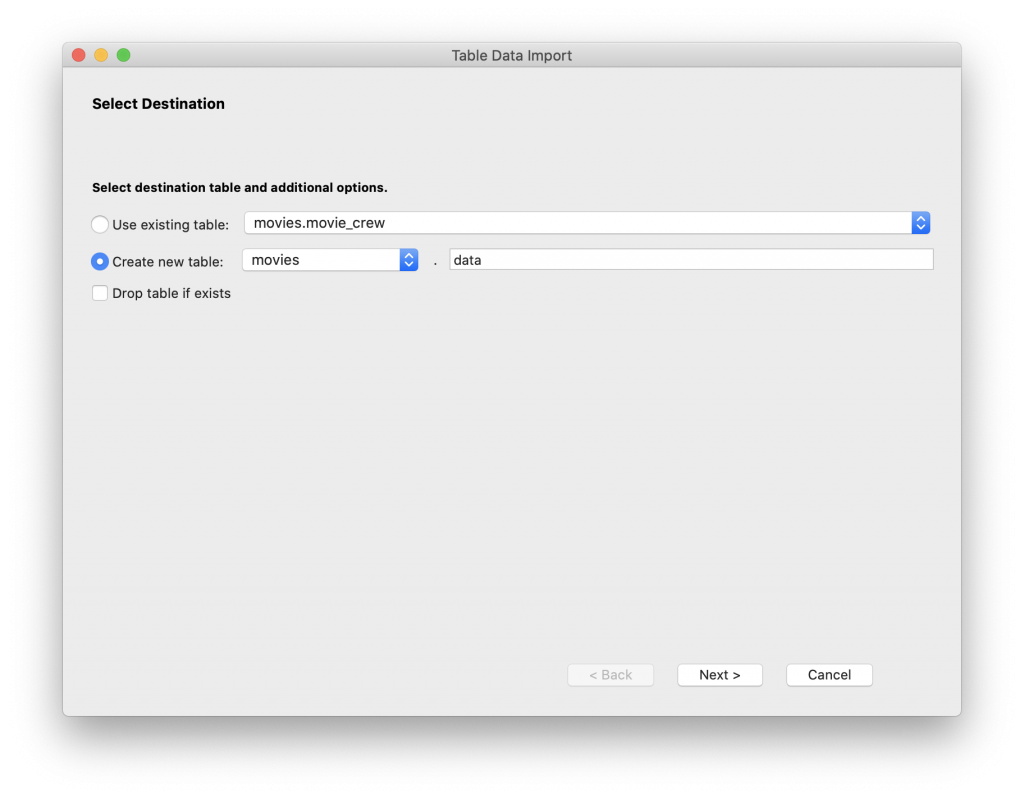
You can either select an existing table to import the data into or create a new table.
Creating a new table is selected by default, and the name is set to your filename. You can change this to whatever you want the table to be called, which might be needed if your table already exists.
Step 5: In this example, I'll change the name from "data" to "import_data", because I think data may be a reserved word.
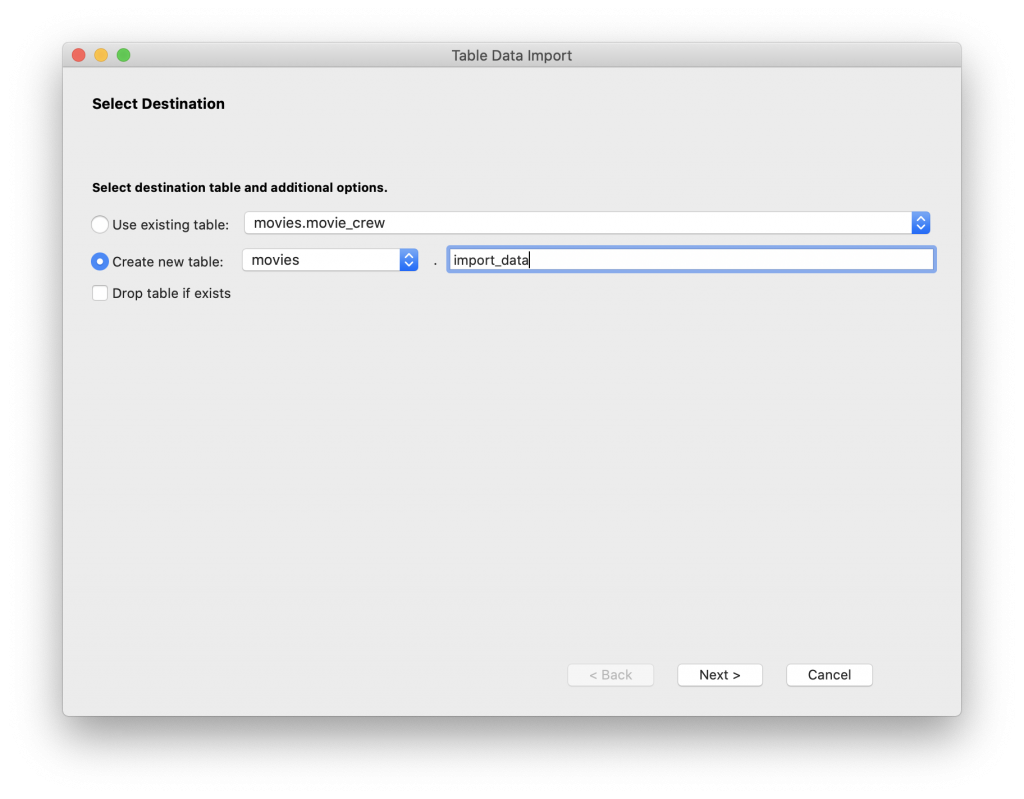
There's a checkbox you can select called "Drop table if exists" if you want to drop the table before creating it. This is helpful if you are importing the CSV file again and want to create the table from scratch.
Step 6: In this example, the table is called "import_data". We'll use that, so click Next.
You'll then see the Configure Import Settings page.
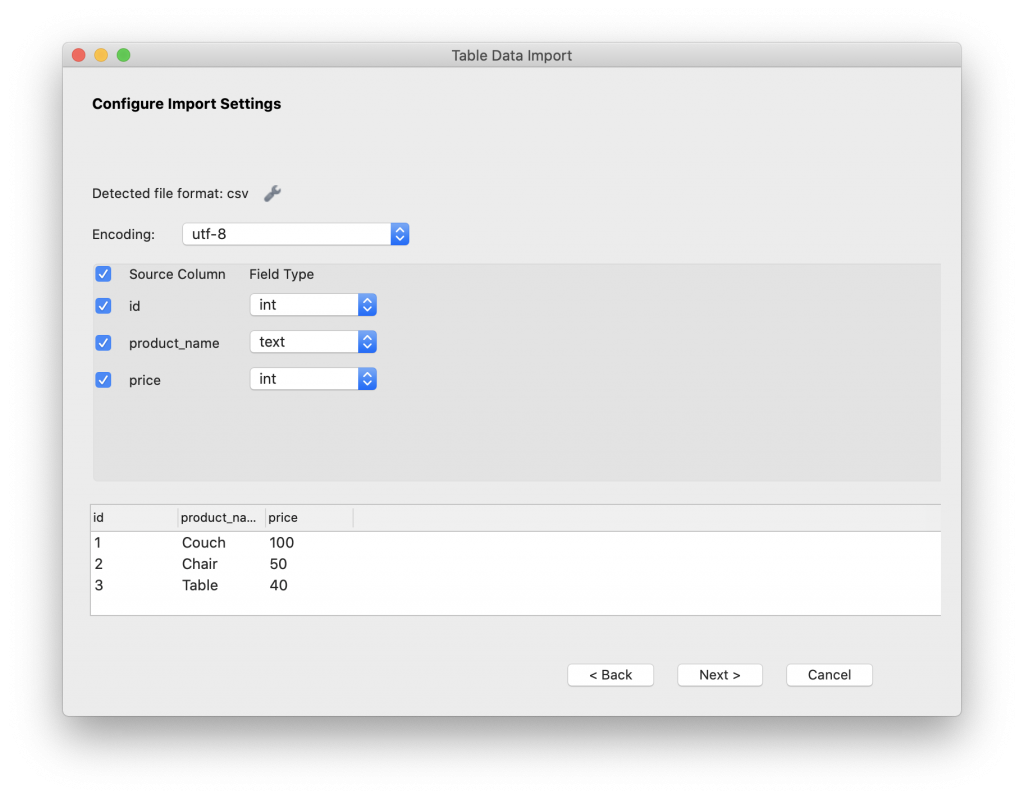
You can see the encoding, which in most cases you can leave as the default value.
The columns from the CSV file are shown. Each of them has a checkbox to the left, indicating whether or not you want to import that column into the table.
You can also see and change the data types for each column. These are determined from the data in the column, but if it's not right, you can change it.
You can see a preview of the data at the bottom of the window.
This is a handy feature of MySQL Workbench. If you want to learn more about the main features of MySQL in an easy-to-see way, check out the MySQL Cheat Sheet here:
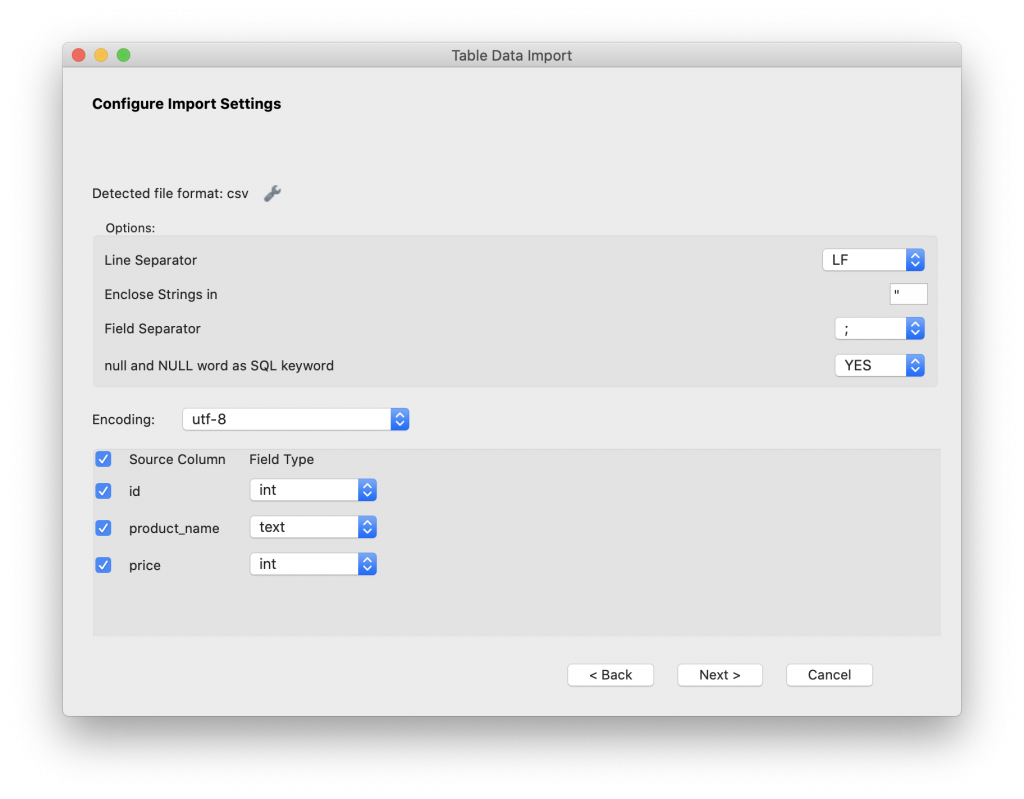
You can click on the wrench icon to change some more settings, such as:
- Line Separator
- Enclose Strings In
- Field Separator
- null and NULL as SQL keyword
Step 7: Once you've made any changes, if any, click Next.
You'll then see the Import Data screen, which is essentially a confirmation screen.
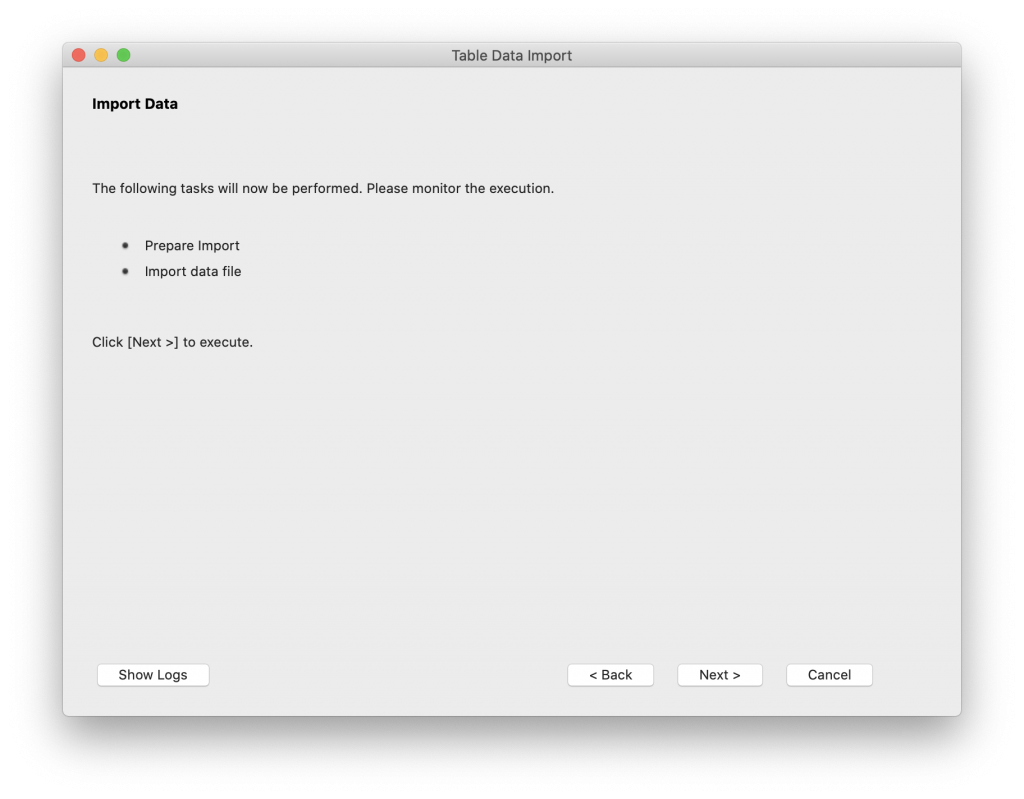
Step 8: Click Next.
The two steps shown will then be performed, and hopefully green ticks will appear next to them, indicating it was successful.
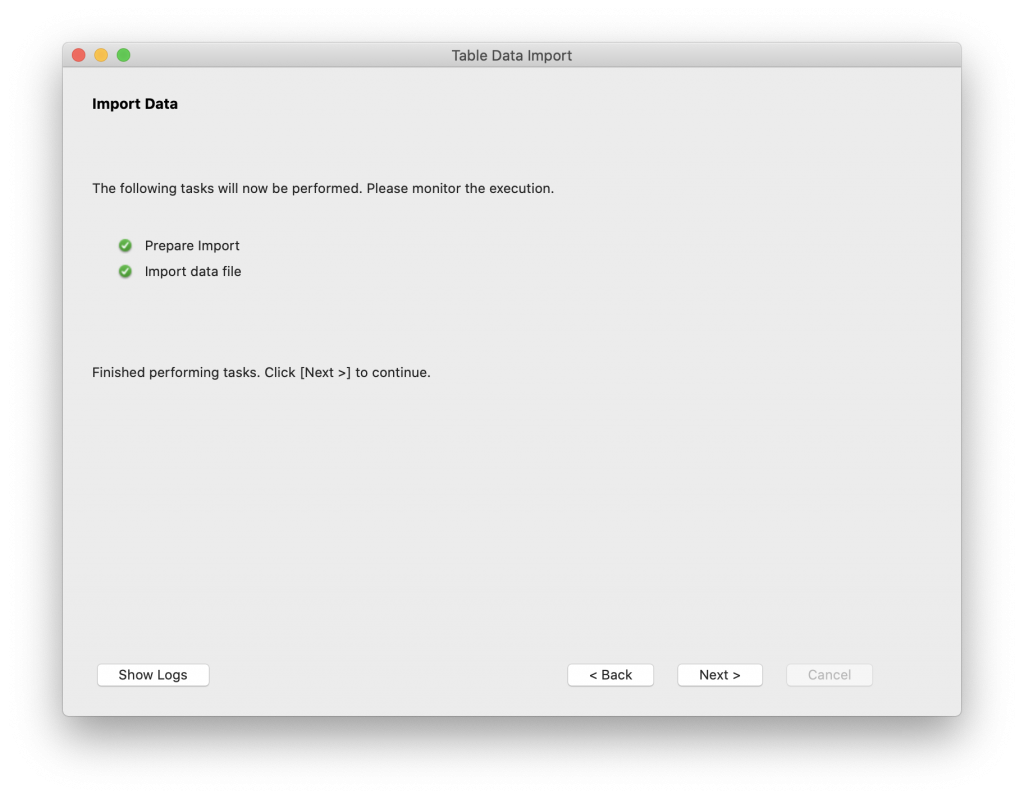
Step 9: If it was successful, click Next to continue.
A summary page is shown, letting you know how many rows were imported.
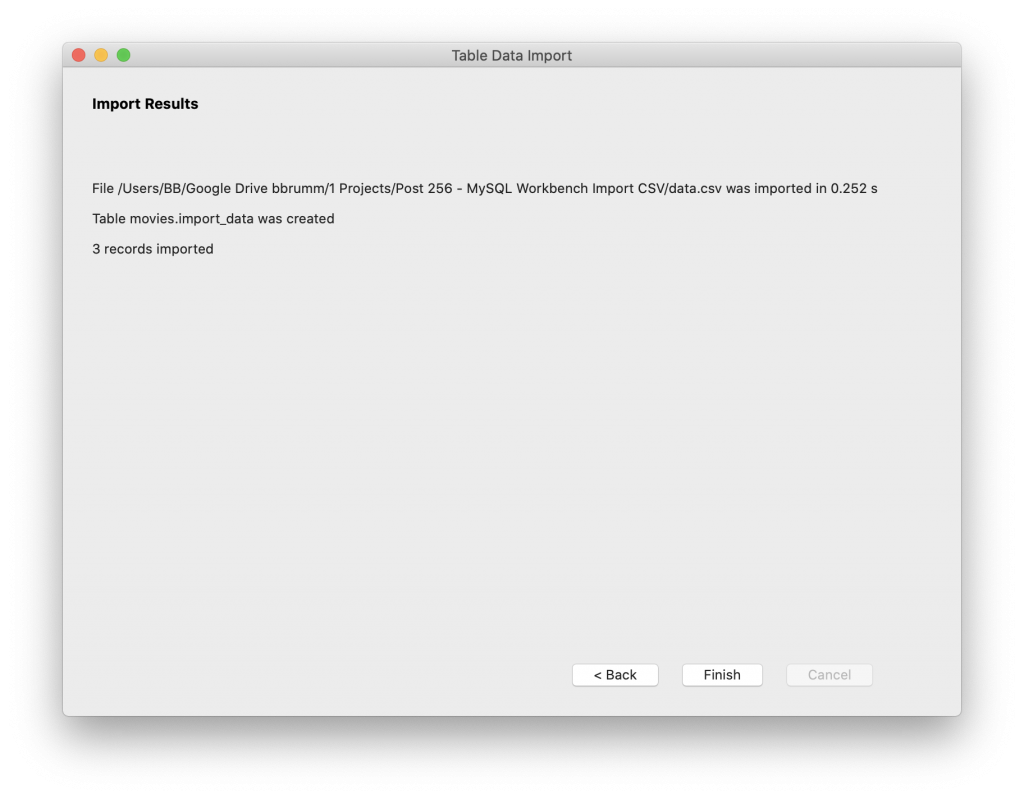
Step 10: Click Finish.
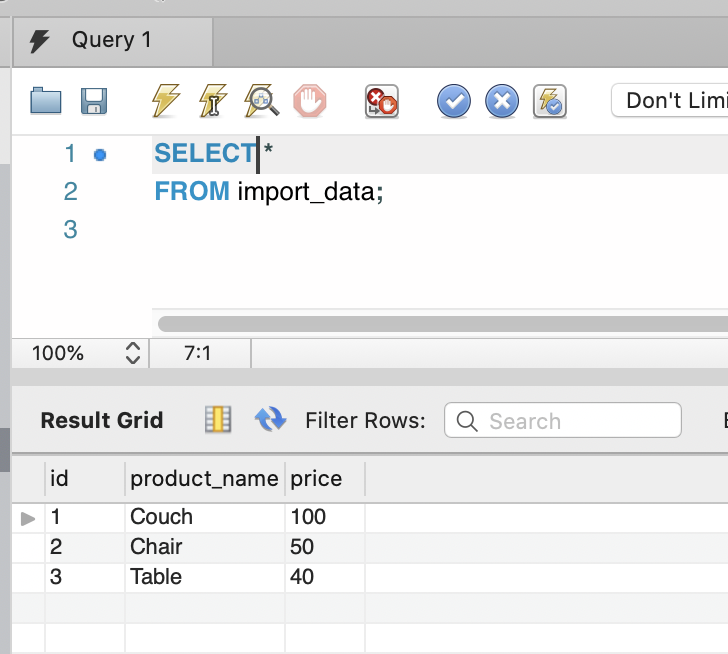
Step 11: You can then check your results by selecting from your new table.
1SELECT *
2FROM import_data;
You can see the results in the output panel.
So, that's how you can use the MySQL workbench import CSV process to import a CSV file.
Making Adjustments
Generally, to make it easier for me, I create the table when I import the CSV file. I don't rename any columns when importing, but I rename the columns if needed after I import.
You can do this with an ALTER TABLE statement. This can also be useful for:
- renaming columns
- changing data types
- renaming the table
So, if you're having issues or concerns over getting the right names and data types, consider making adjustments after the table is imported.
Example of Importing a Large File
I'll also try to import a large CSV file. The example file I'm using here is 271,117 rows and is 41 MB.
When I followed the same process, it took 774.476 seconds to import (12 minutes 54 seconds).
If you want to import the file faster than this, you can use MySQL's LOAD DATA INFILE command, which is a command you can use to import data. I'll write about that in a separate article, but from what I've read it can be quite fast.
Conclusion
Importing CSV data with MySQL is quite easy using the Table Data Import wizard. It can be slow for large files, but the UI is pretty easy to use.
If you want to improve how you use the main features of MySQL, grab the MySQL Cheat Sheet here: