SQL Developer Import CSV: How To
If you're using SQL Developer, there may be a time where you want to import a CSV file into your Oracle database.
SQL Developer includes a wizard that lets you import a file. Let's see how to use it in this guide.

Our Sample Data
We'll load a CSV (Comma Separated Values) file into our Oracle database using SQL Developer. Here's the sample CSV we'll use in this article:
1created_date,product_name,category_id,price
22019-04-21,'Large Table',2,120
32020-03-08,'Chair',1,39
42021-02-16,'Couch',1,100
52020-11-04,'Standing Desk',3,240
62015-01-20,'Coffee Table',3,79
72021-06-29,'Dining Table',3,36
82020-04-13,'Ottoman',4,29
If you want to follow along, you can download this CSV file here: sample_csv_data.csv.
Let's import this into SQL Developer.
Import a CSV into SQL Developer
To do this, follow the steps below.
Step 1: Open SQL Developer and connect to your database.
Step 2: In the Connections panel, you have two methods, depending on whether you have a table already:
If you already have a table to import data into, right-click on the table and select Import Data.
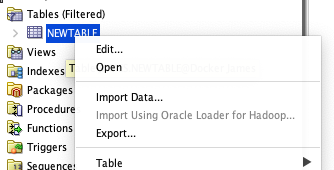
If you don't have a table, you can create one as part of the import process. Right-click on the Tables entry and select Import Data.
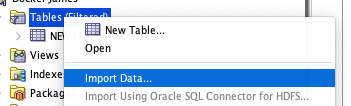
In the steps below, we'll assume that a table does not exist, and we've selected Import Data by right-clicking on the Tables item.
You'll see the Data Import Wizard screen.
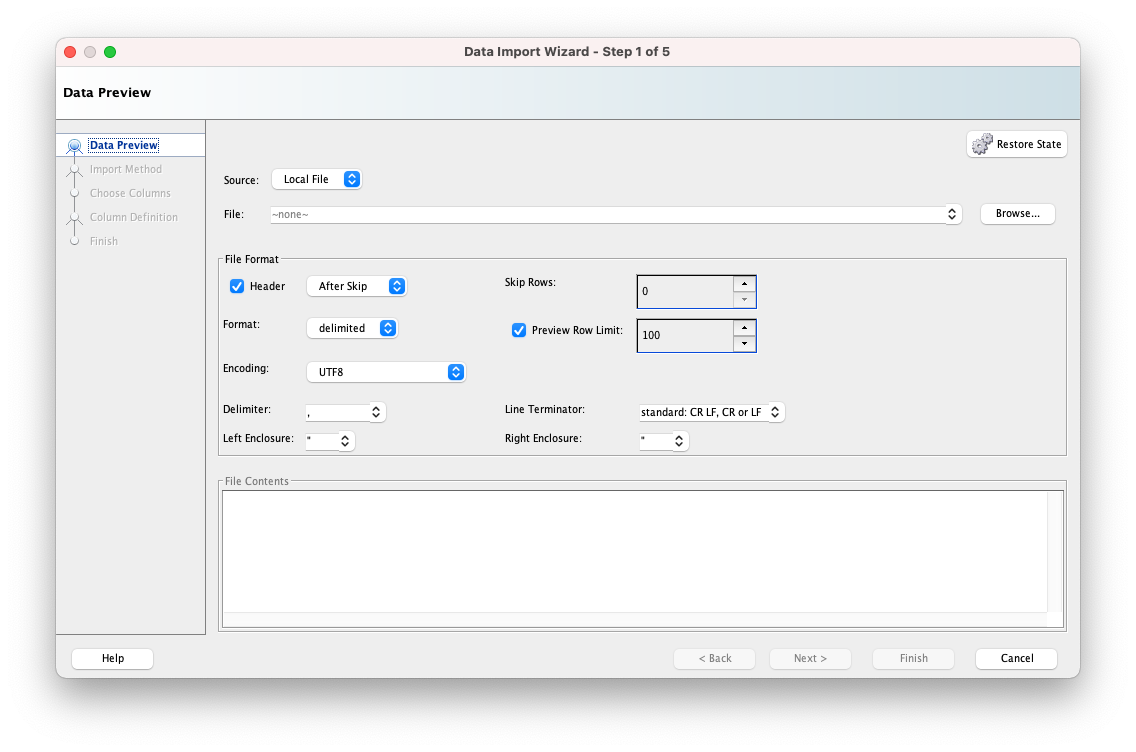
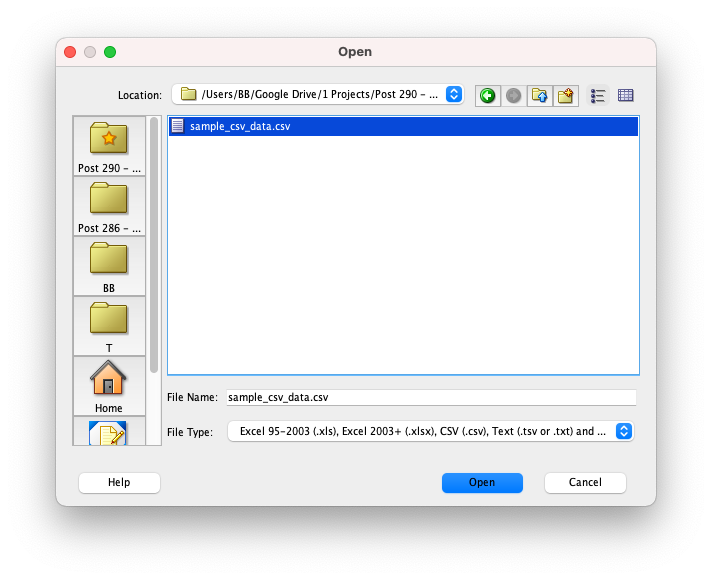
Step 3: Browse and select your CSV file.
Step 4: Change any of the settings you need for your file if needed.
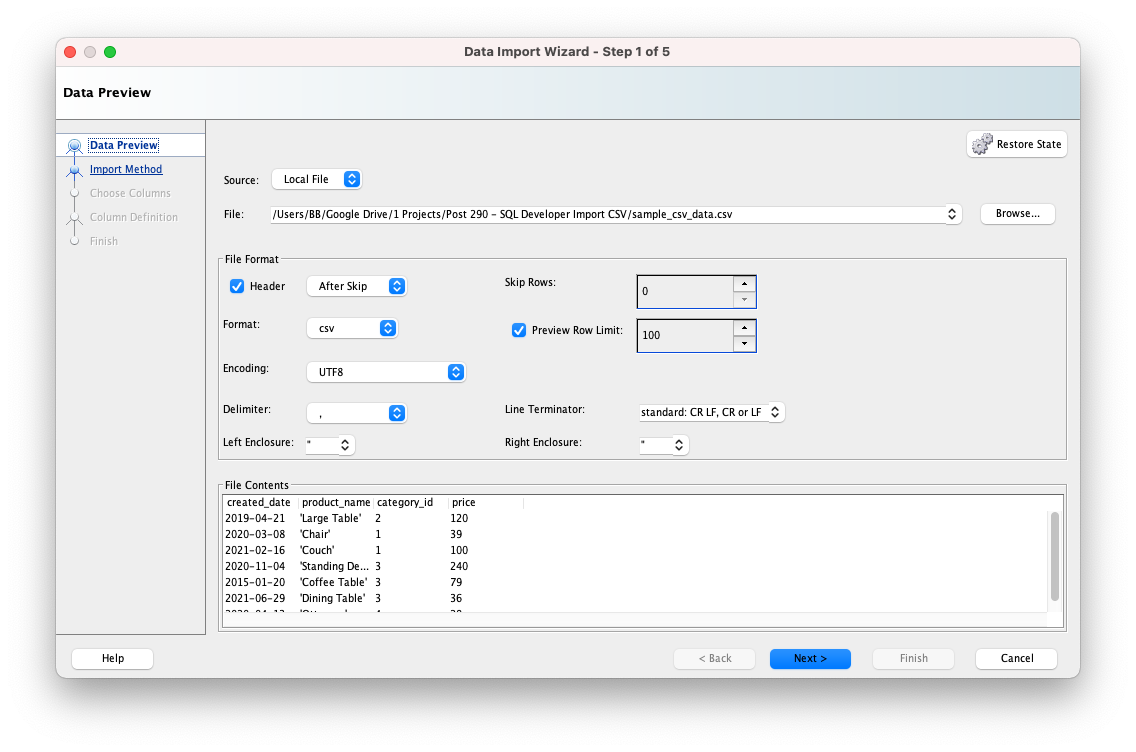
These settings include:
- Header
- Skip Rows
- Format
- Preview Row Limit
- Encoding
- Delimiter
- Line Terminator
- Left Enclosure
- Right Enclosure
The defaults should work in most cases.
You can see what your table would look like with some of the rows from your file in a preview at the bottom.
In the Preview, we can see that the product_name column data has single quotes. We don't want the single quotes as part of the data, so we can specify that these are our "left enclosure" and "right enclosure" characters.
Change these values from double quotes to single quotes.
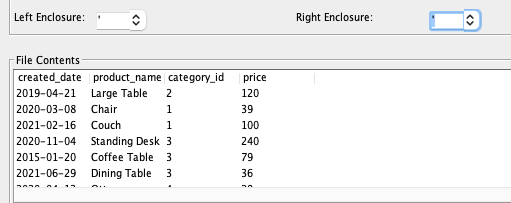
We can see the quotes no longer appear in the data.
Step 5: Click Next to go to the Import Method screen.
It looks like this:
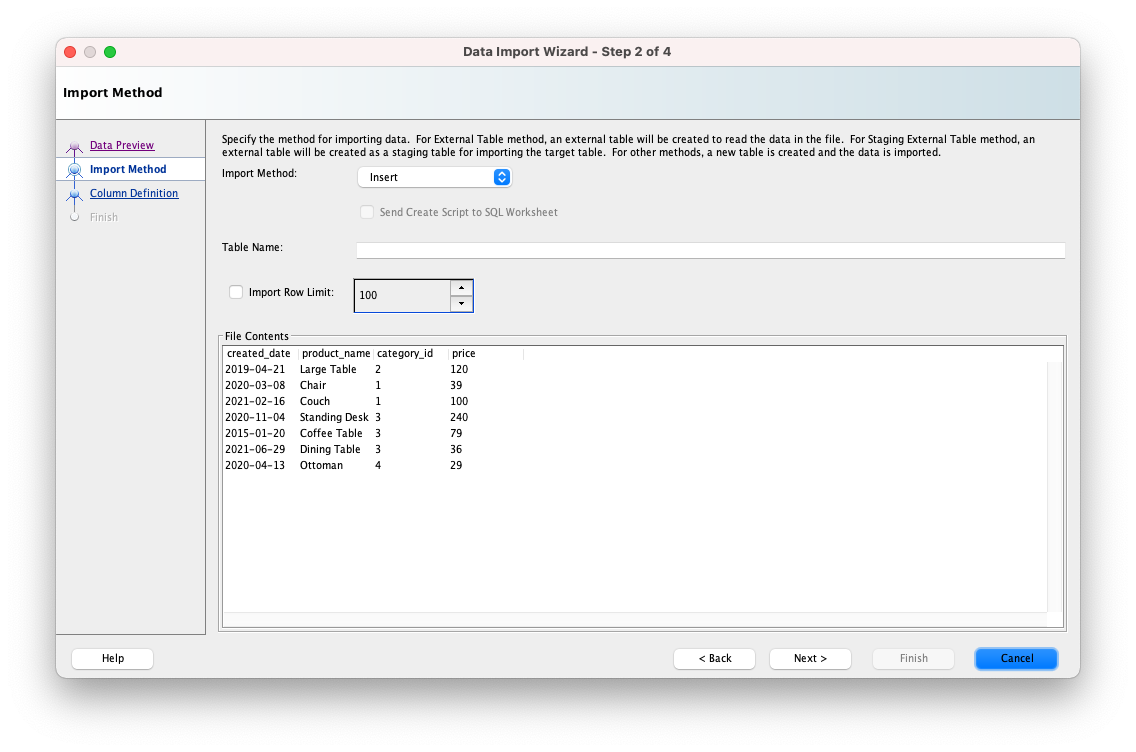
Step 6: Enter a table name to create for the data you are importing.
In this example, we've entered a table name of "new_products".
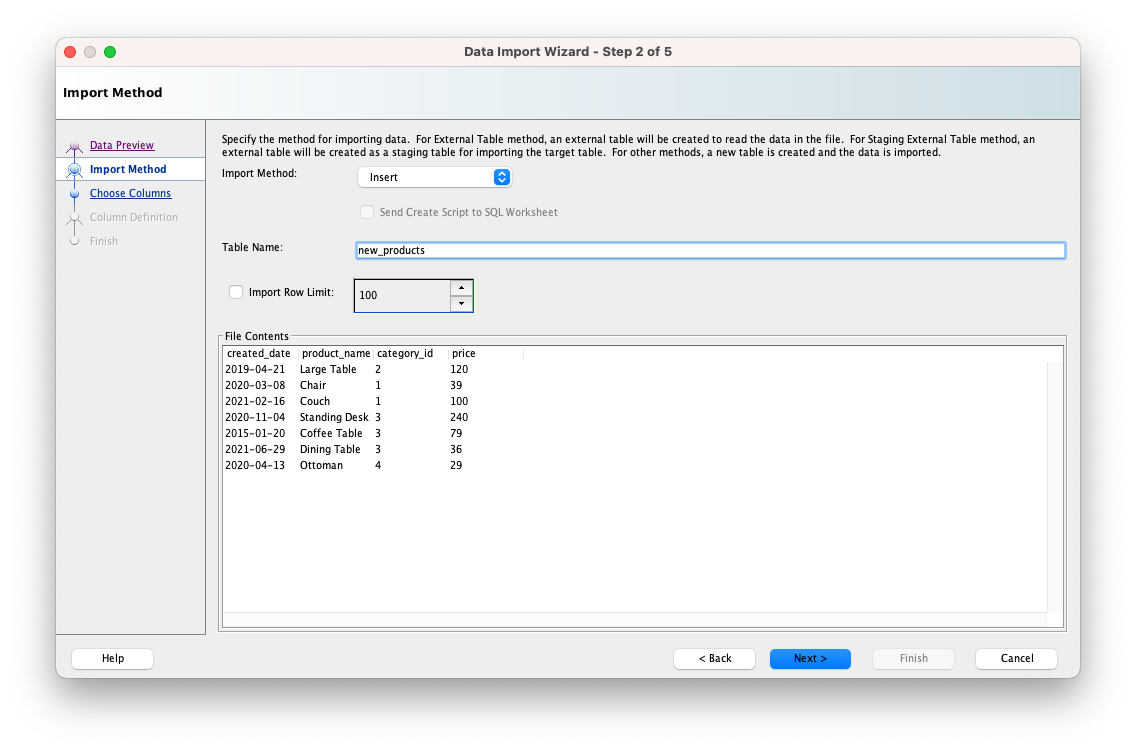
When we do this, we notice that a new step in the process appears: Choose Columns.
Step 7: Leave the defaults and click Next.
You can change a couple of things on this screen if you want to.
For "Import Method":
- Insert: this will create and execute an INSERT statement for each row in the table. This means the data is inserted into your table. In
- Insert Script: this will create an SQL script with a range of Insert statements without running them. This can be helpful if you want to save the file or modify it.
- External Table: this creates an External Table object for the data to be stored.
- Staging External Table: this also creates an external table, but can be used as a staging table for inserting into a target table.
- SQL*Loader Utility: this uses the SQL*Loader feature.
You can also set the Import Row Limit, which is the maximum number of rows that will be imported. This is unchecked by default.
Step 8: On the Choose Columns screen, select any columns you do not want to import and move them to the Available Columns section.
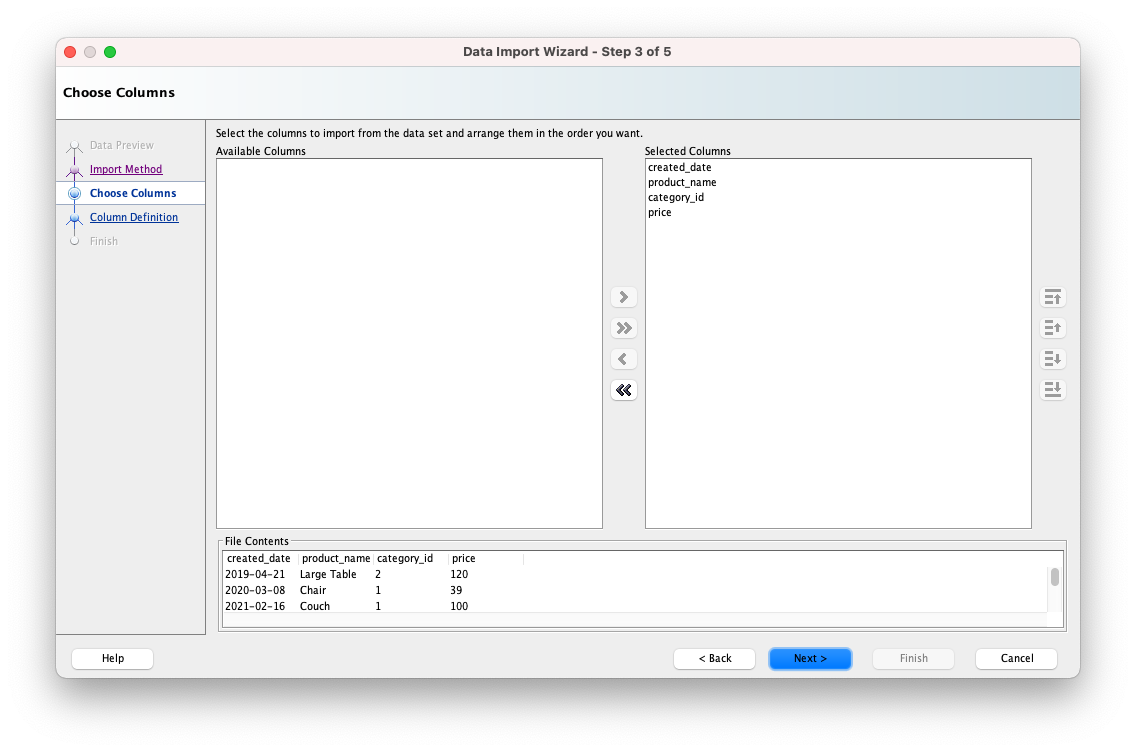
This will be useful if your CSV file has more columns than your destination table. You can decide which columns to import and which to ignore.
By default, all columns will be imported. If this is what you want, proceed to the next step.
Step 9: Click Next.
While you're here, if you want a helpful list of ways to save time with Oracle SQL Developer, get my PDF guide here:
Step 10: On the Column Definition screen, select the data type and format for each of the columns you are importing.
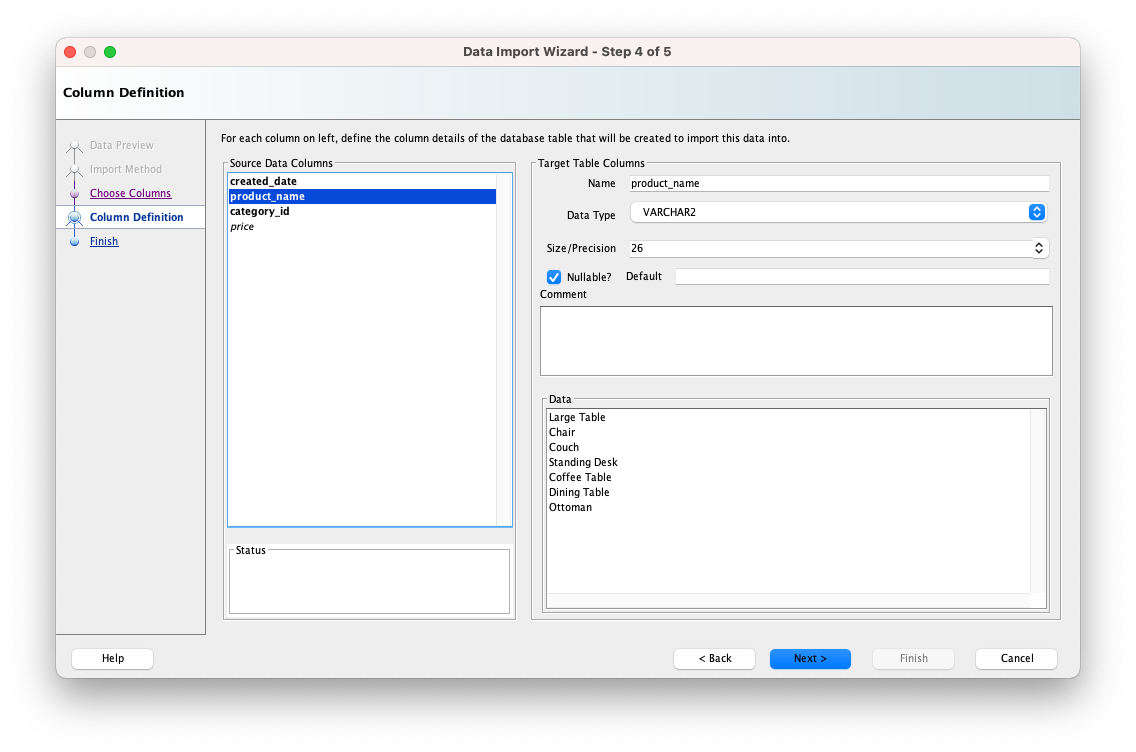
SQL Developer makes a pretty good guess based on the data in each column. But you should check that the data types are correct before proceeding.
Click on each of the column names on the left, and review or modify:
- the target column name
- the data type
- the format
- whether it can be NULL
- the default value
- any comments you want to add
You'll see a sample of the data as well on the right to help with your decision.
In the left panel, the columns change from italics to bold once you have clicked on them, to help you keep track of which ones you've seen.
Step 11: Click Next and you'll see the Finish tab.
This summarises the options you have chosen.
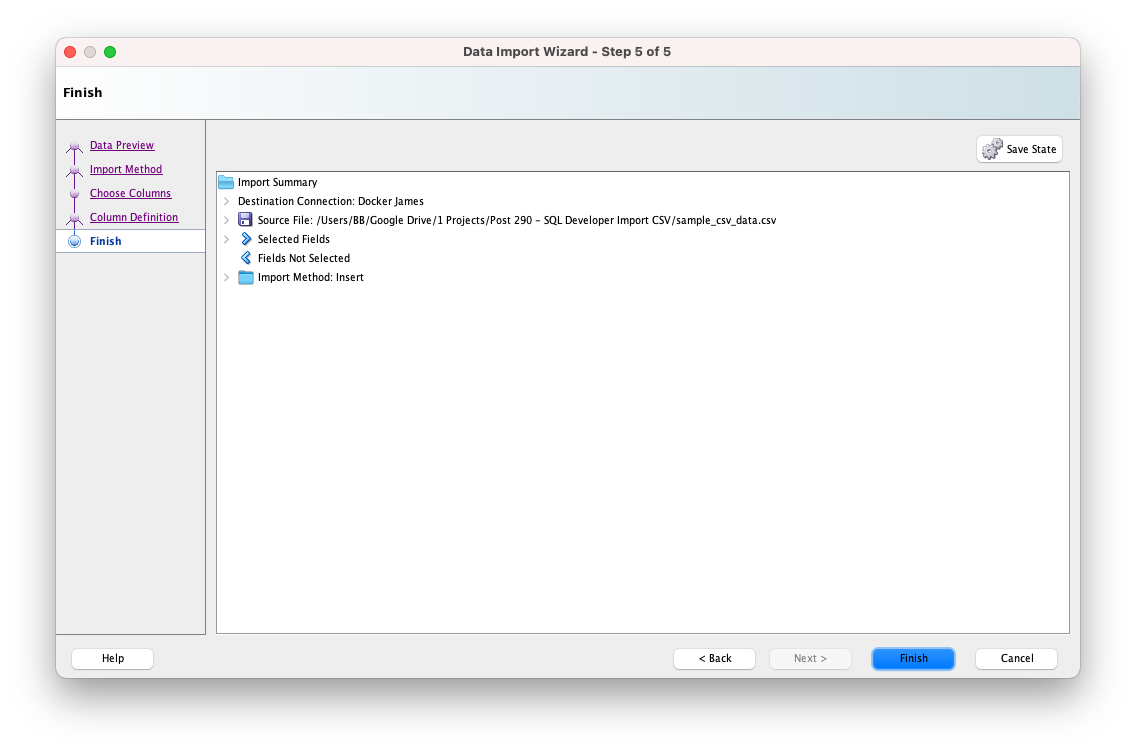
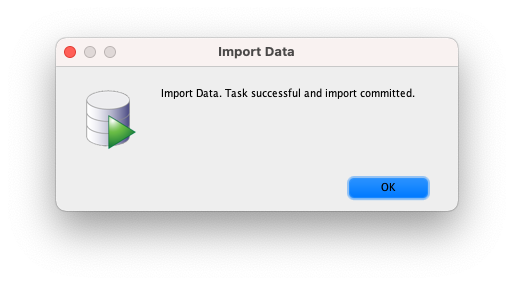
Step 12: Click Finish. Your data is imported.
Check the Imported Data
Now that the data has been imported, let's quickly check that it's in the table.
We can run a simple SELECT query:
1SELECT *
2FROM new_products;
Here are the results:
| created_date | product_name | category_id | price |
|---|---|---|---|
| 21/APR/19 | Large Table | 2 | 120 |
| 08/MAR/20 | Chair | 1 | 39 |
| 16/FEB/21 | Couch | 1 | 100 |
| 04/NOV/20 | Standing Desk | 3 | 240 |
| 20/JAN/15 | Coffee Table | 3 | 79 |
| 29/JUN/21 | Dining Table | 3 | 36 |
| 13/APR/20 | Ottoman | 4 | 29 |
Here's what it looks like in SQL Developer:
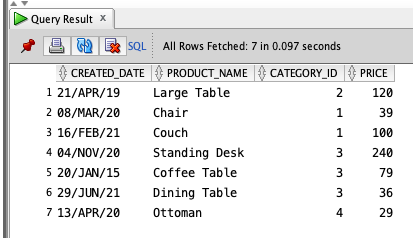
We can see the data has been imported and matches our CSV from earlier.
Conclusion
So, that's how you can import a CSV using Oracle SQL Developer. You follow the Data Import Wizard steps and the defaults are usually OK (but can be changed).
While you're here, if you want a helpful list of ways to save time with Oracle SQL Developer, get my PDF guide here: