How to Create a Connection and Set Up Data for the Introduction to Oracle SQL Course
This post will show you how to set up the sample user and sample data for my Introduction to Oracle SQL course.
If you're enrolled in my Introduction to Oracle SQL course either on Udemy, on YouTube, or inside the Database Star Academy, you'll find that one of the first steps is to set up a new user and sample data to use in the course.
Setting this up is the biggest issue that new students have.
There's a video in the course that shows how this is done, but this post will also explain how to do it, and explain some common issues that come up.

Prerequisites
Before you start setting up the sample user and data, you'll need to:
- Install Oracle Express. To do this, refer to this video.
- Download SQL Developer, which is explained in this video.
- Set up a connection to the SYS account, which is explained in this video.
- Can connect to your database
Once you have done this, and can connect to your database without issues, you're ready to set up the sample data.
Create a New User
Once you have created the connection to the SYS account and connected to the database, your SQL Developer window should look like this.
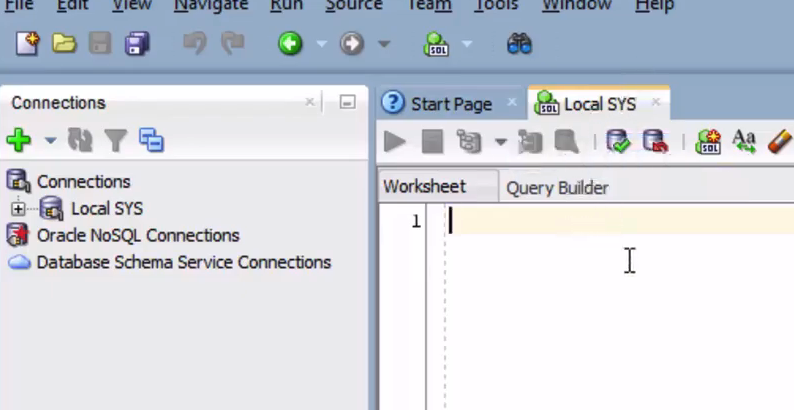
It shows:
- A connection on the left called Local SYS
- A new SQL worksheet at the top
- The name of the connection in the drop-down box on the top right
To start with our sample data, we need to create a new user.
The user that comes with the Oracle database (SYSTEM or SYS) has a lot of privileges and access to a lot of things we don't need to use. It also means we can accidentally change or break something. Once we create a connection with this user, I've suggested creating a new user with only the basic privileges needed for this course. To use the database as this user, we need to create a new connection, as a connection contains a username and database details.
We could go through the entire course using the SYSTEM account and it will work OK, but it's not a good habit to get into. Also if you're working with Oracle in your job, then you'll be using a normal account like this and not a system account.
So, to create a new user:
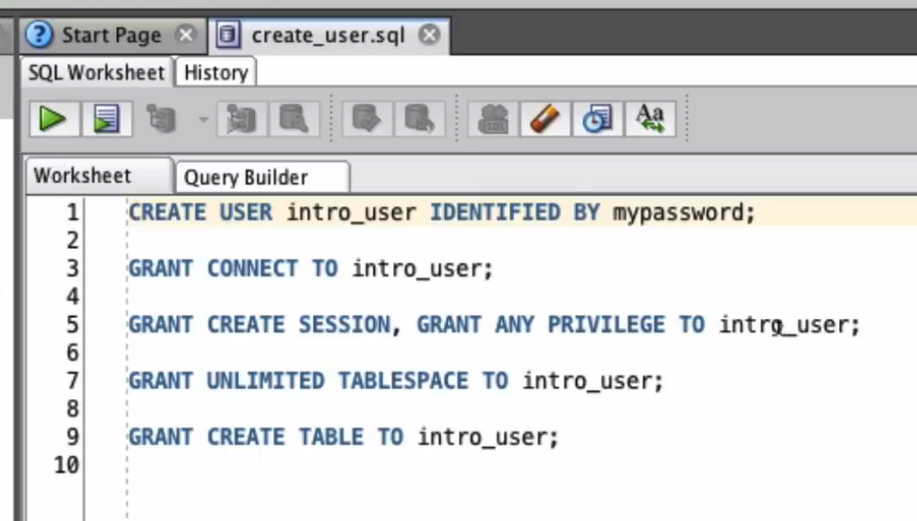
- Open the create_user.sql file. The file looks like this:
1CREATE USER intro_user IDENTIFIED BY mypassword;
2GRANT CONNECT TO intro_user;
3GRANT CREATE SESSION, GRANT ANY PRIVILEGE TO intro_user;
4GRANT UNLIMITED TABLESPACE TO intro_user;
5GRANT CREATE TABLE TO intro_user;
This code does a few things:
- Creates a new user called intro_user with a password of mypassword.
- Gives this user permissions to connect to the database and create tables.
To open the file, click File > Open, or click the icon on the toolbar that represents Open. Browse to the location of the file.
Or, you can copy and paste the code above into the SQL worksheet. Once you have done this, your screen should look like this:
2. Run the SQL code by clicking the Run Statement button (big green triangle).
This will cause the code to run, and your output should look like this.
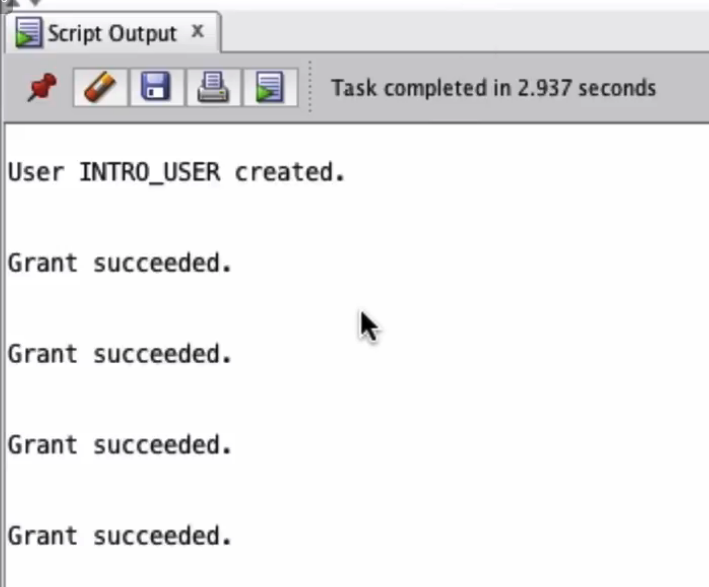
The user is now created.
Create a Connection for the New User
The next step after creating our new user is to create a connection with this user, so we can run our SQL code as this user.
To do this:
- Click the + button on the top left of the SQL Developer window, under the Connections tab.
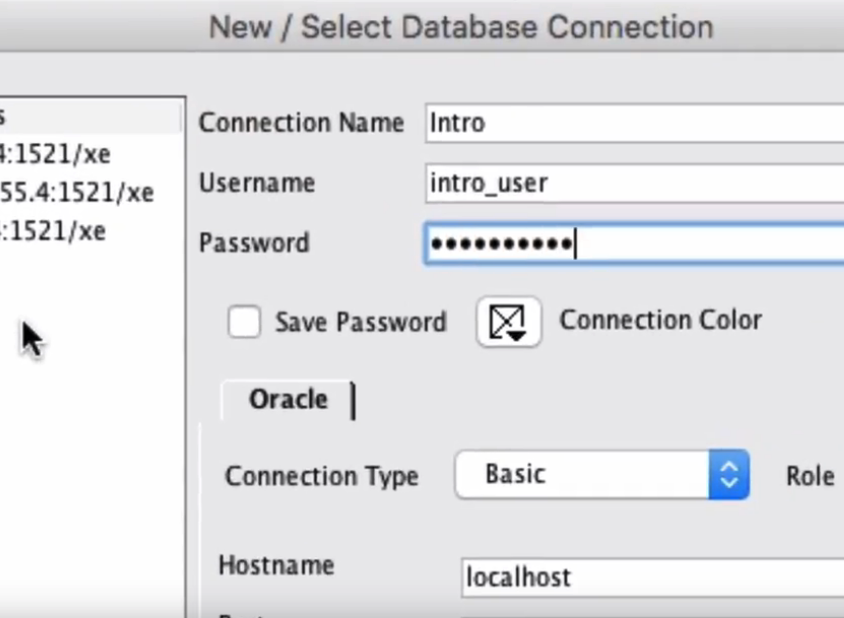
- Enter the fields for a new connection:
- Connection Name: Whatever you like. In the course I've used the word "Intro".
- Username: intro_user
- Password: mypassword
- Save Password: on
- Hostname: localhost
- Port: 1521
- Service Name: XEPDB1
- Click Test to test the connection. It should say Success.
- Click Save
Note: As of Oracle 18c, the connection needs to be made to the Service Name of XEPDB1, and not SID = XE.
This will ensure you connect to the "pluggable database", and not the "container database". If you leave the connection as SID=XE, you will connect, but you'll get strange errors when creating users and tables.
You can read more about container and pluggable databases here: A Guide to PDBs and CDBs.
For more help on resolving issues when creating connections, read this post: How to Resolve Oracle Connection Issues.
Your new connection is now saved.
Possible Errors
There are a range of errors you might get at this stage when testing the connection to the database.
"The network adapter could not establish the connection"
This means SQL Developer can't connect to the database. To resolve this, start the database by going to Start > Oracle > Start Oracle Database. A command window should appear briefly and once it disappears, the database should be started. Try testing the connection again.
"Invalid username/password, login denied"
This means the username and password you have entered does not match the username and password in the create_user.sql script. Ensure they are the same, and try again.
Connect as New User
Once you have created the new connection, connect as the new user by double-clicking on the new Connection entry on the left of the screen.
This will open a new SQL window for this connection, which also shows in the top left of the window.
Open Sample Data File
Now you have a new connection and are connected as the Intro user, it's time to create the sample data. First, you'll need to open the file.
To do this, click File > Open, or click the Open button on the toolbar.
Browse to the location of the file (which you would have downloaded from where you're learning the course), and open it.
The file should appear as a new tab inside SQL Developer.
Run Sample Data File
To run the sample data file, you'll first need to specify the connection to run the file as. Opening a new file in SQL Developer often means you need to specify who to run the file as.
You can do this by selecting your "Intro" connection from the drop-down on the top right of the screen.
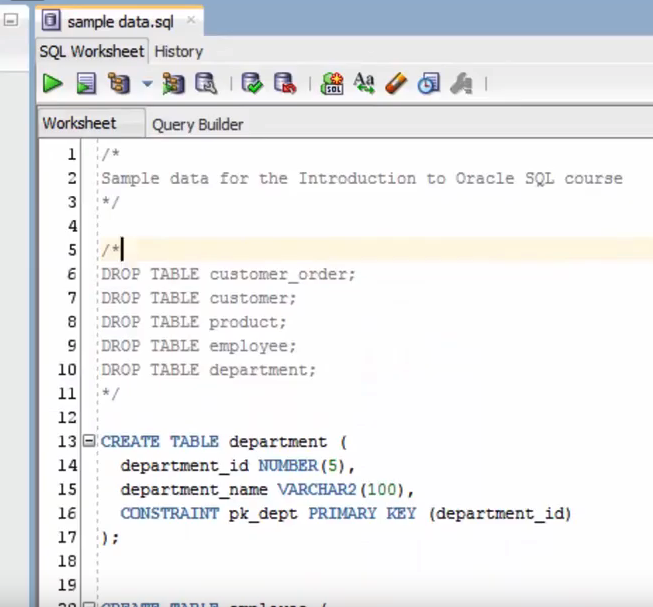
The script should look like the image above. It contains:
- Code to create the new tables
- Code to add data to these tables
- Code to remove the tables if needed (it is commented out so it does not run)
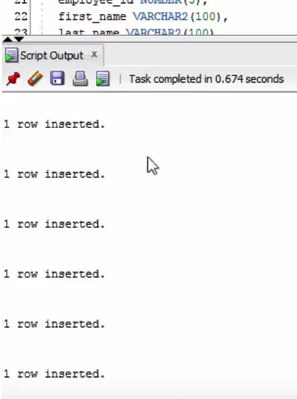
Click the Run Statement button to run all of the code. The output should appear at the bottom of the page and it should tell you that tables are being created and data is being inserted.
If you have any errors, such as the tables already existing, you can uncomment the DROP TABLE commands by removing the /* and */ characters. Your code goes from looking like this:
 1/*
 2Sample data for the Introduction to Oracle SQL course
 3*/
 4
 5/*
 6DROP TABLE customer_order;
 7DROP TABLE customer;
 8DROP TABLE product;
 9DROP TABLE employee;
10DROP TABLE department;
11*/
12
13CREATE TABLE department (
14  department_id NUMBER(5),
15  department_name VARCHAR2(100),
16  CONSTRAINT pk_dept PRIMARY KEY (department_id)
17);
To looking like this:
 1/*
 2Sample data for the Introduction to Oracle SQL course
 3*/
 4
 5DROP TABLE customer_order;
 6DROP TABLE customer;
 7DROP TABLE product;
 8DROP TABLE employee;
 9DROP TABLE department;
10
11CREATE TABLE department (
12  department_id NUMBER(5),
13  department_name VARCHAR2(100),
14  CONSTRAINT pk_dept PRIMARY KEY (department_id)
15);
When you run your code with those /* and */ removed, the DROP TABLE statements will run.
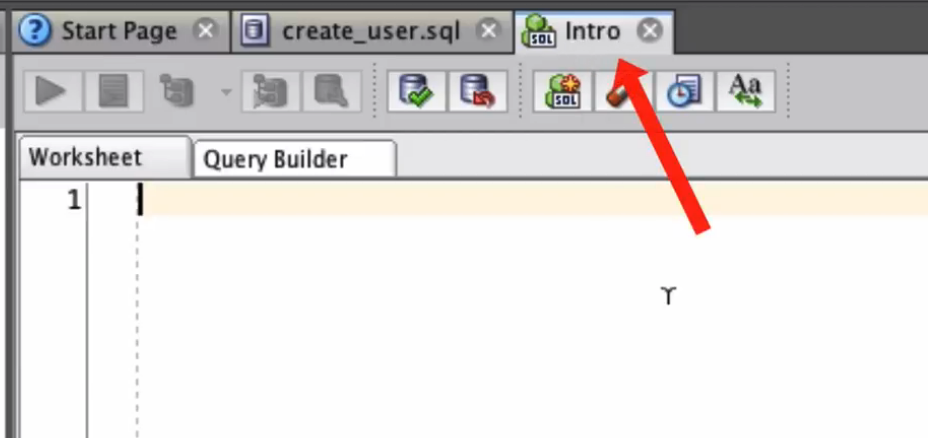
Create a New SQL Window
Now you have your sample tables set up and populated with data, it's time to proceed with the course.
It's good to open a new window for running SQL in the future so you don't remove anything in the sample data file. To do this, click the New Worksheet button on the toolbar. It's a green person icon with SQL written on it.

In the window that appears, select the Intro connection you have set up.
A new SQL window is shown. You can use this window to run your SQL queries in the course.