How to Install Postgres on Mac Using Homebrew
Installing PostgreSQL on a Mac can be done using the Terminal and using something called “homebrew”.
In this article, you’ll see step-by-step instructions on how to install PostgreSQL using Homebrew.

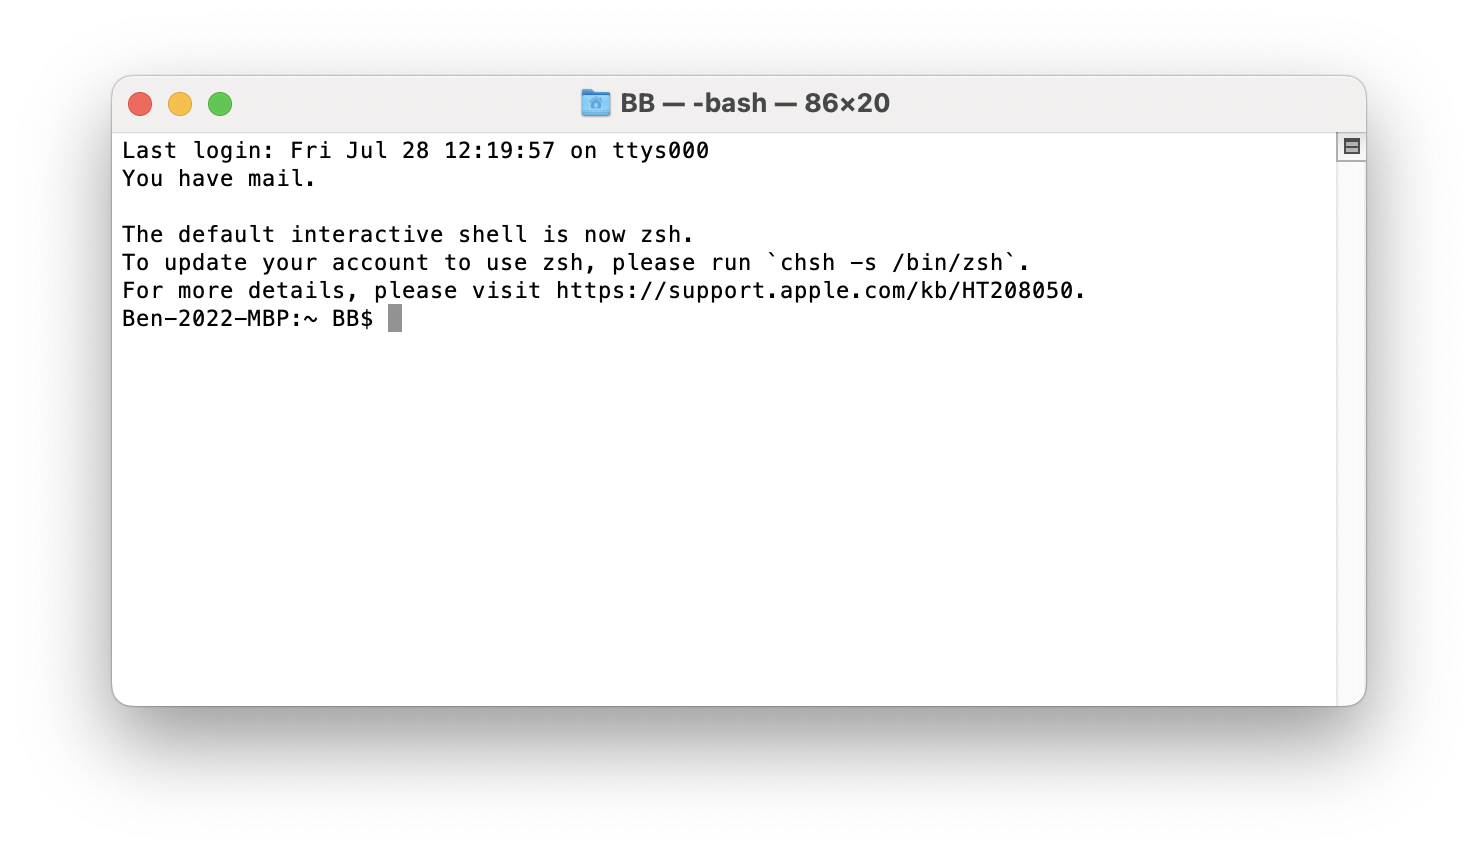
Open Terminal
The first step is to open the Terminal. You can do this on a Mac by pressing Command and Space to open Spotlight, then start typing the word “terminal”. Once it appears, press Enter to open it.
You could also open it from the Applications folder in Finder.
A Terminal window will open, which should look like this:
Install Homebrew
Next, we will install Homebrew, which is a package manager for Mac. Your Mac may already have it installed, so we’ll check that first.
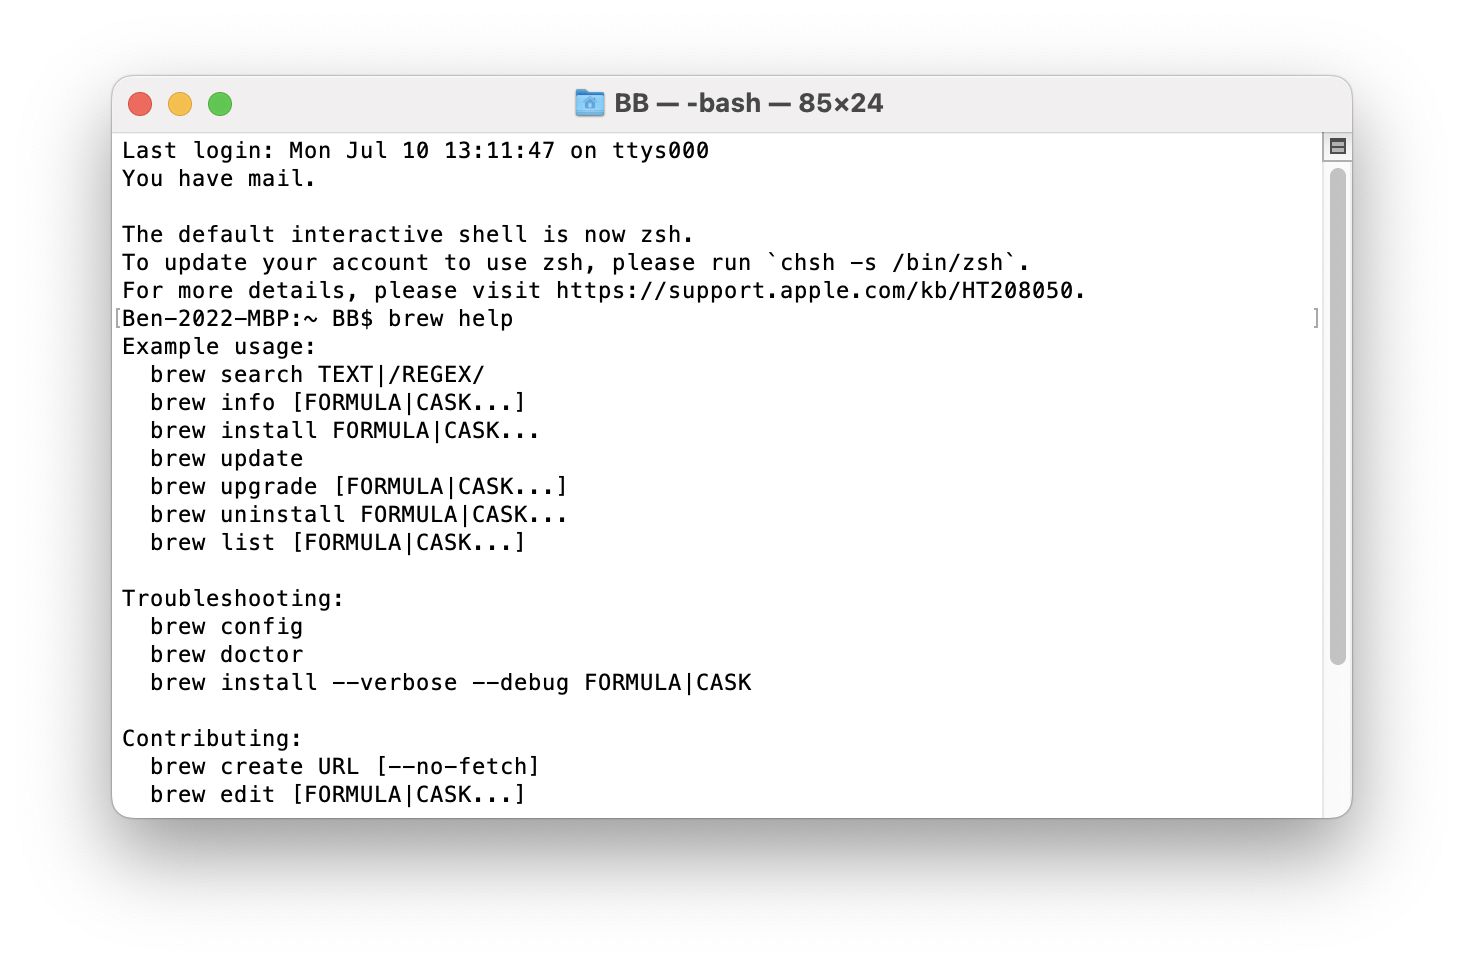
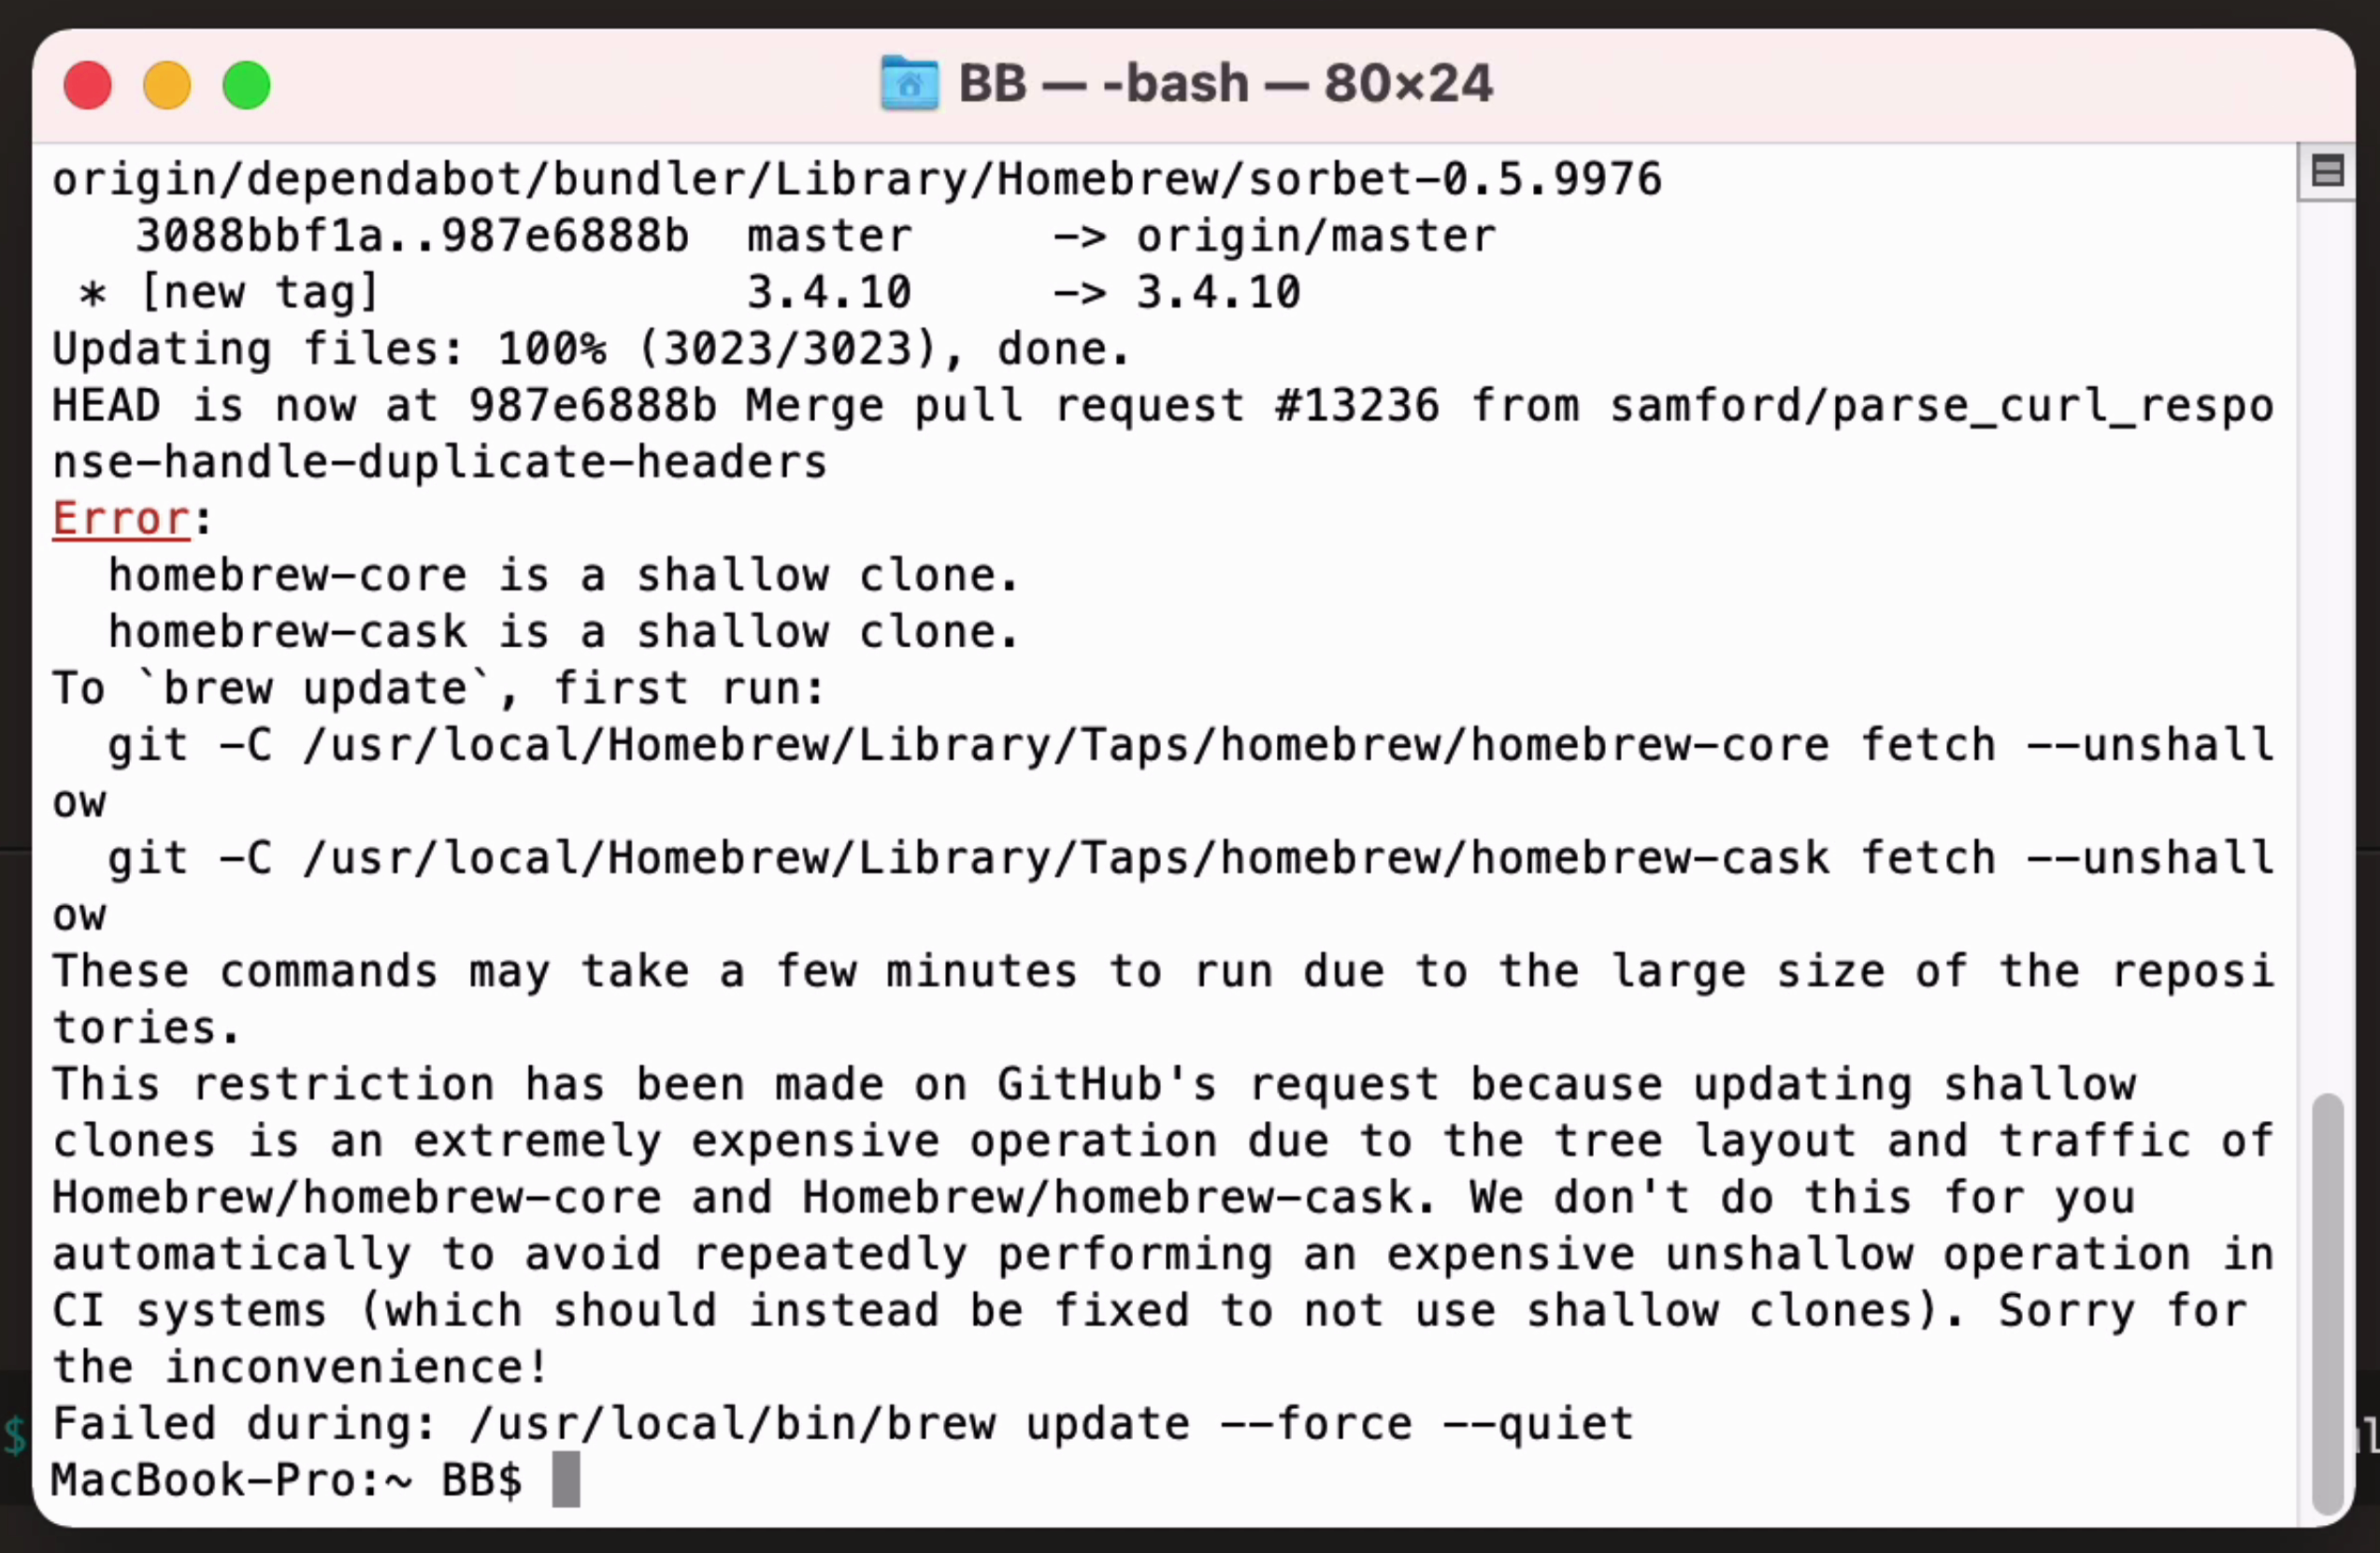
To check if Homebrew is installed, you can type “brew help” at the Terminal prompt and press Enter.
brew help
If you see an output like this, which shows some example commands of “brew”, it means homebrew is installed.
If you get an error message:
1bash: brew: command not found
This means Homebrew is not installed.
So, how can we install homebrew?
We can install it with a single command here:
1/bin/bash -c “$(curl -fsSL https://raw.githubusercontent.com/Homebrew/install/HEAD/install.sh)”
This command was copied from the Homebrew website at brew.sh.
Copy this command into the Terminal window and press Enter.
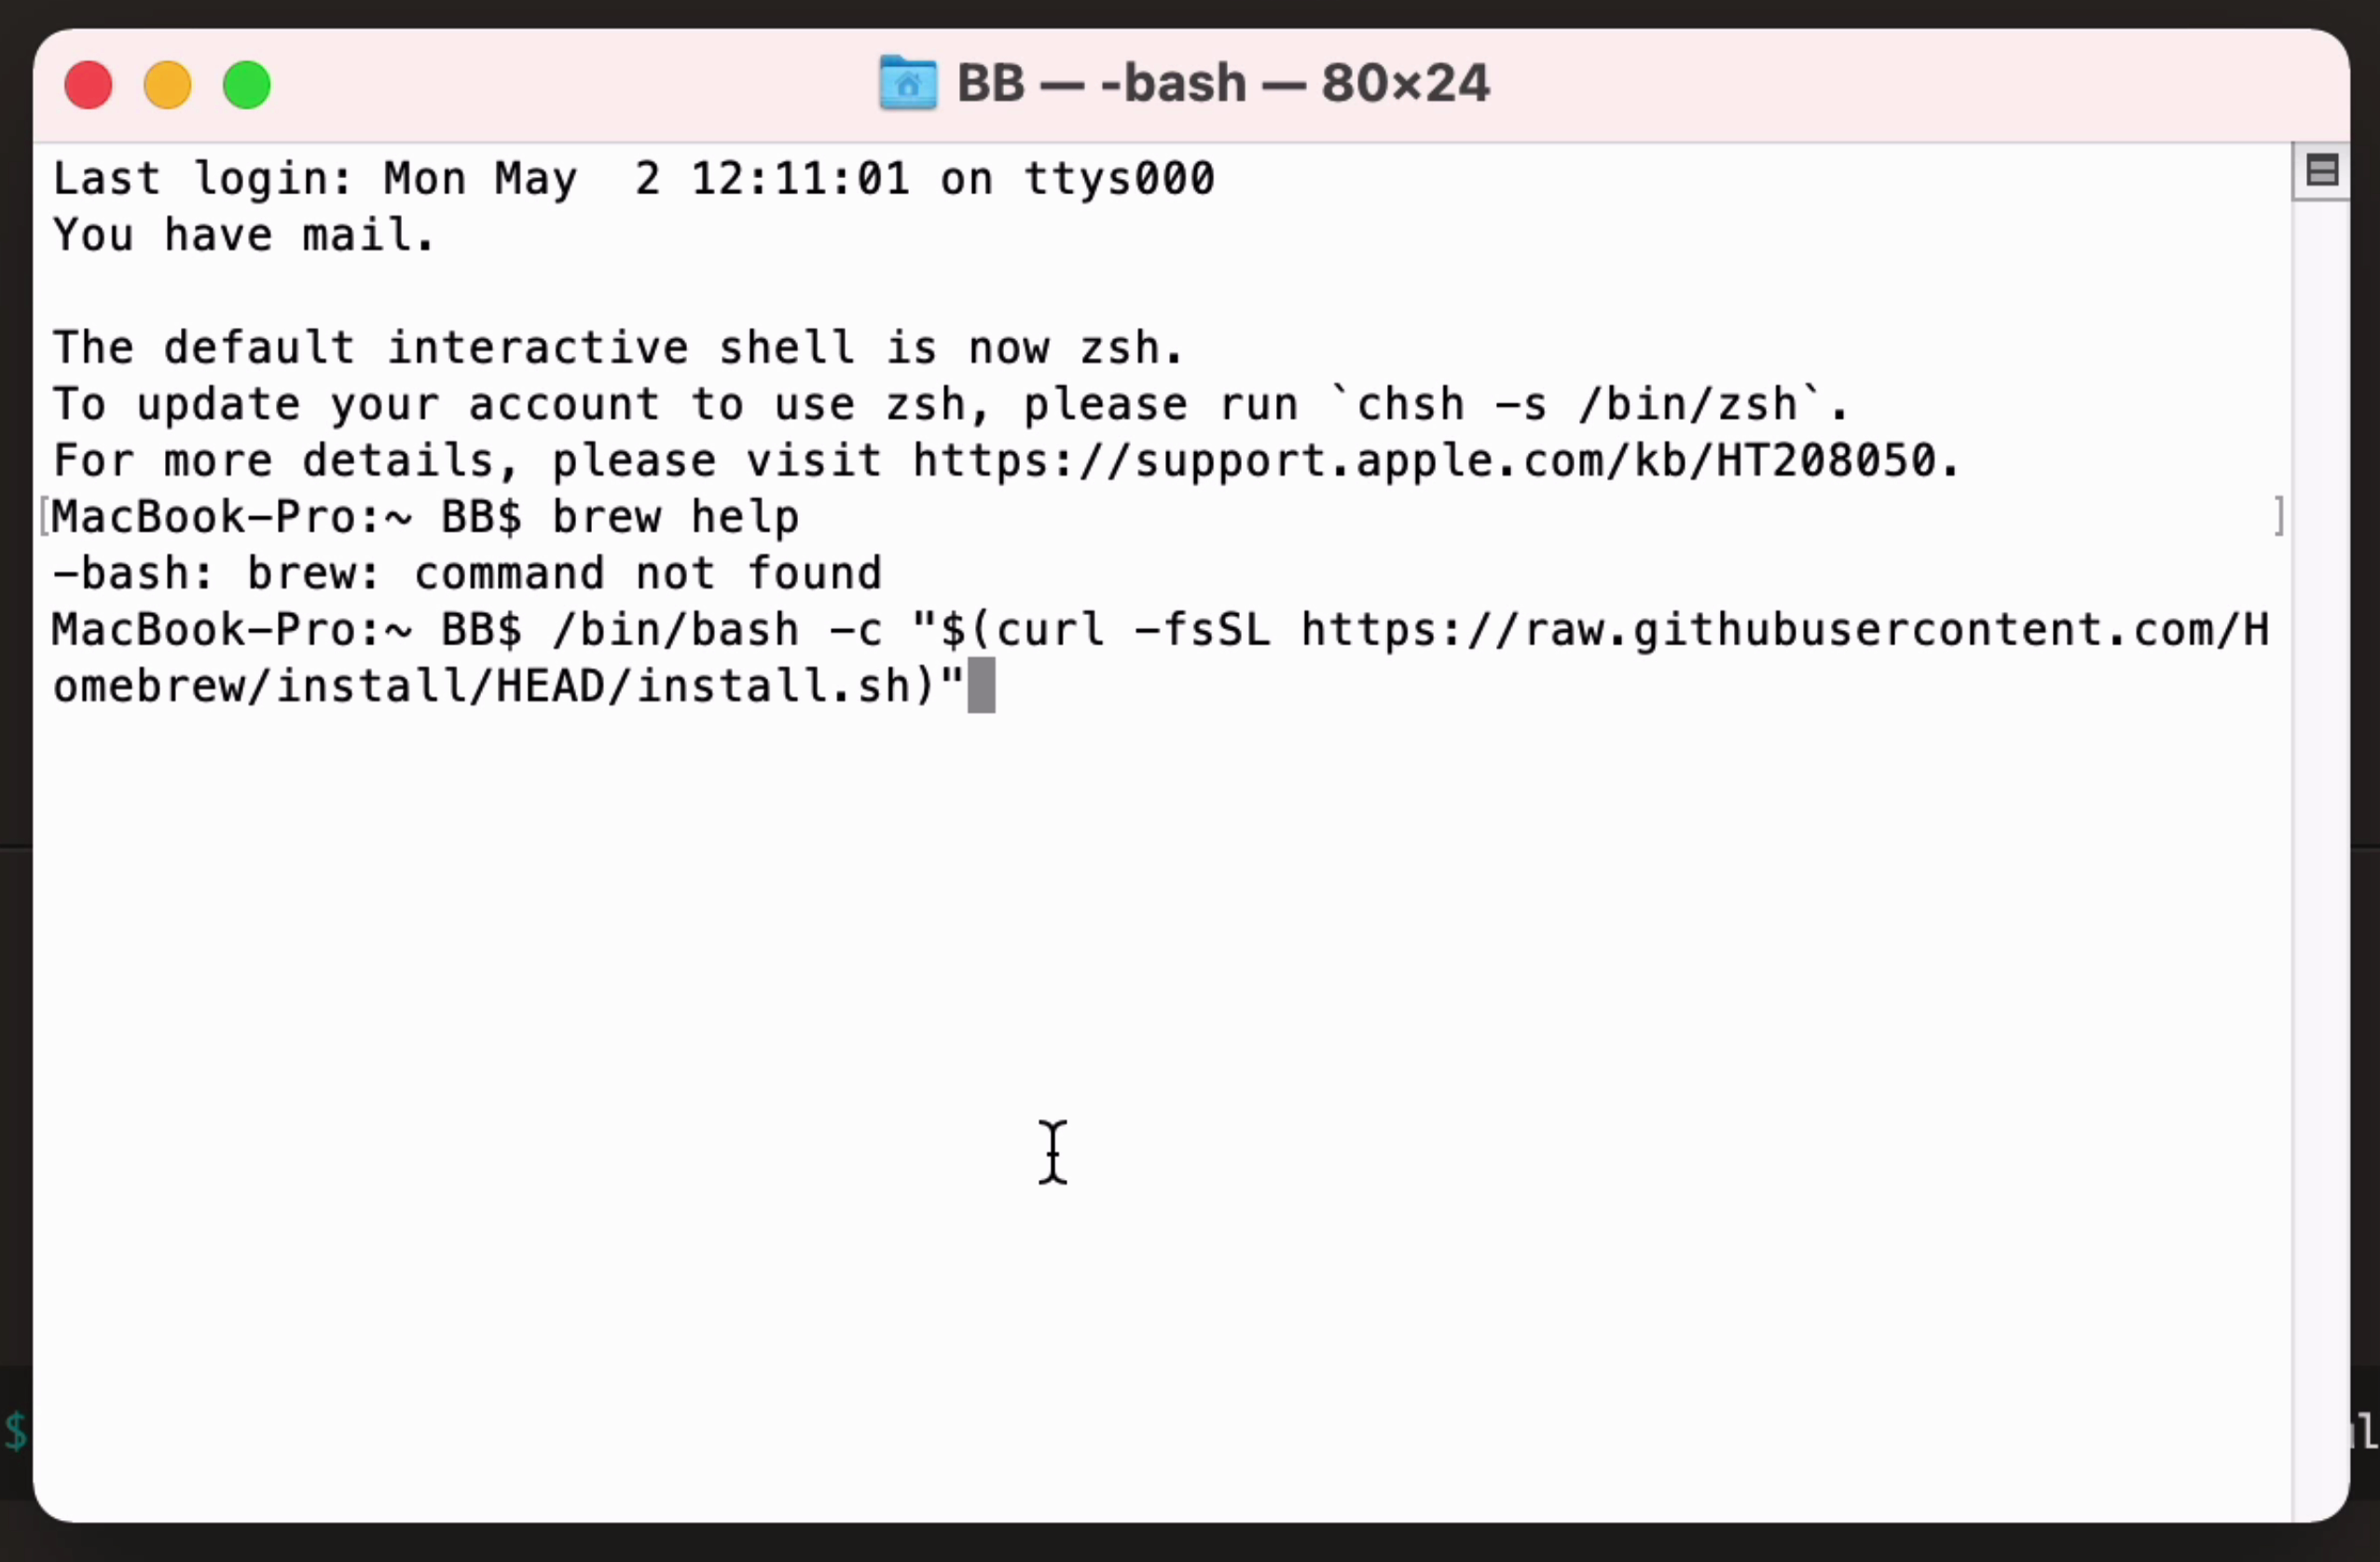
Homebrew will then start to install.
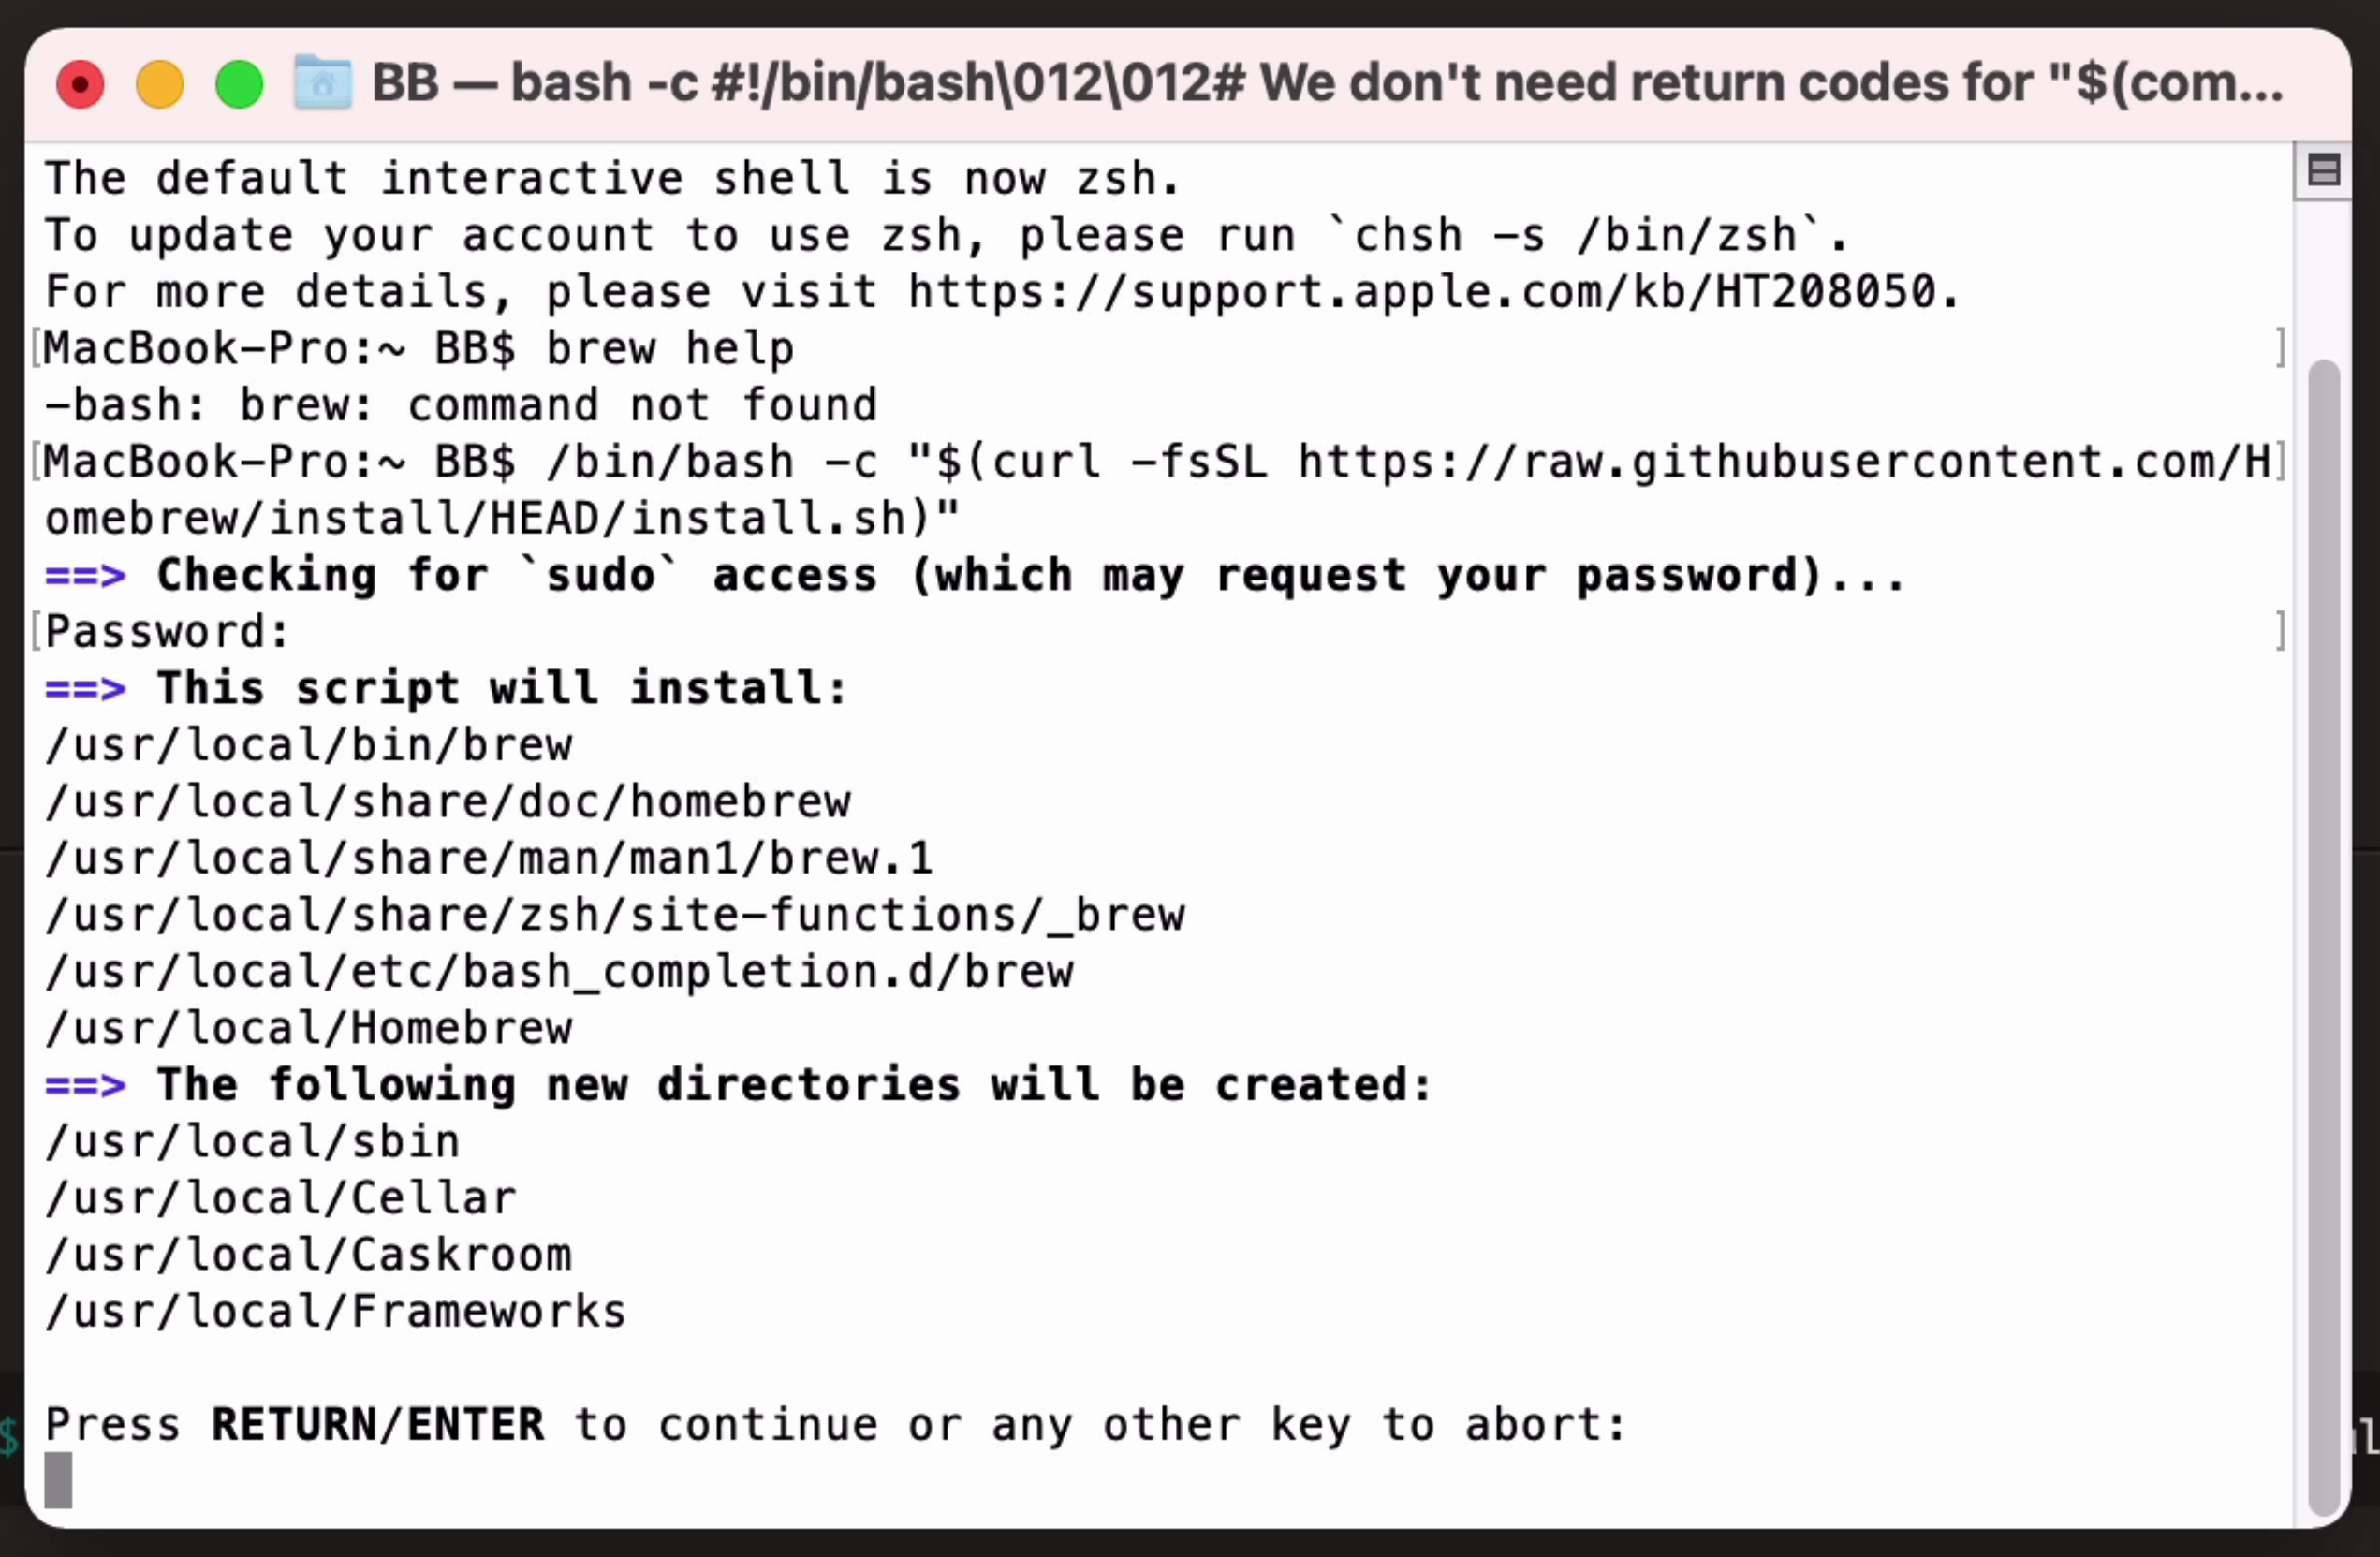
Once it is complete, your screen will look like this:
Homebrew is now installed! Let’s install PostgreSQL.
Install PostgreSQL
Now that you have Homebrew set up, it’s time to install PostgreSQL.
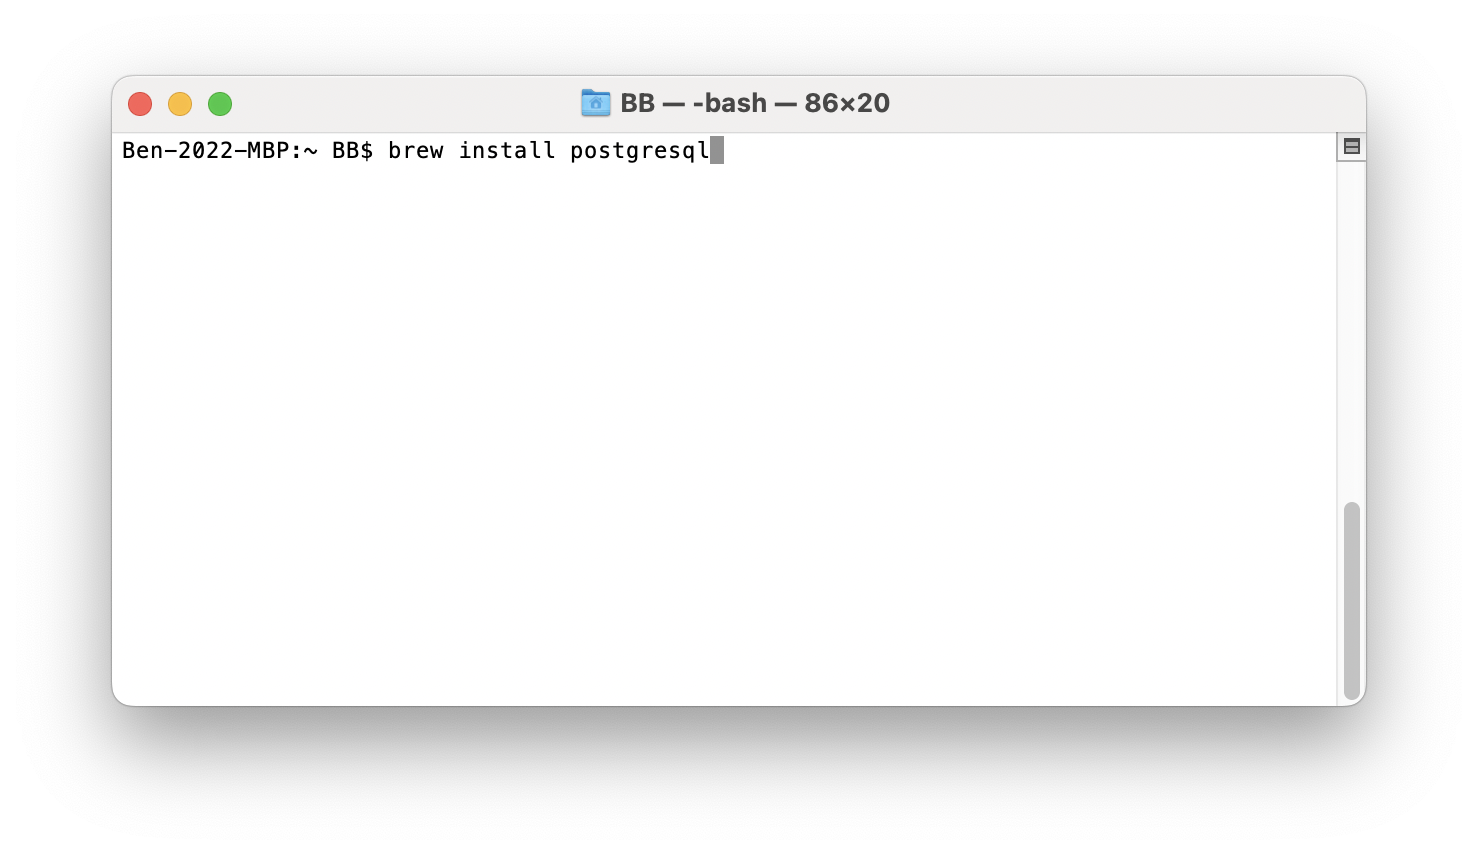
To do this, run this command:
1brew install postgresql
This includes three keywords:
- brew means you are using the Homebrew tool.
- install means you want to install something
- postgresql is the software to install. Homebrew knows what this means and where to get it from. It will install the most recent version of the MySQL package that is available.
The installation will begin.
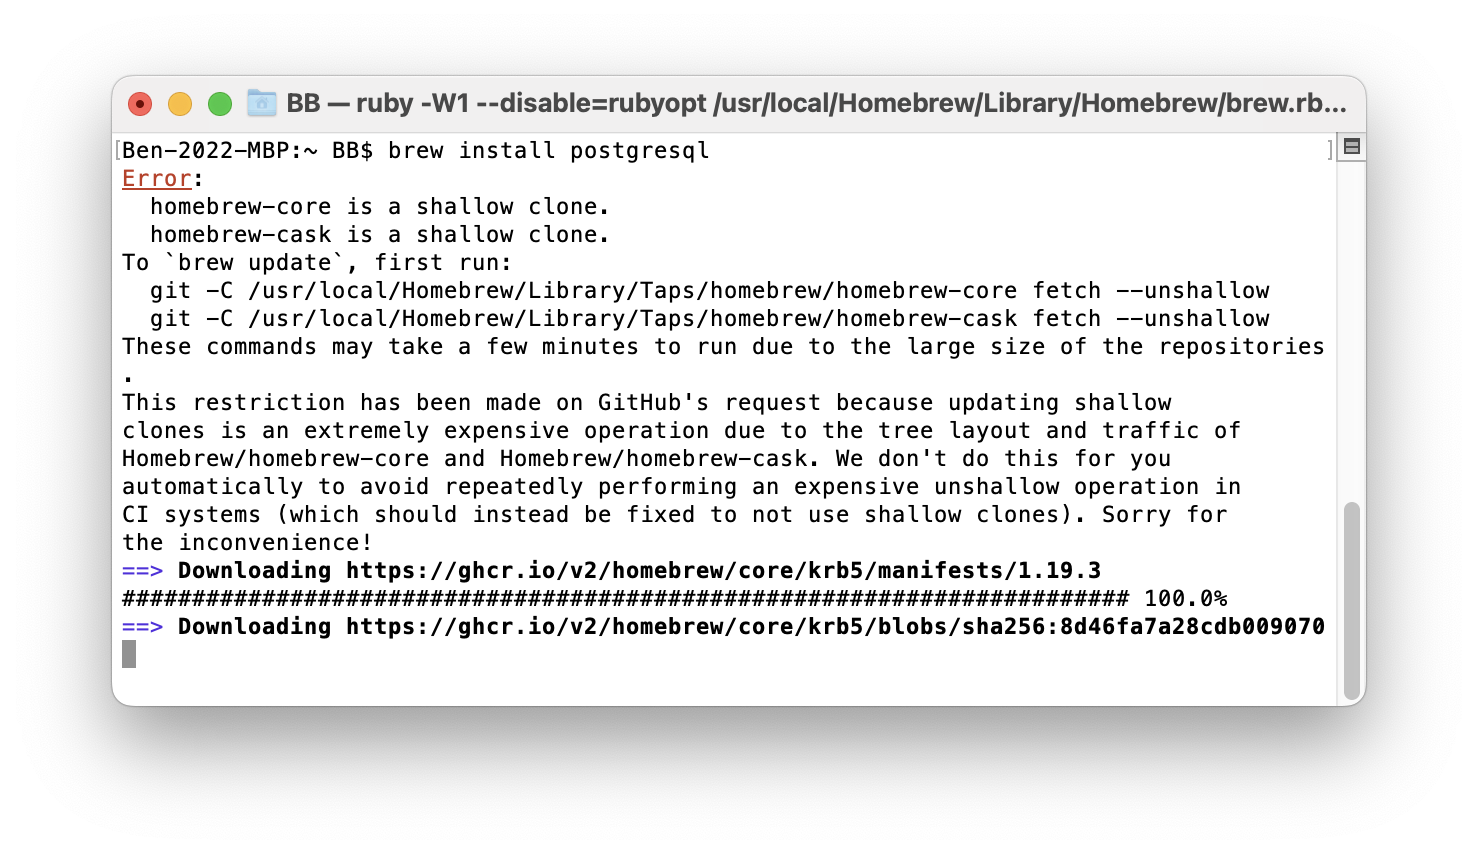
After a little while, the package will be installed. There’s a lot of output here from the different steps that Homebrew takes. You can read through it if you’re interested, but at the end of the output, you’ll see the prompt again.
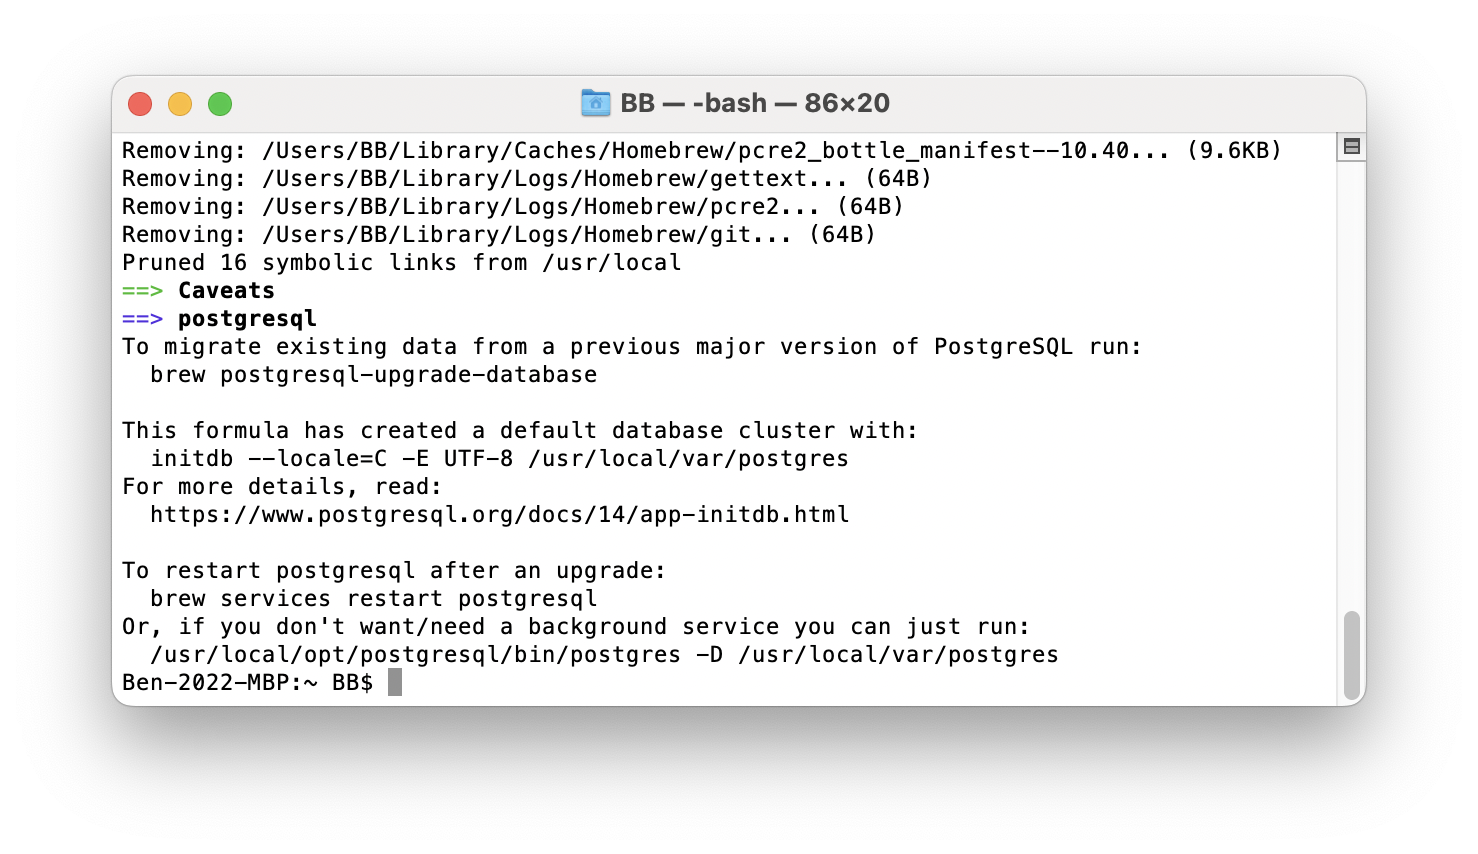
And that’s the installation process complete!
Start the PostgreSQL Service
Once Postgres is installed, you can start the service, and then check it’s running.
To start the service, type:
1brew services start postgresql
You should see this output:
1==> Successfully started `postgresql` (label: homebrew.mxcl.postgresql)
After a few seconds, run this command to check that it is running:
1brew services list
The output of the statement is shown.
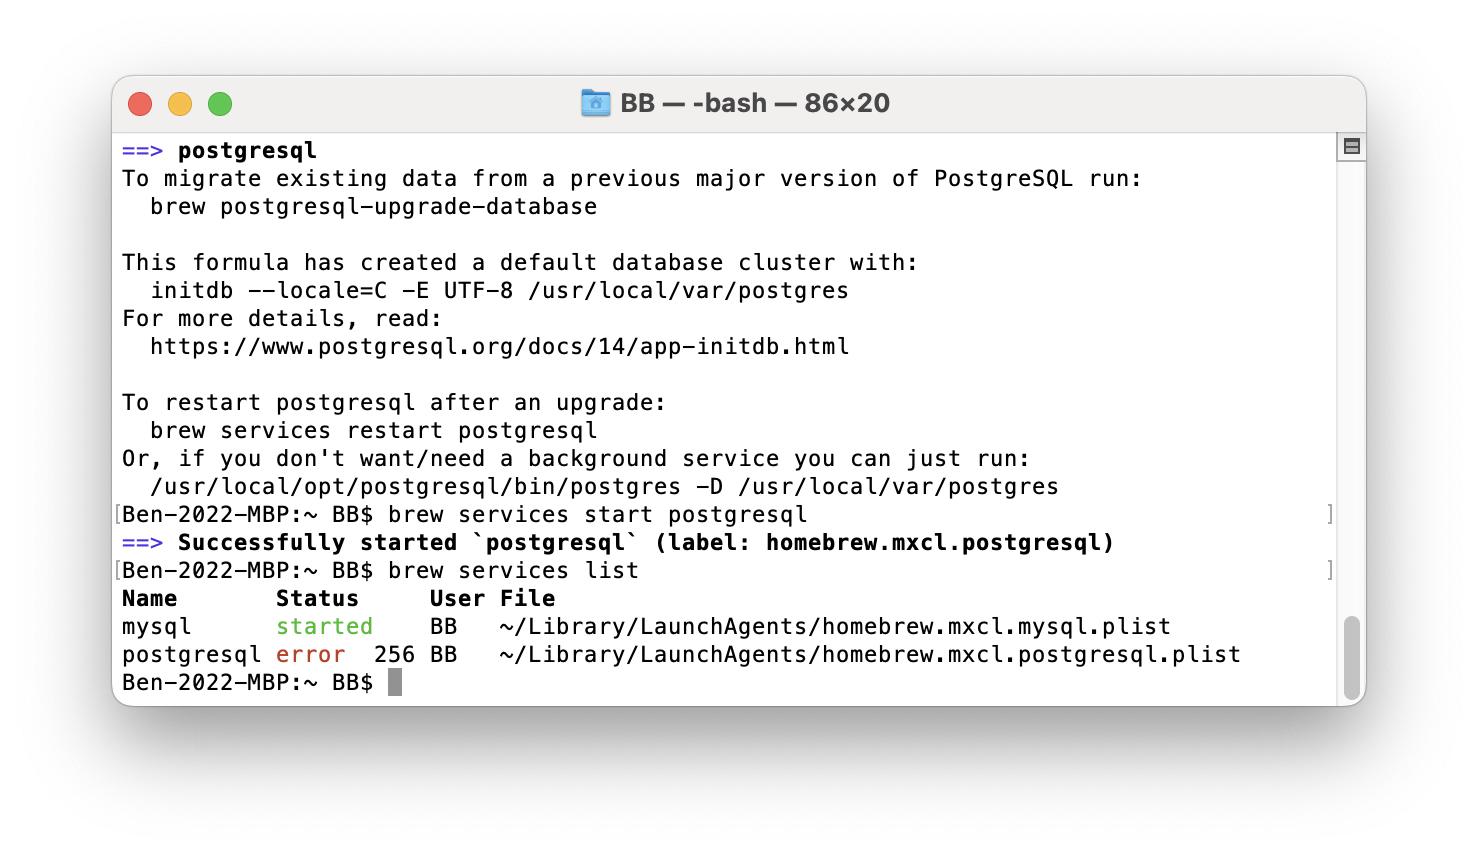
If it says Started, then Postgres is running and can be used.
If it says Error, then there was an issue, and we’ll have to resolve it.
As you can see in the image above, it shows an error for the postgresql service. Let’s see how we can fix that.
(It also shows mysql as started, but that’s because I’ve also got MySQL running using Homebrew)
Error Starting Postgres
If you’re trying to start Postgres using Homebrew and get an error, it could be because you already have Postgres running on your Mac. Homebrew tries to start the service using the same port as an existing installation (port 5432) and gets an error.
This could happen if you’ve installed Postgres using the DMG file or package installation (which I’ve detailed here).
You’ll probably want to use either the Homebrew version or the package version, and not both.
Solution 1: Stop Mac Postgres Service
If you want to use the Homebrew version, you can stop the package version from running.
To do this:
Step 1: Open Terminal (you can use a new tab or the same tab)
Step 2: List all services that are running on port 5432 using the lsof command:
1sudo lsof -i tcp:5432
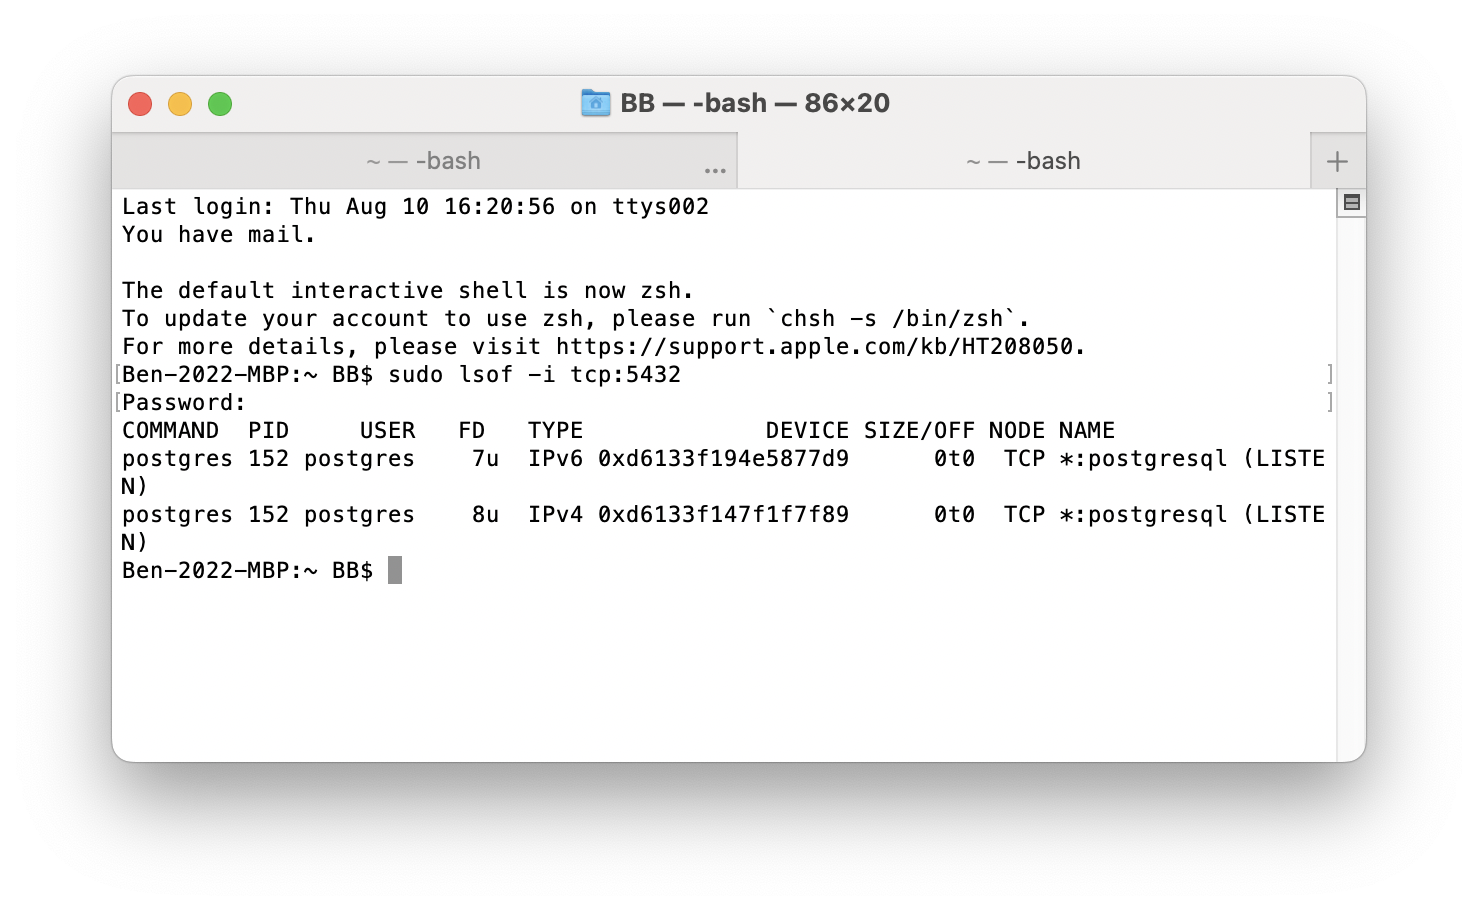
Step 3: Enter the password for your Mac
The list of services is shown.
1COMMAND PID USER FD TYPE DEVICE SIZE/OFF NODE NAME
2postgres 152 postgres 7u IPv6 0xd6133f194e5877d9 0t0 TCP *:postgresql (LISTEN)
3postgres 152 postgres 8u IPv4 0xd6133f147f1f7f89 0t0 TCP *:postgresql (LISTEN)
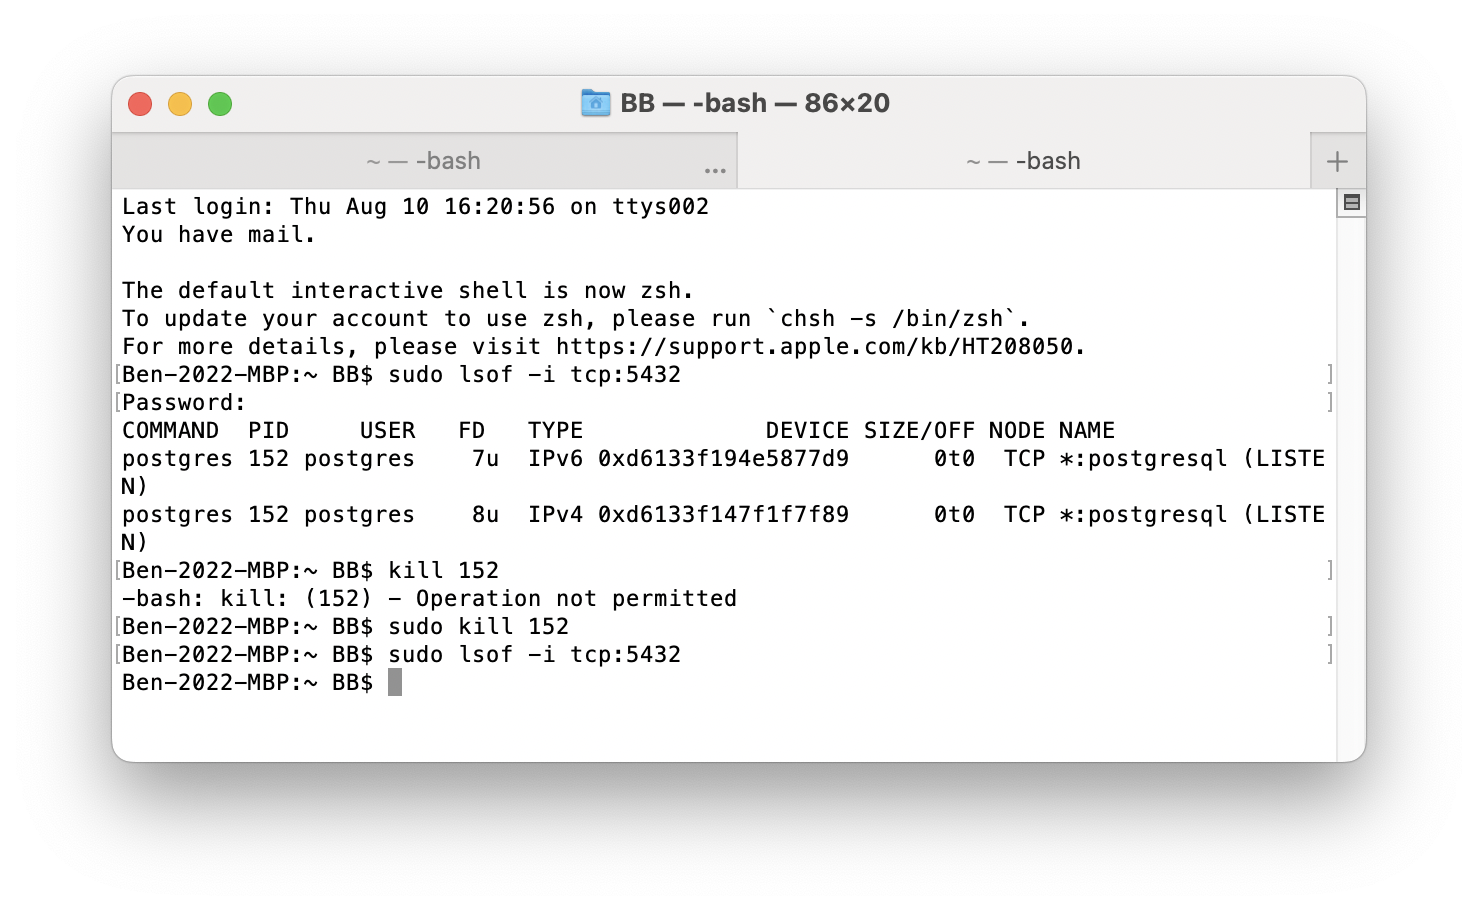
Step 4: Stop the process (or processes) shown here by using the kill command and mentioning the PID. In the list above, the PID for both entries is 152.
1kill <pid>
If you get an error of:
1bash: kill: (152) - Operation not permitted
Then try:
1sudo kill <pid>
Step 5: Run the sudo lsof command from Step 2 above.
You should see no results.
Now, run the service using Homebrew:
1brew services start postgresql
After a few seconds, list the services:
1brew services list
You should see a green starting status for postgres.
Solution 2 - Error While Starting Postgres
If you try to start the postgres service but get an error, it may be because of a version conflict with previous installations of Postgres.
I’ve written an article here on the problem and how to solve it.
Connect to PostgreSQL using Terminal
Now that the service is running, you can connect to it and run some queries.
If you have an editor such as pgAdmin or DBeaver installed, you can use that.
I’ll show you how to connect using the command-line tool called psql, and using an SQL editor.
First, we’ll have to connect using the terminal.
To connect using psql on the Terminal command line, we run this command:
1psql -d postgres
The psql is the tool to run SQL. The -d specifies the database, and postgres is the name of the database.
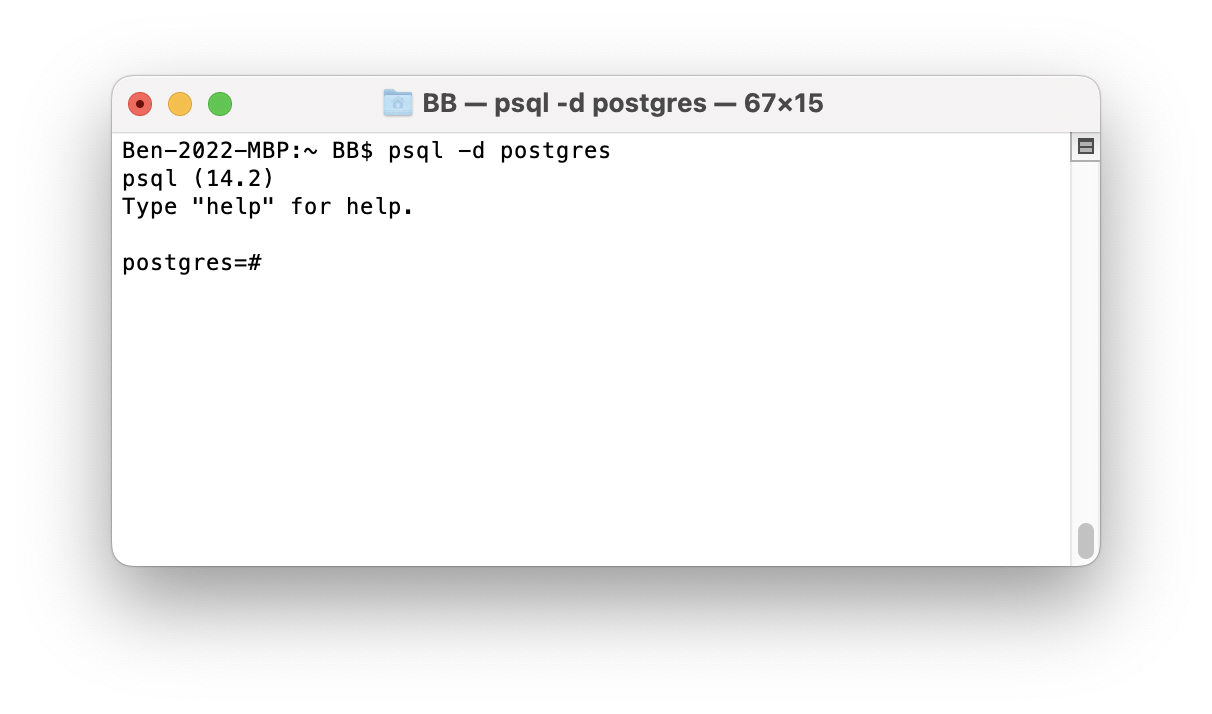
We can see the Terminal now shows the “postgres” prompt, which means we have connected to the database.
We can run a simple SELECT query to check:
1SELECT 1;
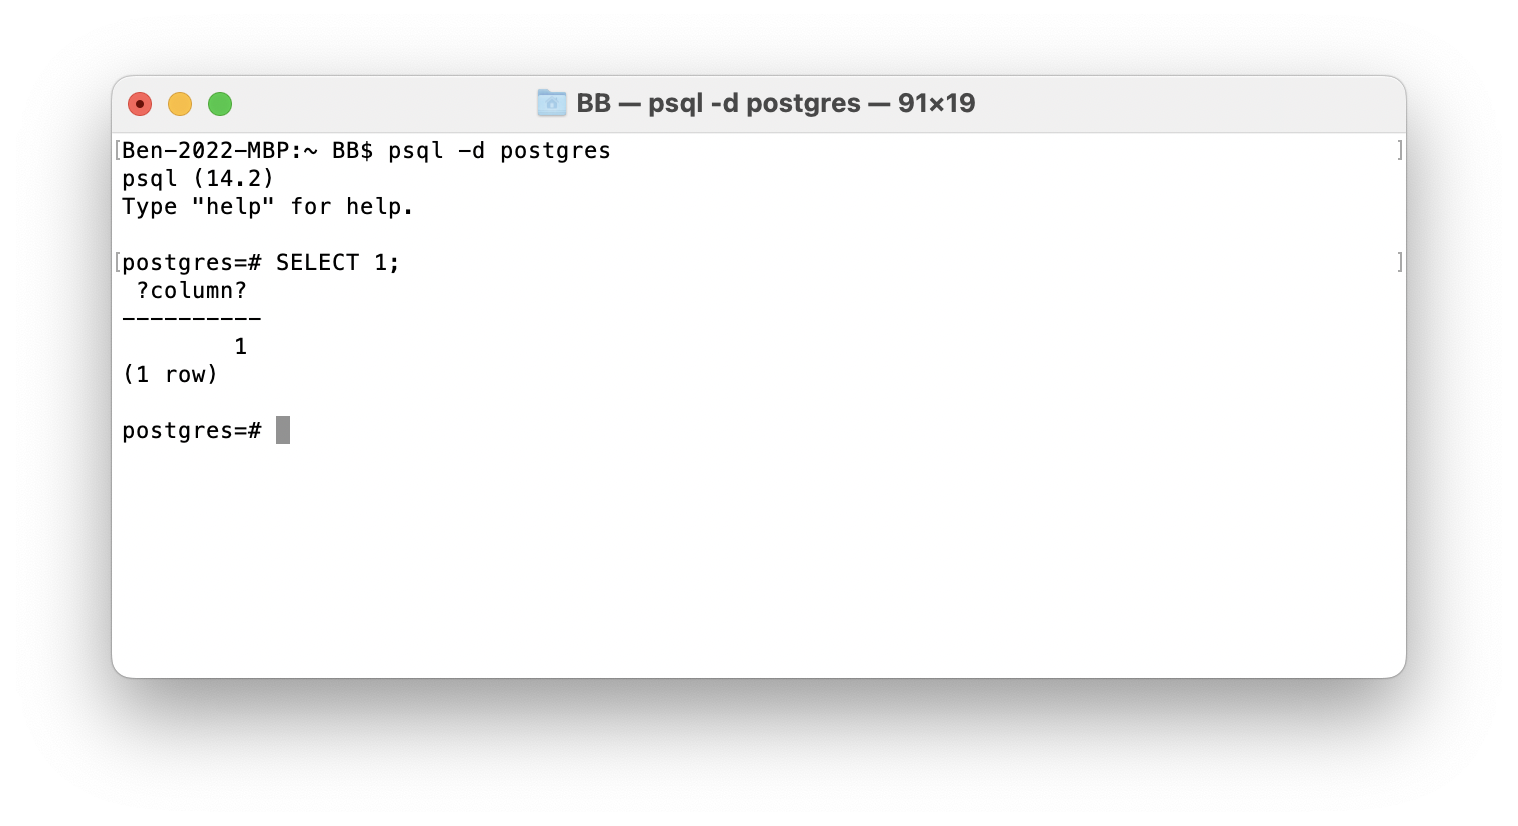
We can see the result of the query on the database.
Create a New User
If you want to connect to the database using an SQL Editor, such as DBeaver or pgAdmin, you’ll need to create a user account so that you can log in.
This can be done easily using Terminal after you have logged in using the steps above.
You should be at the postgres prompt:
1postgres=#
Enter the following command to create a new user:
1CREATE ROLE new_user WITH LOGIN PASSWORD 'password';
This will create a new user called new_user with a password of “password”. You can change the username and password before running the command if you like.
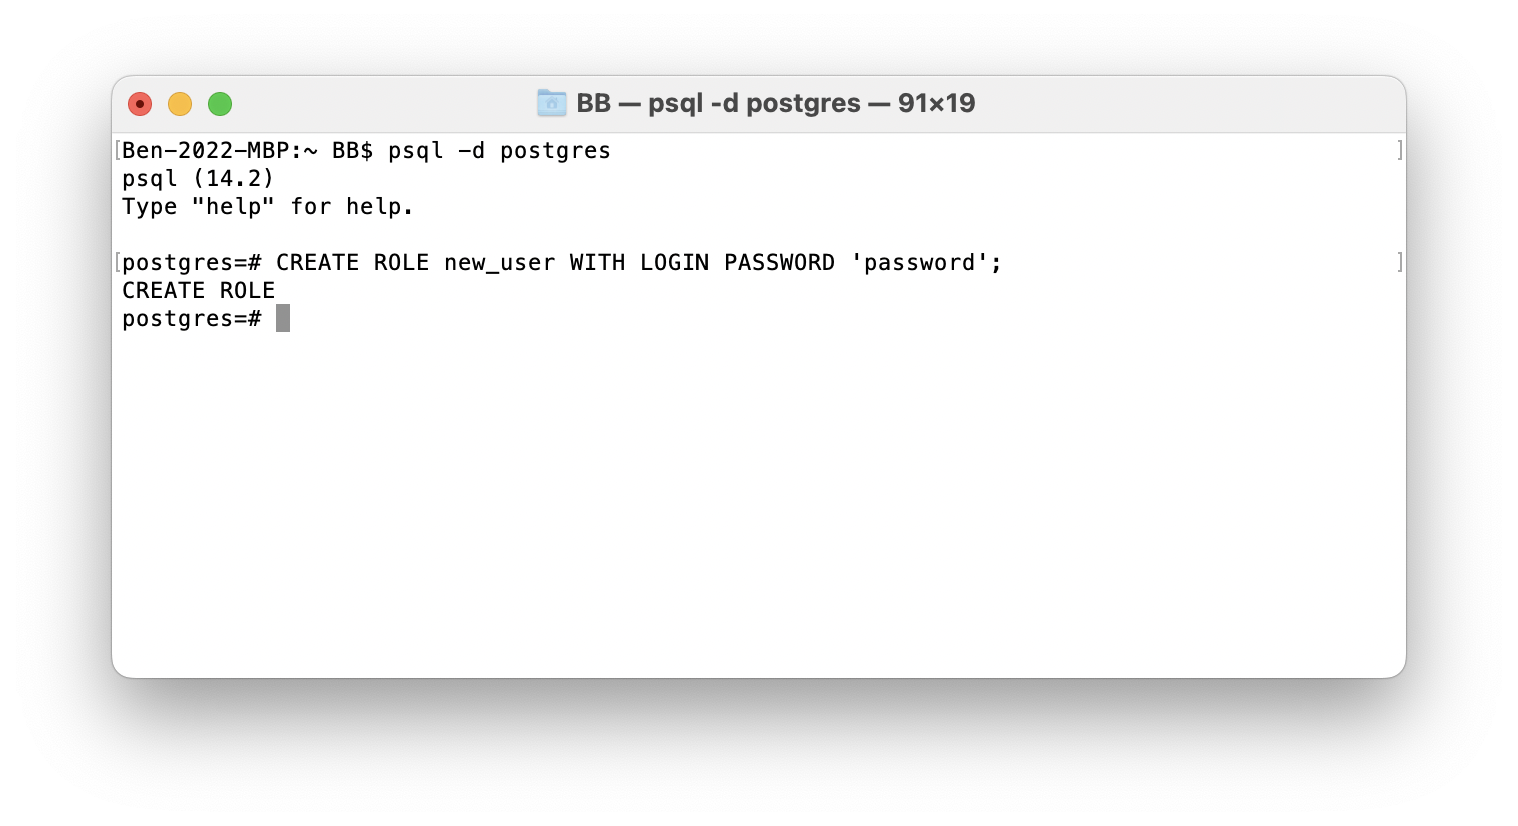
Make sure you have basic single quotes around the password, otherwise, you’ll get an error. This can happen if you copy and paste from a web page, but you can just replace the quotes and rerun the command.
You should see an output of CREATE ROLE, and the prompt again.
Then, we need to give this new user permission to create a database:
1ALTER ROLE new_user CREATEDB;
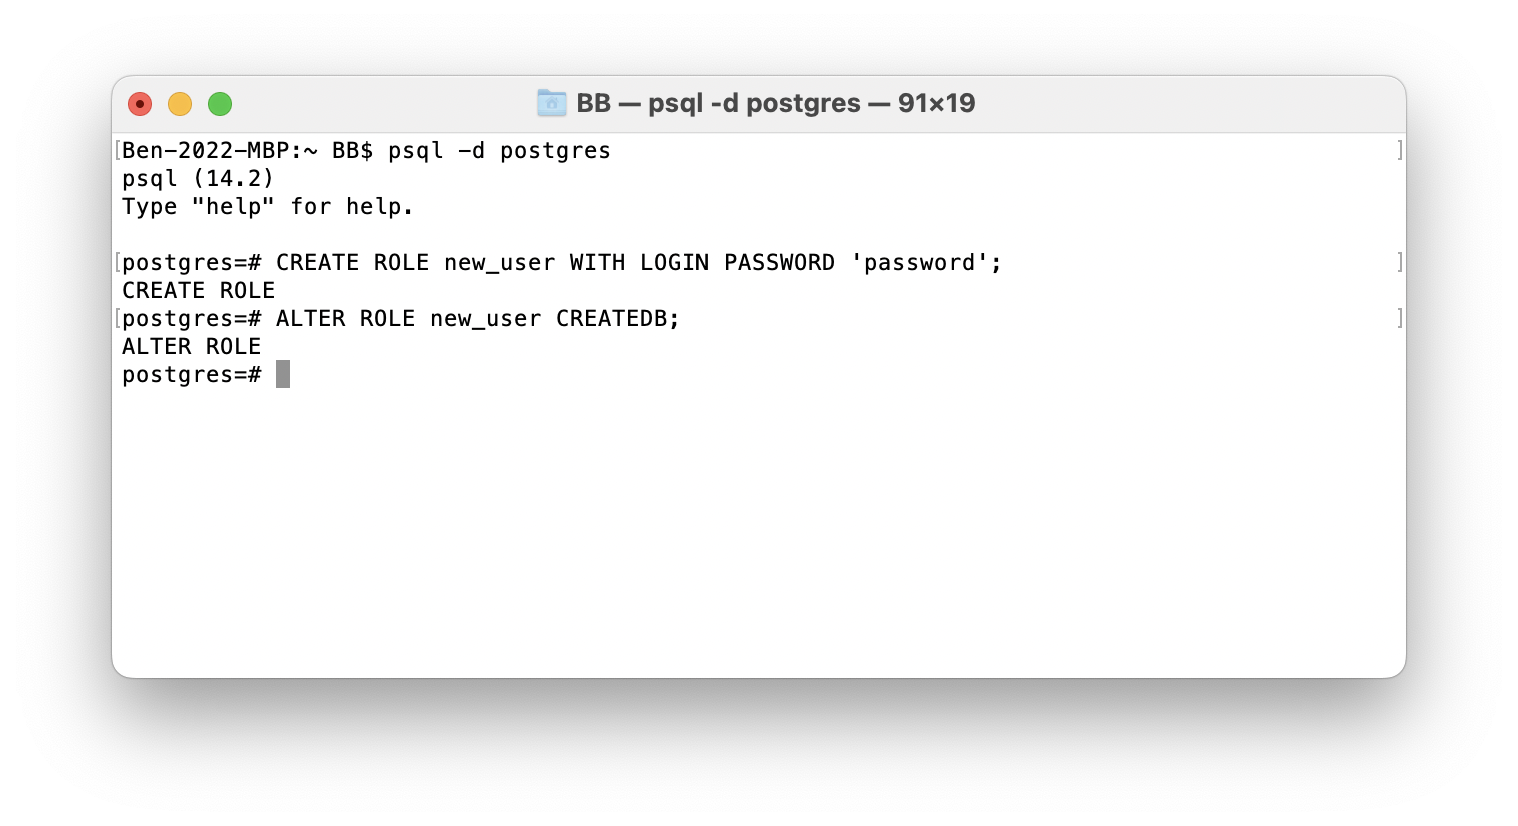
We can see the command has been run.
Connect Using an SQL Editor
Now we can connect to the database using a tool such as pgAdmin or DBeaver.
You’ll need to create a new connection inside this tool, and specify these details:
- Host: localhost
- Port: 5432
- Username: new_user
- Password: password
You may be able to use the editor’s Test Connection feature to test that the details are correct.
Once you have entered these details into a new connection, and they work, you can save the connection and connect to the database.
You can then run SQL on the database.
Stop the Postgres Service
If you ever need to stop the postgres service in Homebrew, you can run the following command:
1brew services stop postgres
This will stop the service, which you can start again if you like.
Now that you have Homebrew and PostgreSQL installed, you can start writing SQL on the database.
To help remember all of the SQL commands you can use for PostgreSQL, get my series of SQL Cheat Sheets here: