How to Install Postgres on Windows
In this guide, you'll learn how to download PostgreSQL for Windows, install it, and use pgAdmin to connect to the database.

Download PostgreSQL
The first step is to download the installation package.
Step 1: Visit the Postgres website at postgresql.org
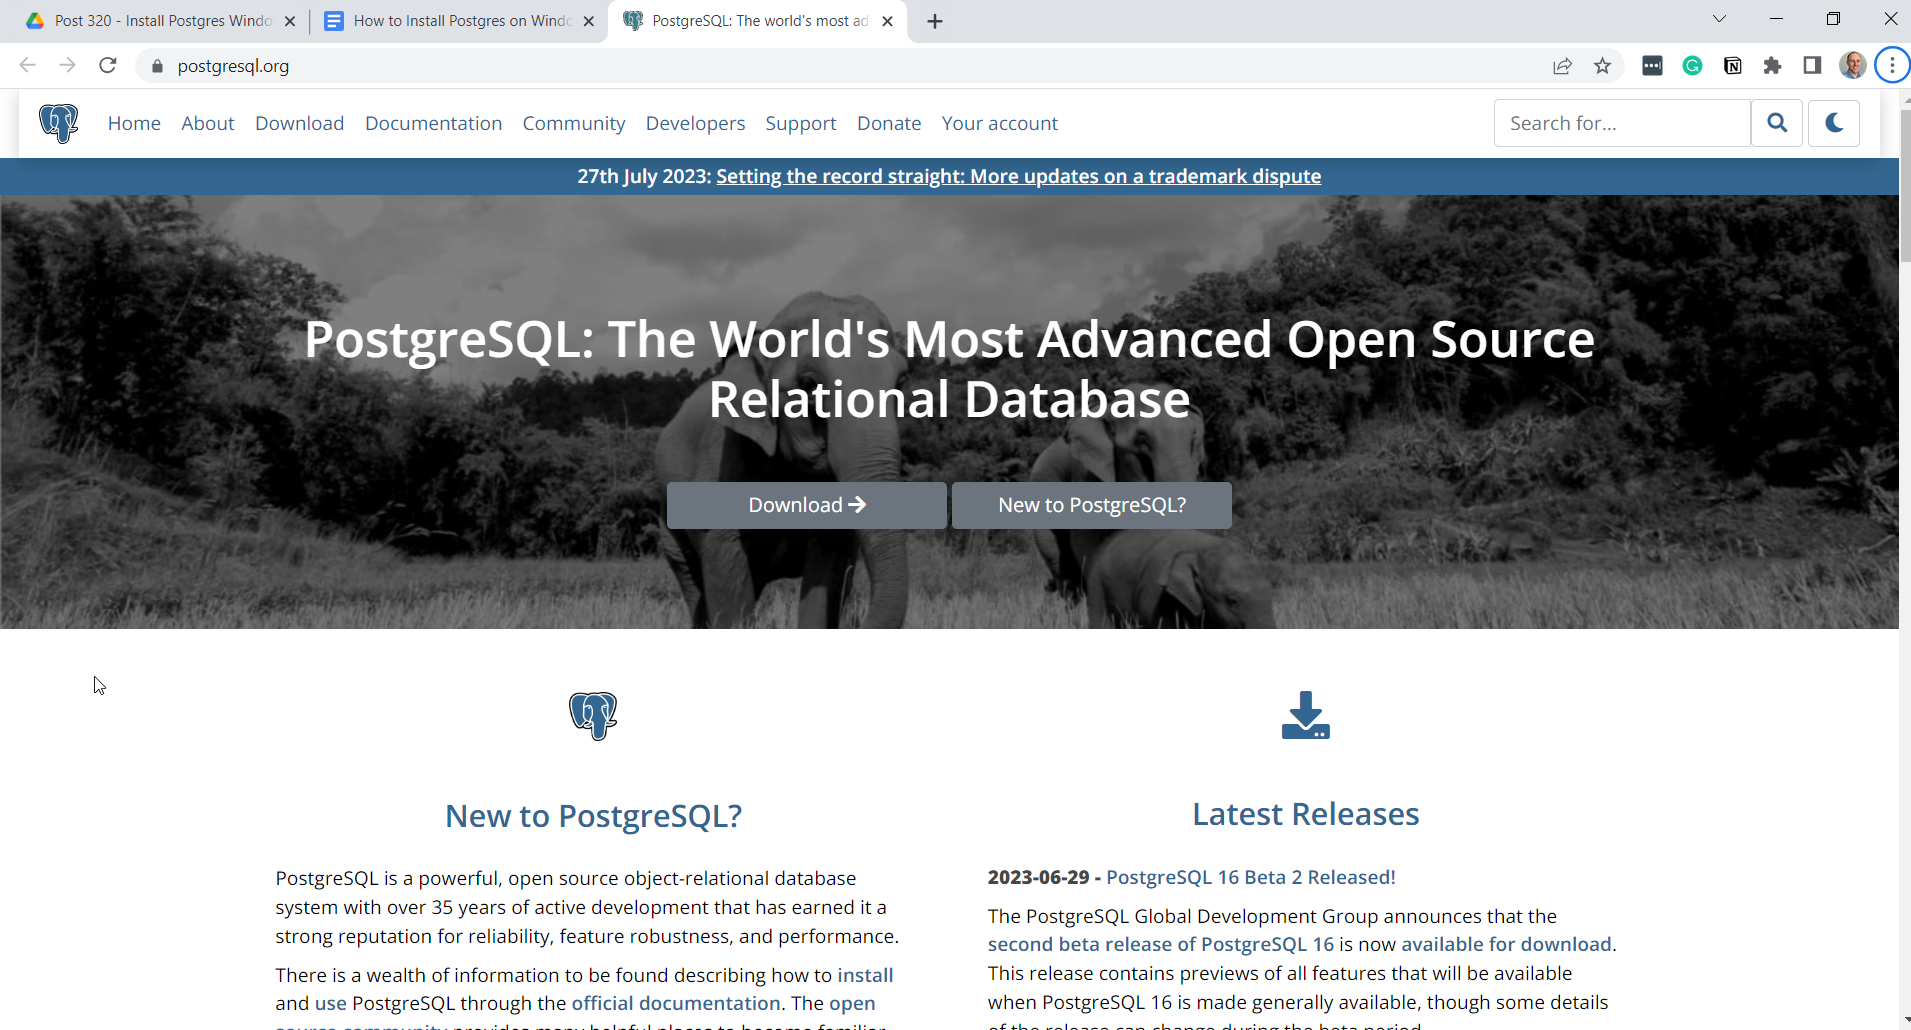
Step 2: Click on the Download button at the top of the screen.
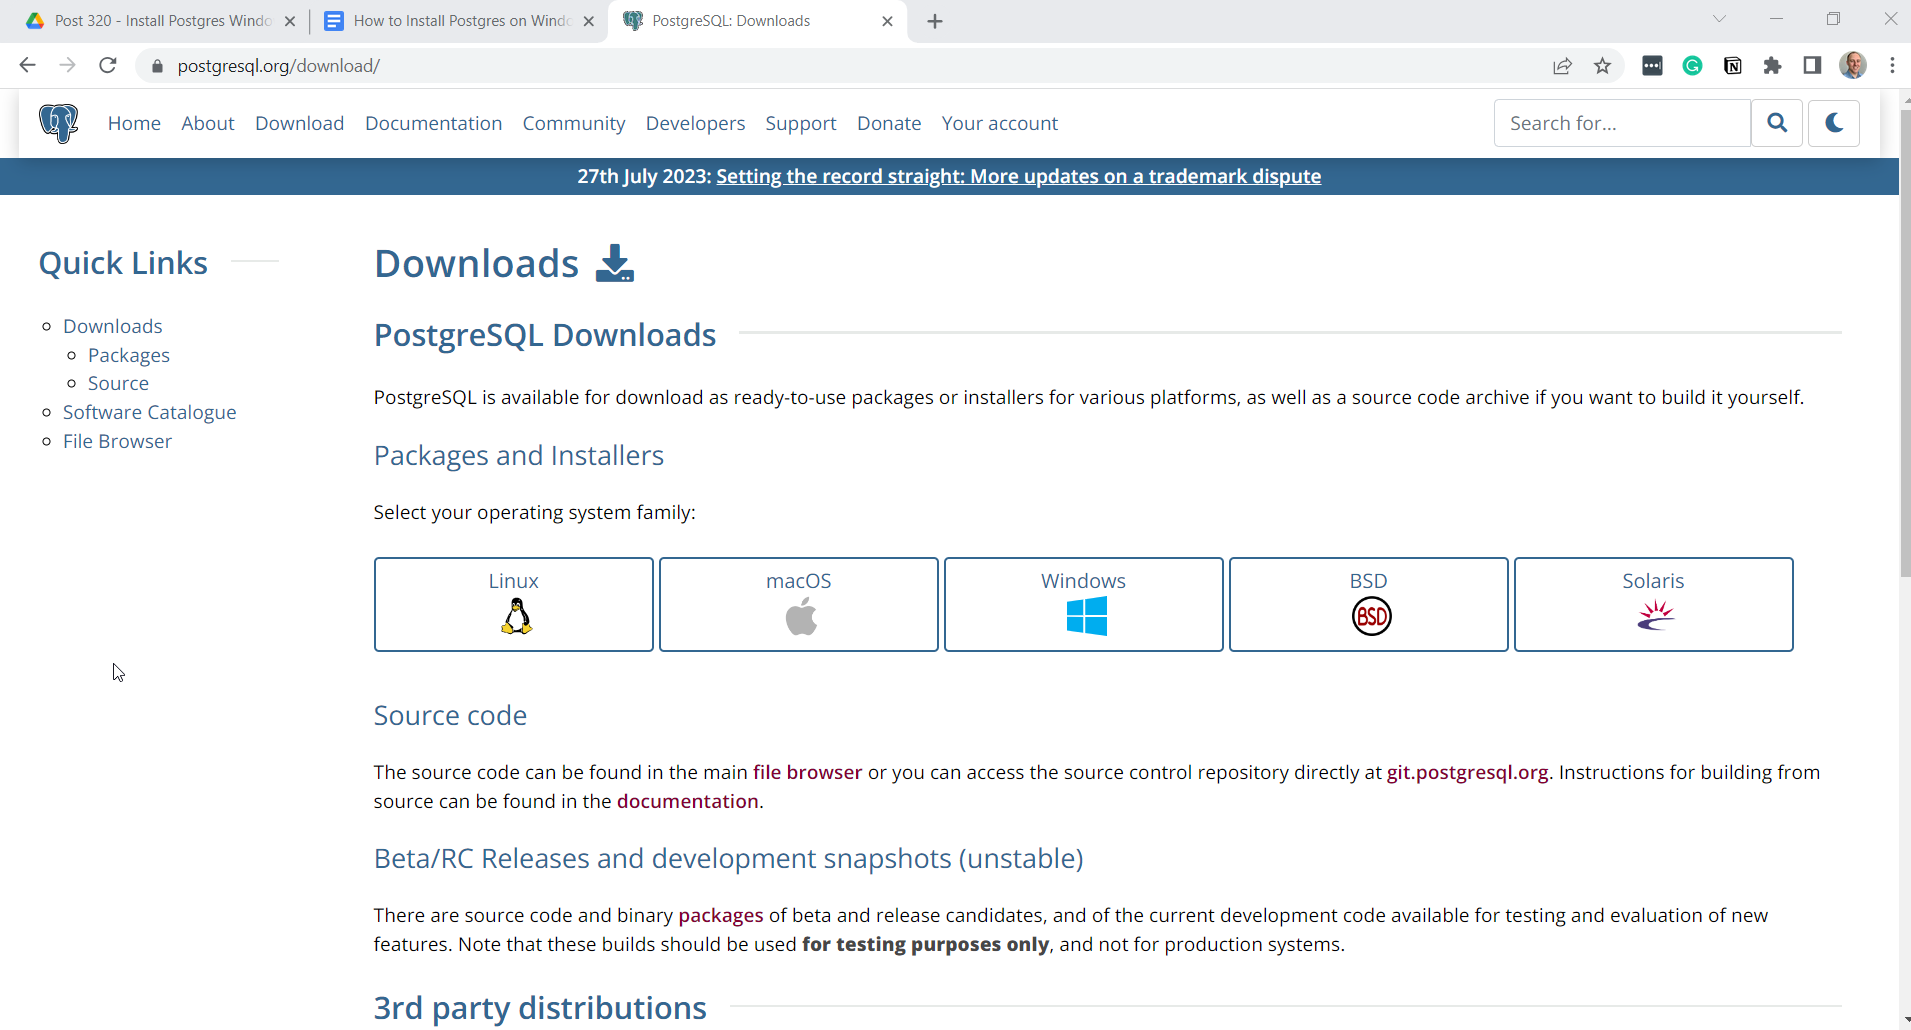
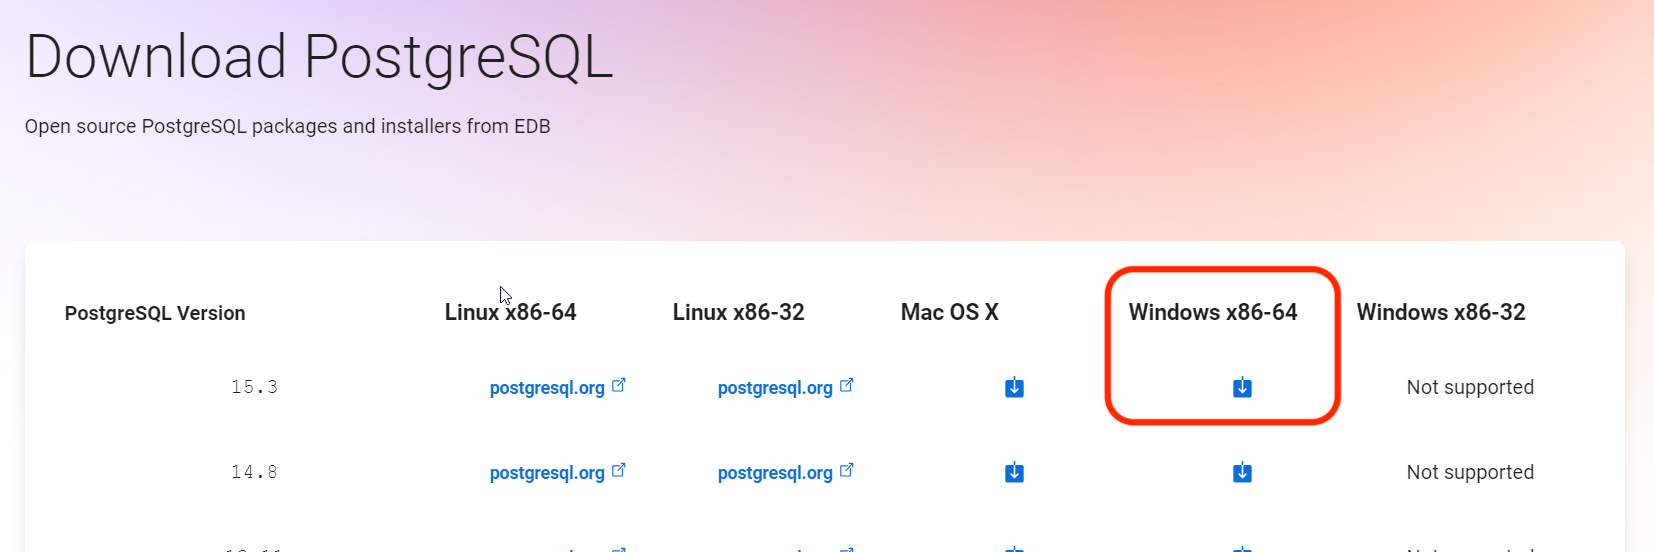
Step 3: On the Download page, click on the Windows button under the PostgreSQL Downloads section.
A new page is shown.
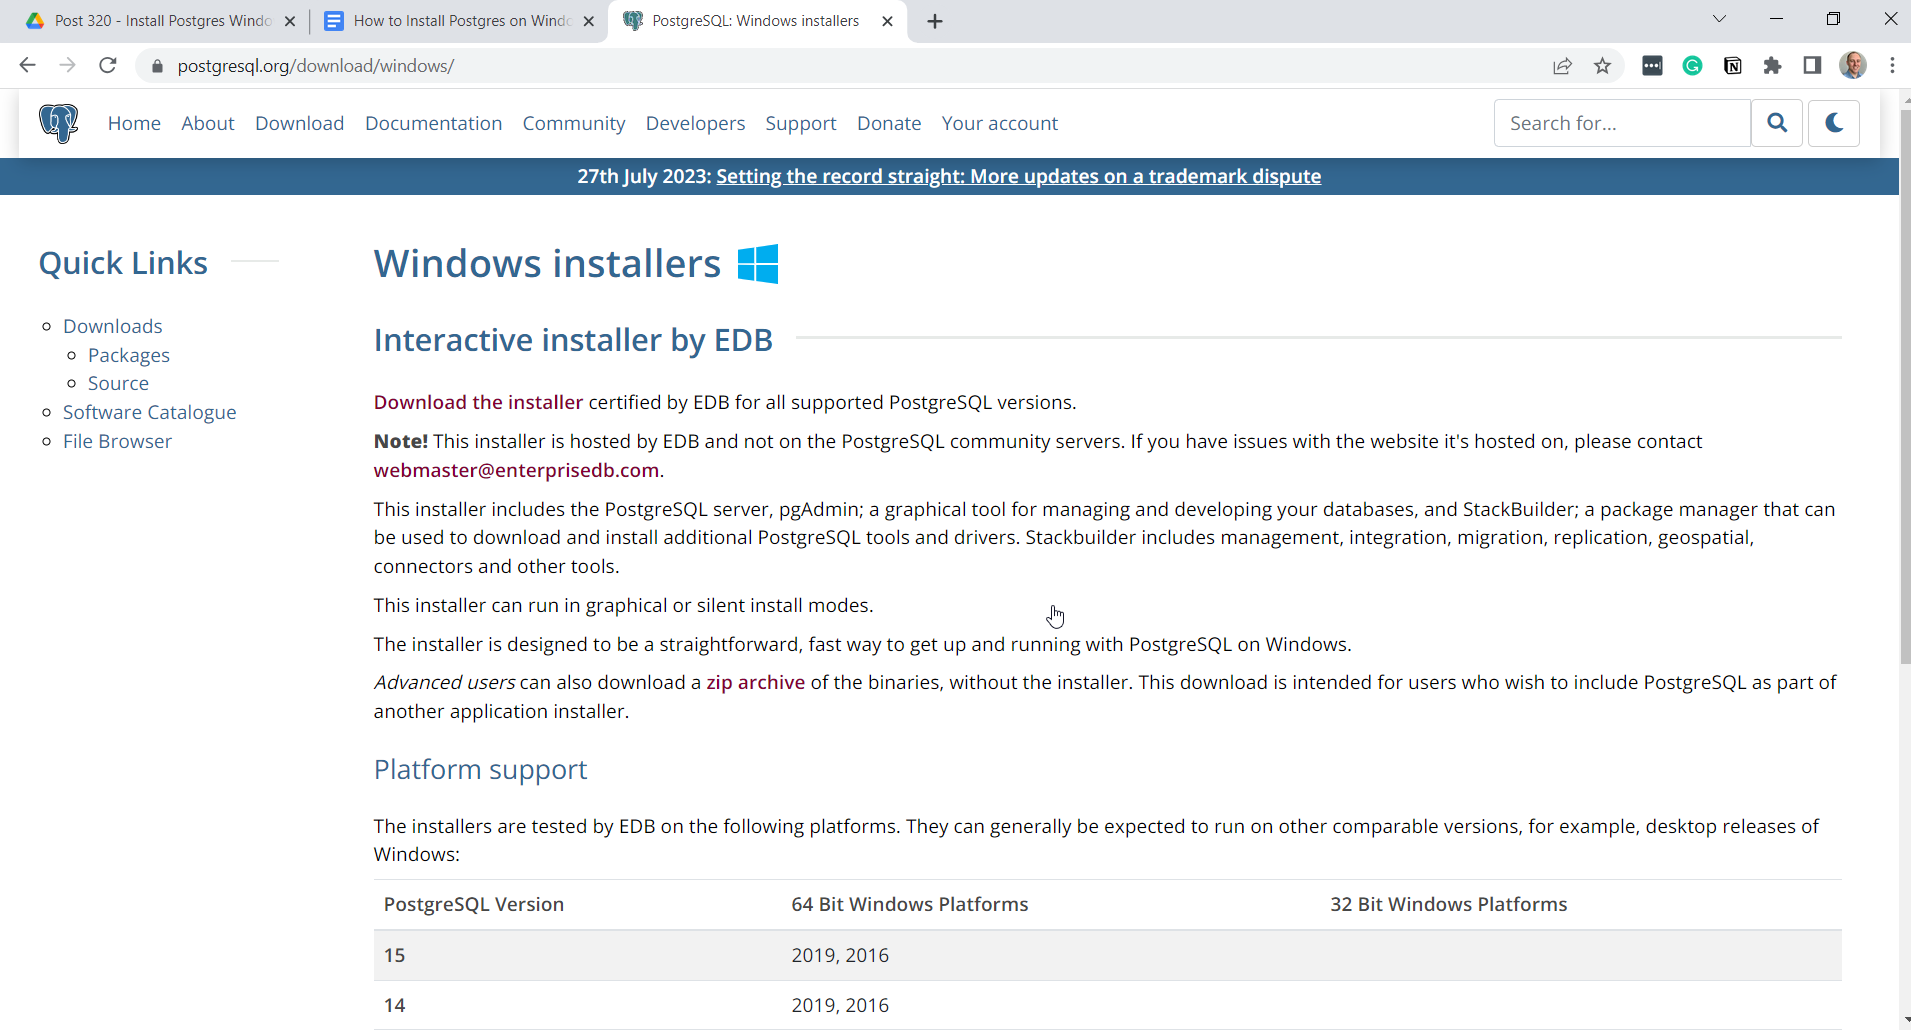
Step 4: Click on the “Download the installer” link under the “Interactive installer by EDB” section.
You’ll be taken to a site called Enterprise DB which hosts the Postgres installation packages.
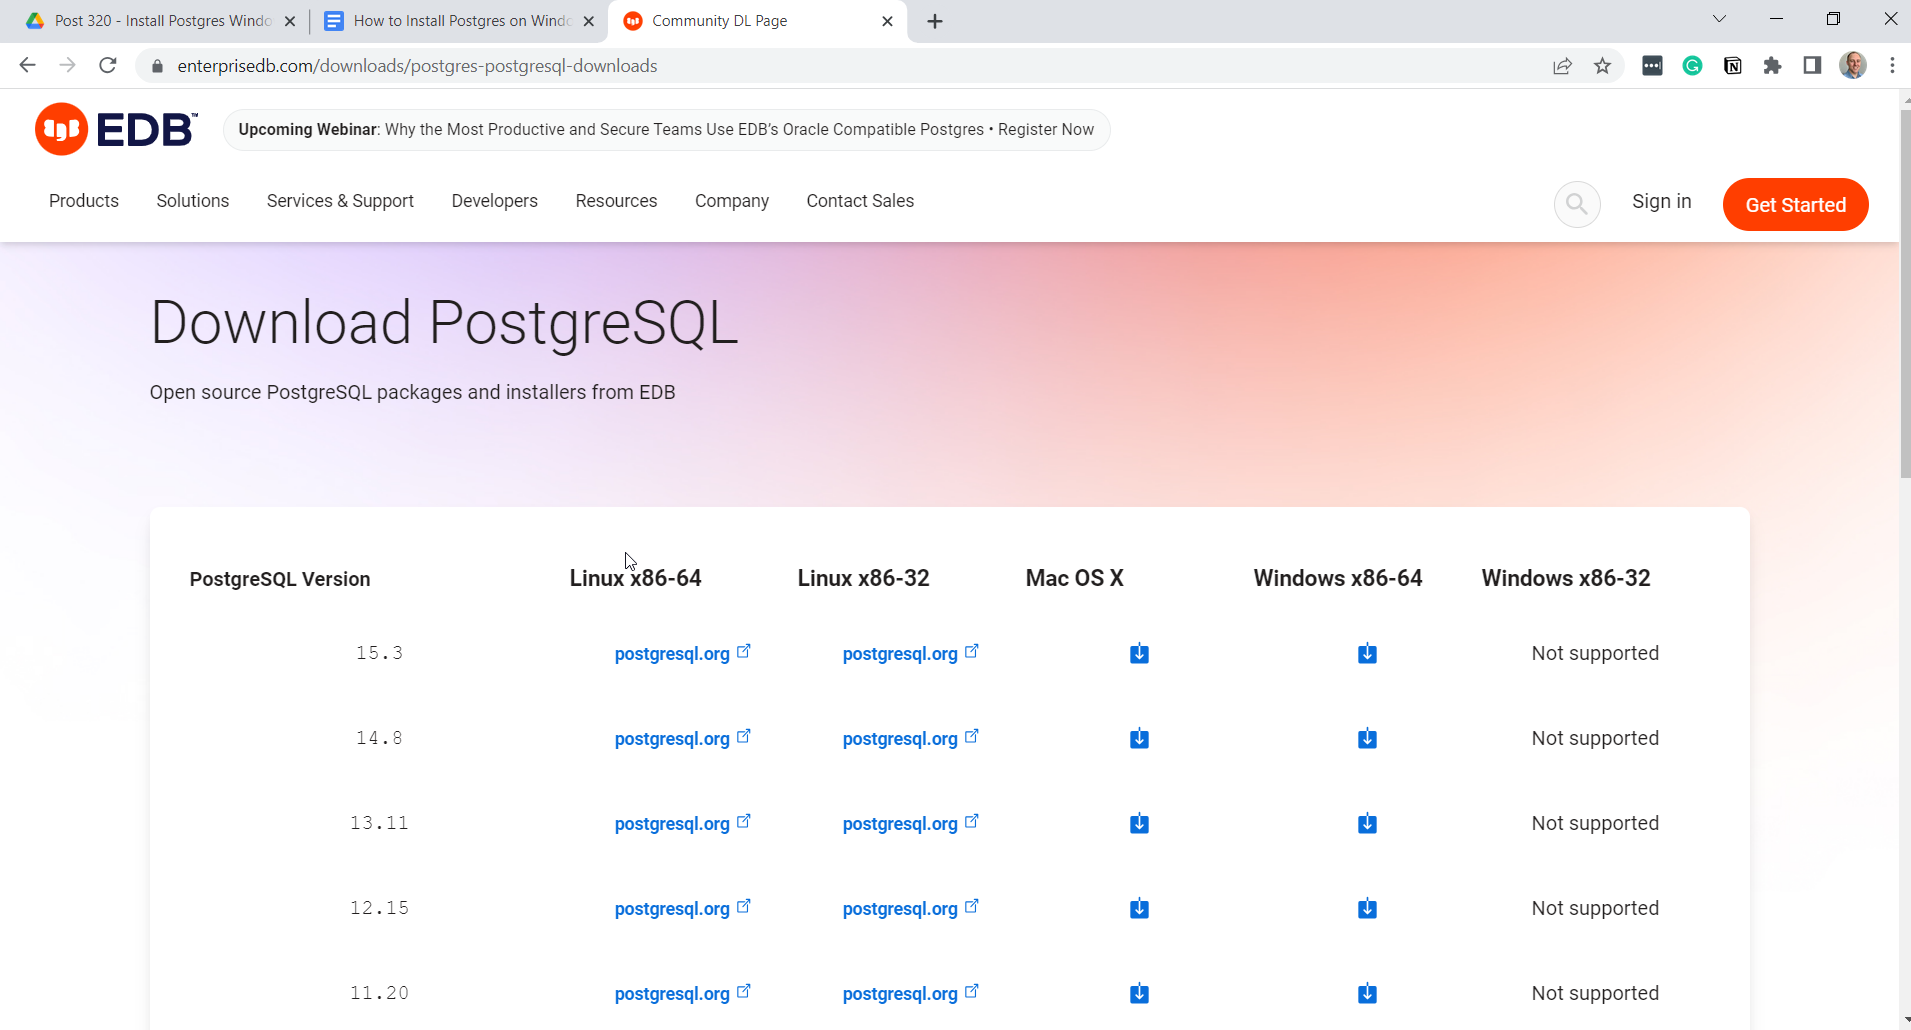
Step 5: Click the button under the Windows column for the version you would like. The version numbers shown here may be different to the ones you see, as newer versions are added over time.
For this demo, I’ll click the button for the 15.3 version.
Step 6: Select a location to save the installation package, and click Save.

The file will then begin downloading. It’s about 300 MB so may take a little while, depending on your connection speed.
Install Postgres
Step 1: Once the installation package is downloaded, you can open it.
You’ll then see a splash screen for a moment.
Once the splash screen has loaded, you’ll see the PostgreSQL Setup Wizard.
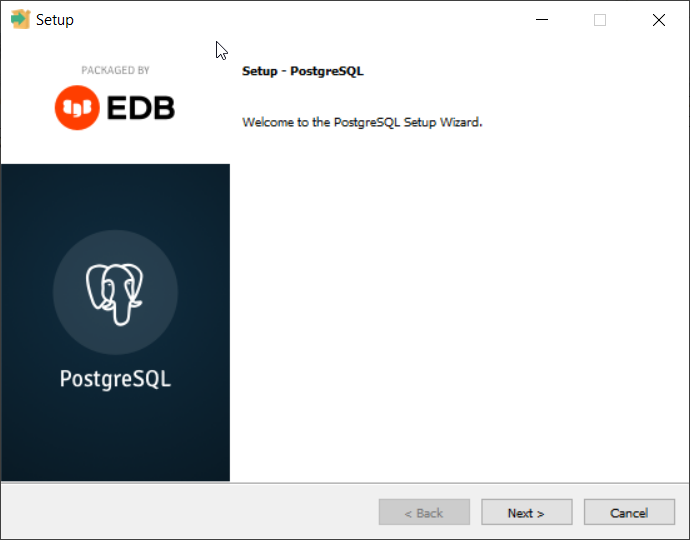
Step 2: Click Next on the welcome screen.
You’ll see the Installation Directory screen.
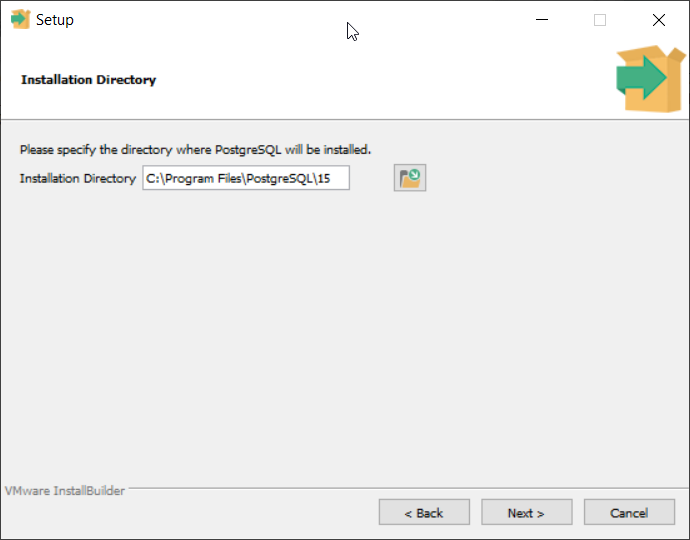
Step 3: Leave the default directory and click Next.
You’ll see the Select Components screen.
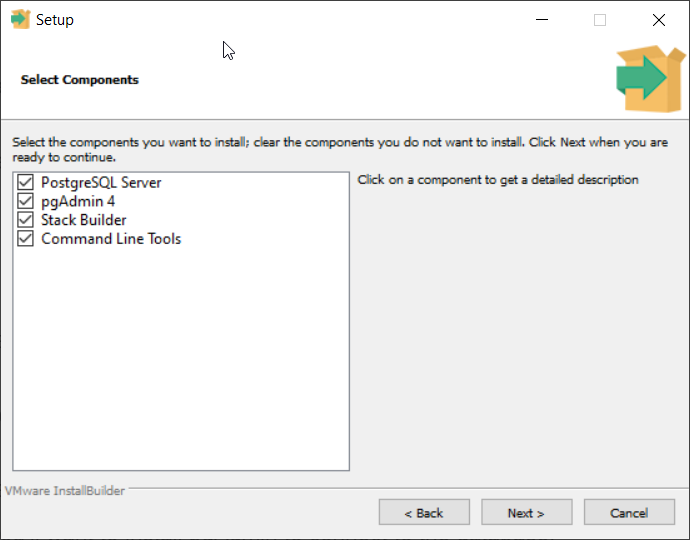
You can deselect any that you don’t want.
For our installation:
- PostgreSQL Server: check
- pgAdmin 4: check
- Stack Builder: uncheck
- Command Line Tools: check
The only change I suggest you making is to uncheck Stack Builder.
Step 4: Leave the defaults, and click Next.
You’ll then see the Data Directory screen.
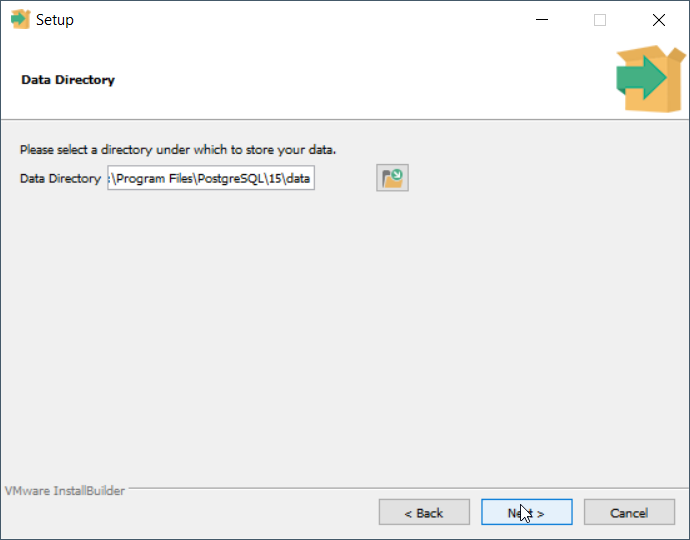
Step 5: Leave the default values on the Data Directory screen and click Next.
You’ll see the Password screen.
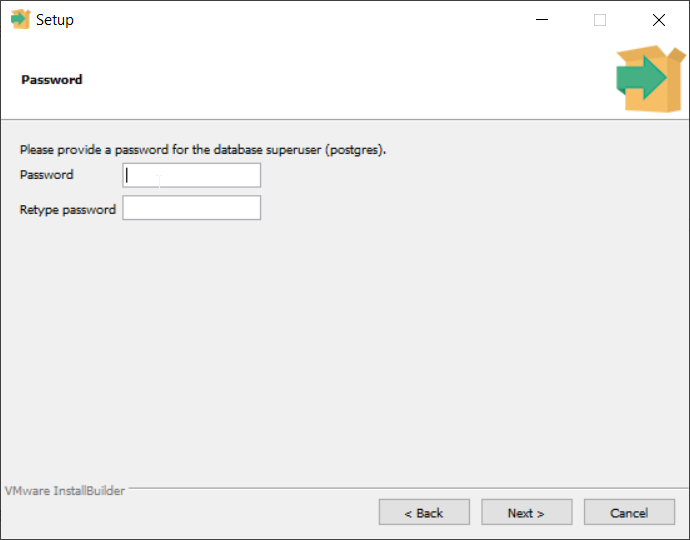
Step 6: Enter a password to use for the postgres user on the database, and click Next.
You’ll need to remember this password for when you connect to the database later in this guide.
You’ll then see the Port screen.

By default, the installer will use port 5432. It may detect that this port is in use, and change it to 5433.
Step 7: Click Next.
You’ll then see the Advanced Options screen.
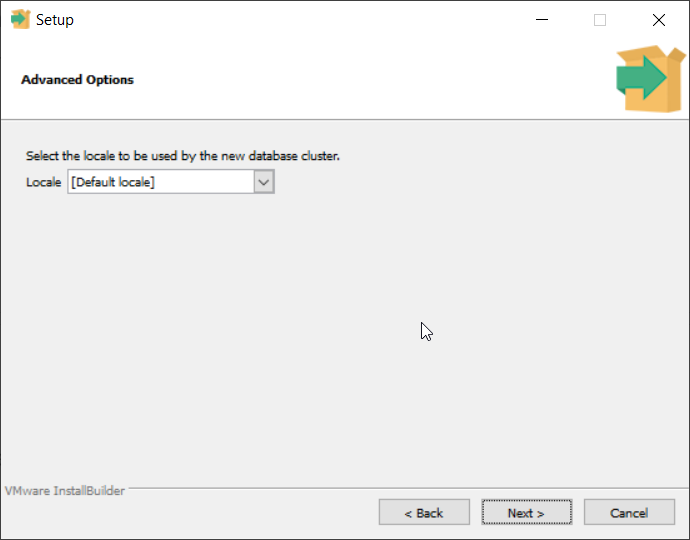
Step 8: Leave the default locale selected, and click Next.
Next is the Pre-Installation Summary screen.
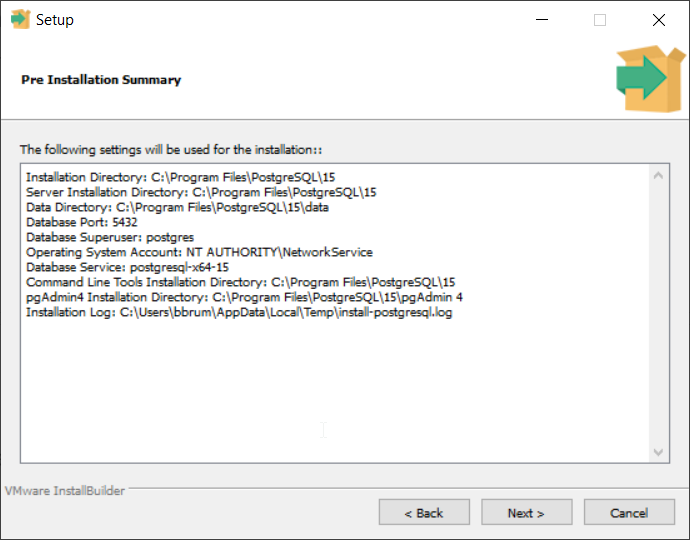
Step 9: Click Next.
You’ll then see the Ready to Install screen.
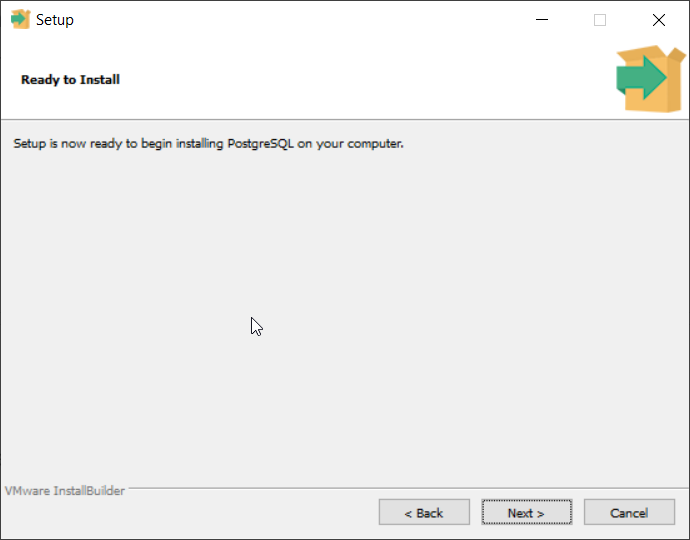
Step 10: Click Next to begin the installation, and it will begin.
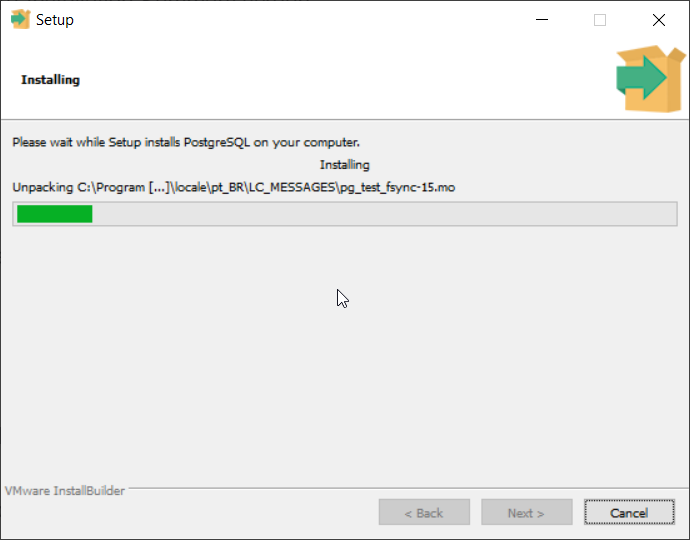
The installation should complete in about two minutes.
Once it is complete, you’ll see the Completing the Setup Wizard screen.
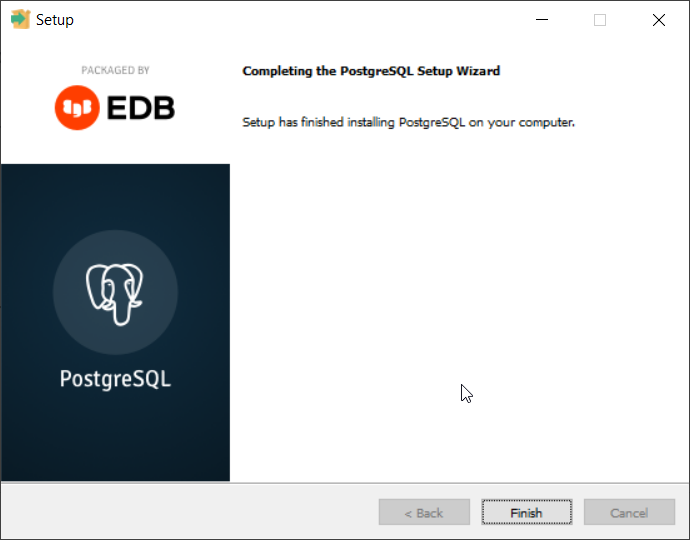
It says that the setup is complete and asks if you want to run Stack Builder.
Step 11: Click Finish.
Postgres is now installed on your computer!
The next step is to connect to the database using pgAdmin.
Open pgAdmin
You can connect to this database using the pgAdmin tool that was installed with Postgres, or you can use another IDE such as DBeaver.
We’ll use pgAdmin in this guide.
Step 1: Open pgAdmin by going to Start then PostgreSQL.
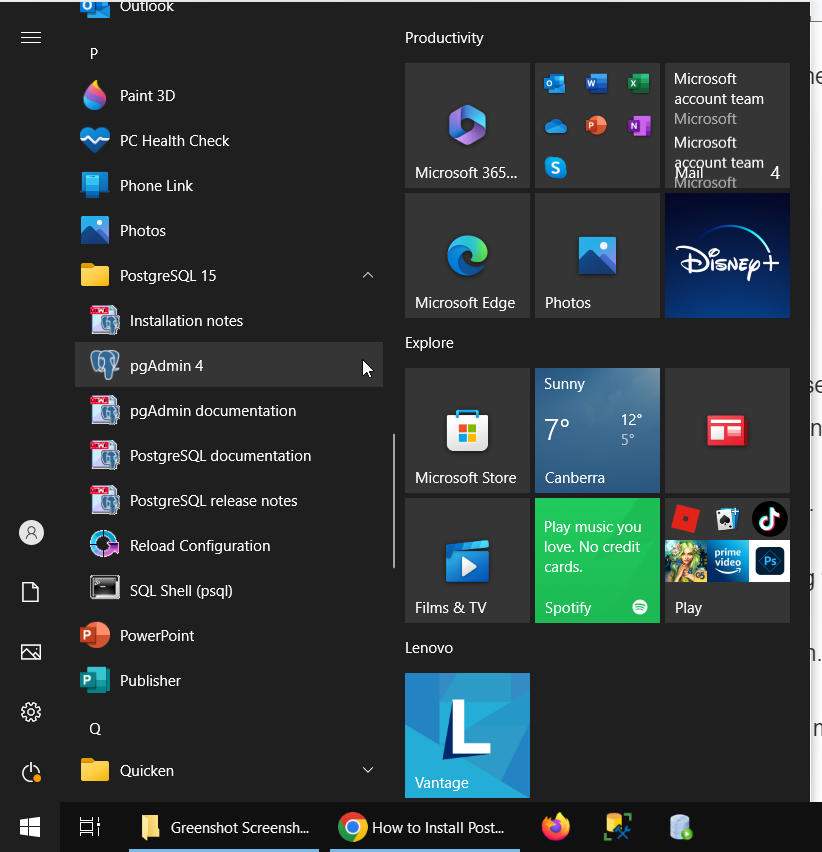
Open the pgAdmin 4 application.
You’ll see a splash screen for a moment while it loads.
You may be prompted to provide a master password. This is a password used by pgAdmin to access all of the databases that you set up. It’s different to the Postgres password you specified when you installed Postgres.
The master password is strongly recommended by the pgAdmin team because of the way the application works and to add more security.
Step 2: Enter a master password you want to use, and click OK.
If you're not prompted, you can skip ahead to the next step.
The pgAdmin main screen will then be displayed.
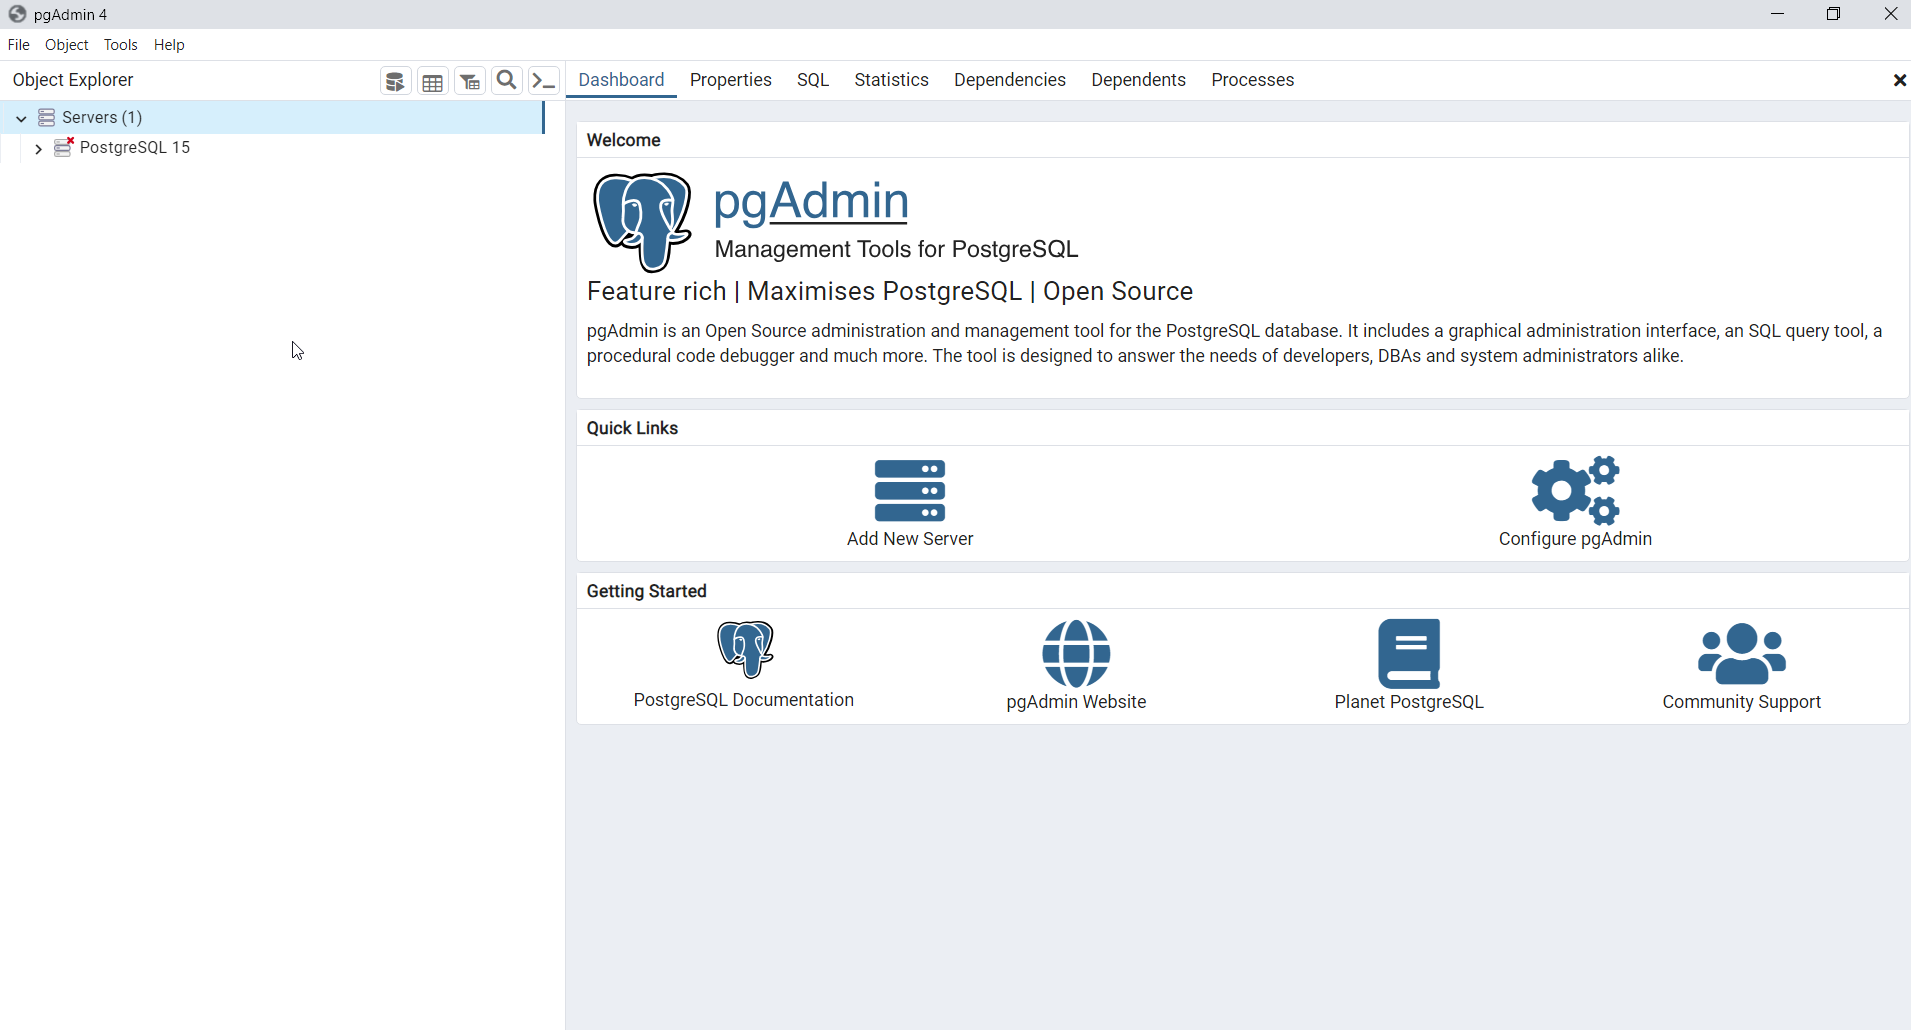
Servers in pgAdmin
Step 1: Expand the Servers section on the left of the screen.
There should be at least one entry shown here. pgAdmin will automatically detect any Postgres installations and create a server entry (which represents a database connection).
You should see one for the Postgres version you installed, such as Postgres 15.
Step 2: Double-click on the PostgreSQL 15 entry.
You’ll be prompted to enter the password.
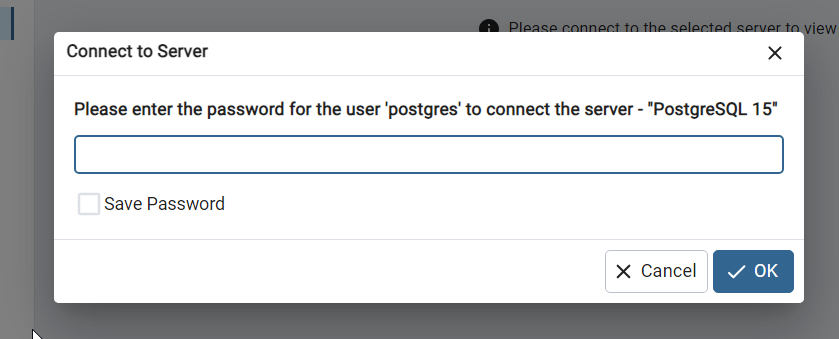
Step 3: Enter the password you provided during the PostgreSQL installation – the one you needed to remember for later.
Step 4: Check the Save Password box if you want pgAdmin to store the password, so you don’t have to enter it each time you want to connect.
Step 5: Then, click OK.
After a moment, the database will be connected.

The PostgreSQL 14 icon in the Server list will change to an elephant icon, which is the Postgres logo, to indicate it is connected.
Postgres is now installed on your computer!
You can run SQL statements in pgAdmin on the Postgres database and get started working with your database.
If you have any questions or issues, let me know in the comments below.