How to Set Up the Oracle Cloud Free Tier
Do you want to create an Oracle database to use for free? Oracle offers a cloud-based Oracle Cloud Free Tier database which you can sign up for and access using a tool like SQL Developer on your own computer, all for free.

Learn how in this article.
In this article, I'll show you how to:
- sign up for the account
- create the database
- connect to the database from SQL Developer
- run a few SQL statements on the database.
Also, this process should work on the M1 MacBook computers, so you can run Oracle on your MacBook. Other methods of running Oracle on a Mac, such as Oracle Express, Docker, or a Virtual Machine, don't work yet, at the time of creating this article. Because this is a cloud-hosted database, all you need is SQL Developer on your MacBook or even another IDE, and you should be able to connect.
Let me know in the comments if you're on an M1 MacBook, have tried the steps in this video, and it doesn't work.
Let's get into it.
Create an Account
We'll start by creating an account on the Oracle website for Oracle Cloud Free Tier, which is Oracle's free level of their cloud service.
Step 1: Visit oracle.com/cloud/free. You'll see this web page here.
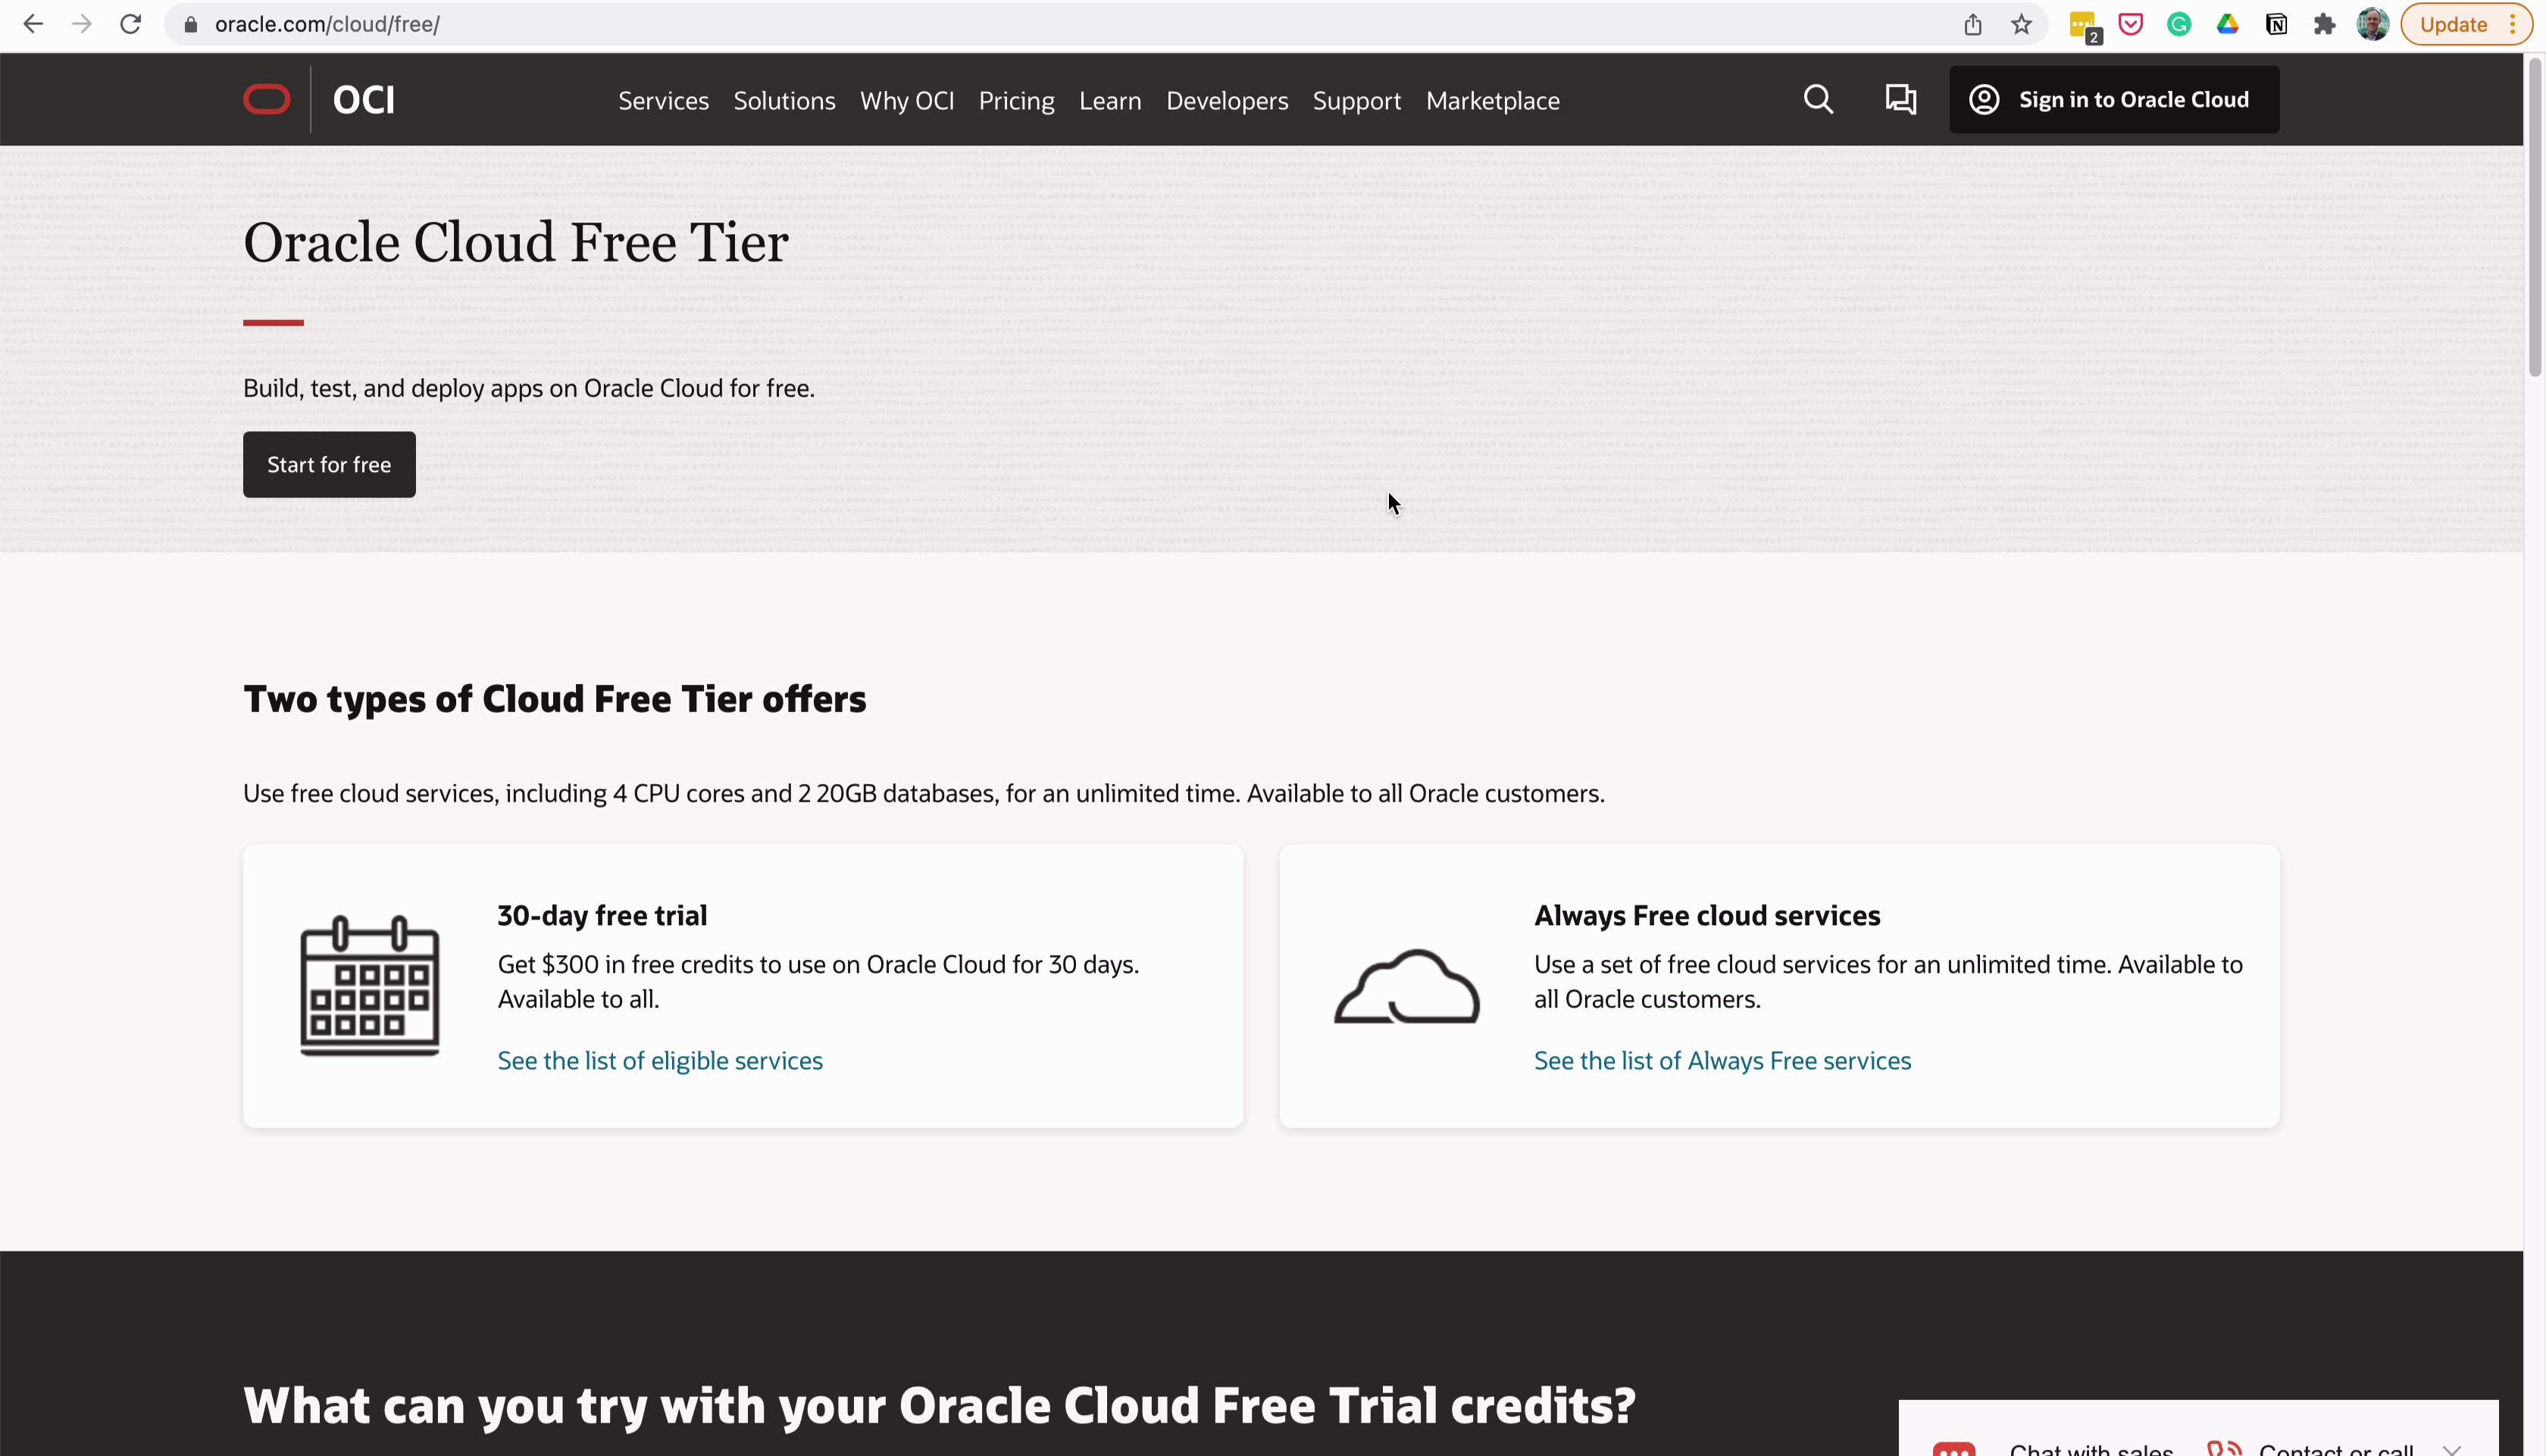
This page explains a little more about the Oracle Cloud Free Tier, which you can read if you like.
Step 2: Click on the Start for Free button.
You'll then see the registration page.
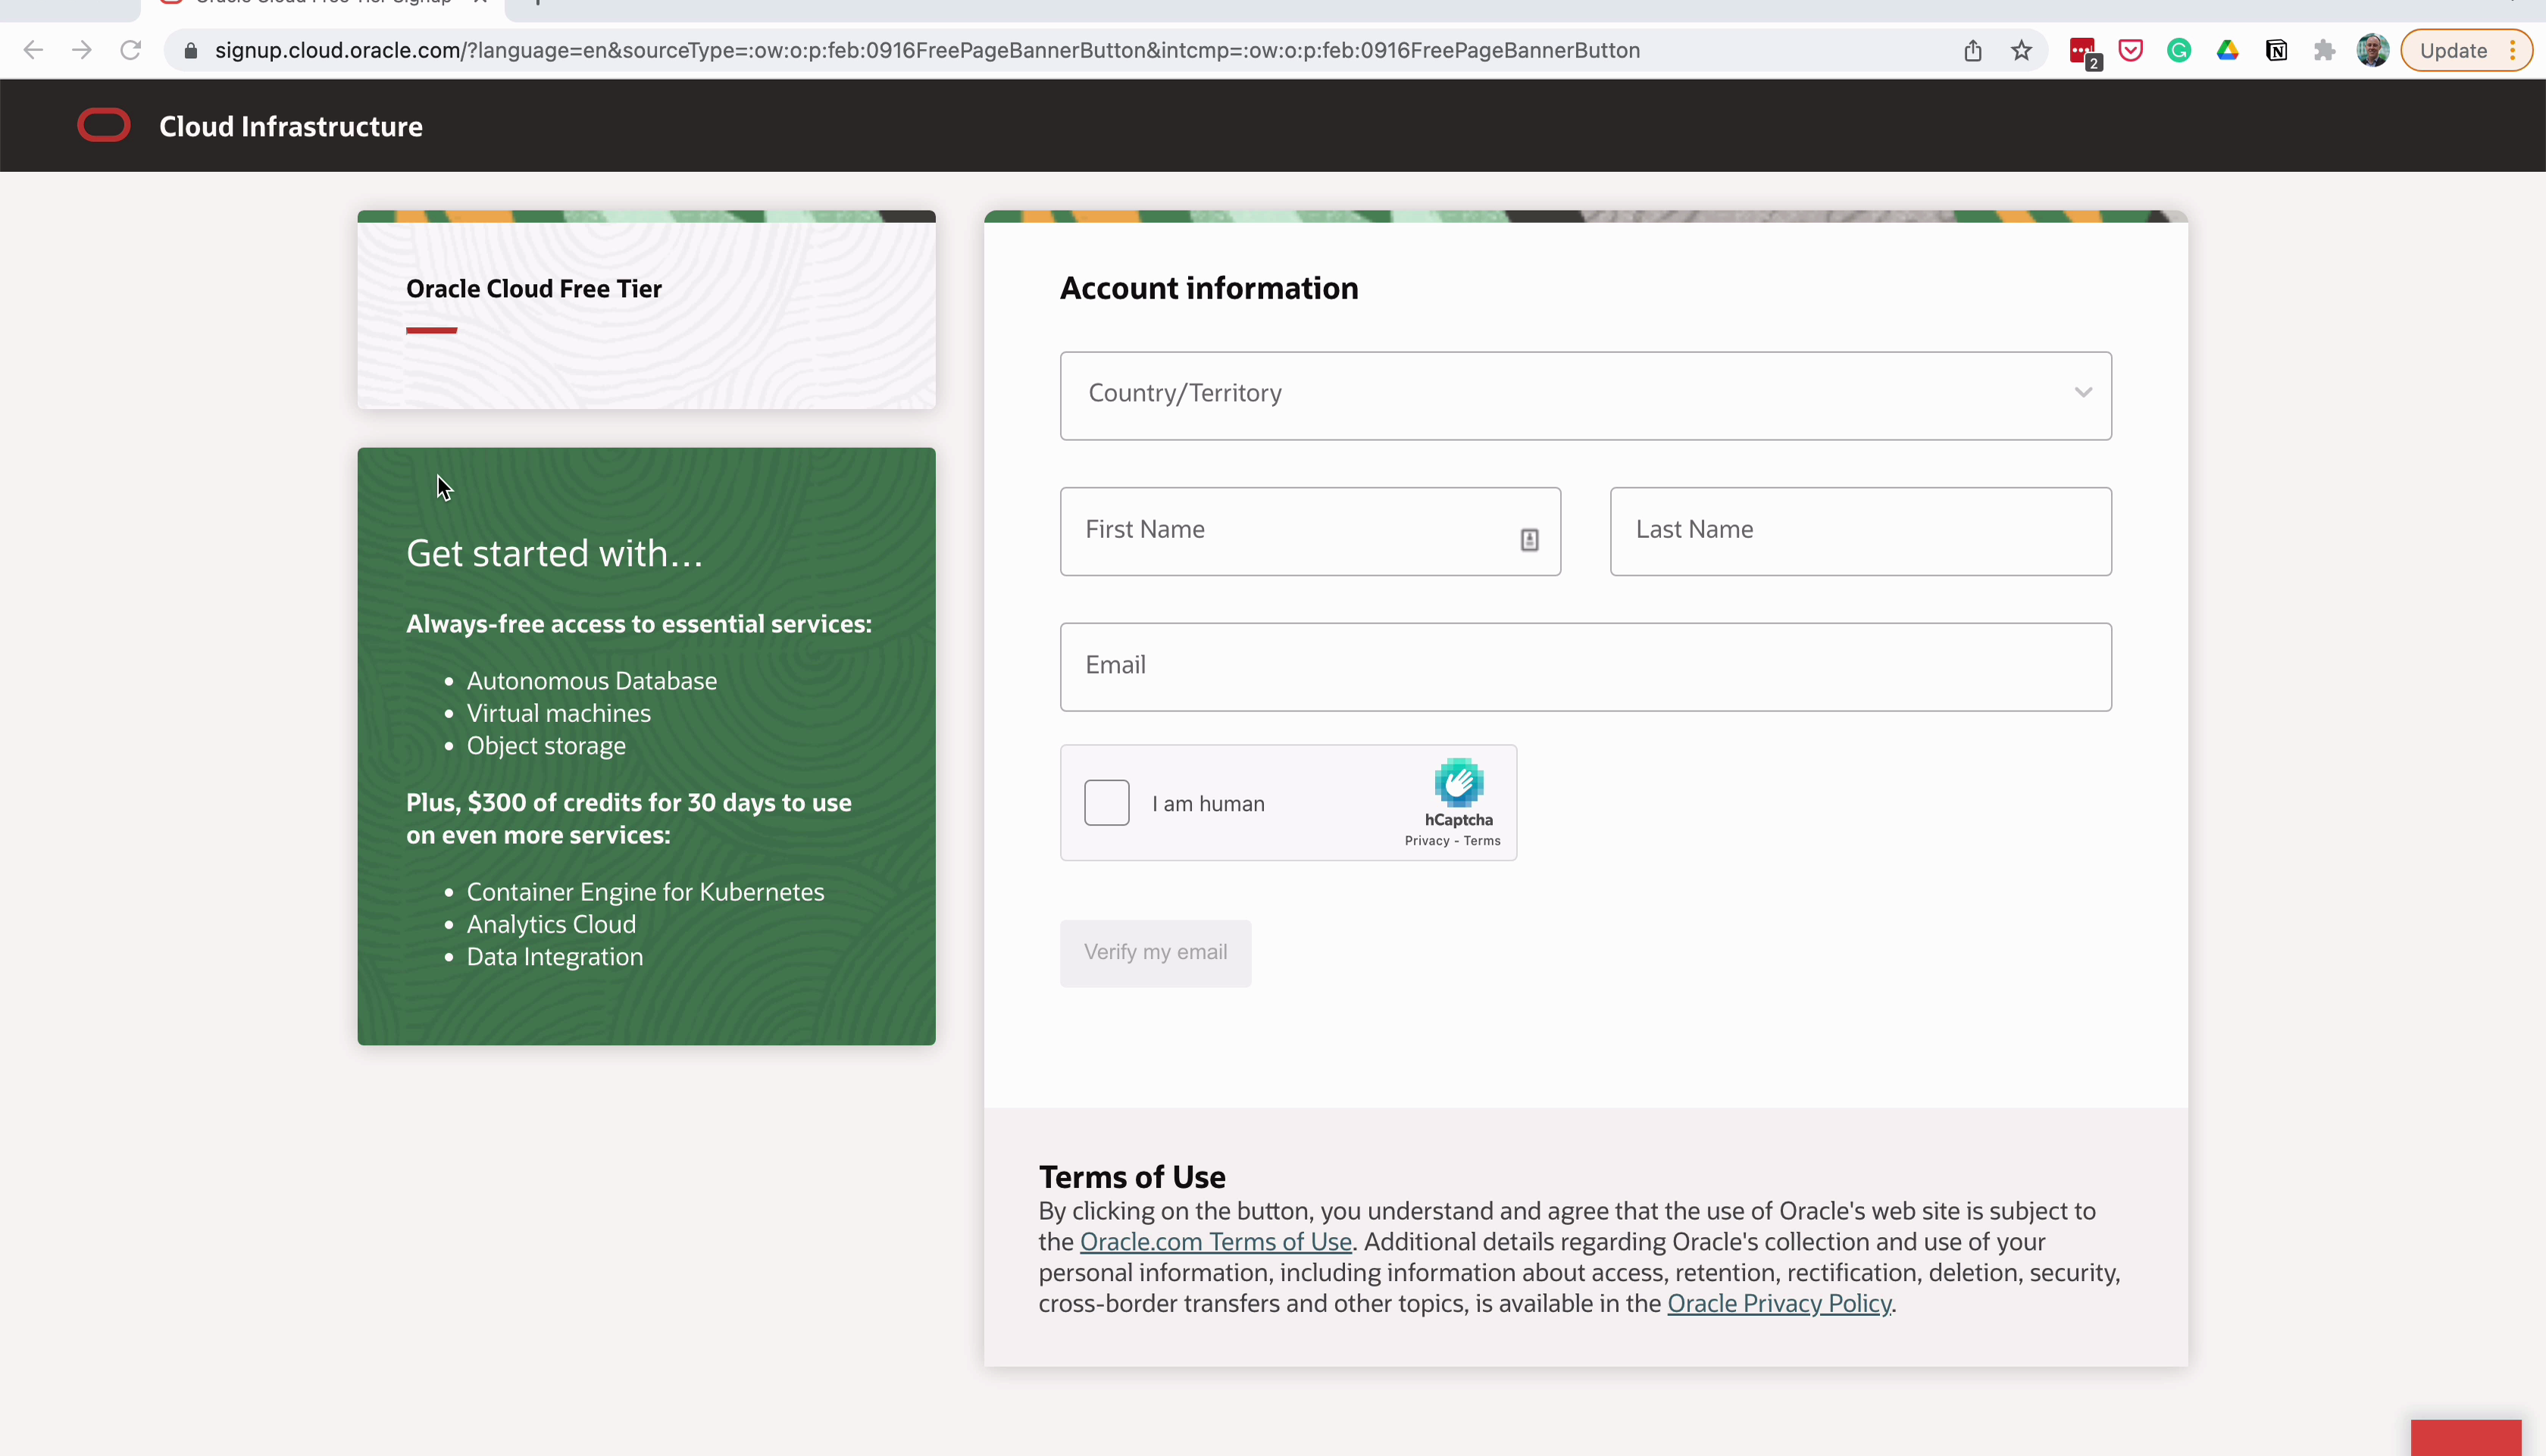
Step 3: Enter the details on this page: country, name, and email.
Step 4: Complete the Captcha check and click Verify my email.
Once the page says “email verification link sent”, you'll then be sent a verification email.
Step 6: Click the link in the email to verify, and you can resume the sign-up process.
The page is opened in a new tab with the details populated already.
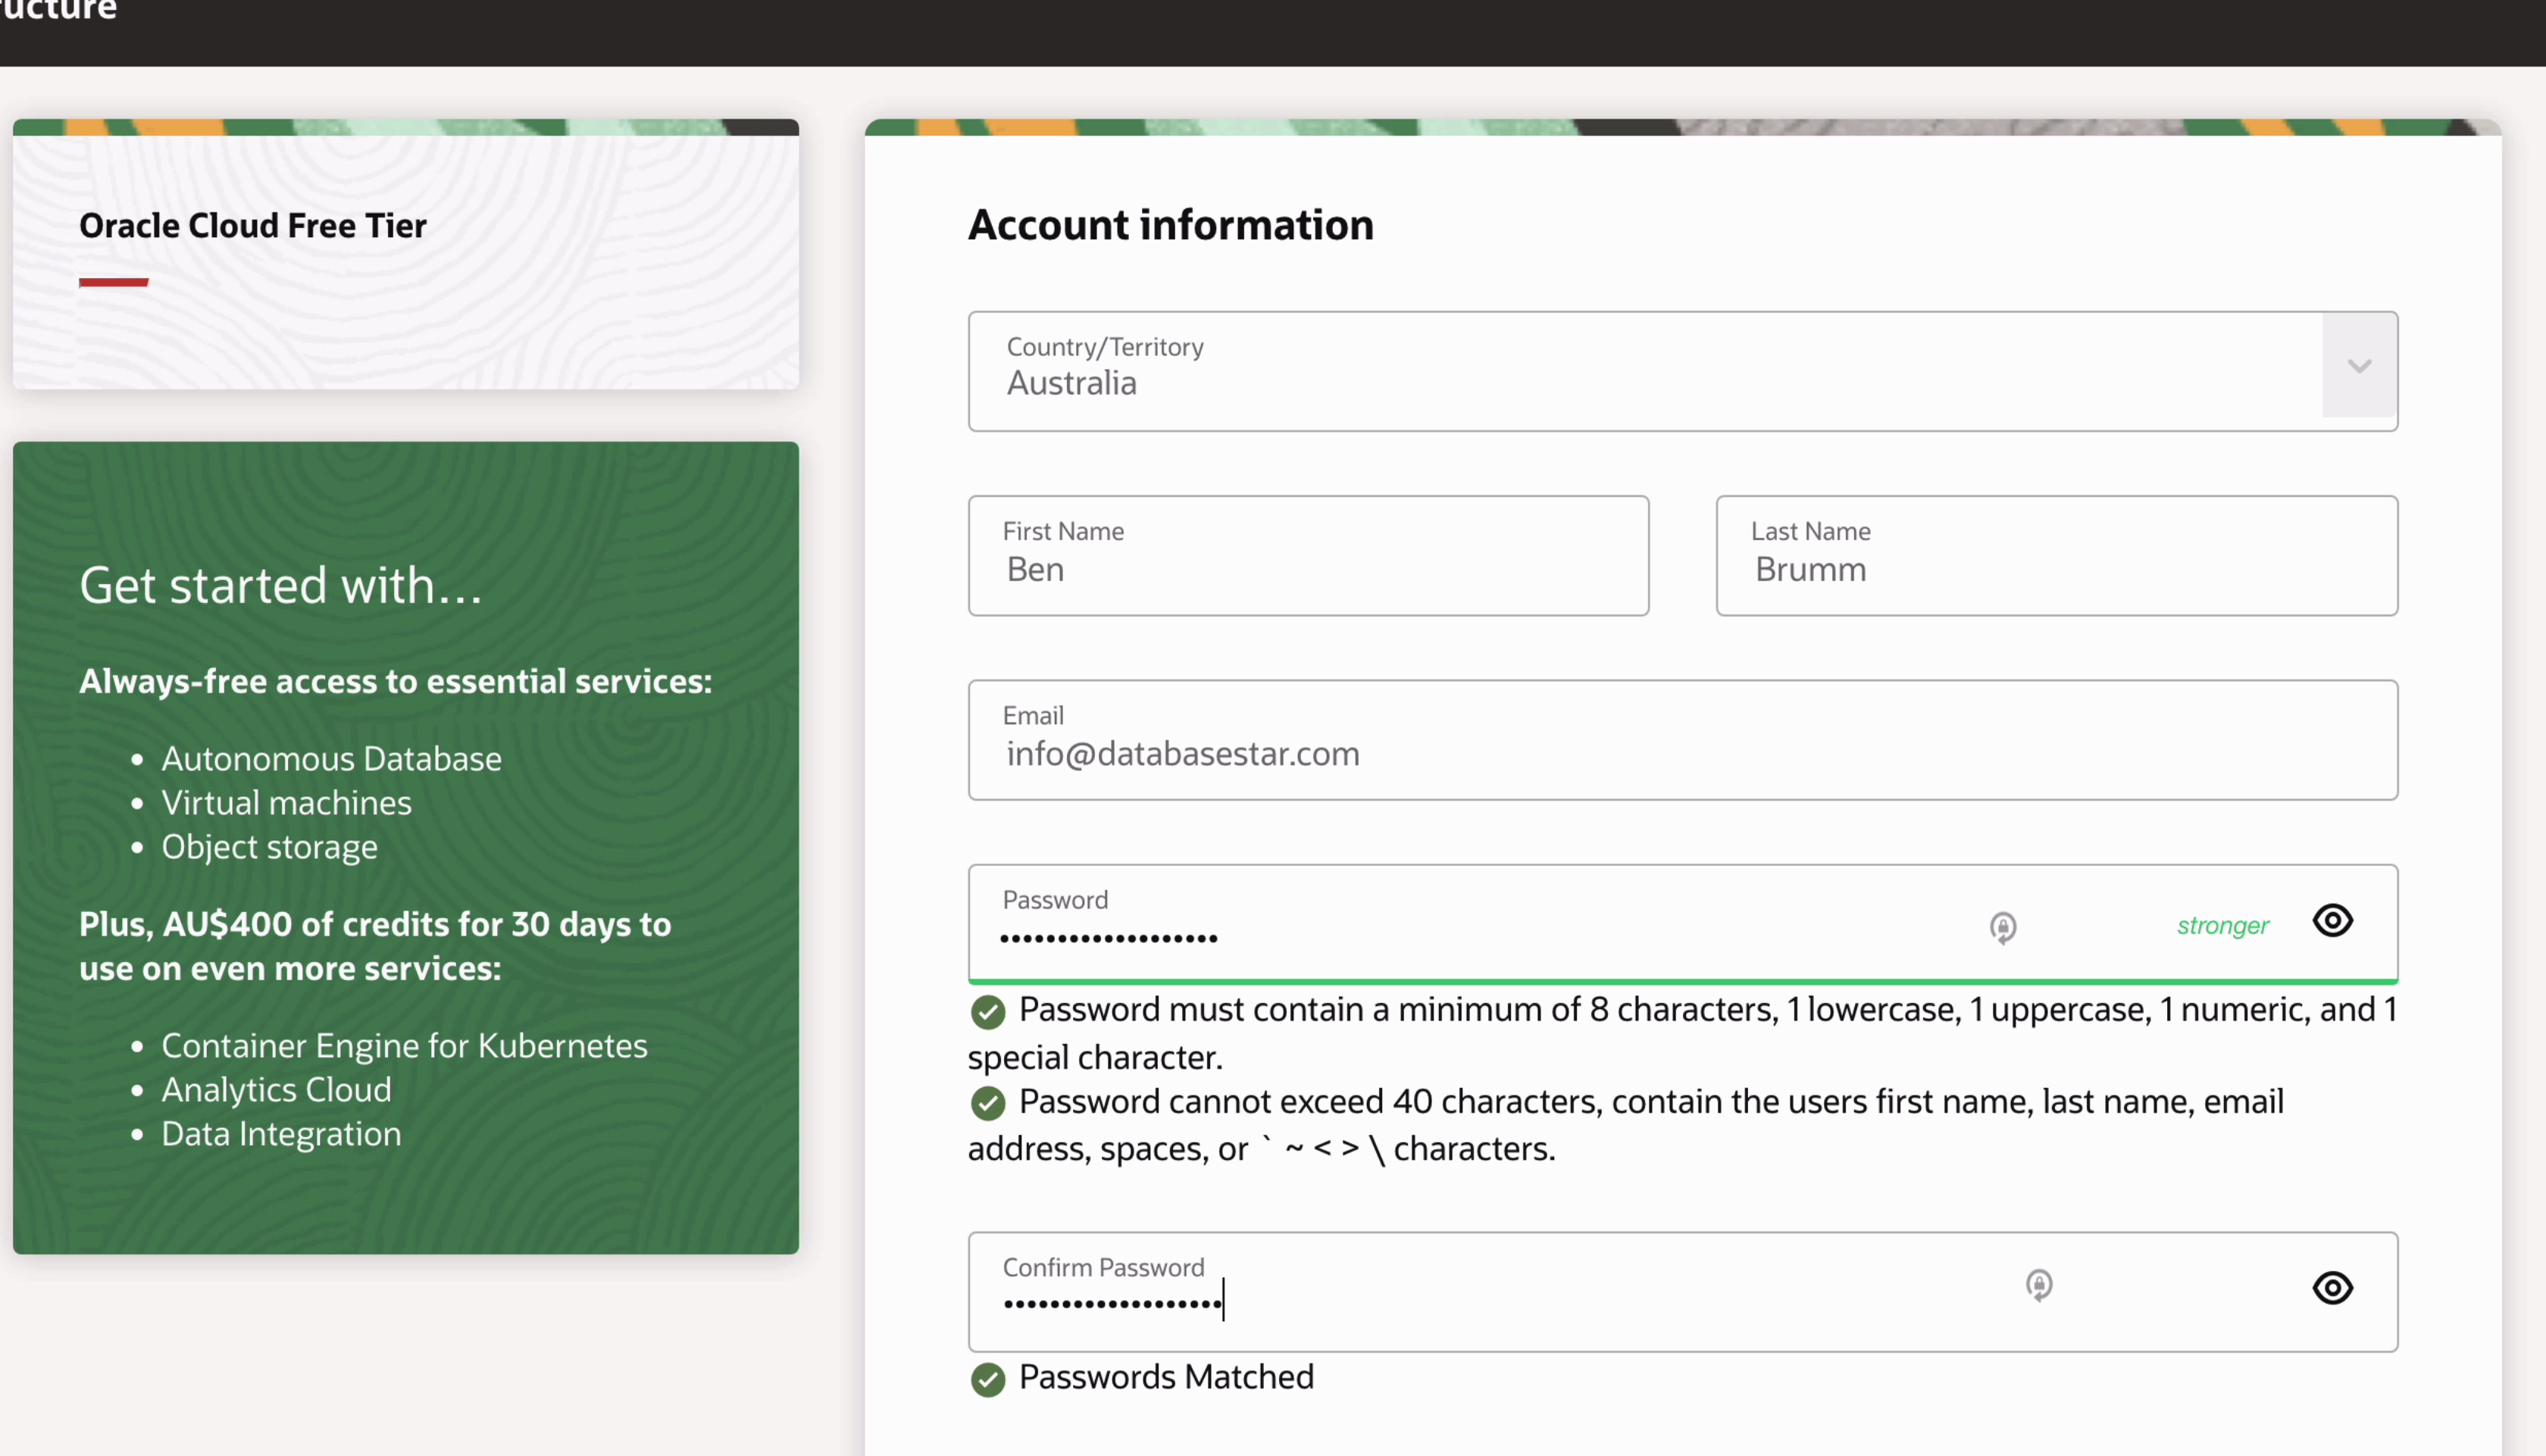
Step 7: Enter a password for your Oracle Free Cloud account that adheres to the guidelines given.
Step 8: You can enter a company name if you like, or leave it blank.
The Cloud Account home is automatically populated but you can change this.
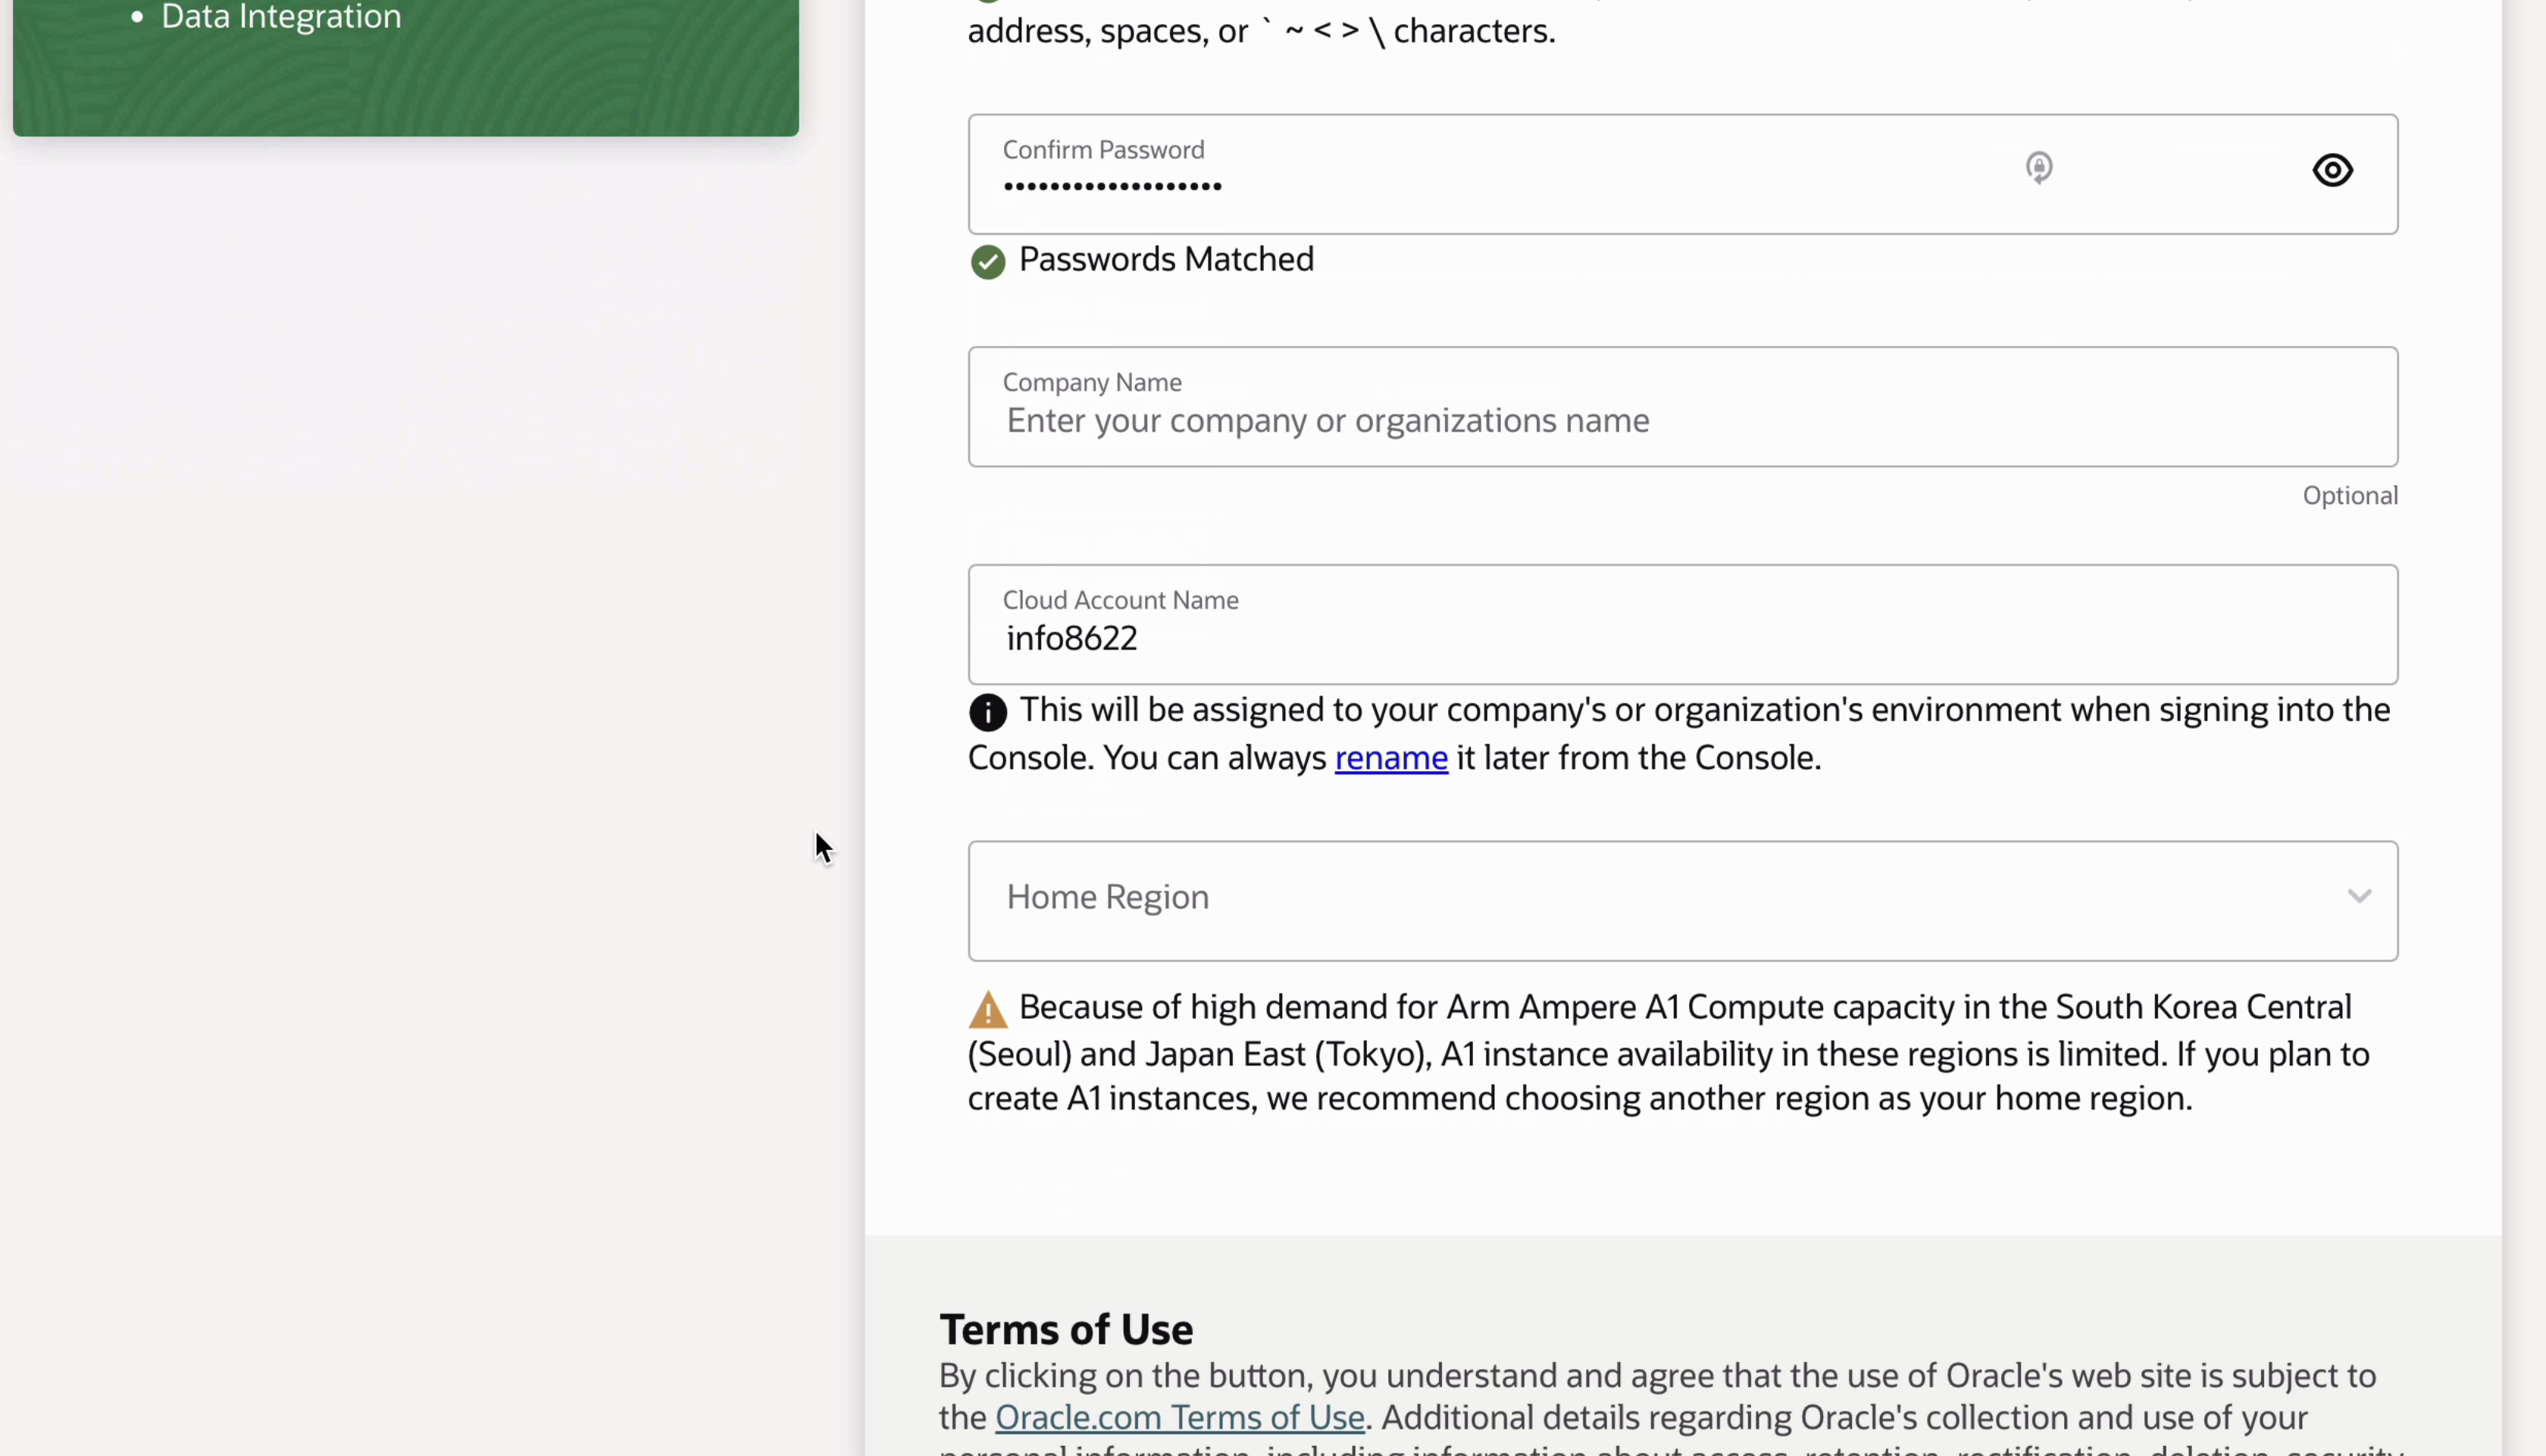
Step 9: For your Home Region, select one that's near you. I'll select Australia Southeast Melbourne.
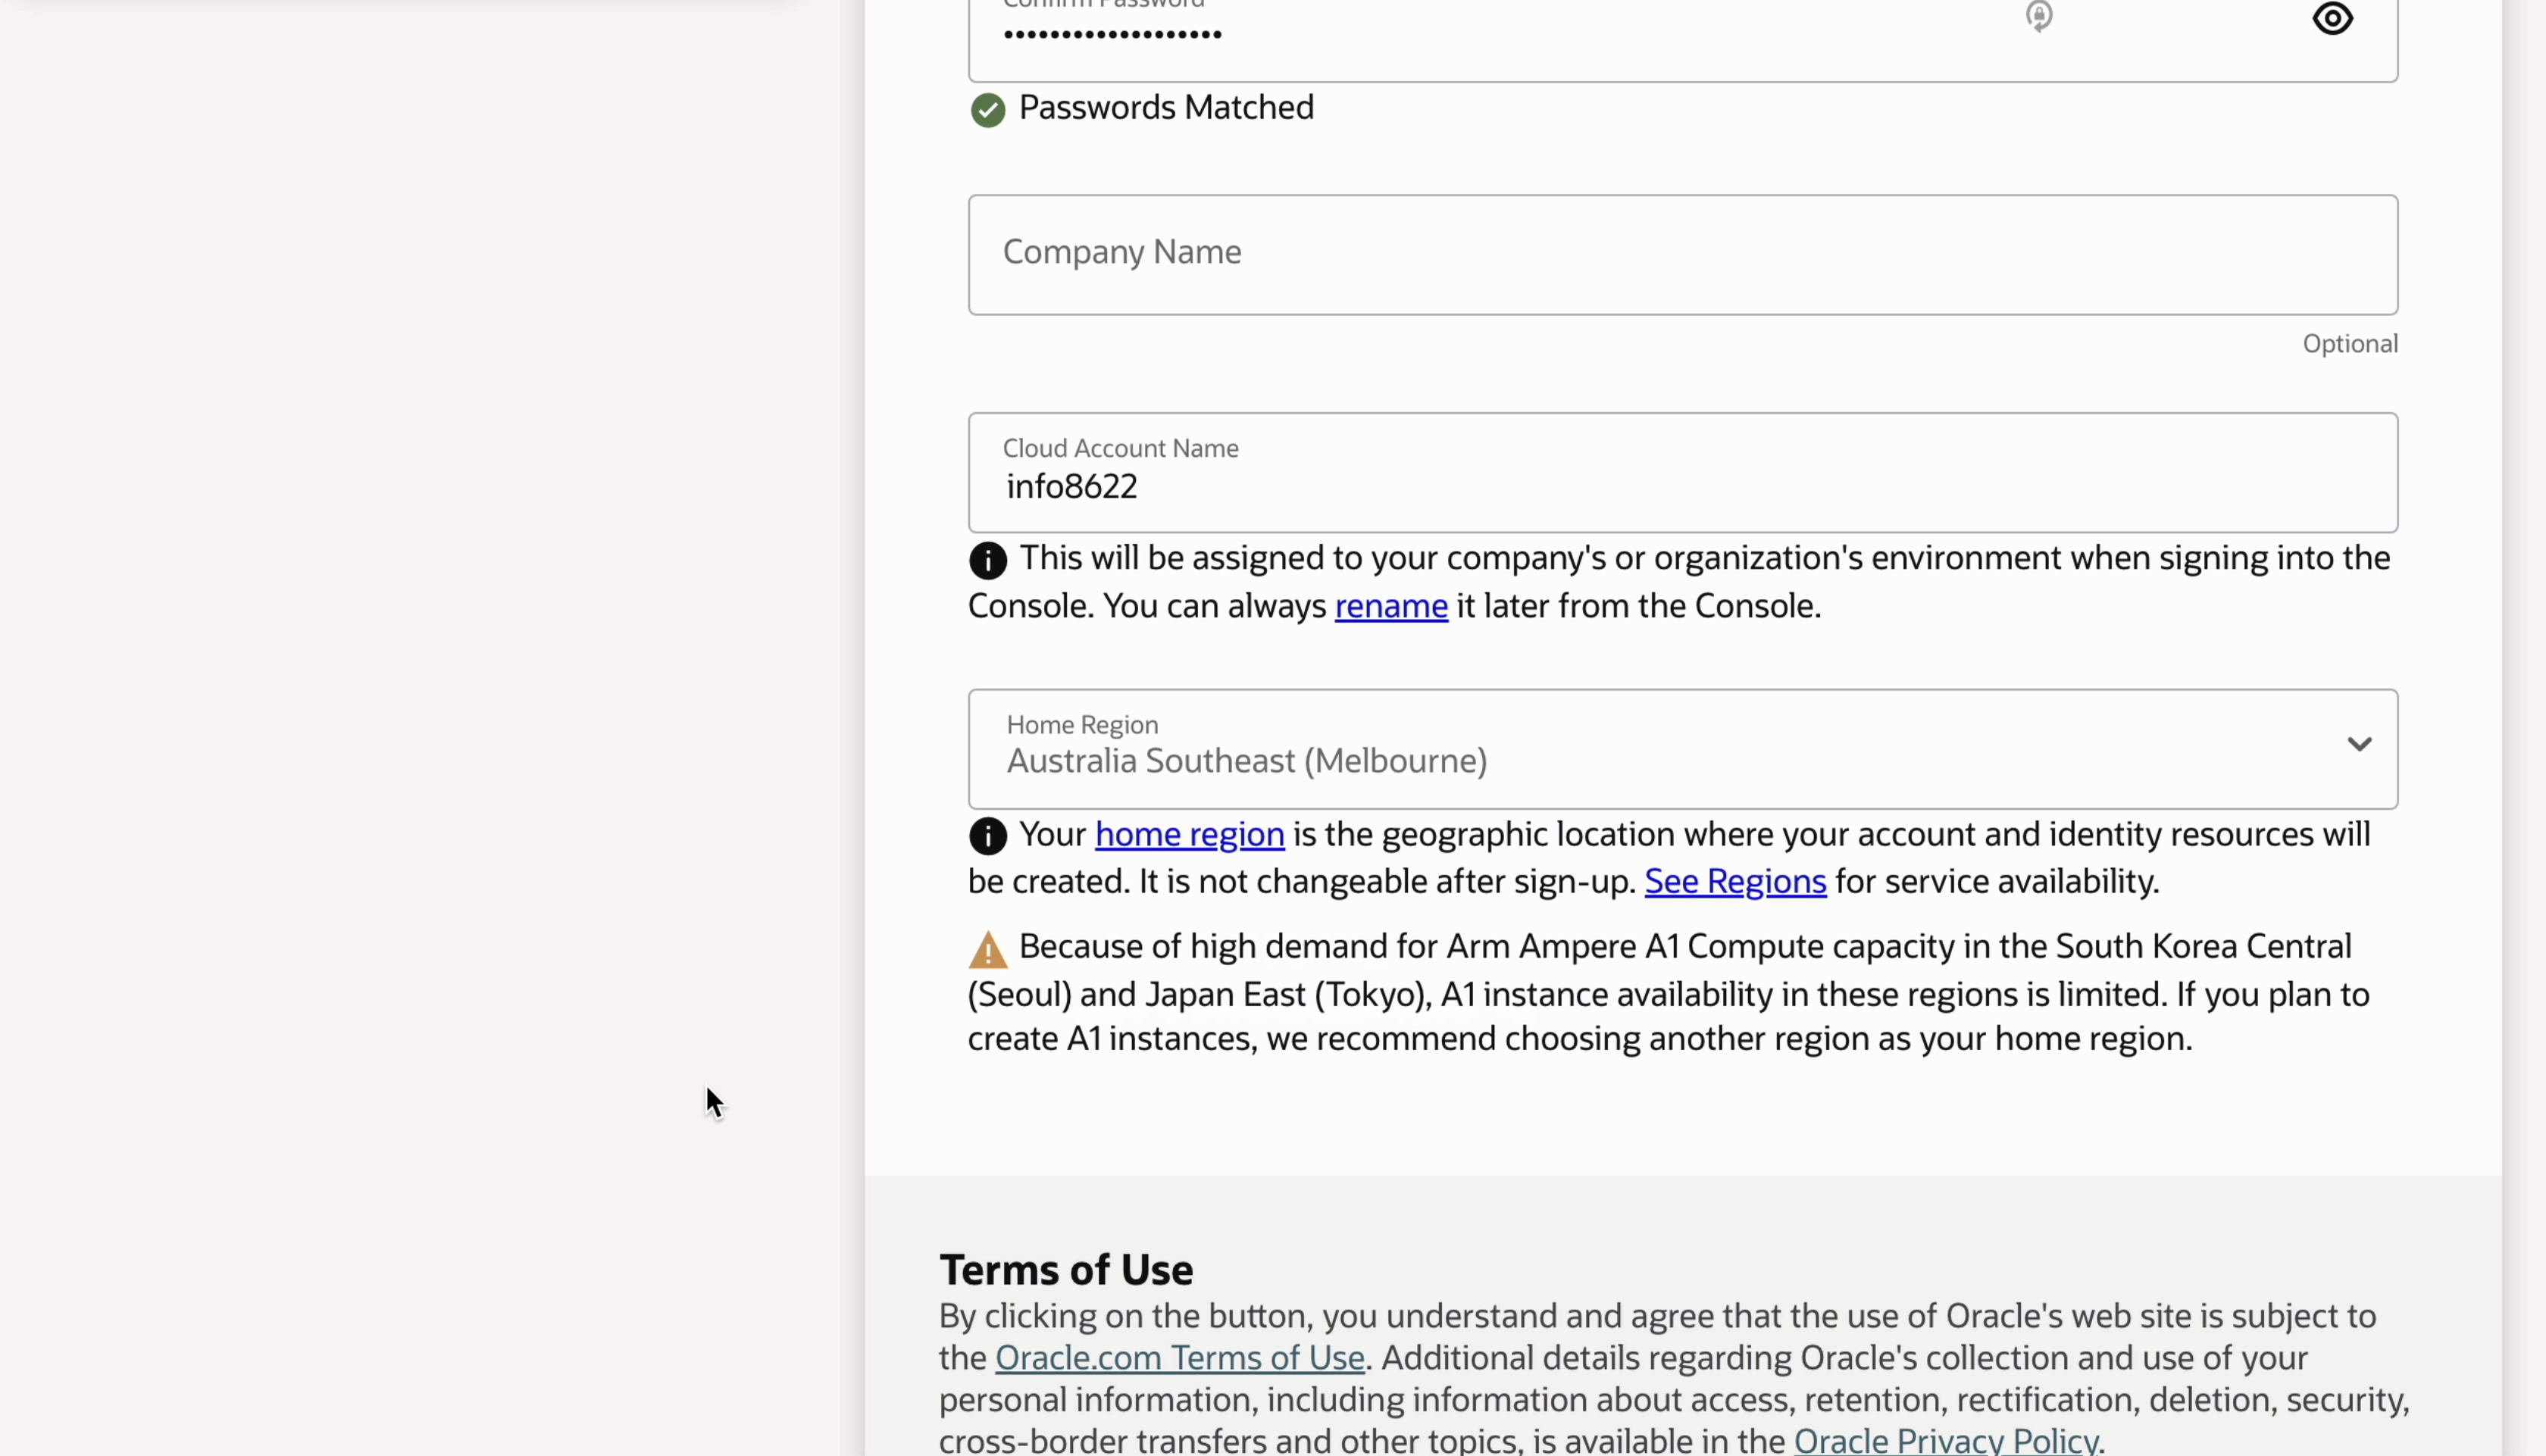
Step 10: Click on the Continue button.
The next page is shown.
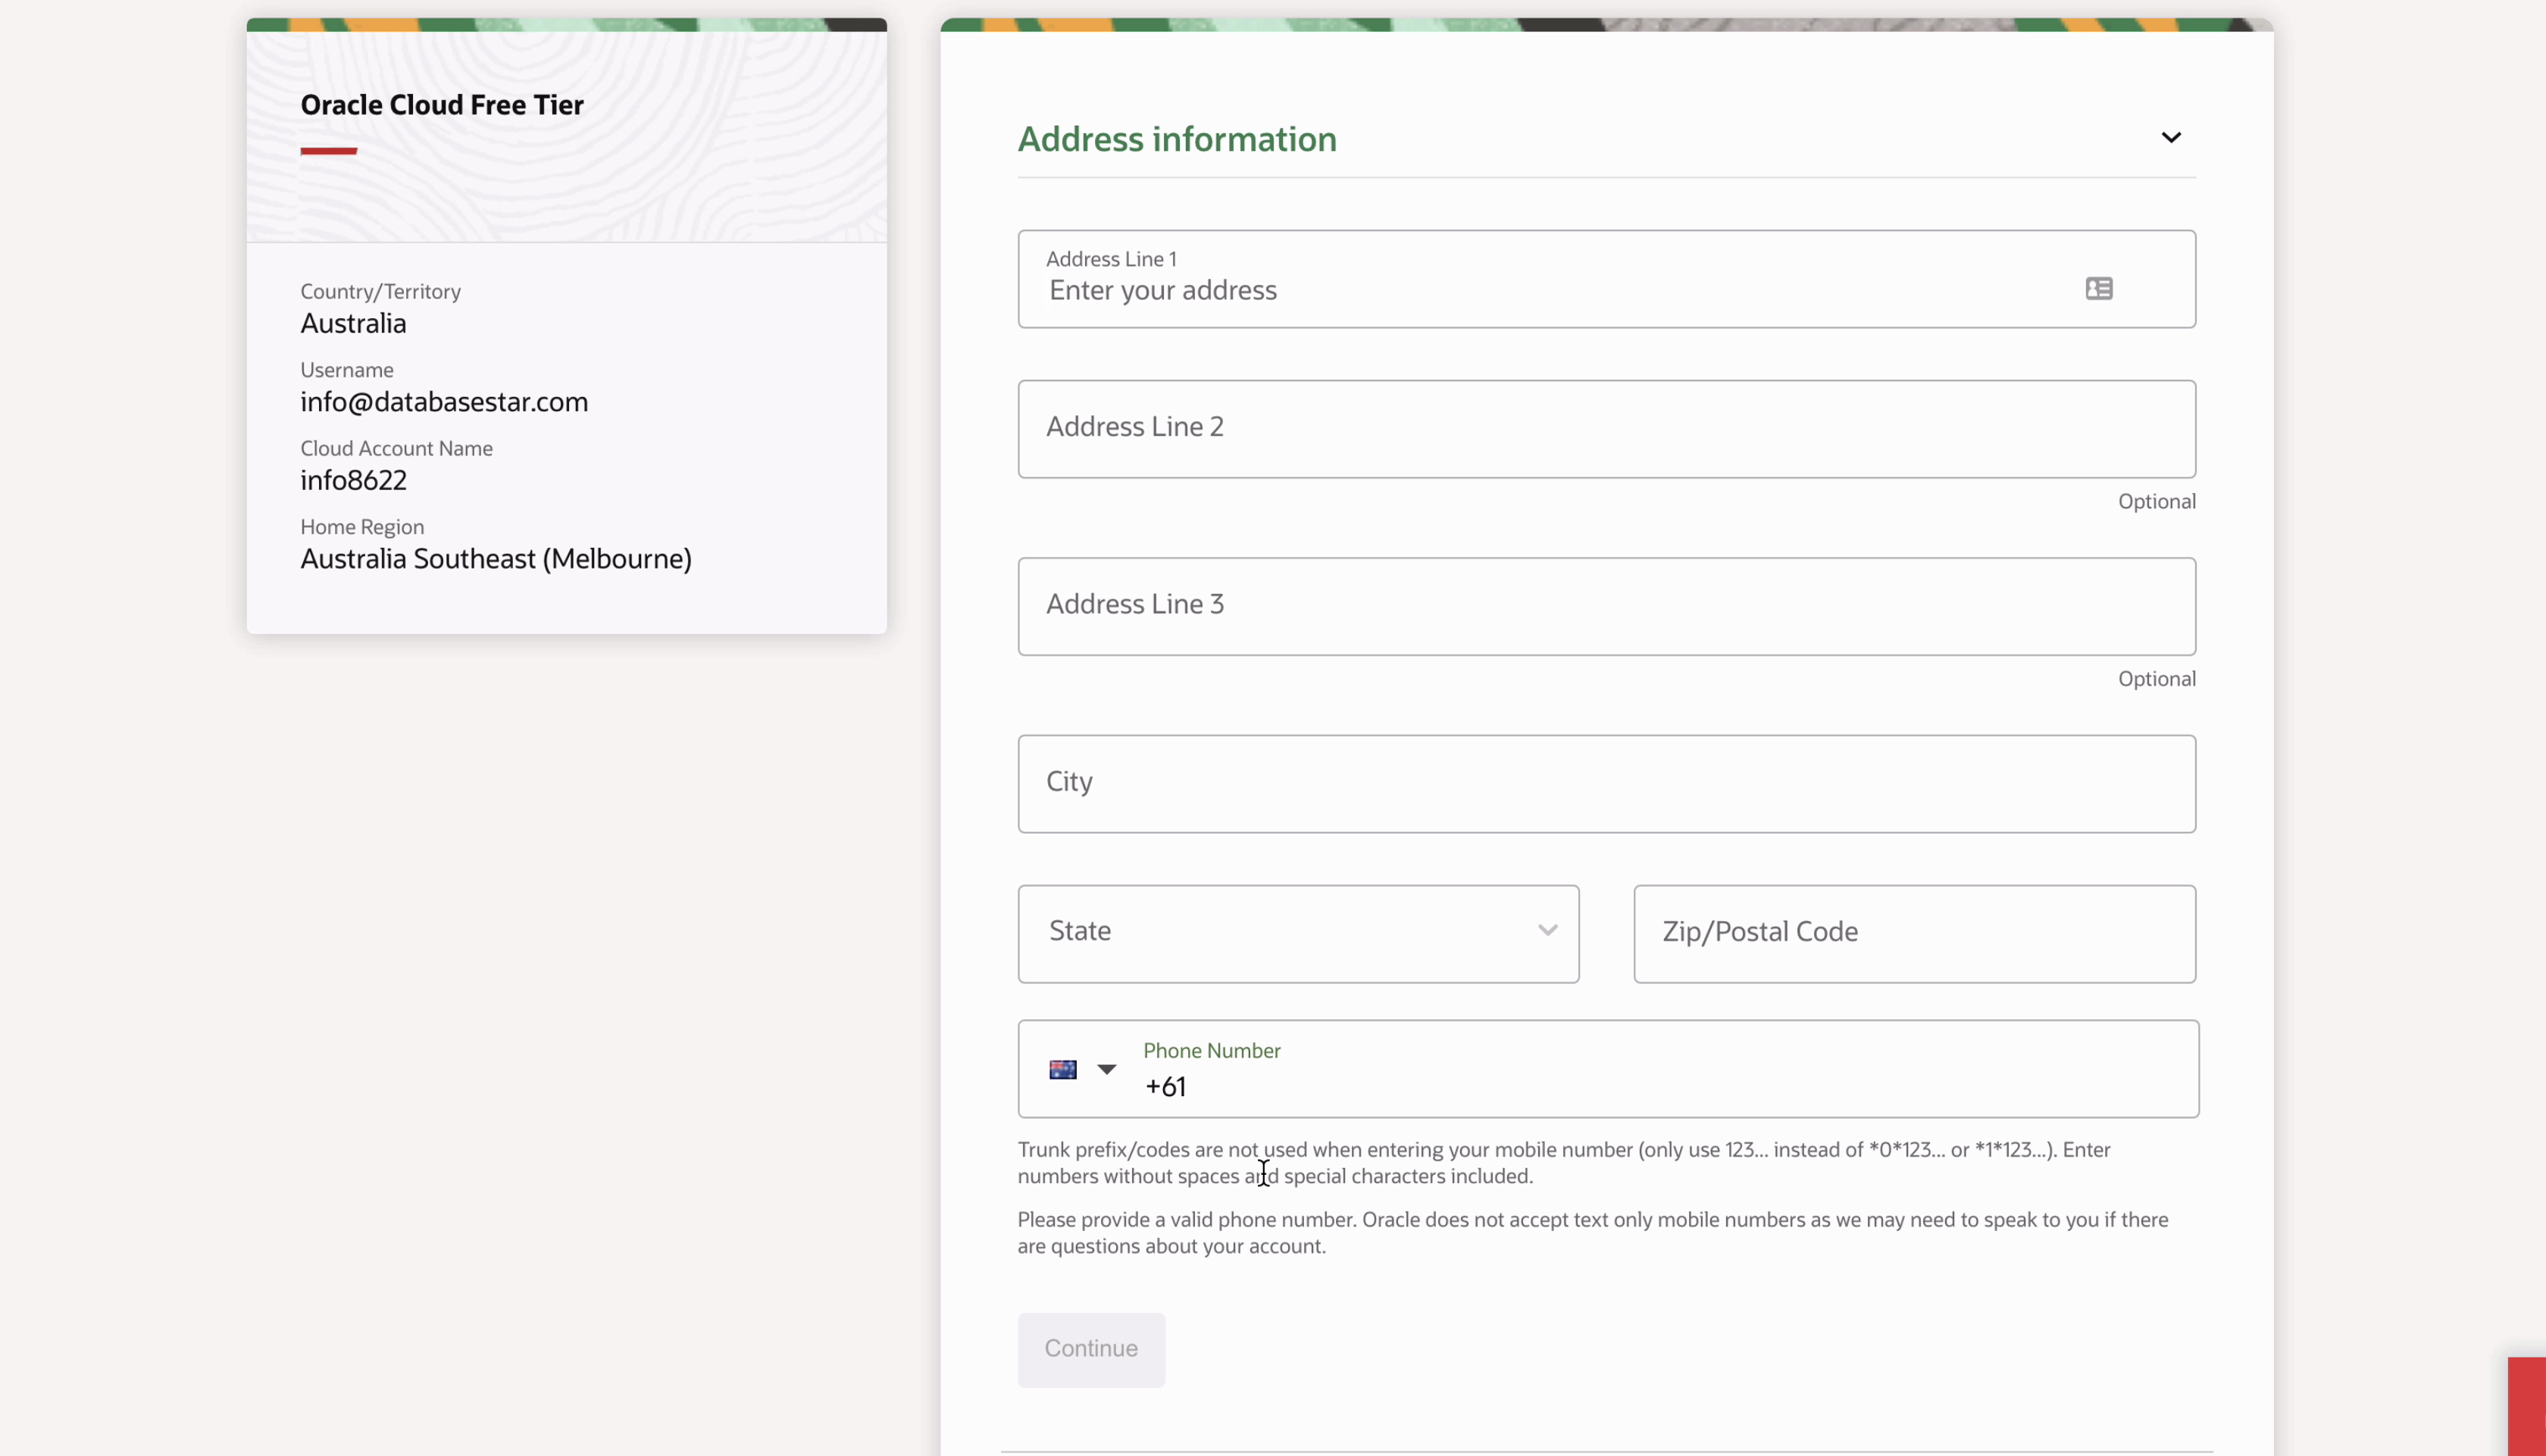
Step 11: On this page, enter your address information and phone number, and click Continue.
You'll then see the Payment Verification section.
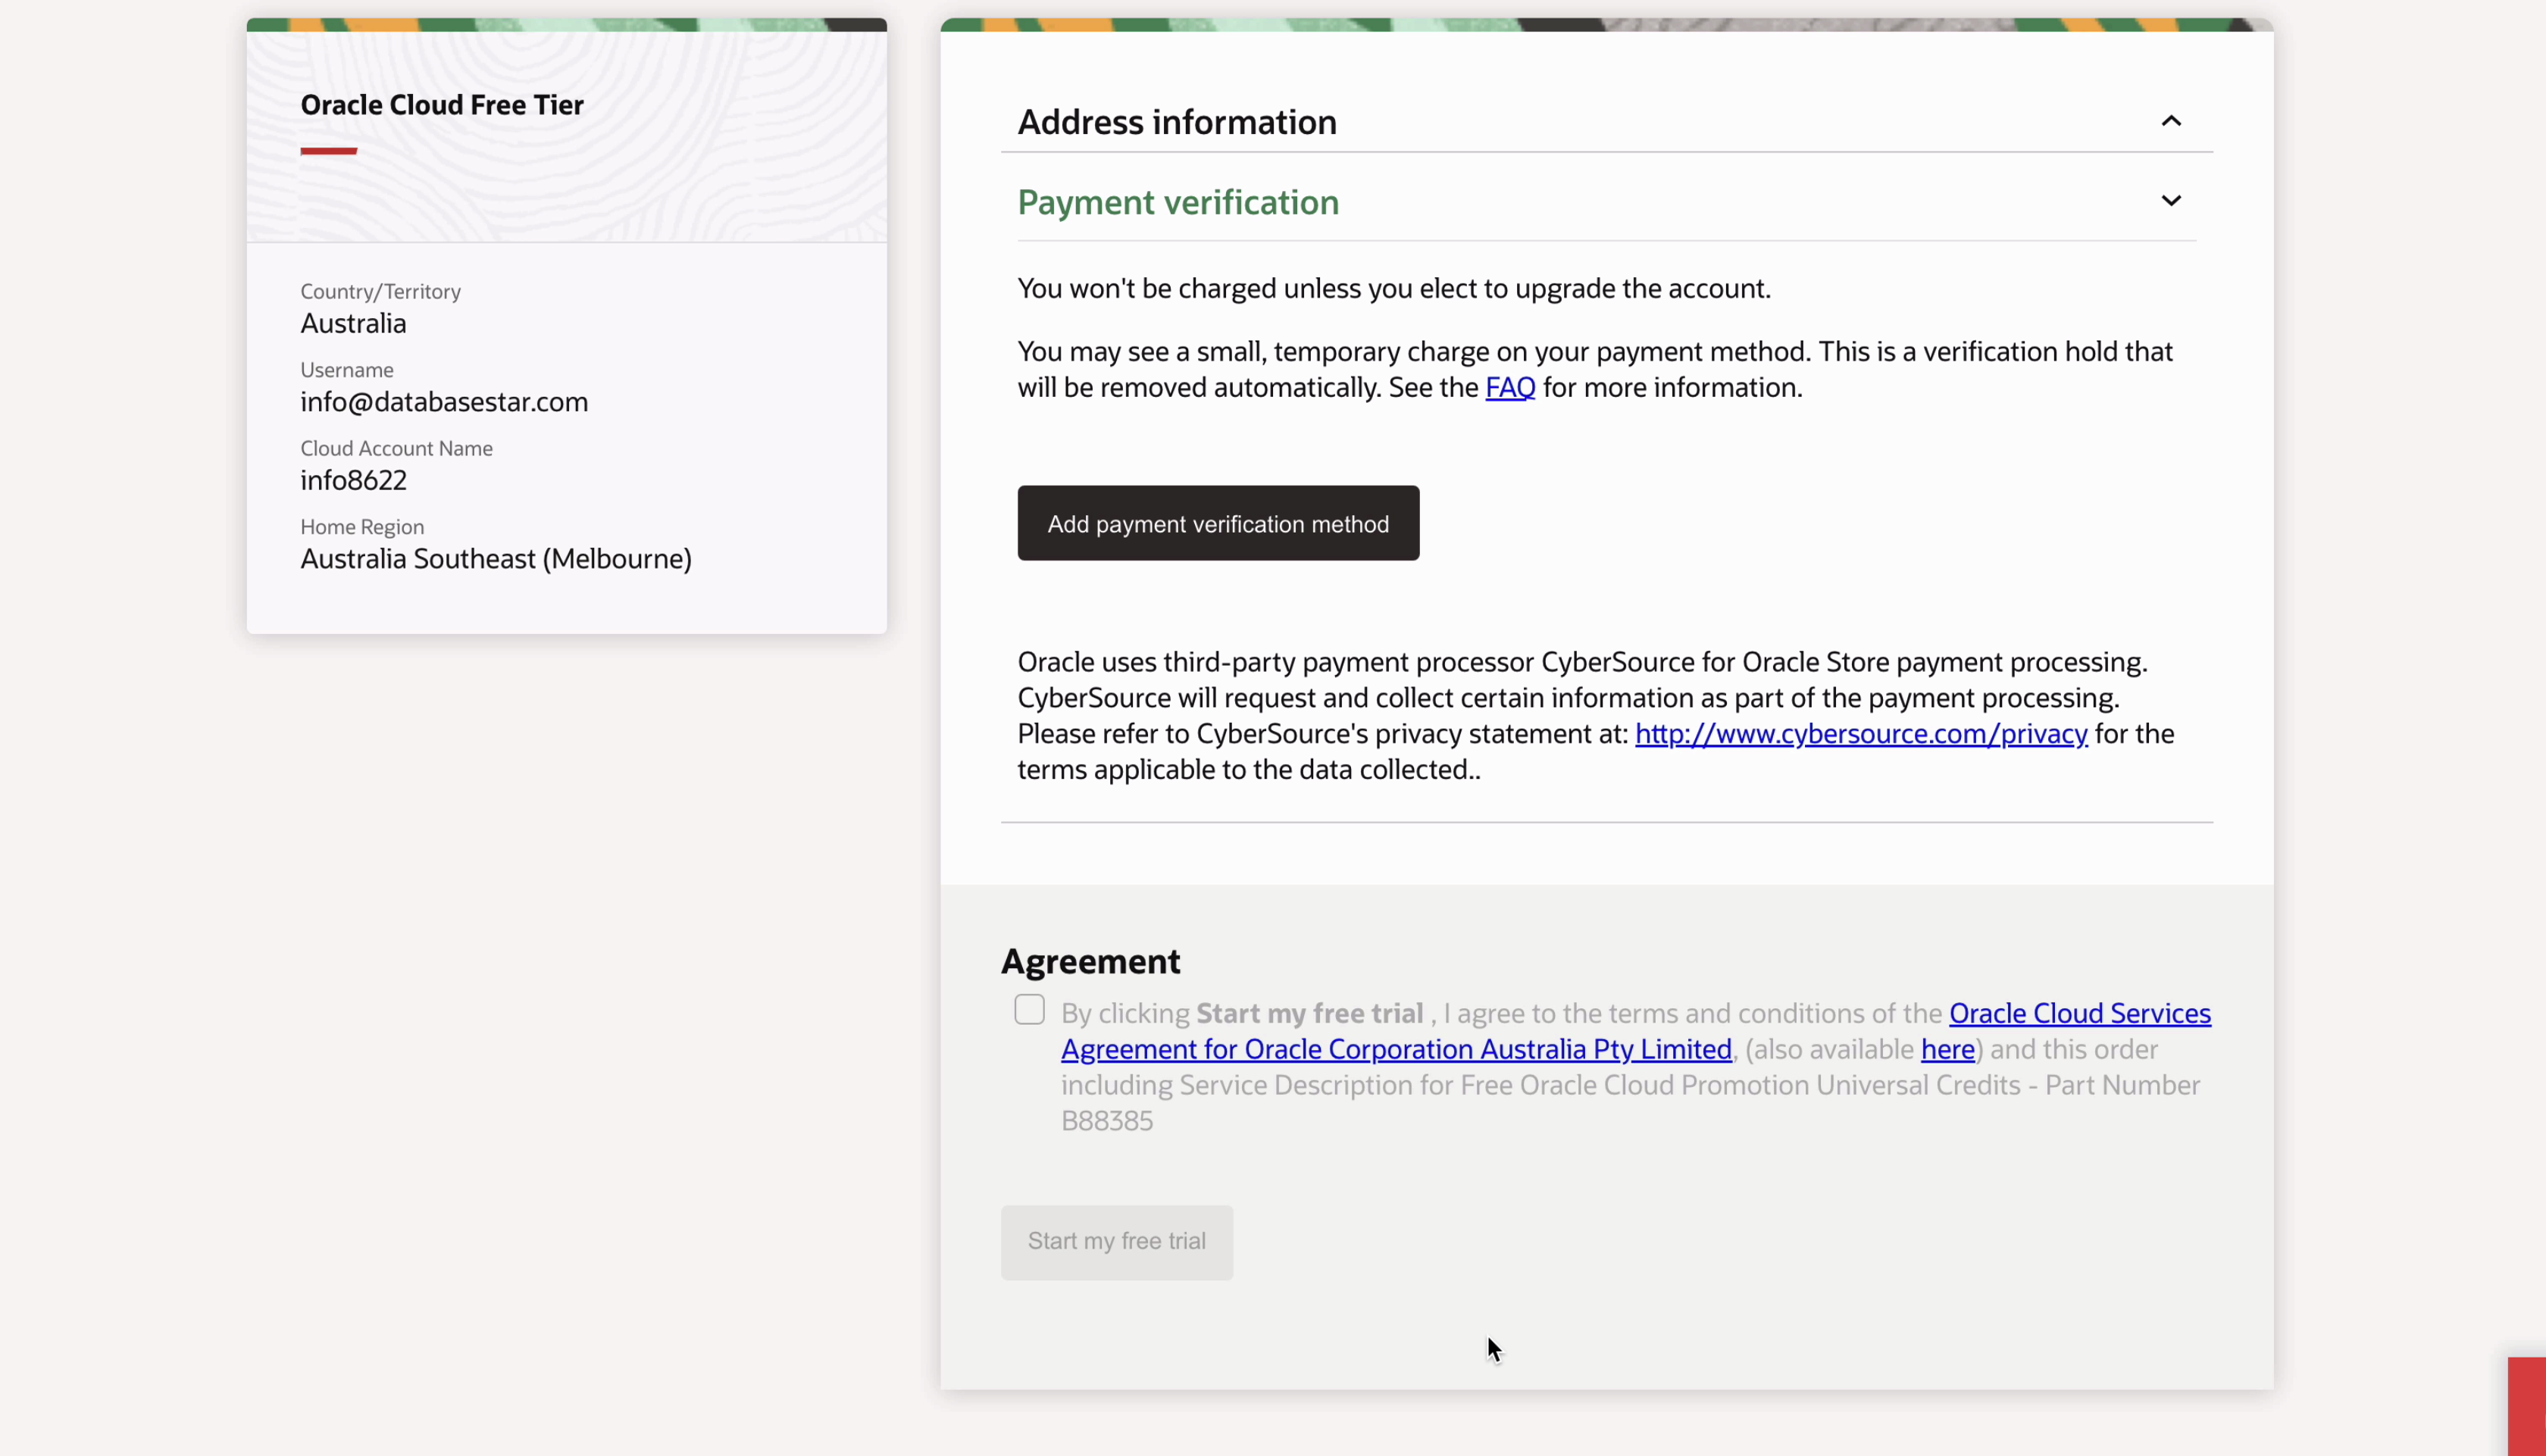
Now, this is a free tier and you won't be charged unless you elect to upgrade the account, as mentioned on the page here. You may see a small, temporary charge as part of the verification that will then get removed. But, you'll need to enter a payment method as part of the signup process.
Step 12: Click the “add payment verification method” button.
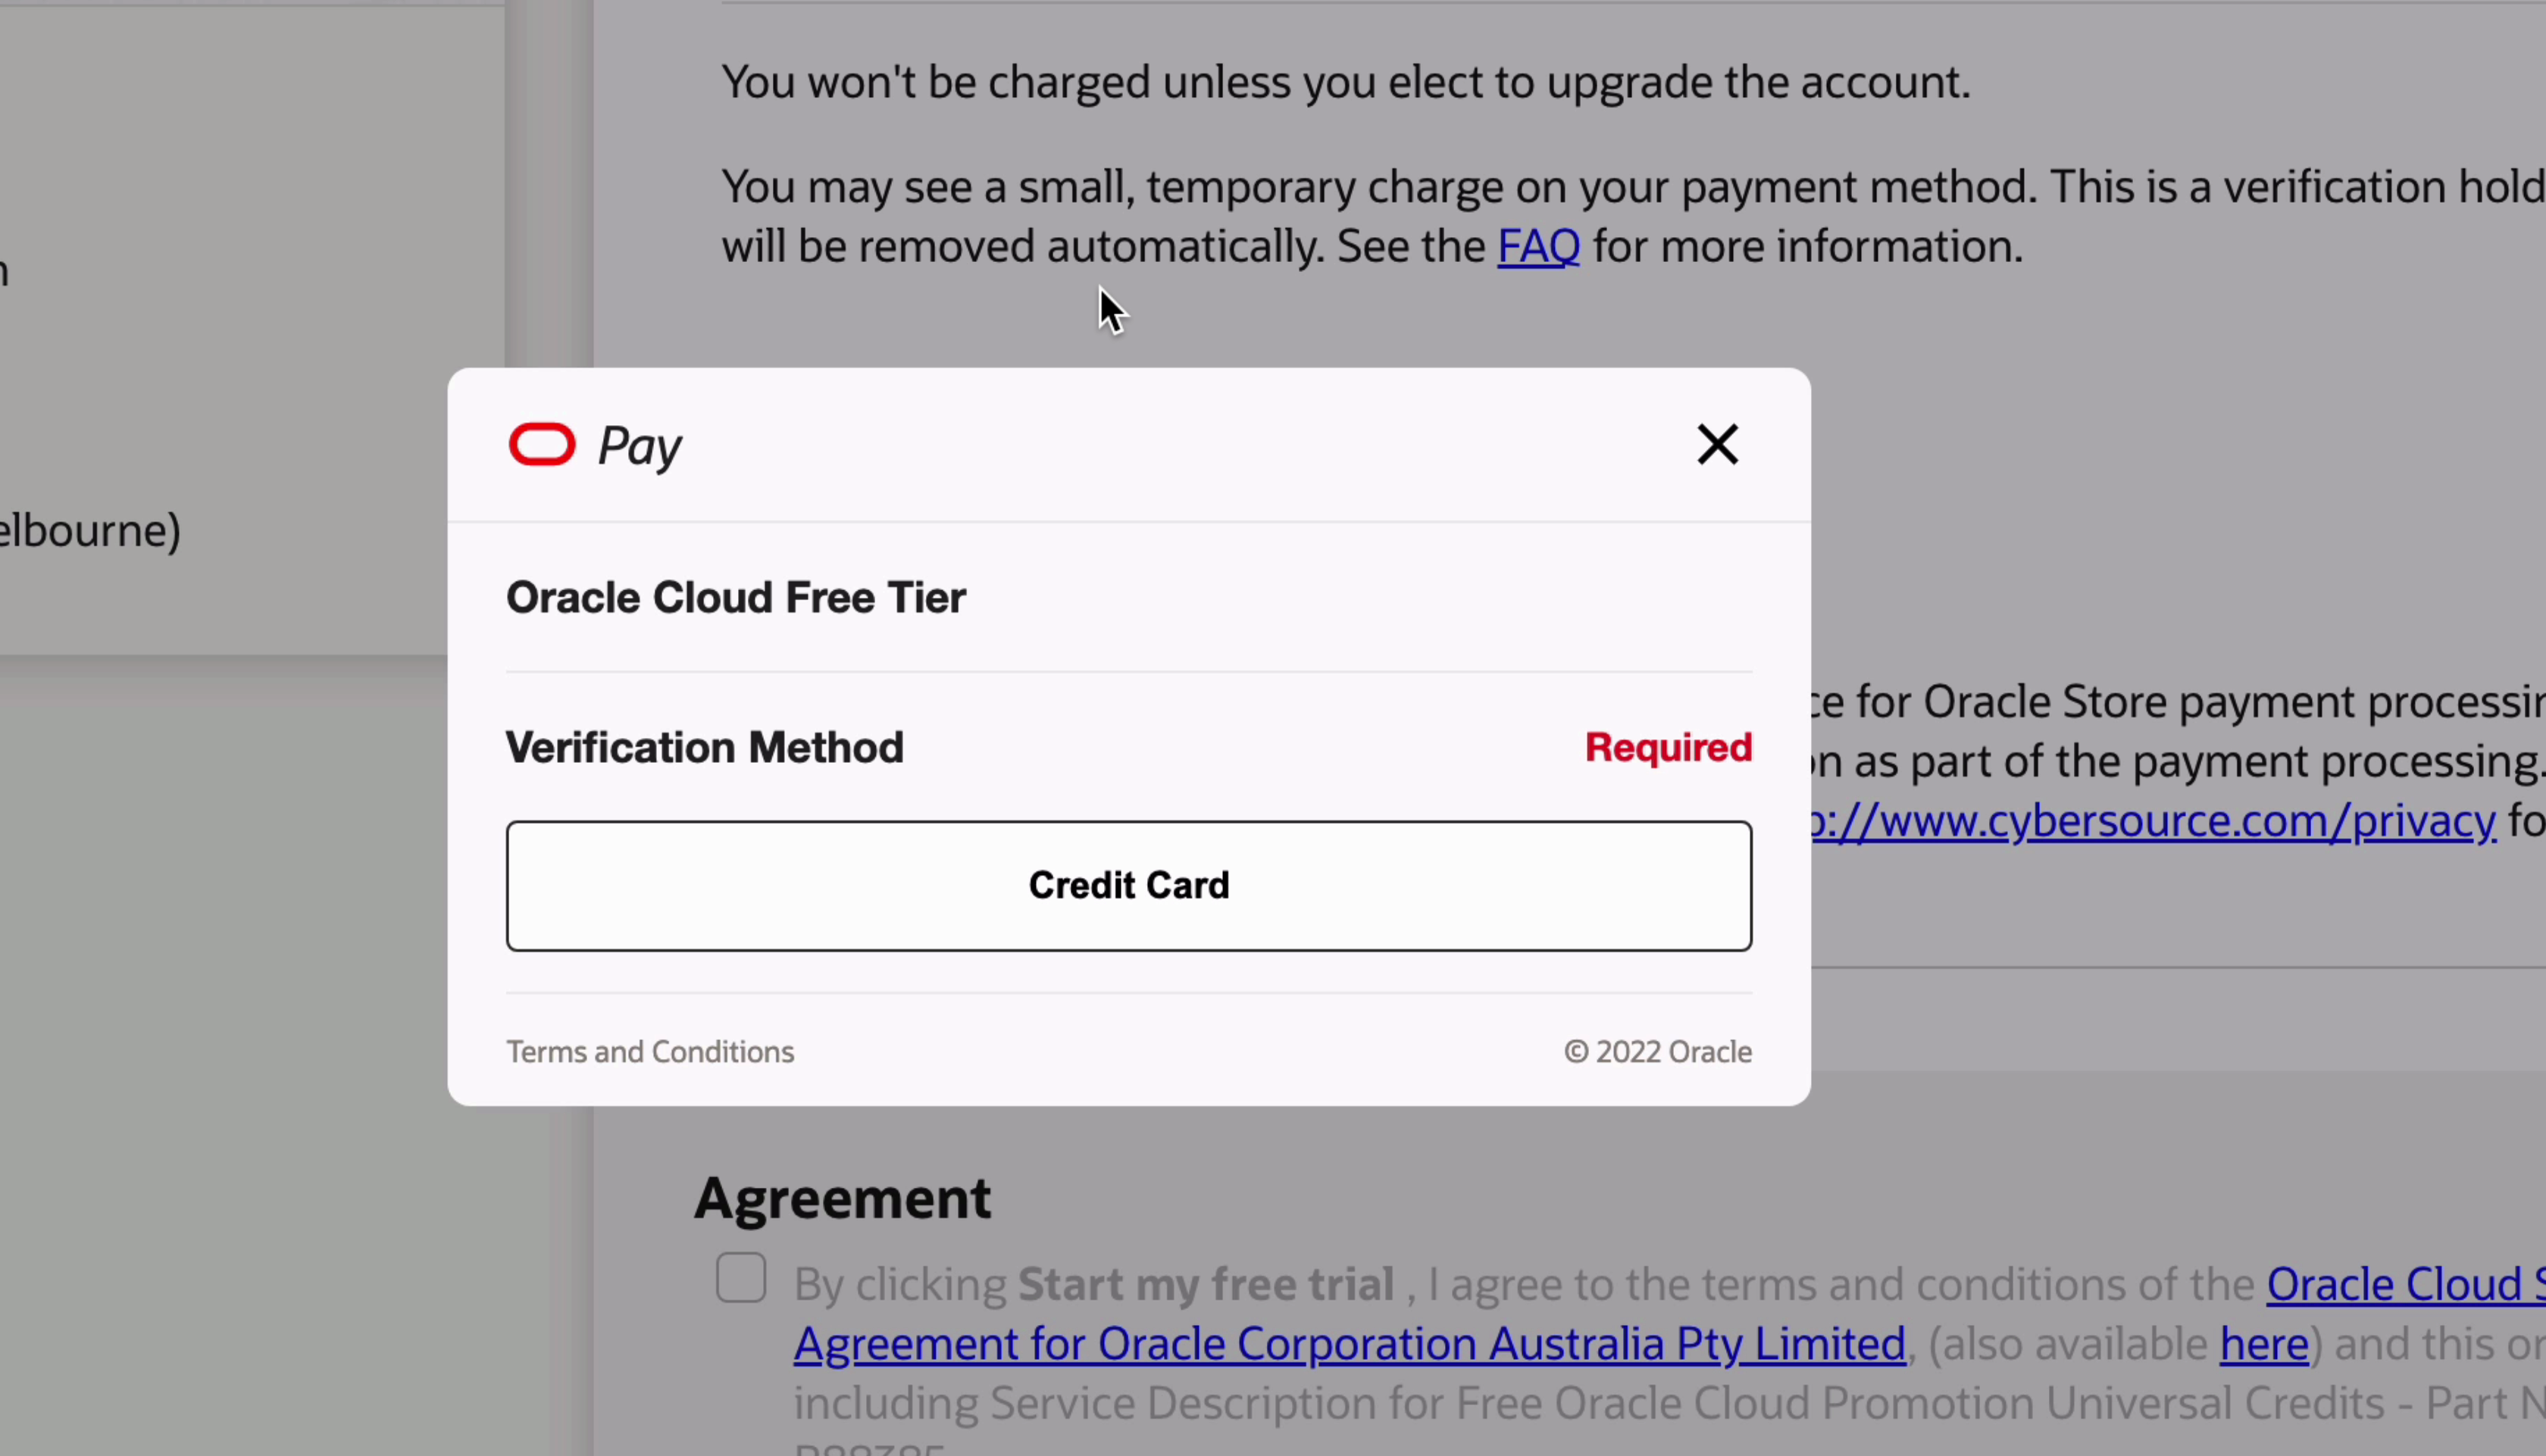
Step 13: Click the Credit Card button on the popup that appears.
Step 14: Enter the remaining billing information, as much of it has already been populated.
Step 15: Scroll down and select your card type.
Step 16: Enter the card details, and click Finish.
The payment method will be processed.
Step 17: Click Close when it is done.
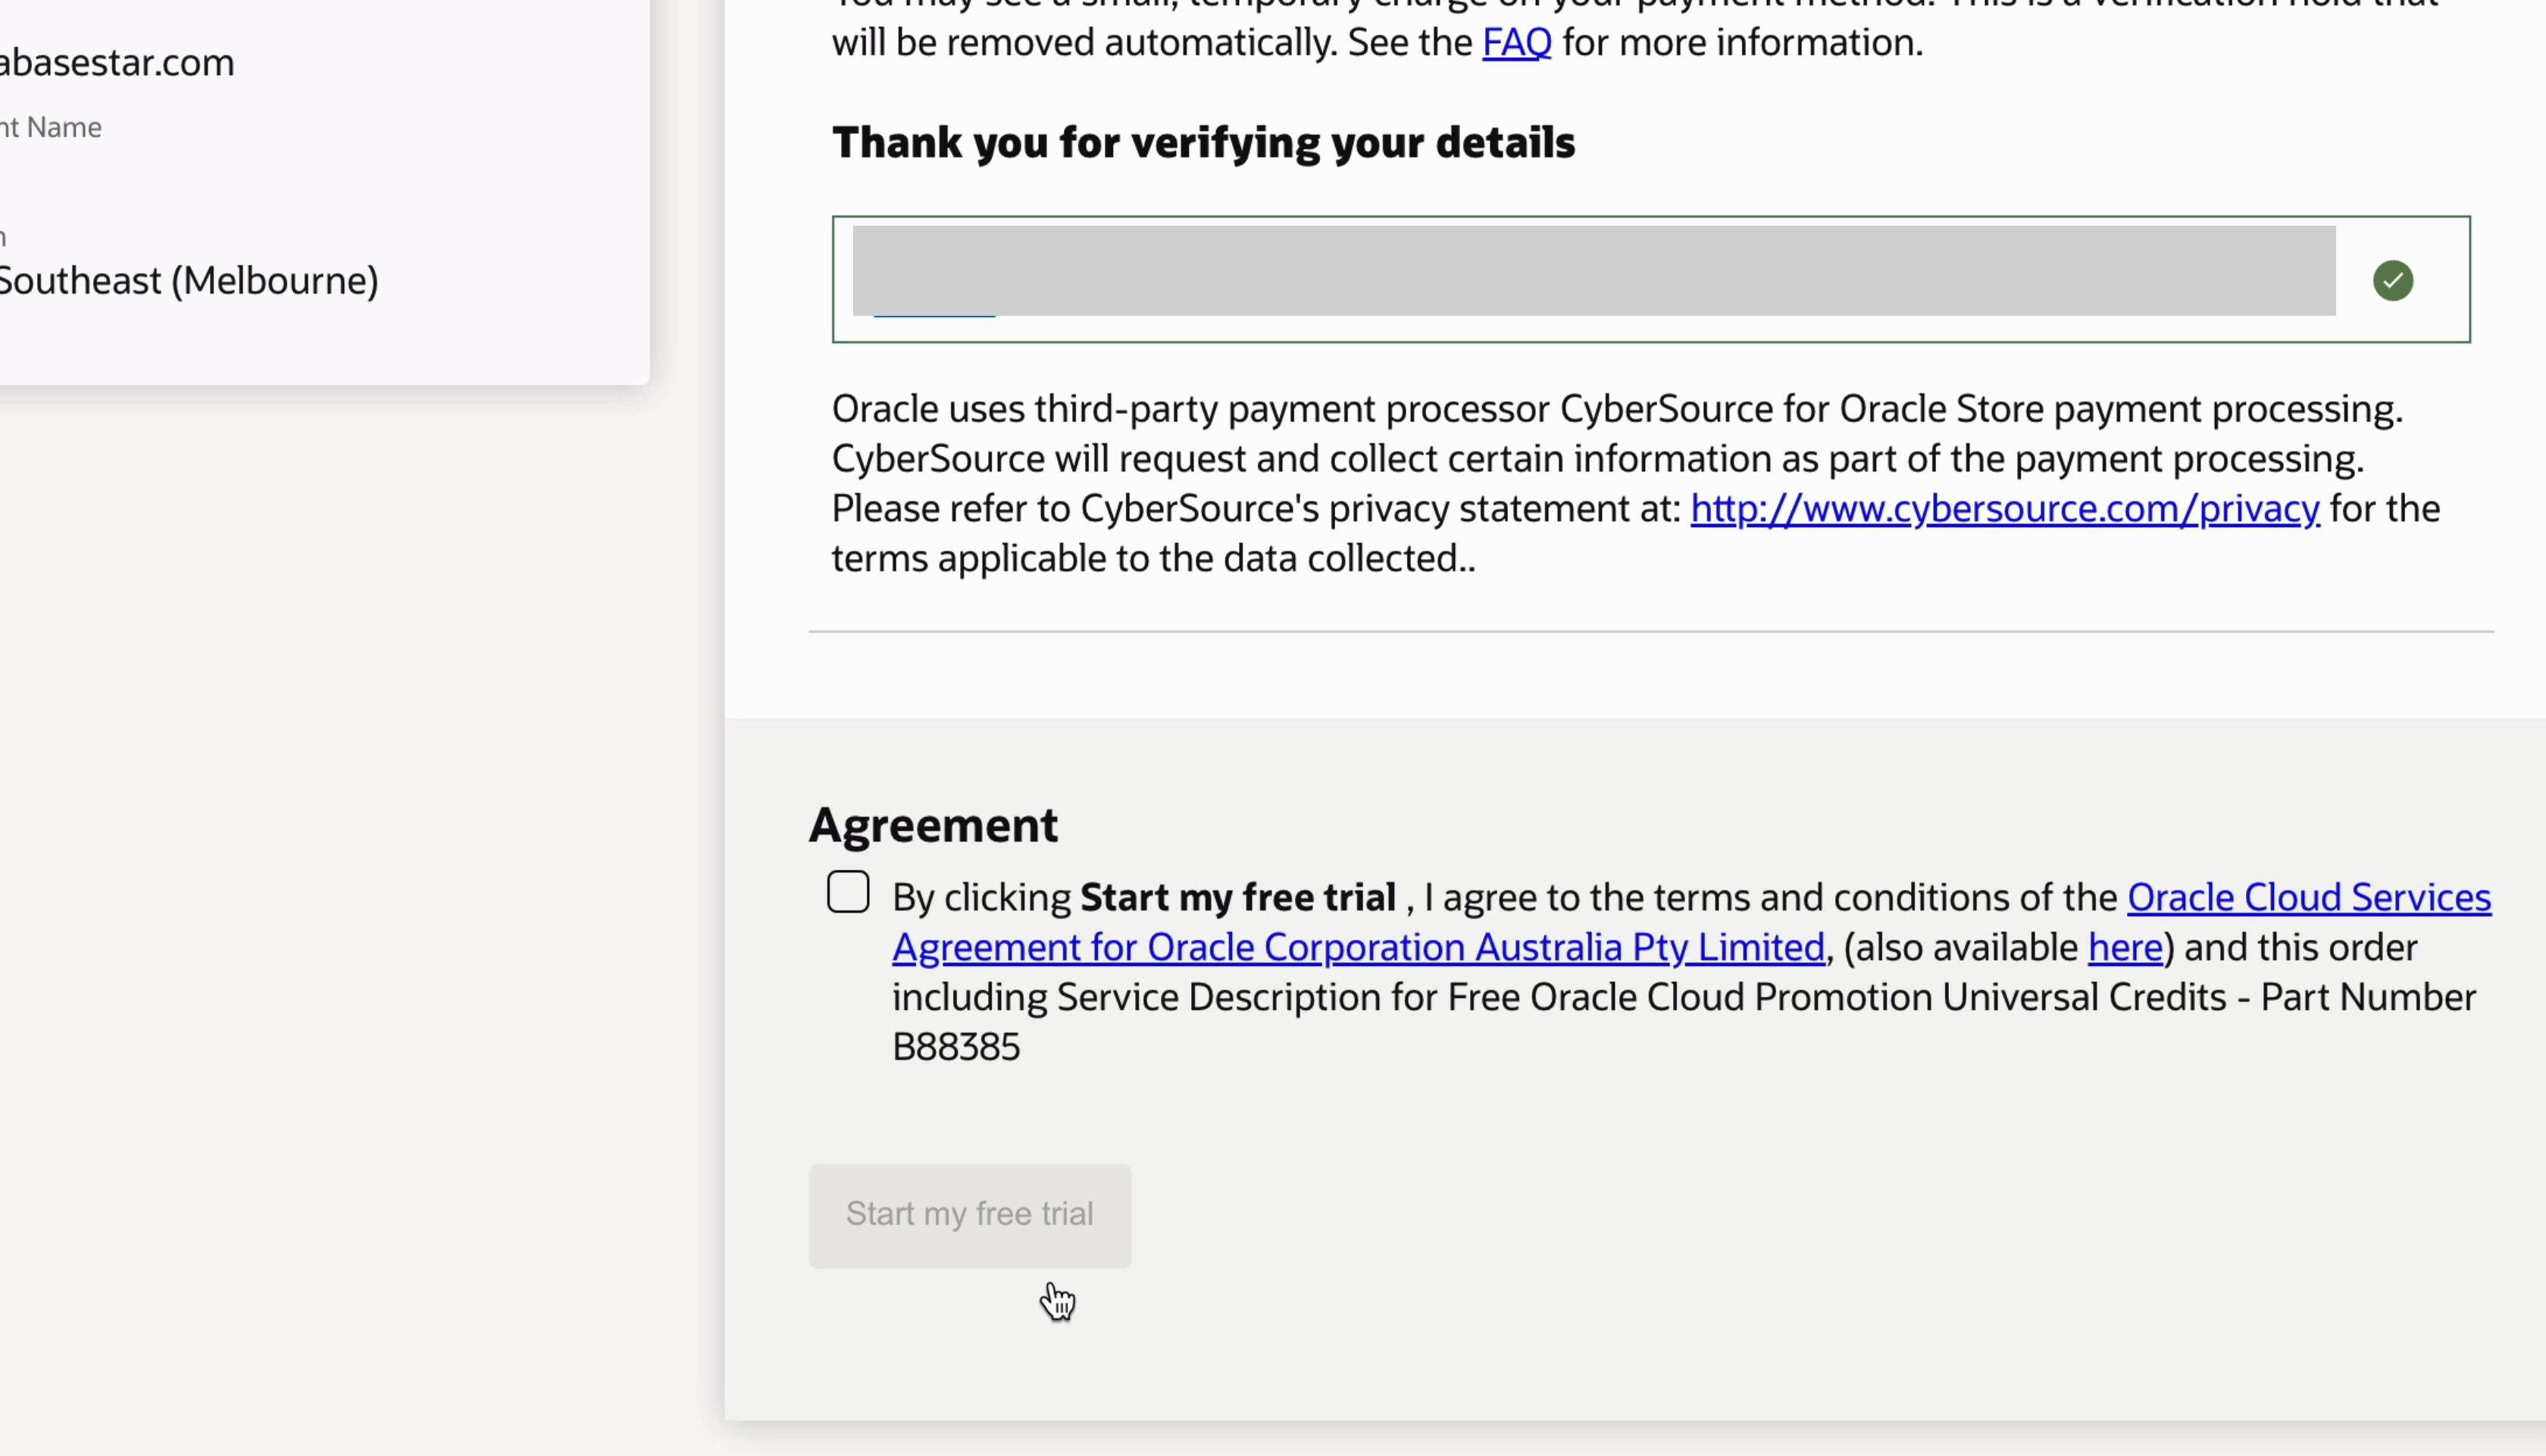
Step 18: Tick the checkbox in the agreement section, and click Start my free trial.
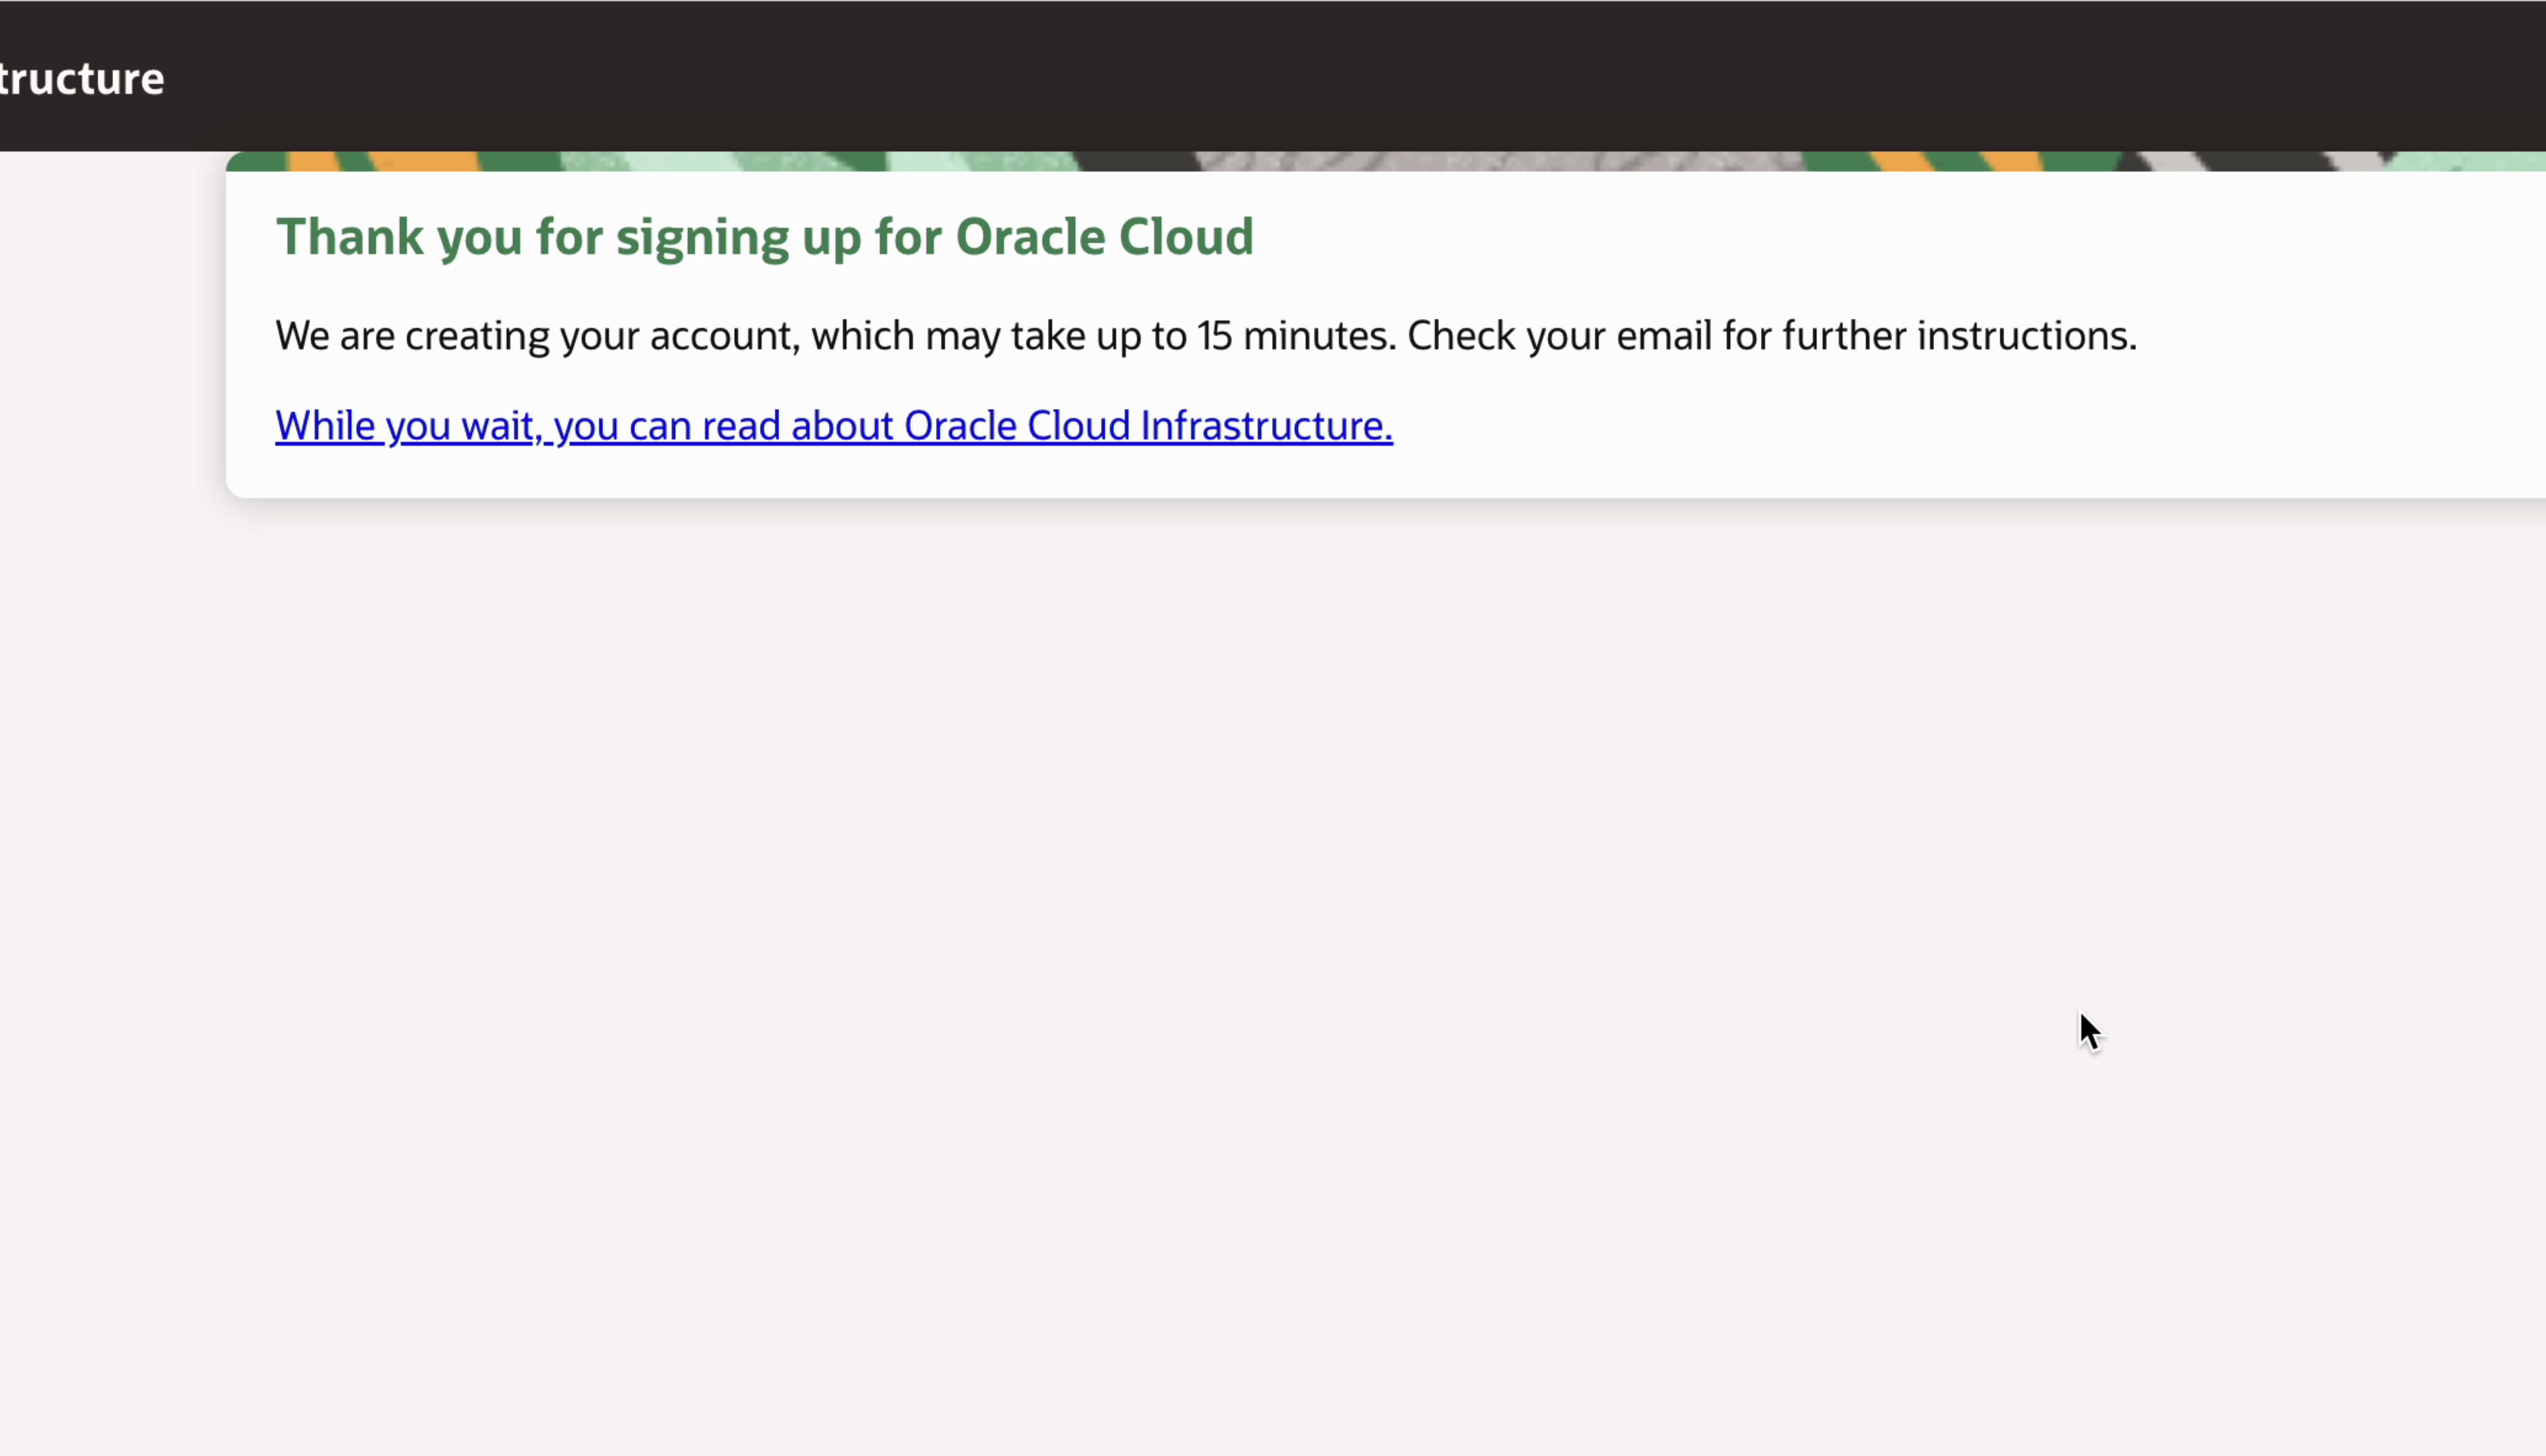
Your account will then start being set up. After a minute or two, you'll see this Thanks page. It says your account is being created and to check your email.
Create Database
You should receive an email soon titled “Get started now with Oracle Cloud”.
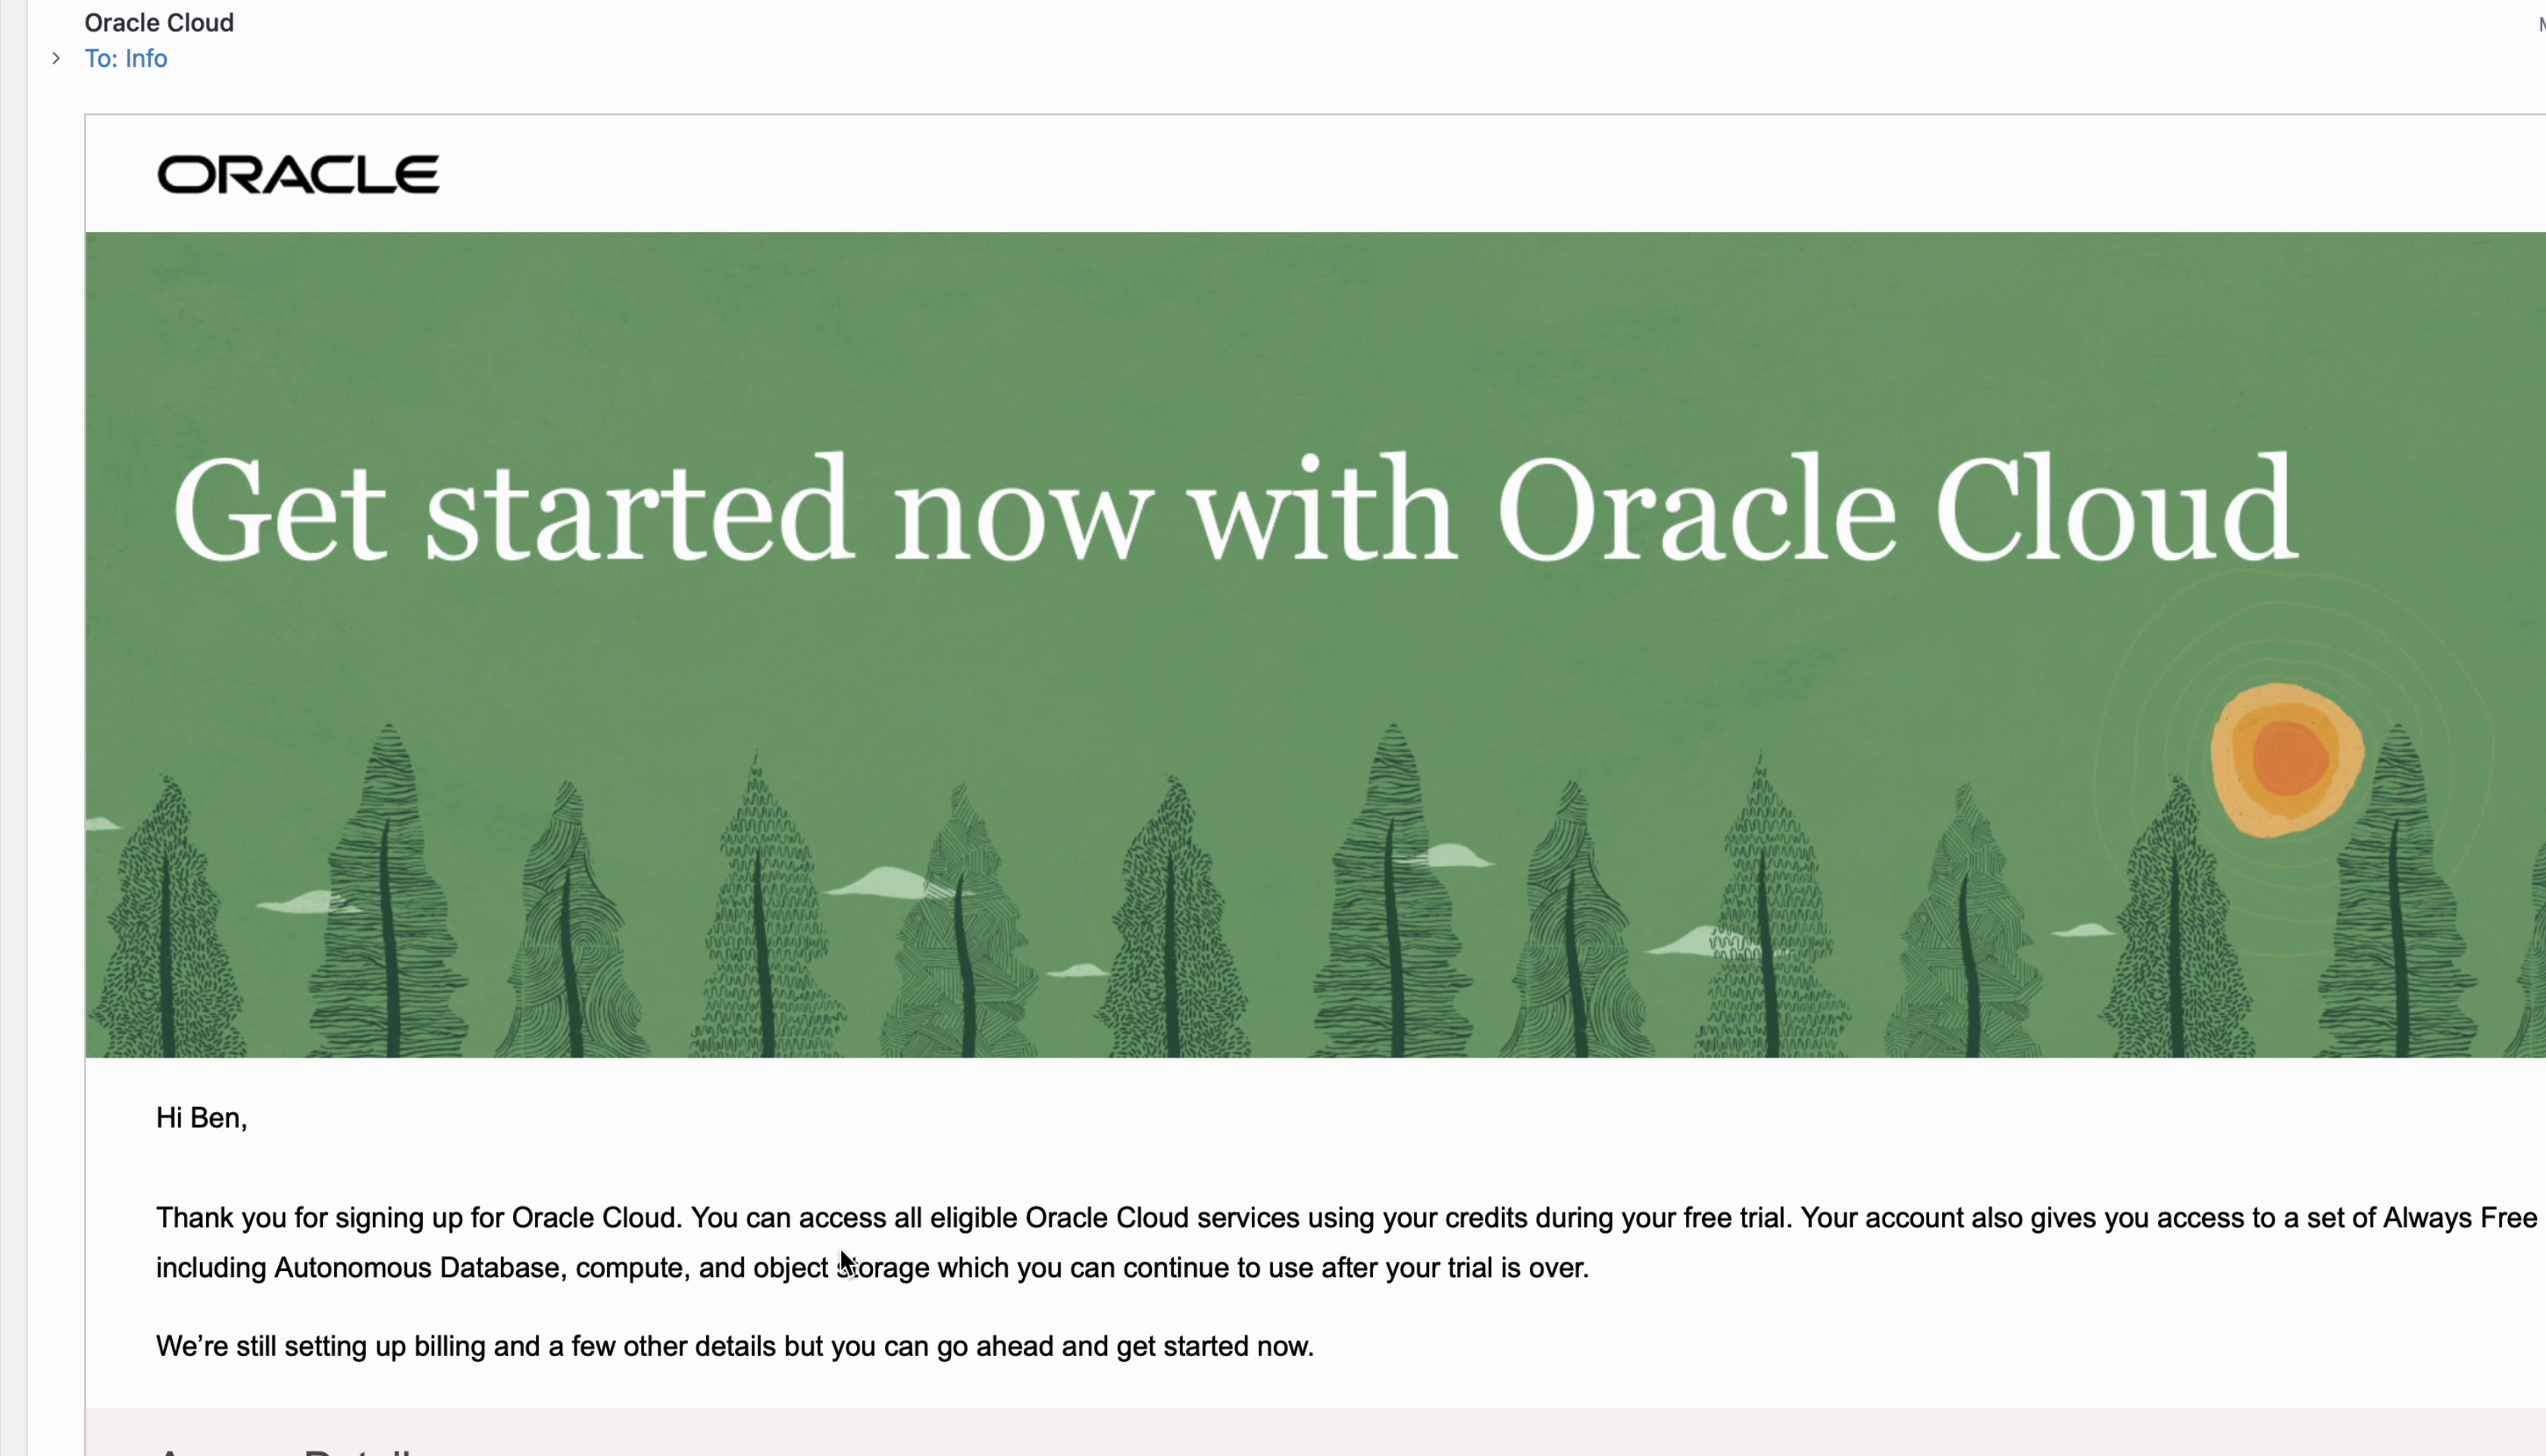
Step 1: In this email, you'll see a link to sign in. Click the Sign In button.
You'll be taken to the Oracle Cloud Account sign-in page.
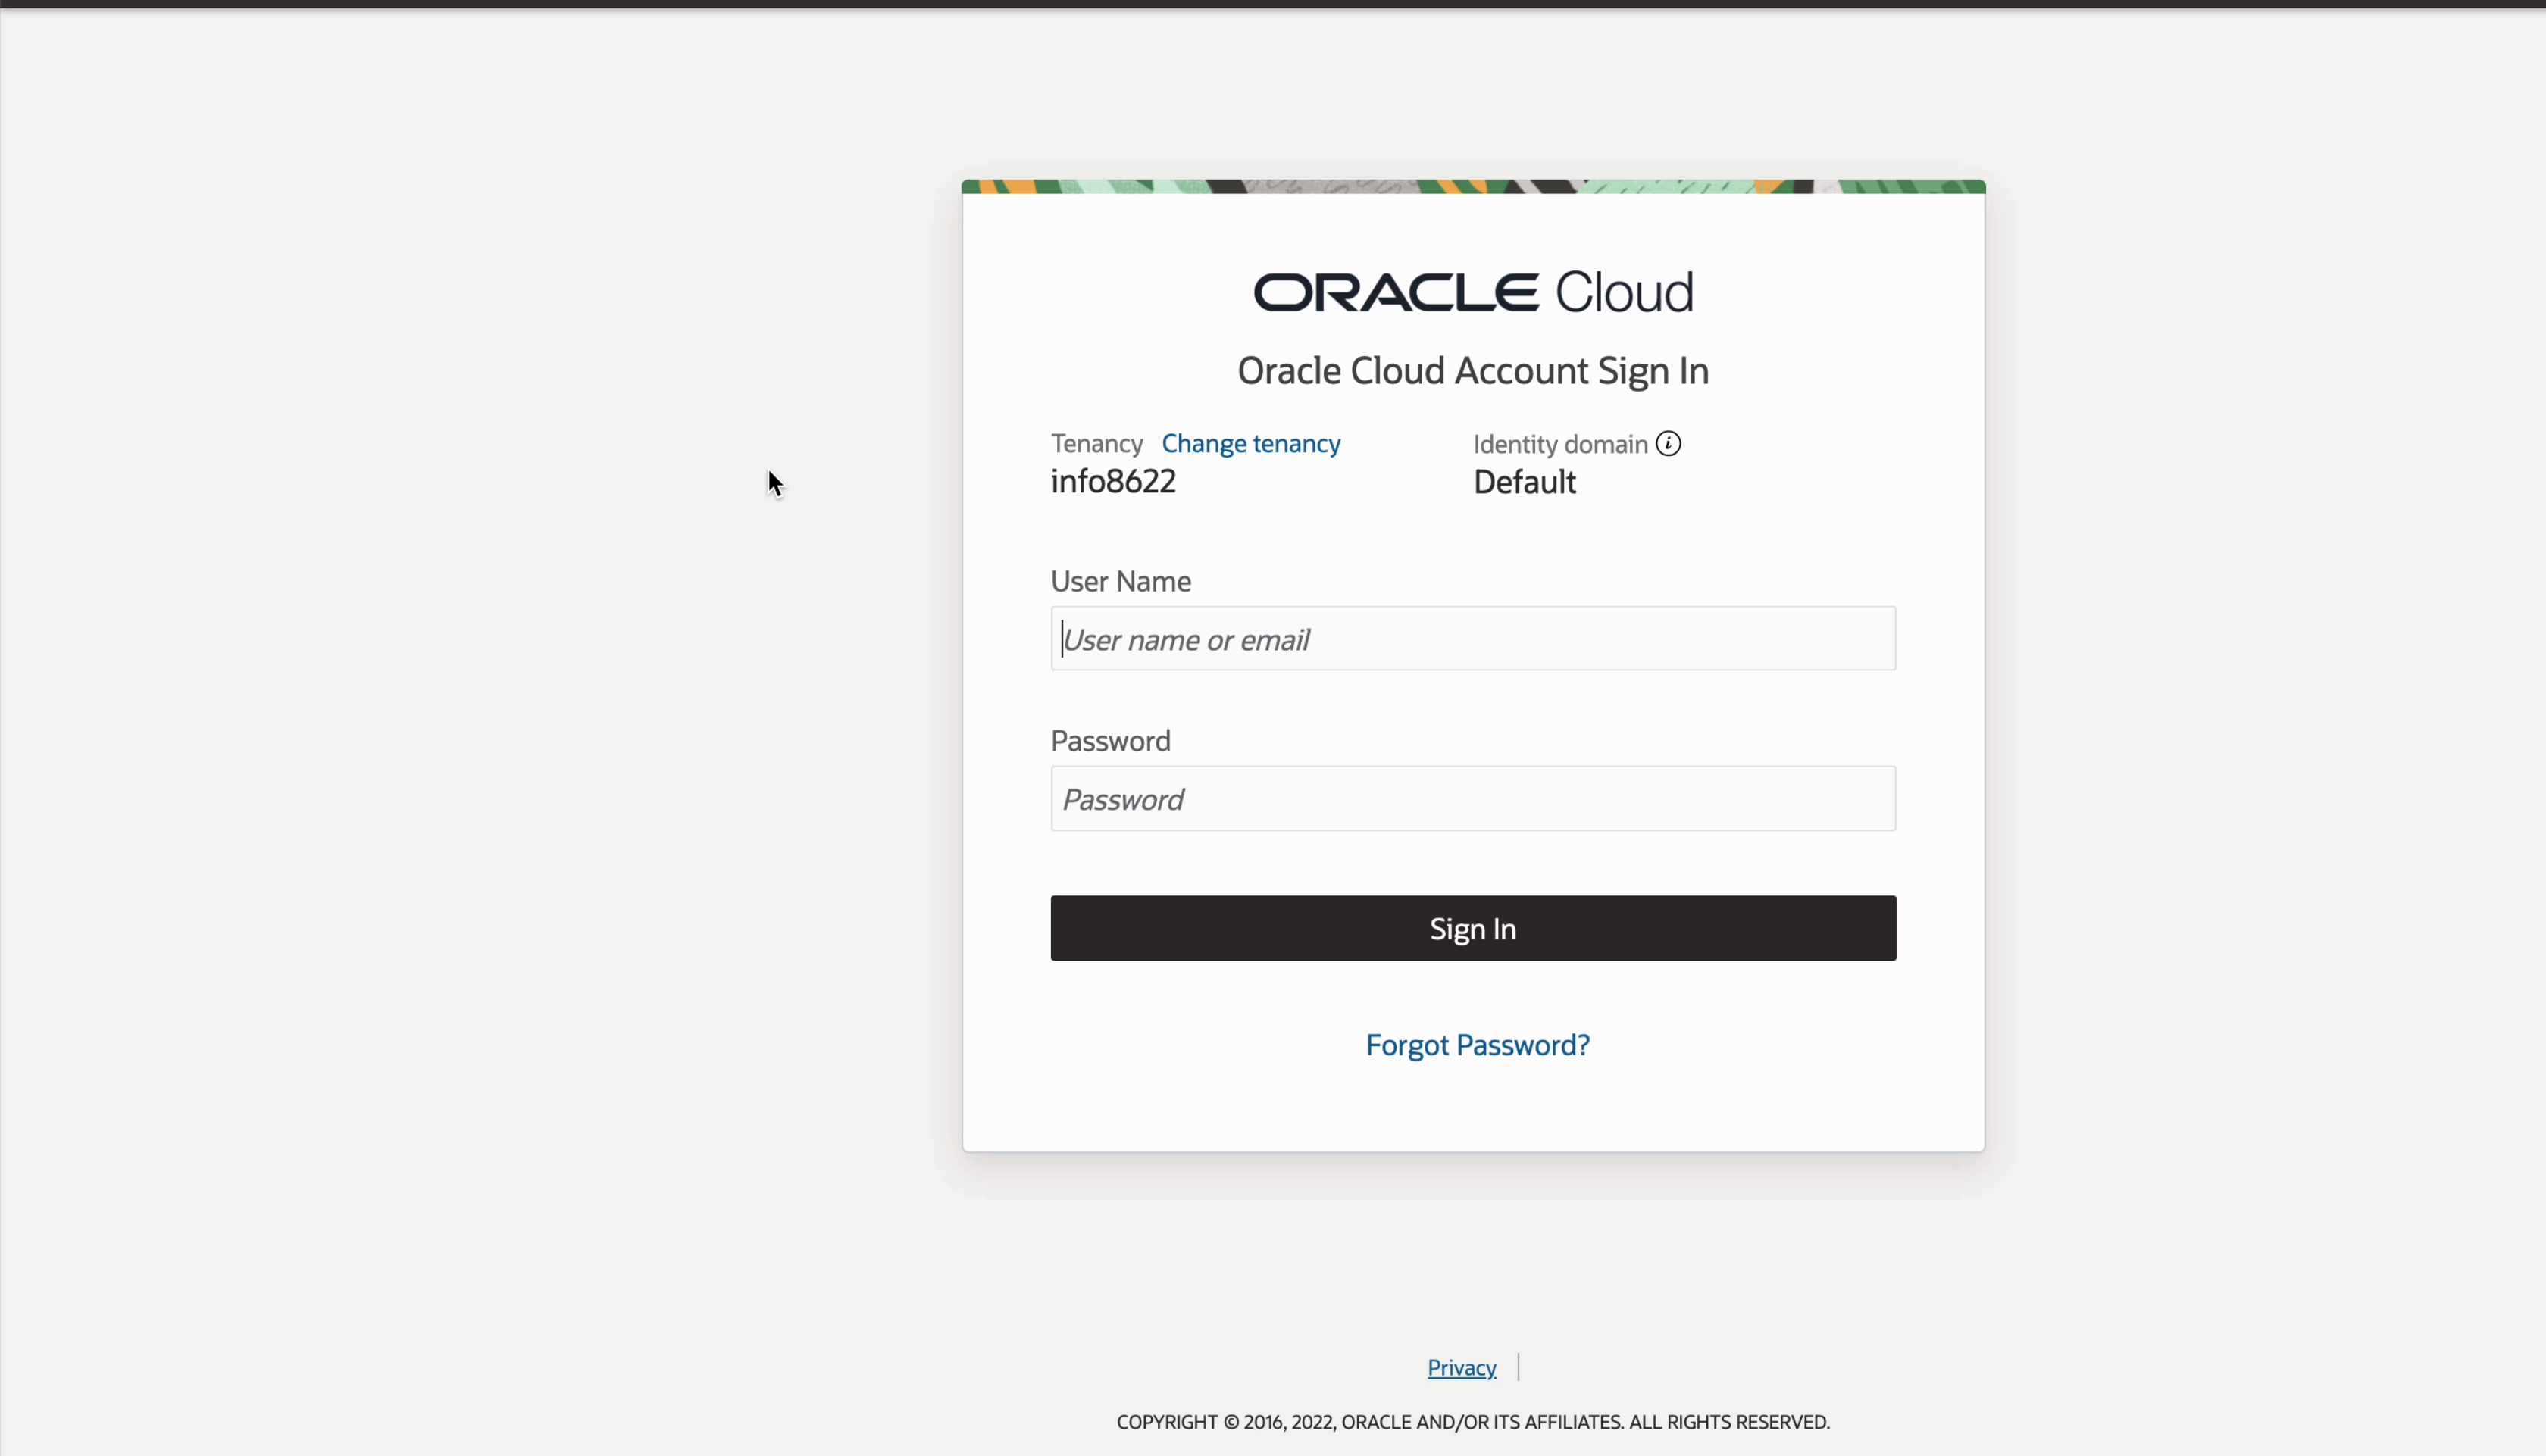
Step 2: Enter the email address and password you specified during the setup process, and click Sign In.
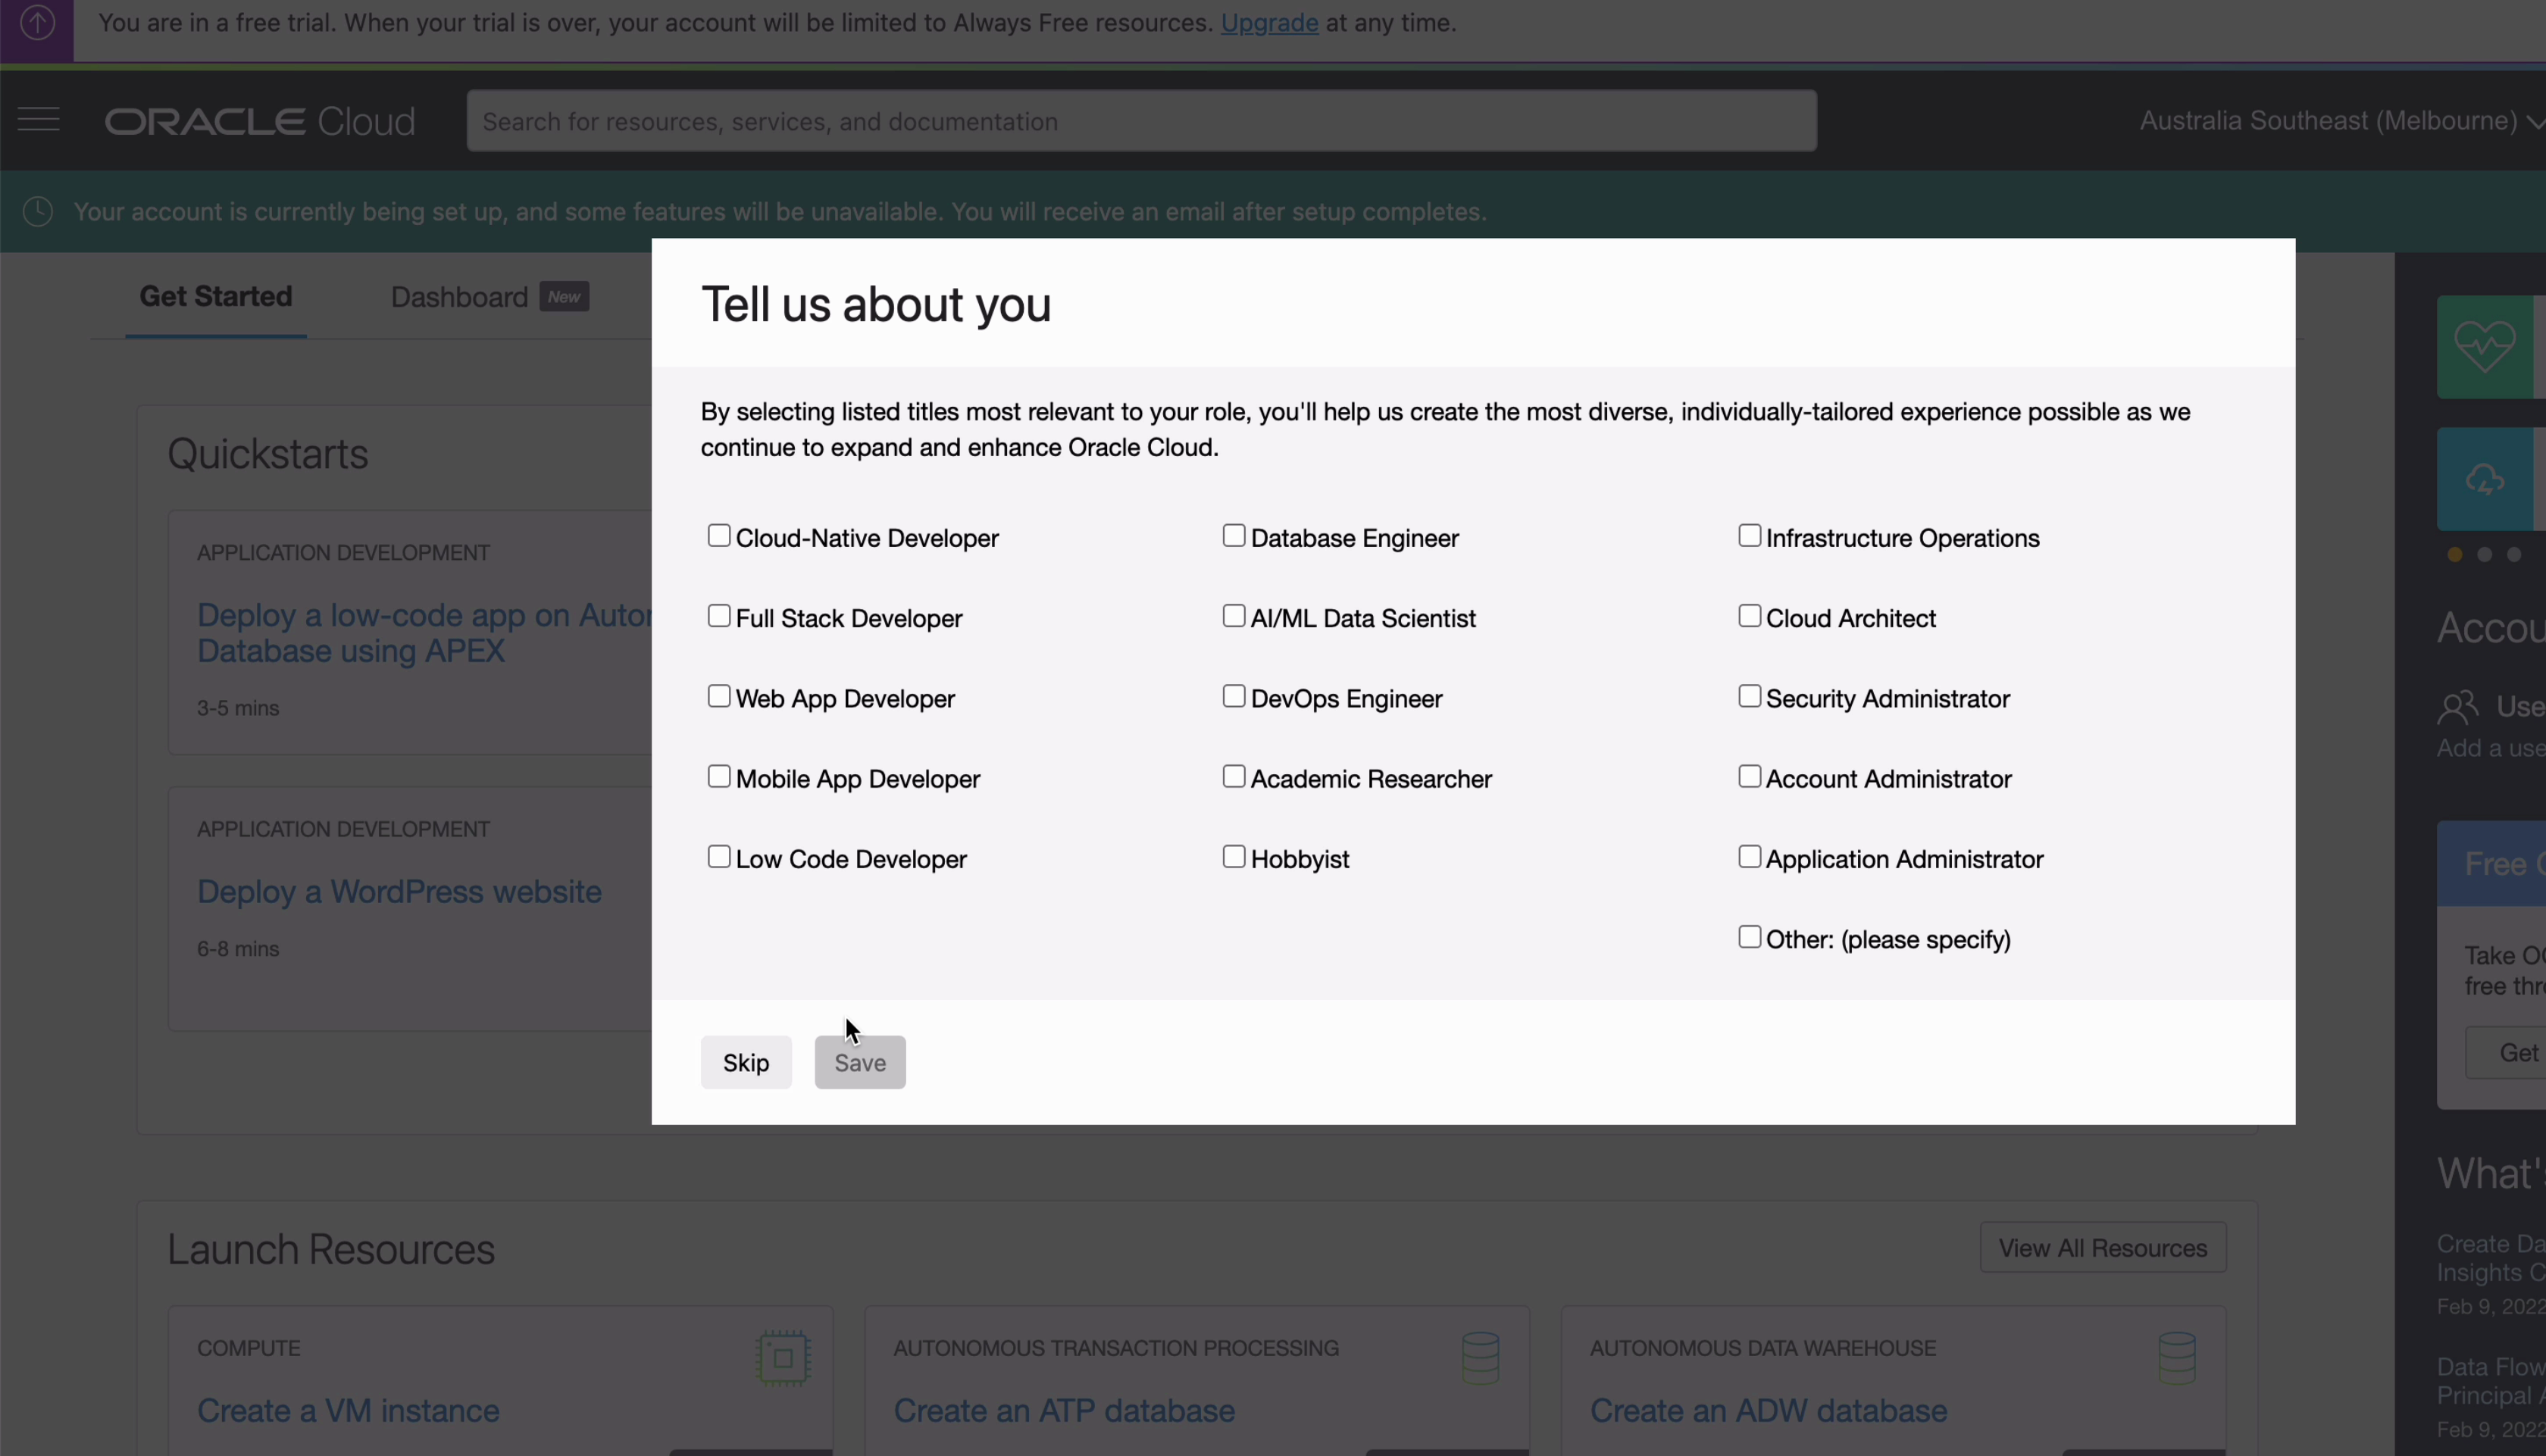
Step 3: Click Skip on the “Tell us about you” window, or select the areas that interest you.
You'll be shown the Get Started page within Oracle Cloud. There are a lot of things you can create inside Oracle Cloud, and the services you can use for free with the Oracle Cloud Free Tier are tagged with “Always Free Eligible”.
The one we're looking for is the database, which is labelled “Create an ATP Database”, where ATP stands for Autonomous Transaction Processing.
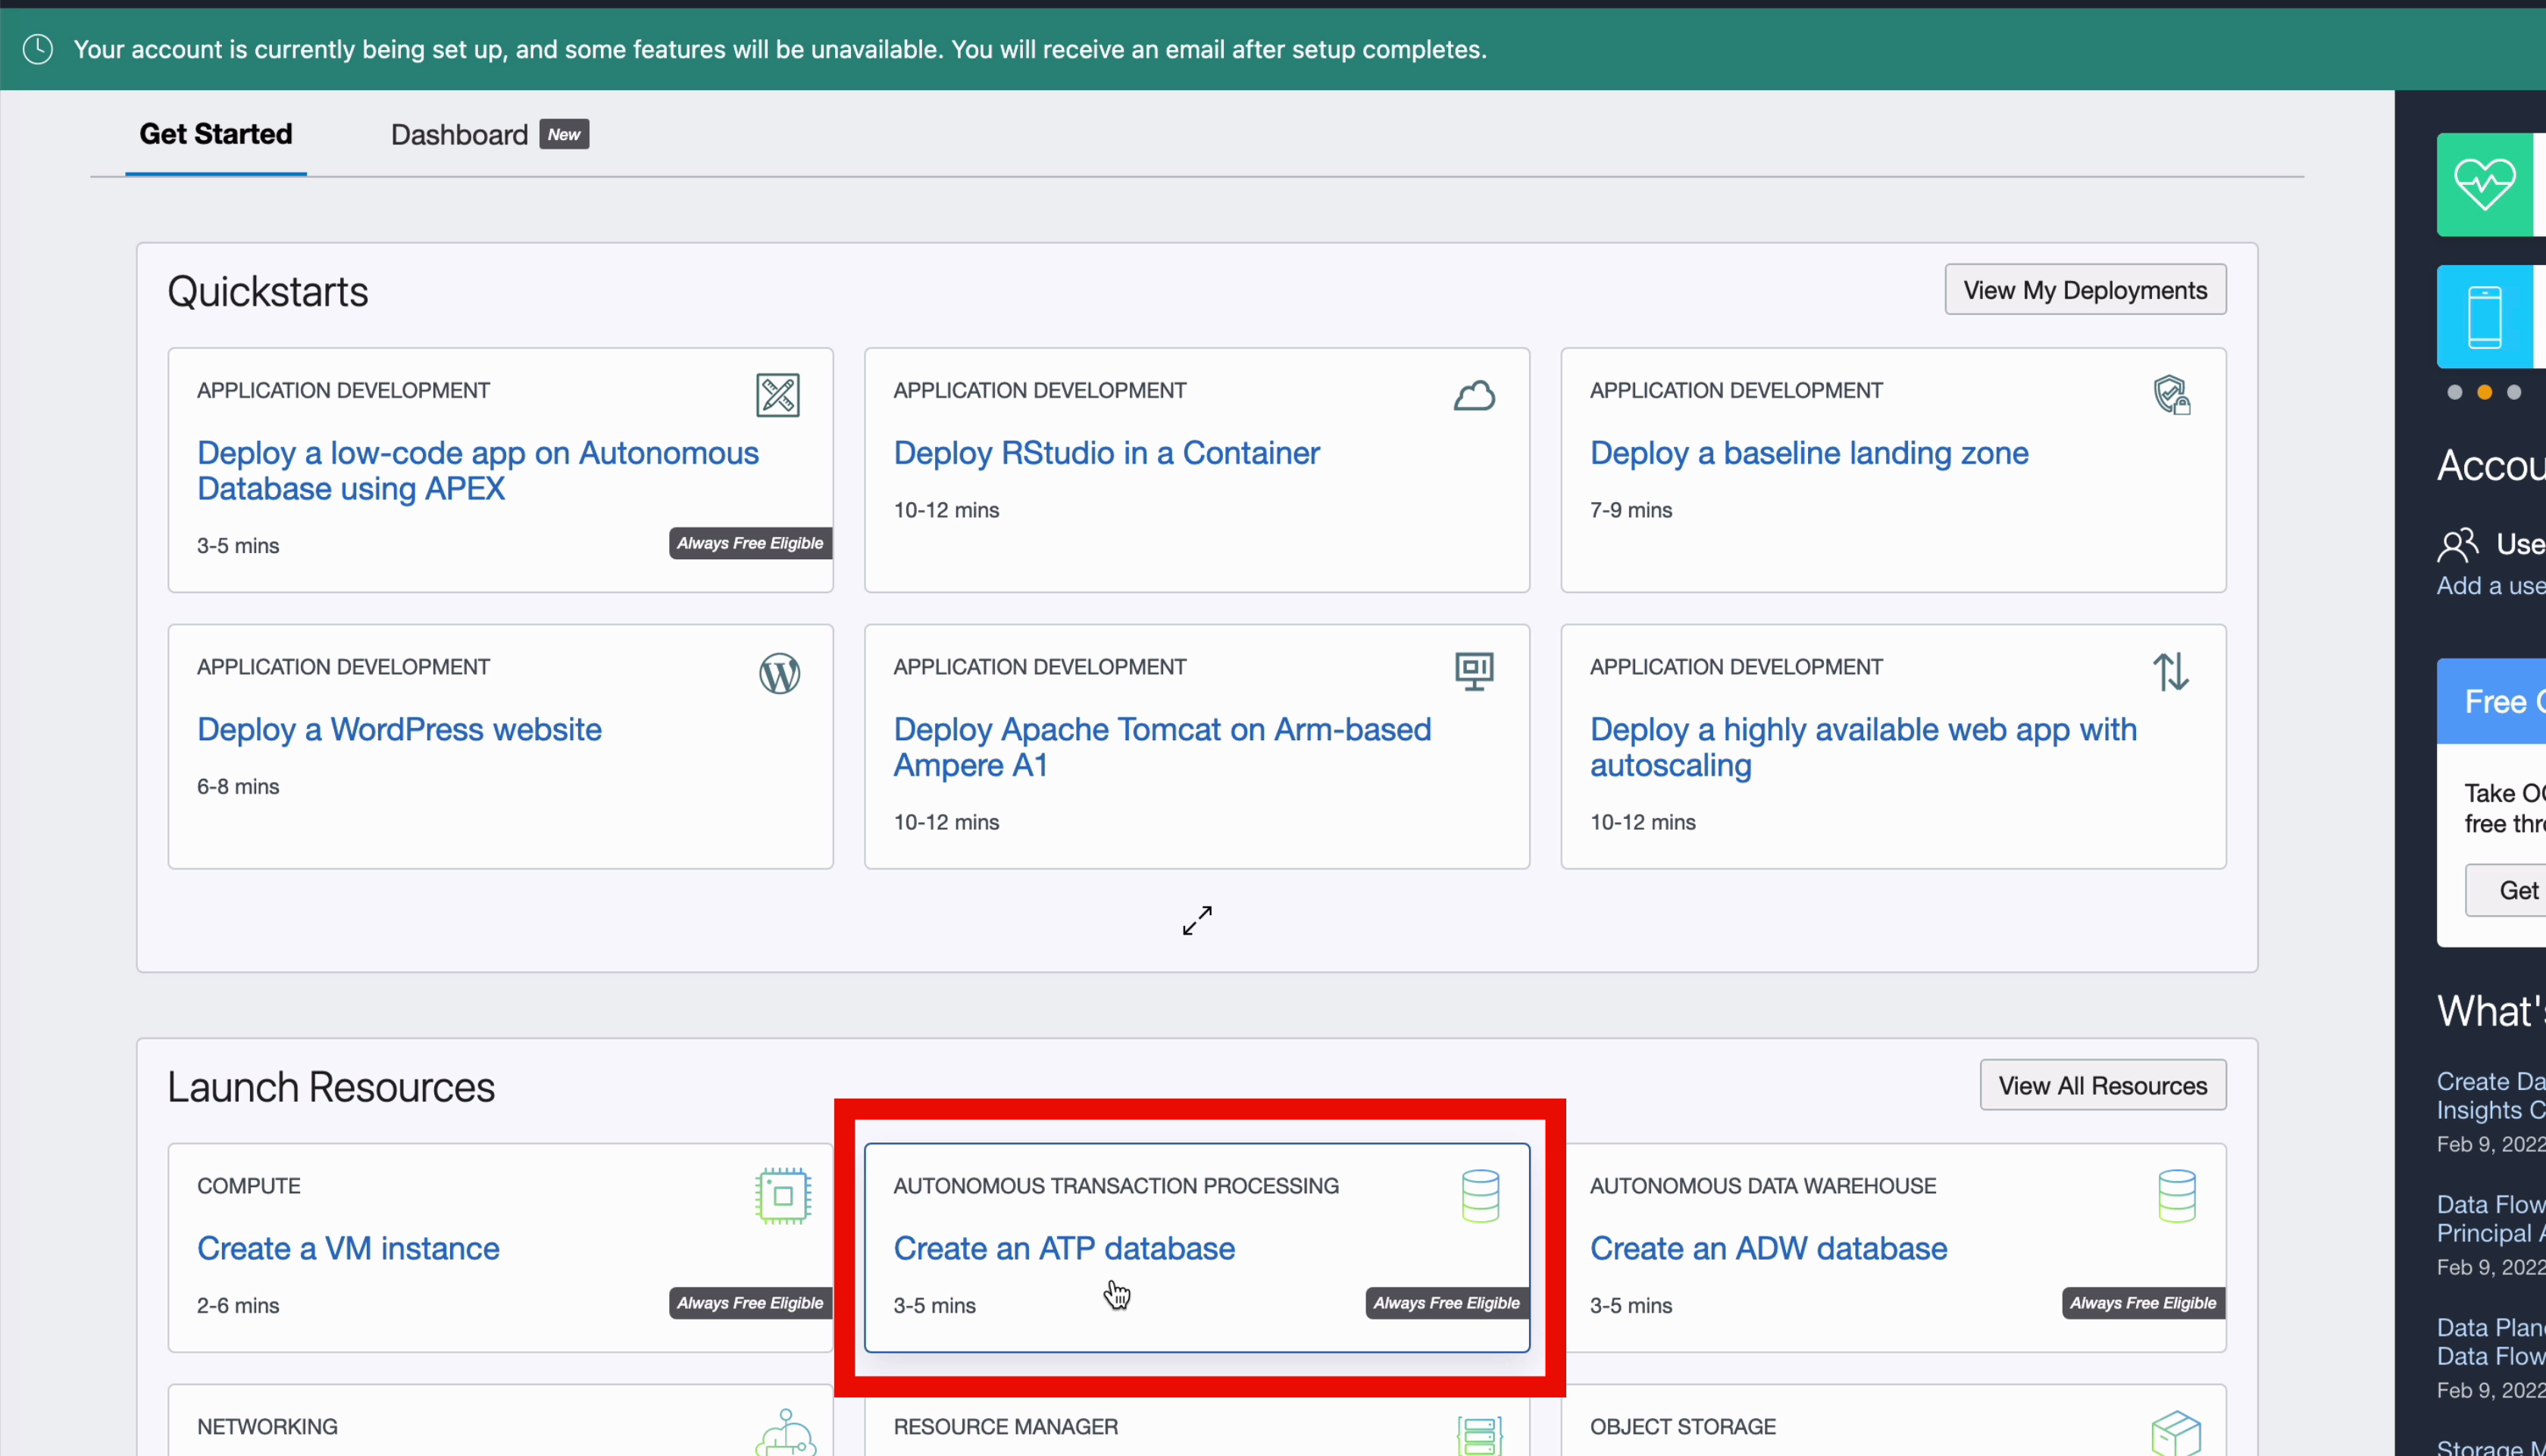
Step 4: Click the button here called "Create an ATP database", and you're taken to the Create Autonomous Database page.
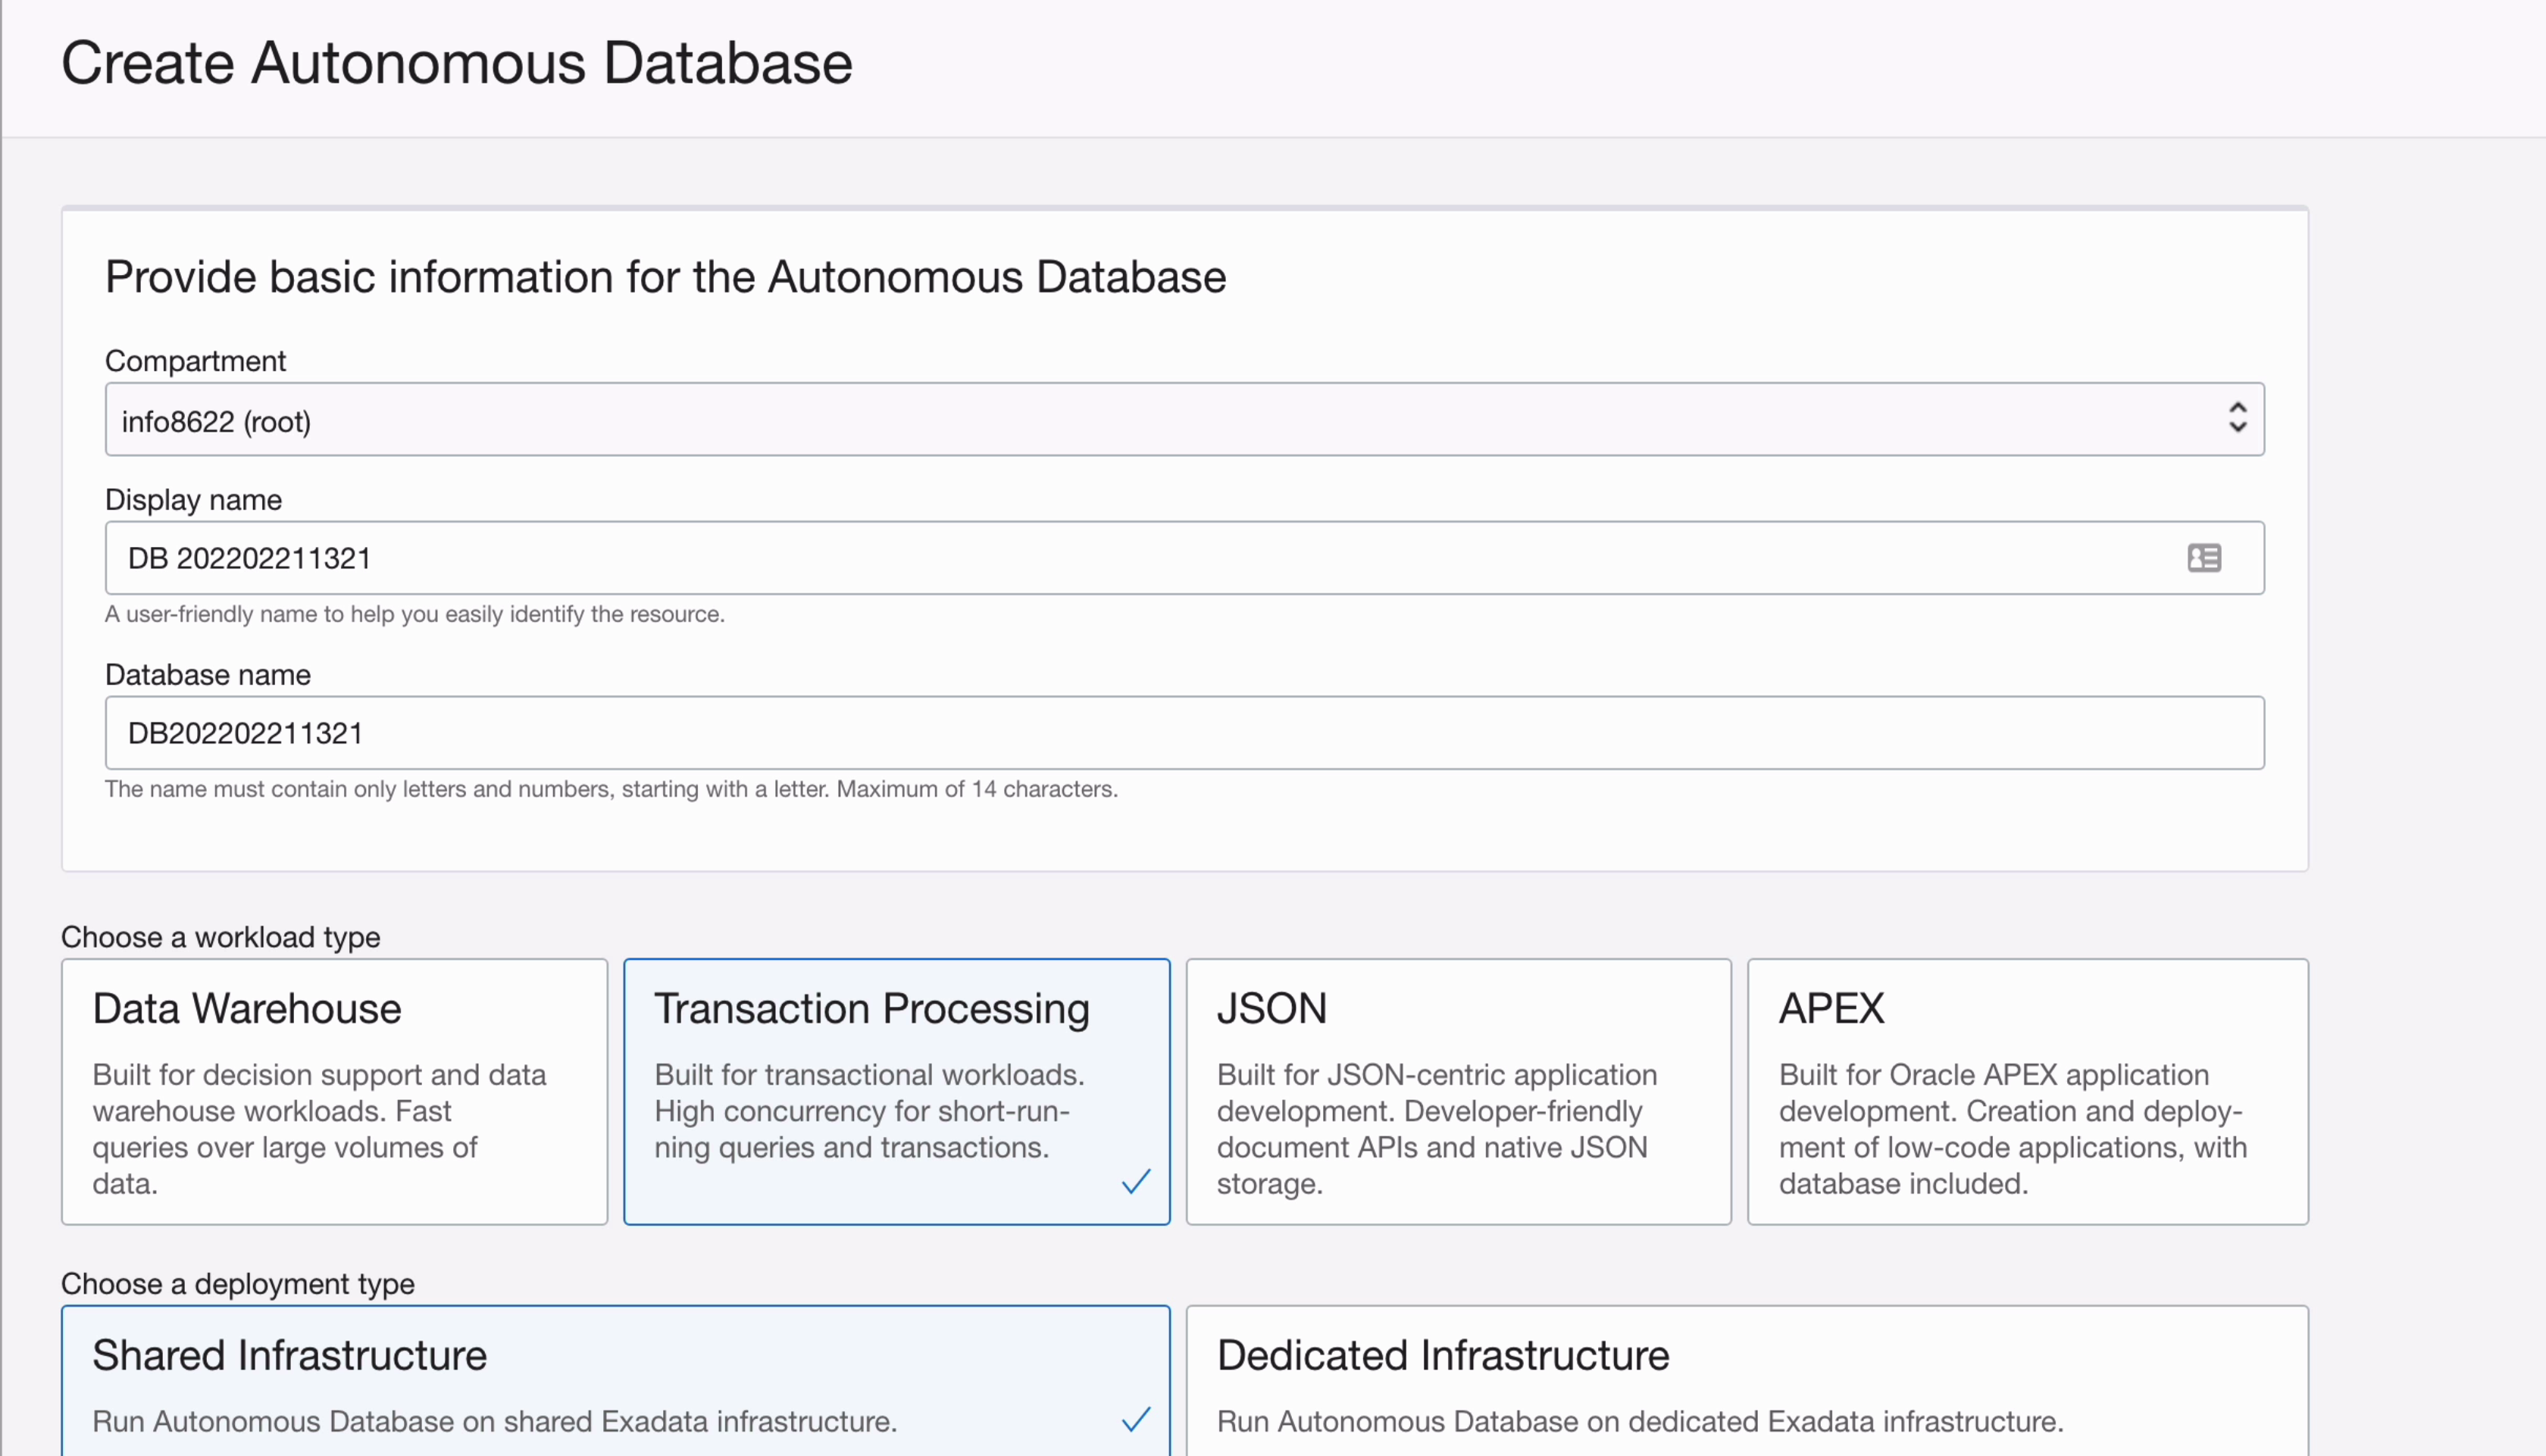
This is the page you can use to create your database. The first few sections are automatically populated, and you can leave them as the default values.
Step 5: For the workload type, you have a few options, but we can leave the default value of Transaction Processing.
Step 6: Leave the Shared Infrastructure selected by default.
Step 7: Scroll down and toggle the Always Free configuration options to display. This will mean only the free options are selectable, making it easier to complete the form.
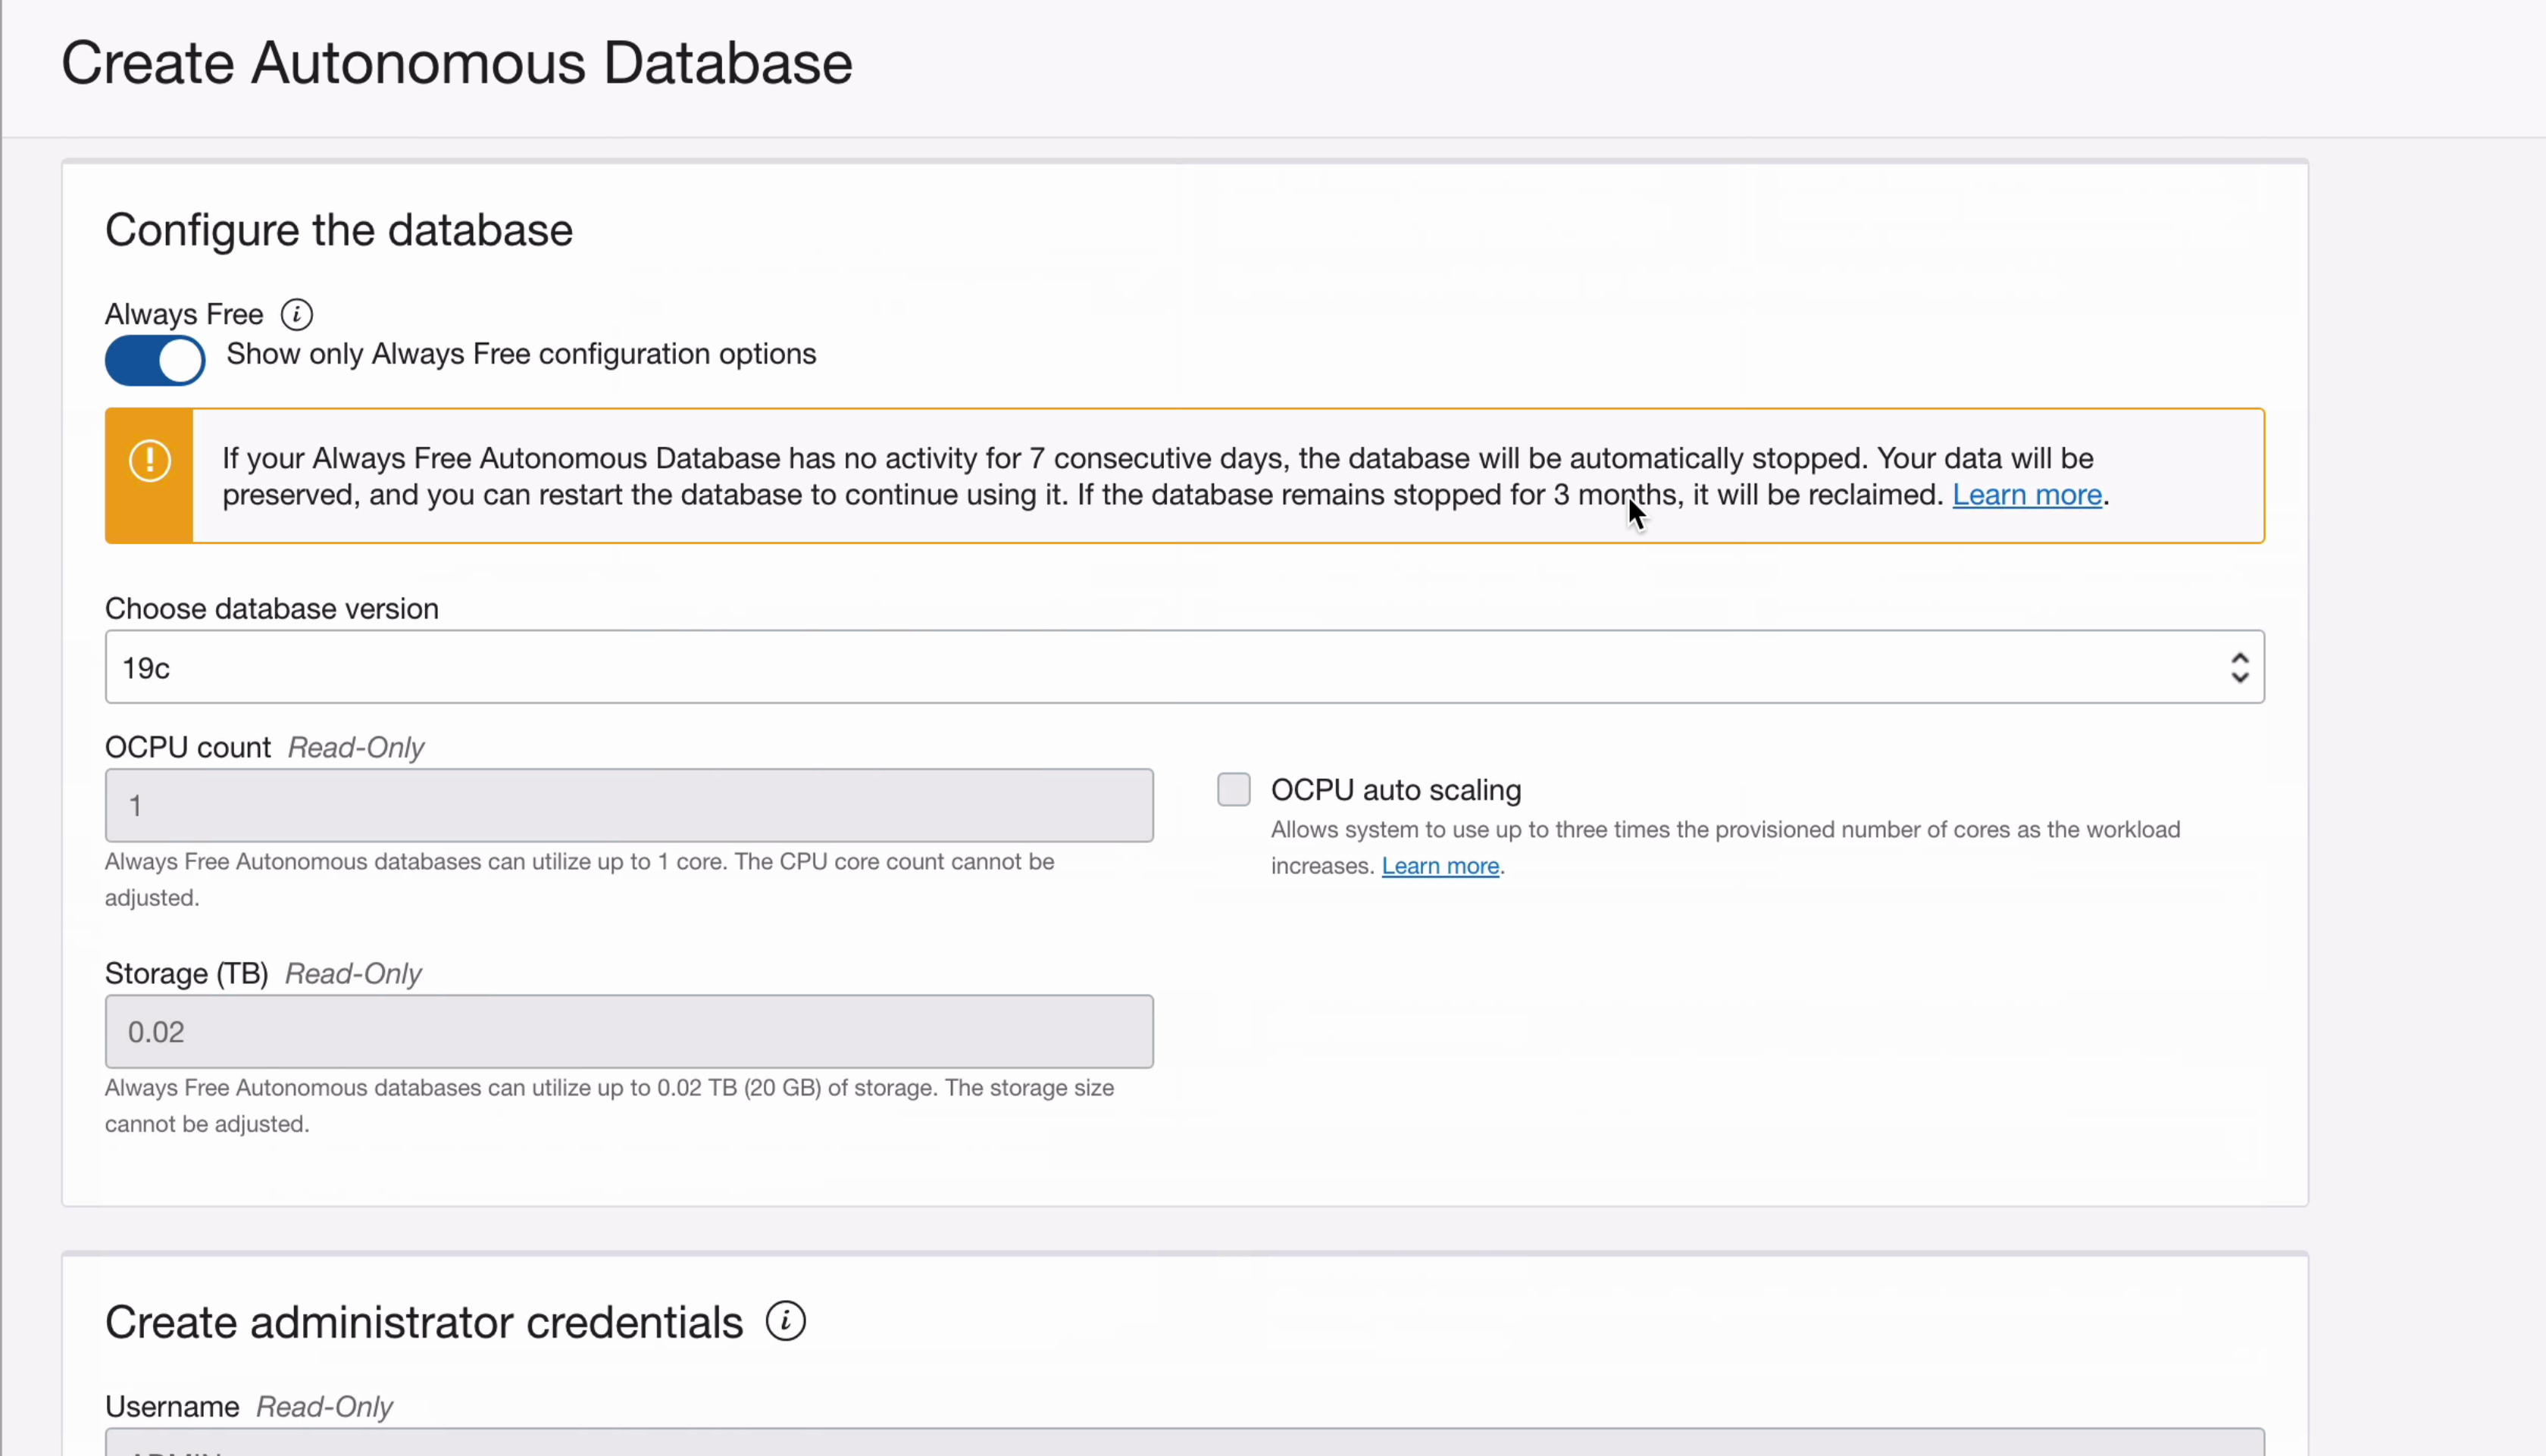
You'll see an information section here about idle usage of the database, which is good to know.
At the moment, the only database version available is 19c, which should be enough for our needs to get started.
Step 8: Scroll down to the administrator credentials section. Enter a password for the admin account. This is the password for the database, which you'll use when creating a connection in your IDE such as SQL Developer.
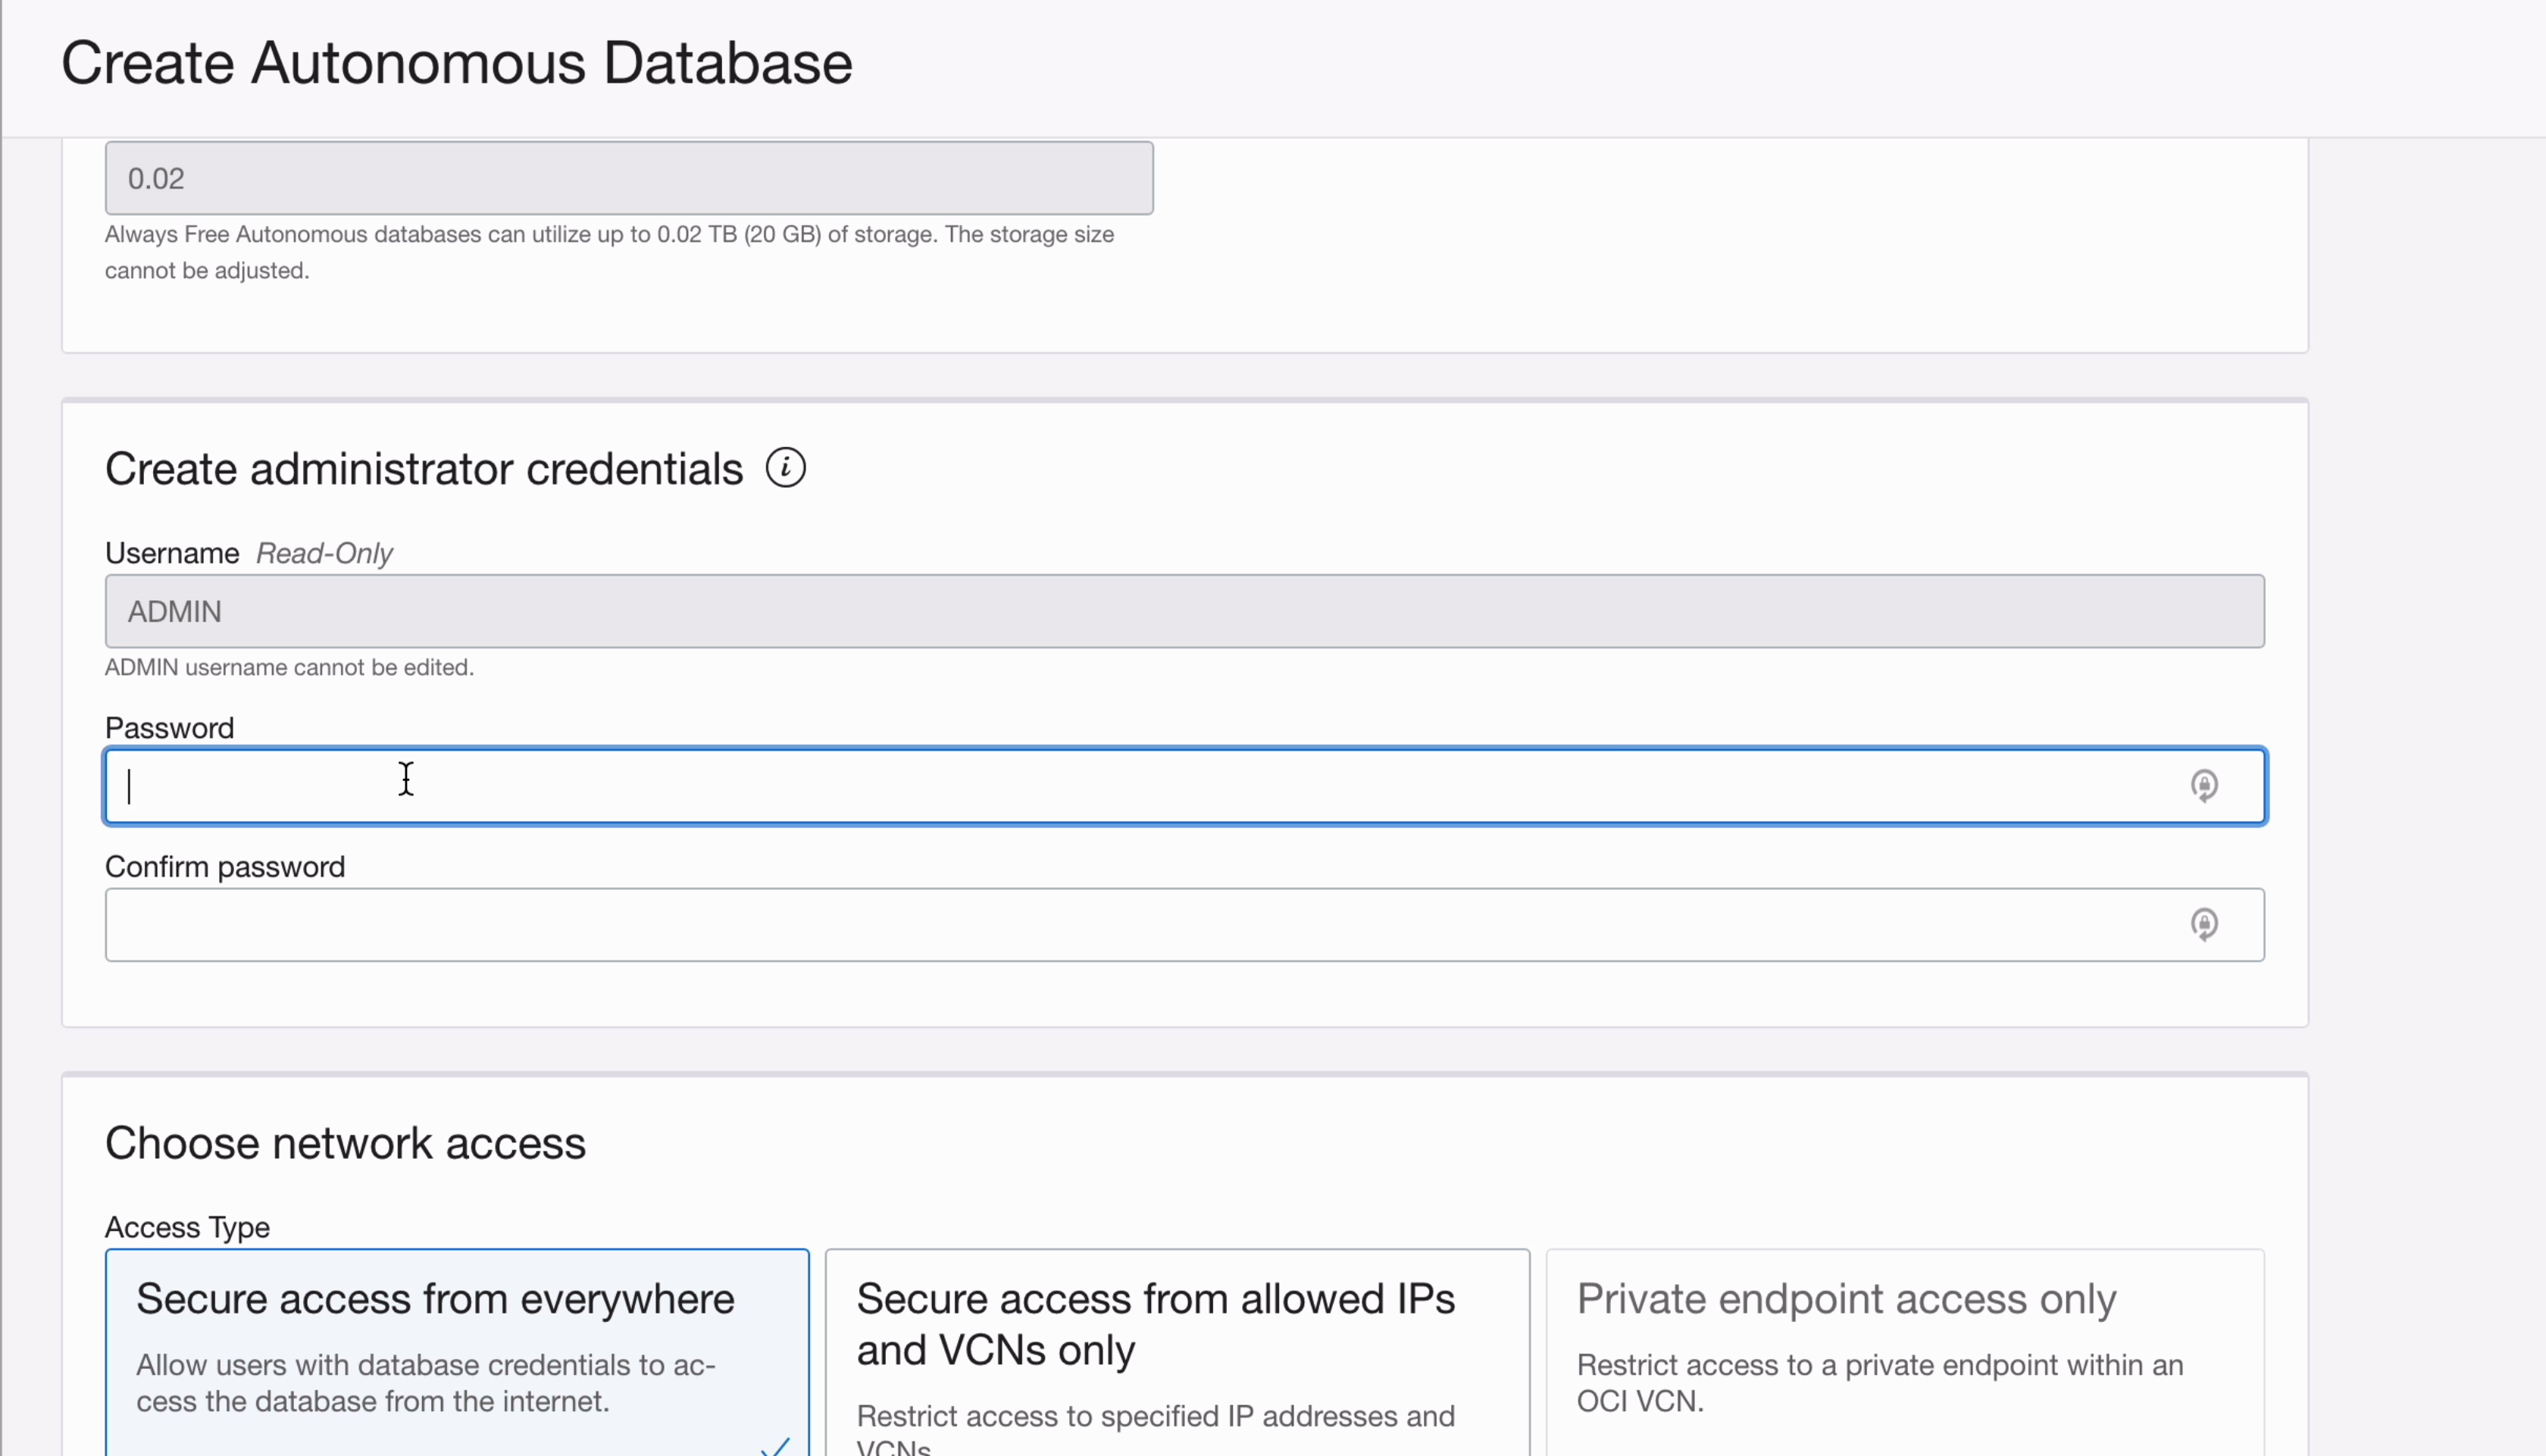
Leave the default selections of “secure access from everywhere” and “license included”
Step 9: Finally, click “Create Autonomous Database” at the bottom of the page.
The database will start being created and will show an orange Provisioning icon here.
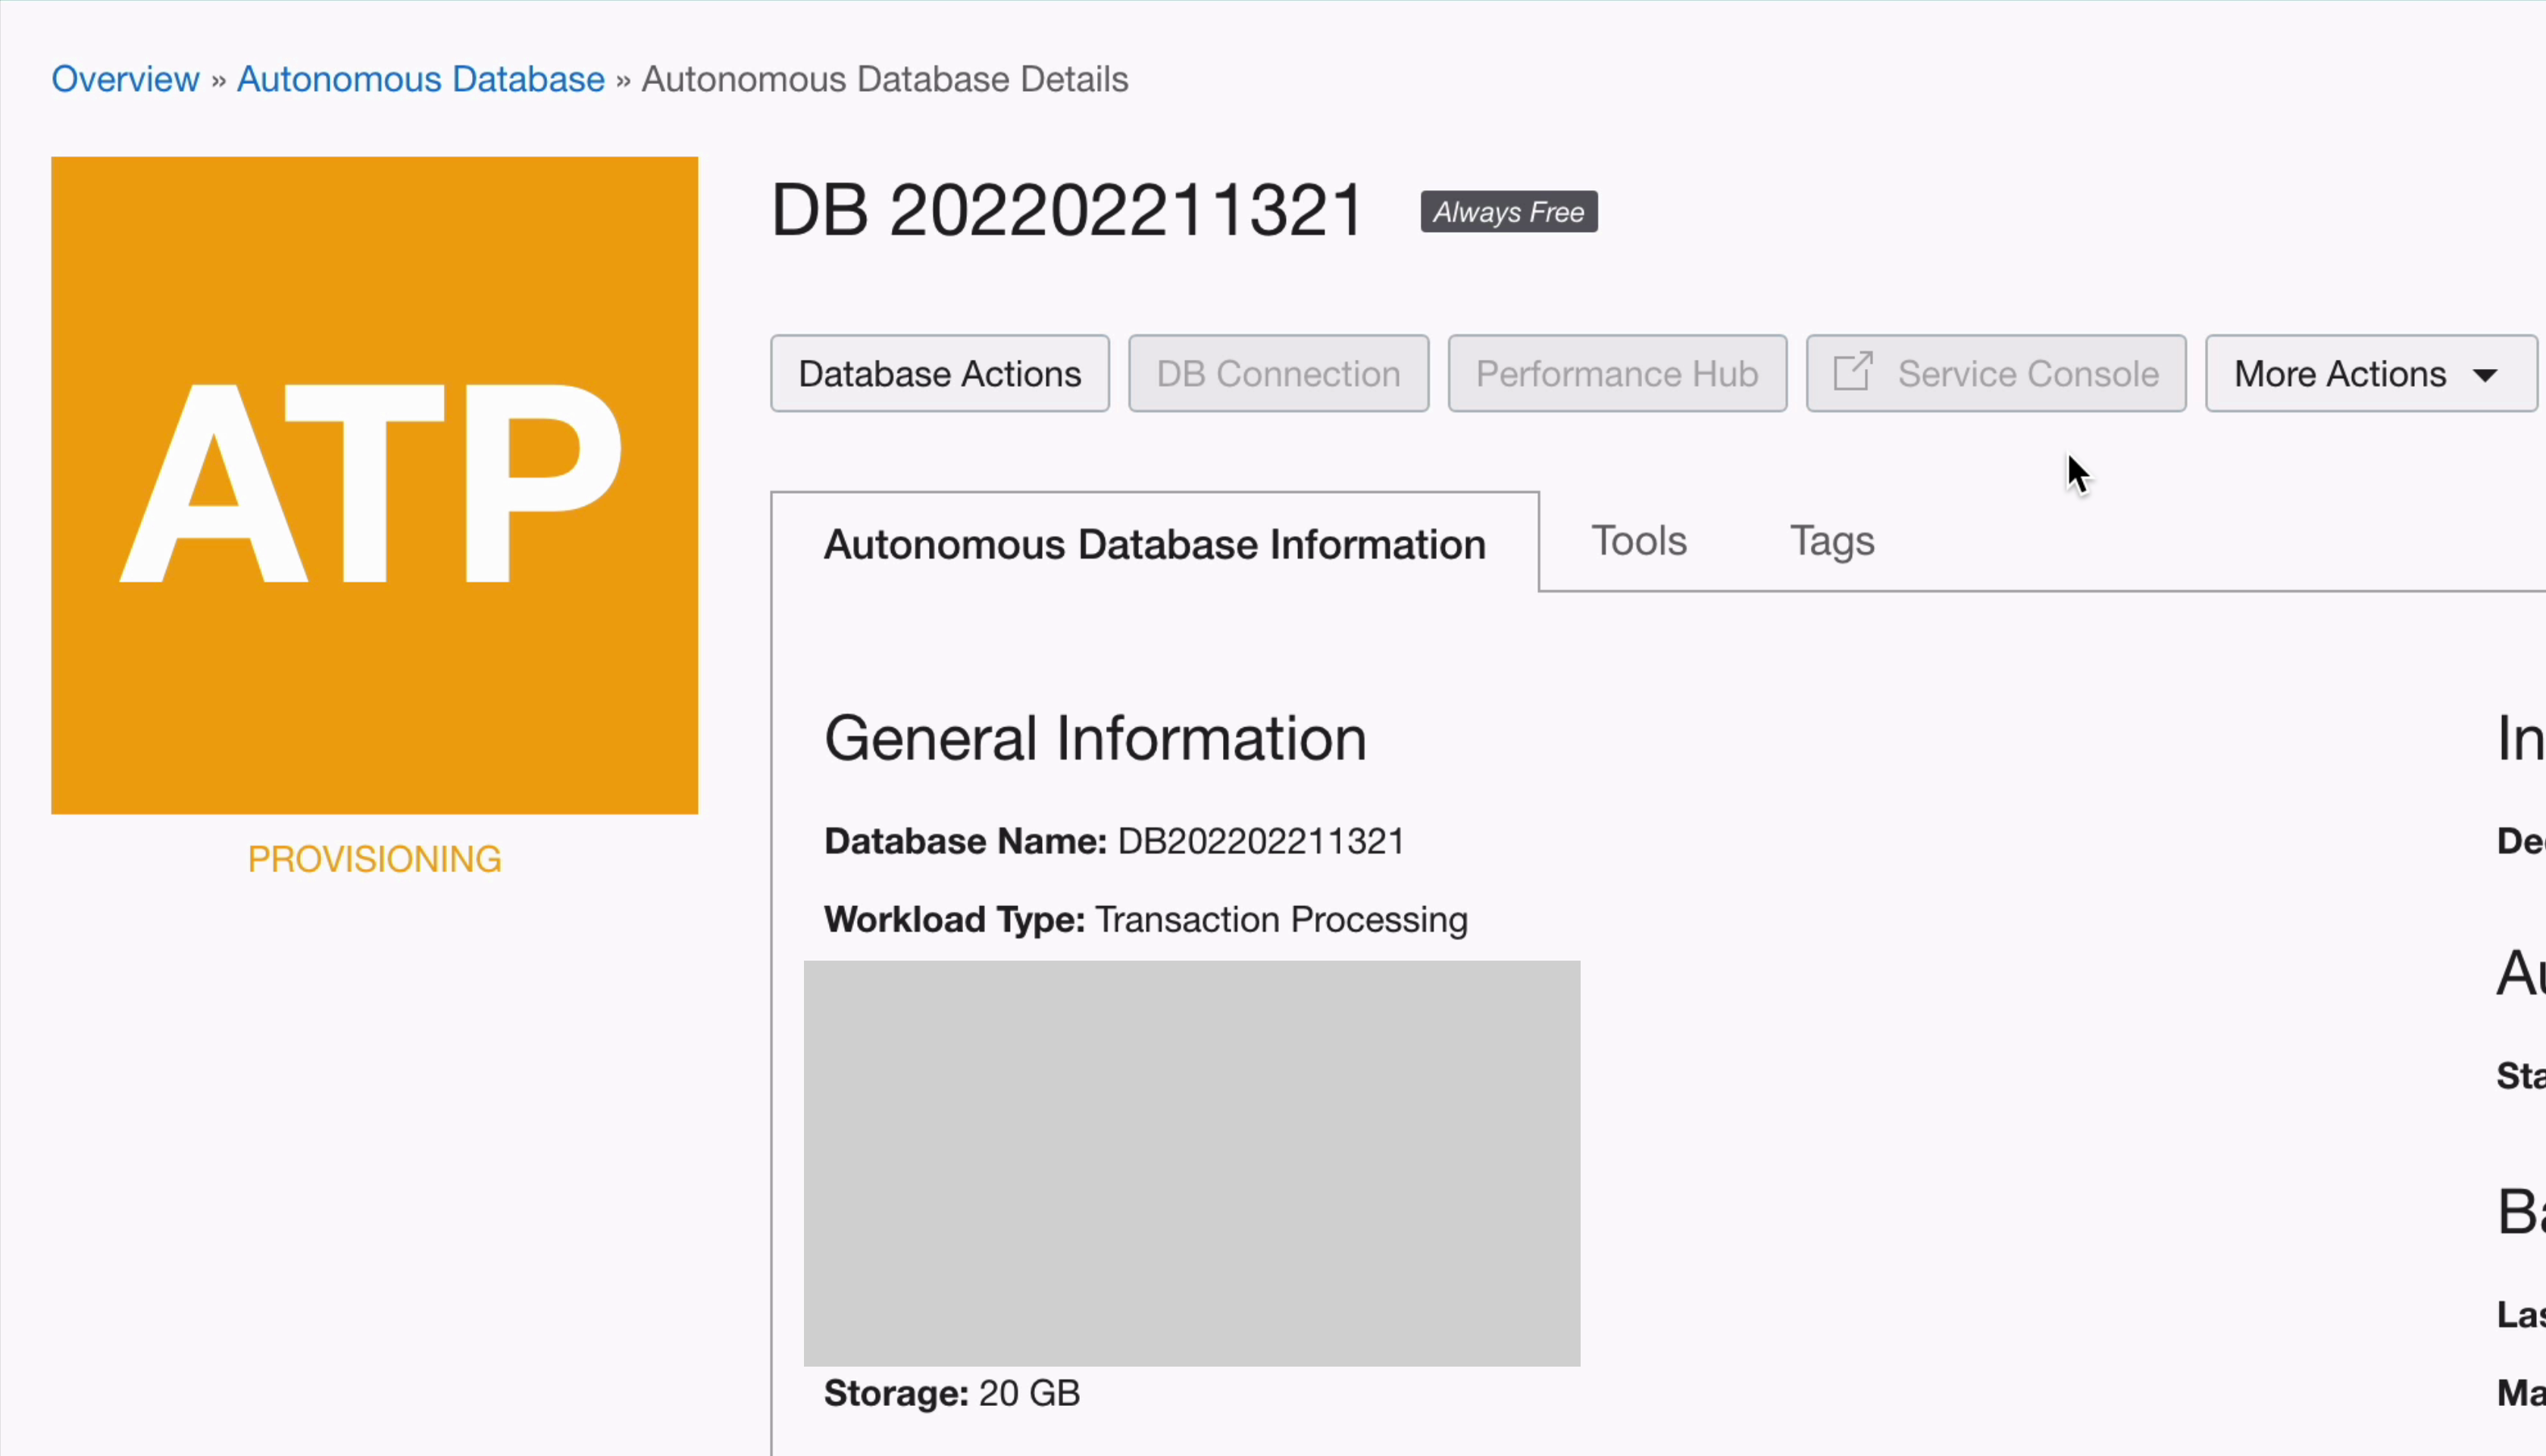
About a minute later, it will change to a green Available icon.
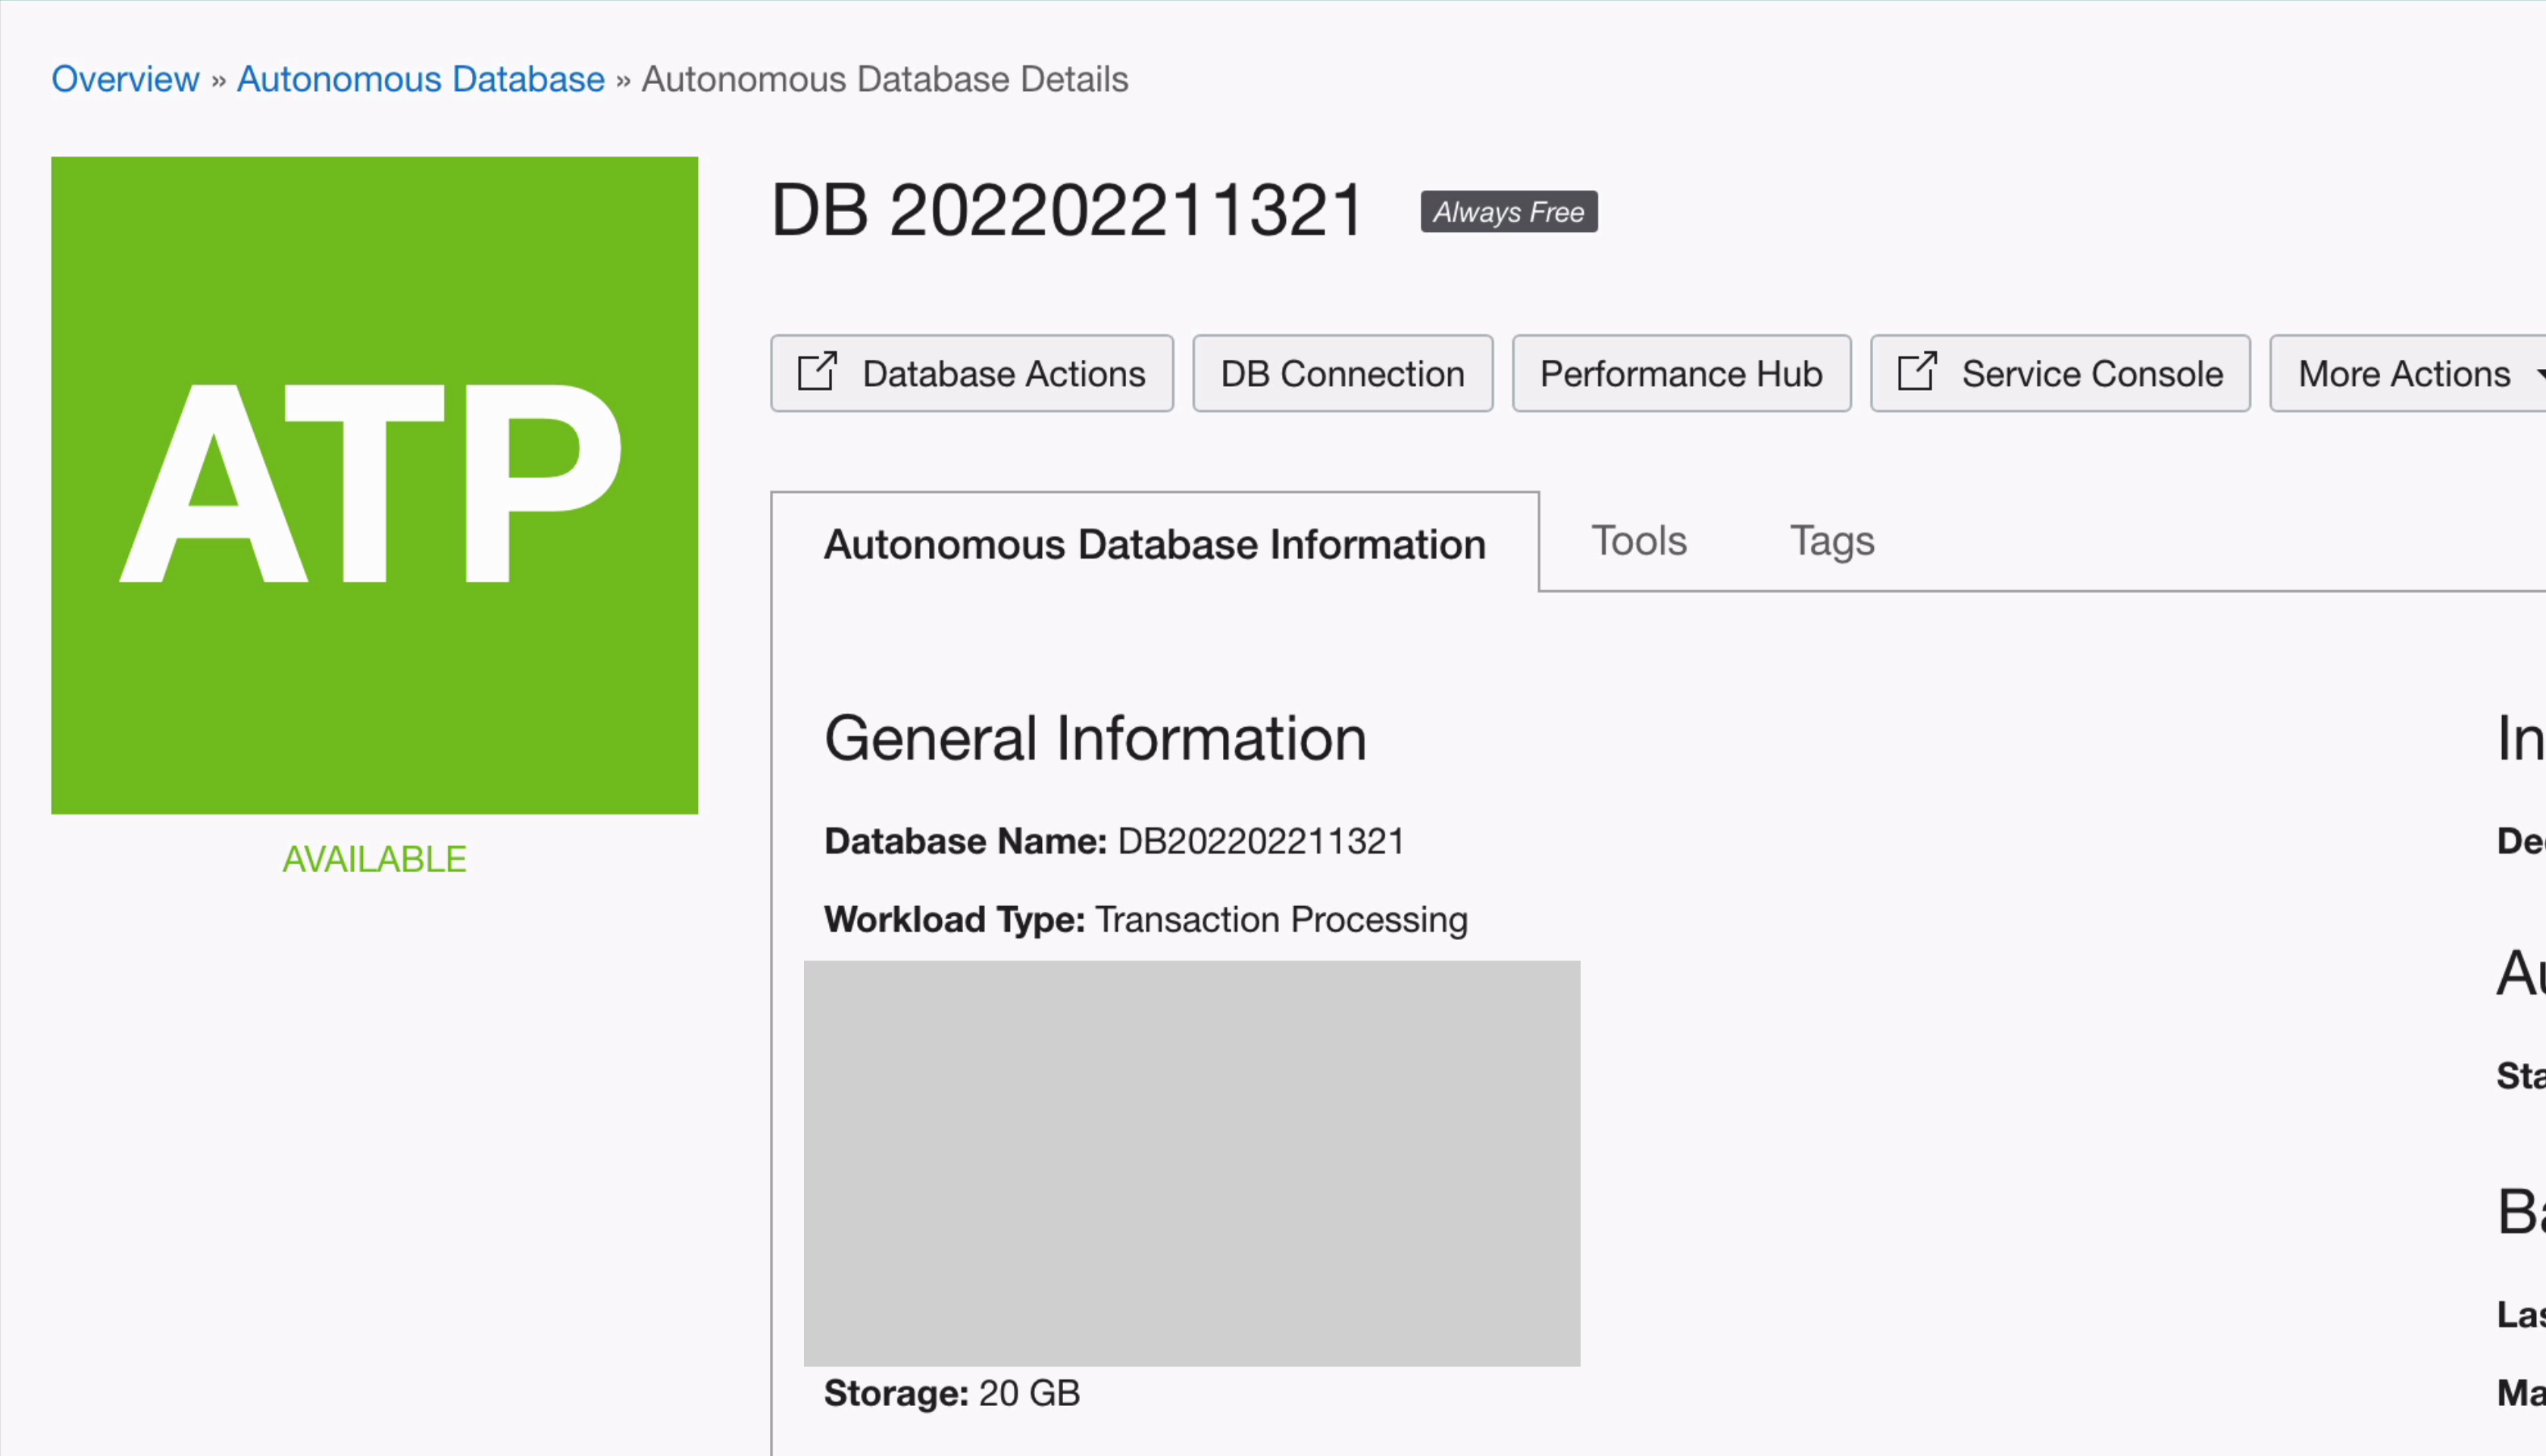
The database is now created!
Create a Wallet
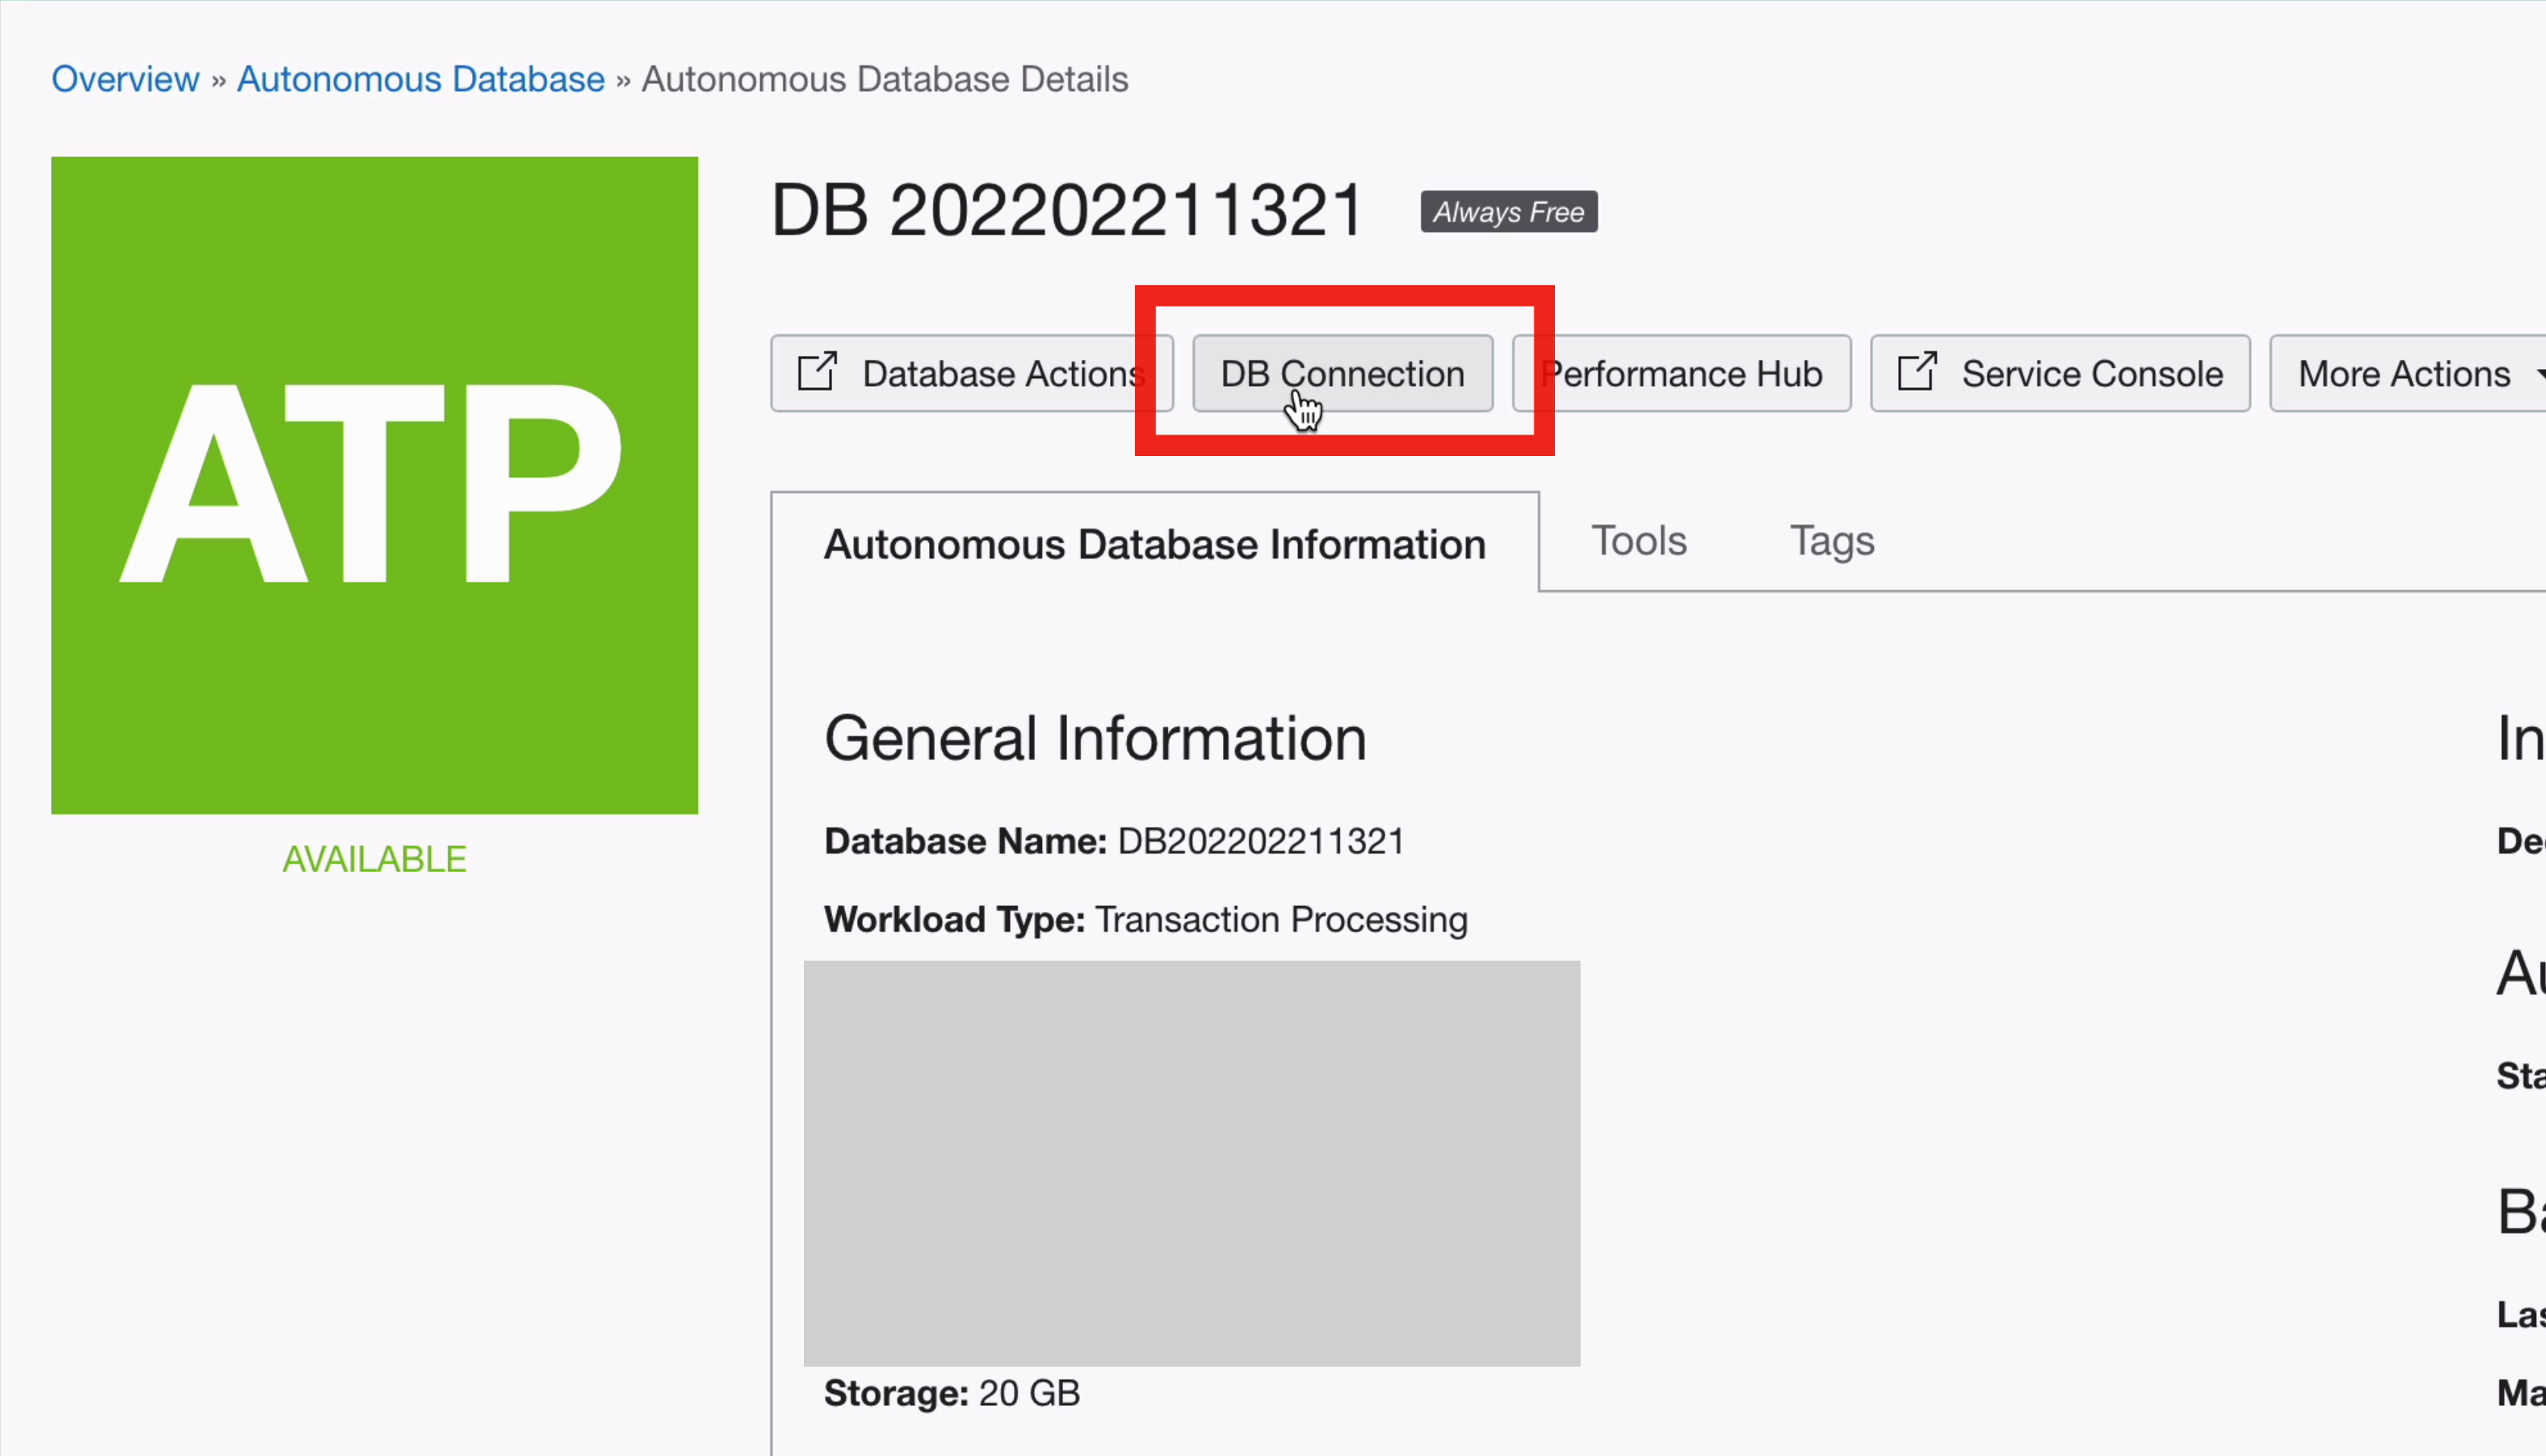
The next step is to connect to it. In order to connect to the Oracle Cloud Free Tier database from a tool like SQL Developer, we need to create something called a wallet.
Step 1: Click on the DB Connection button here at the top.
A new window will open.
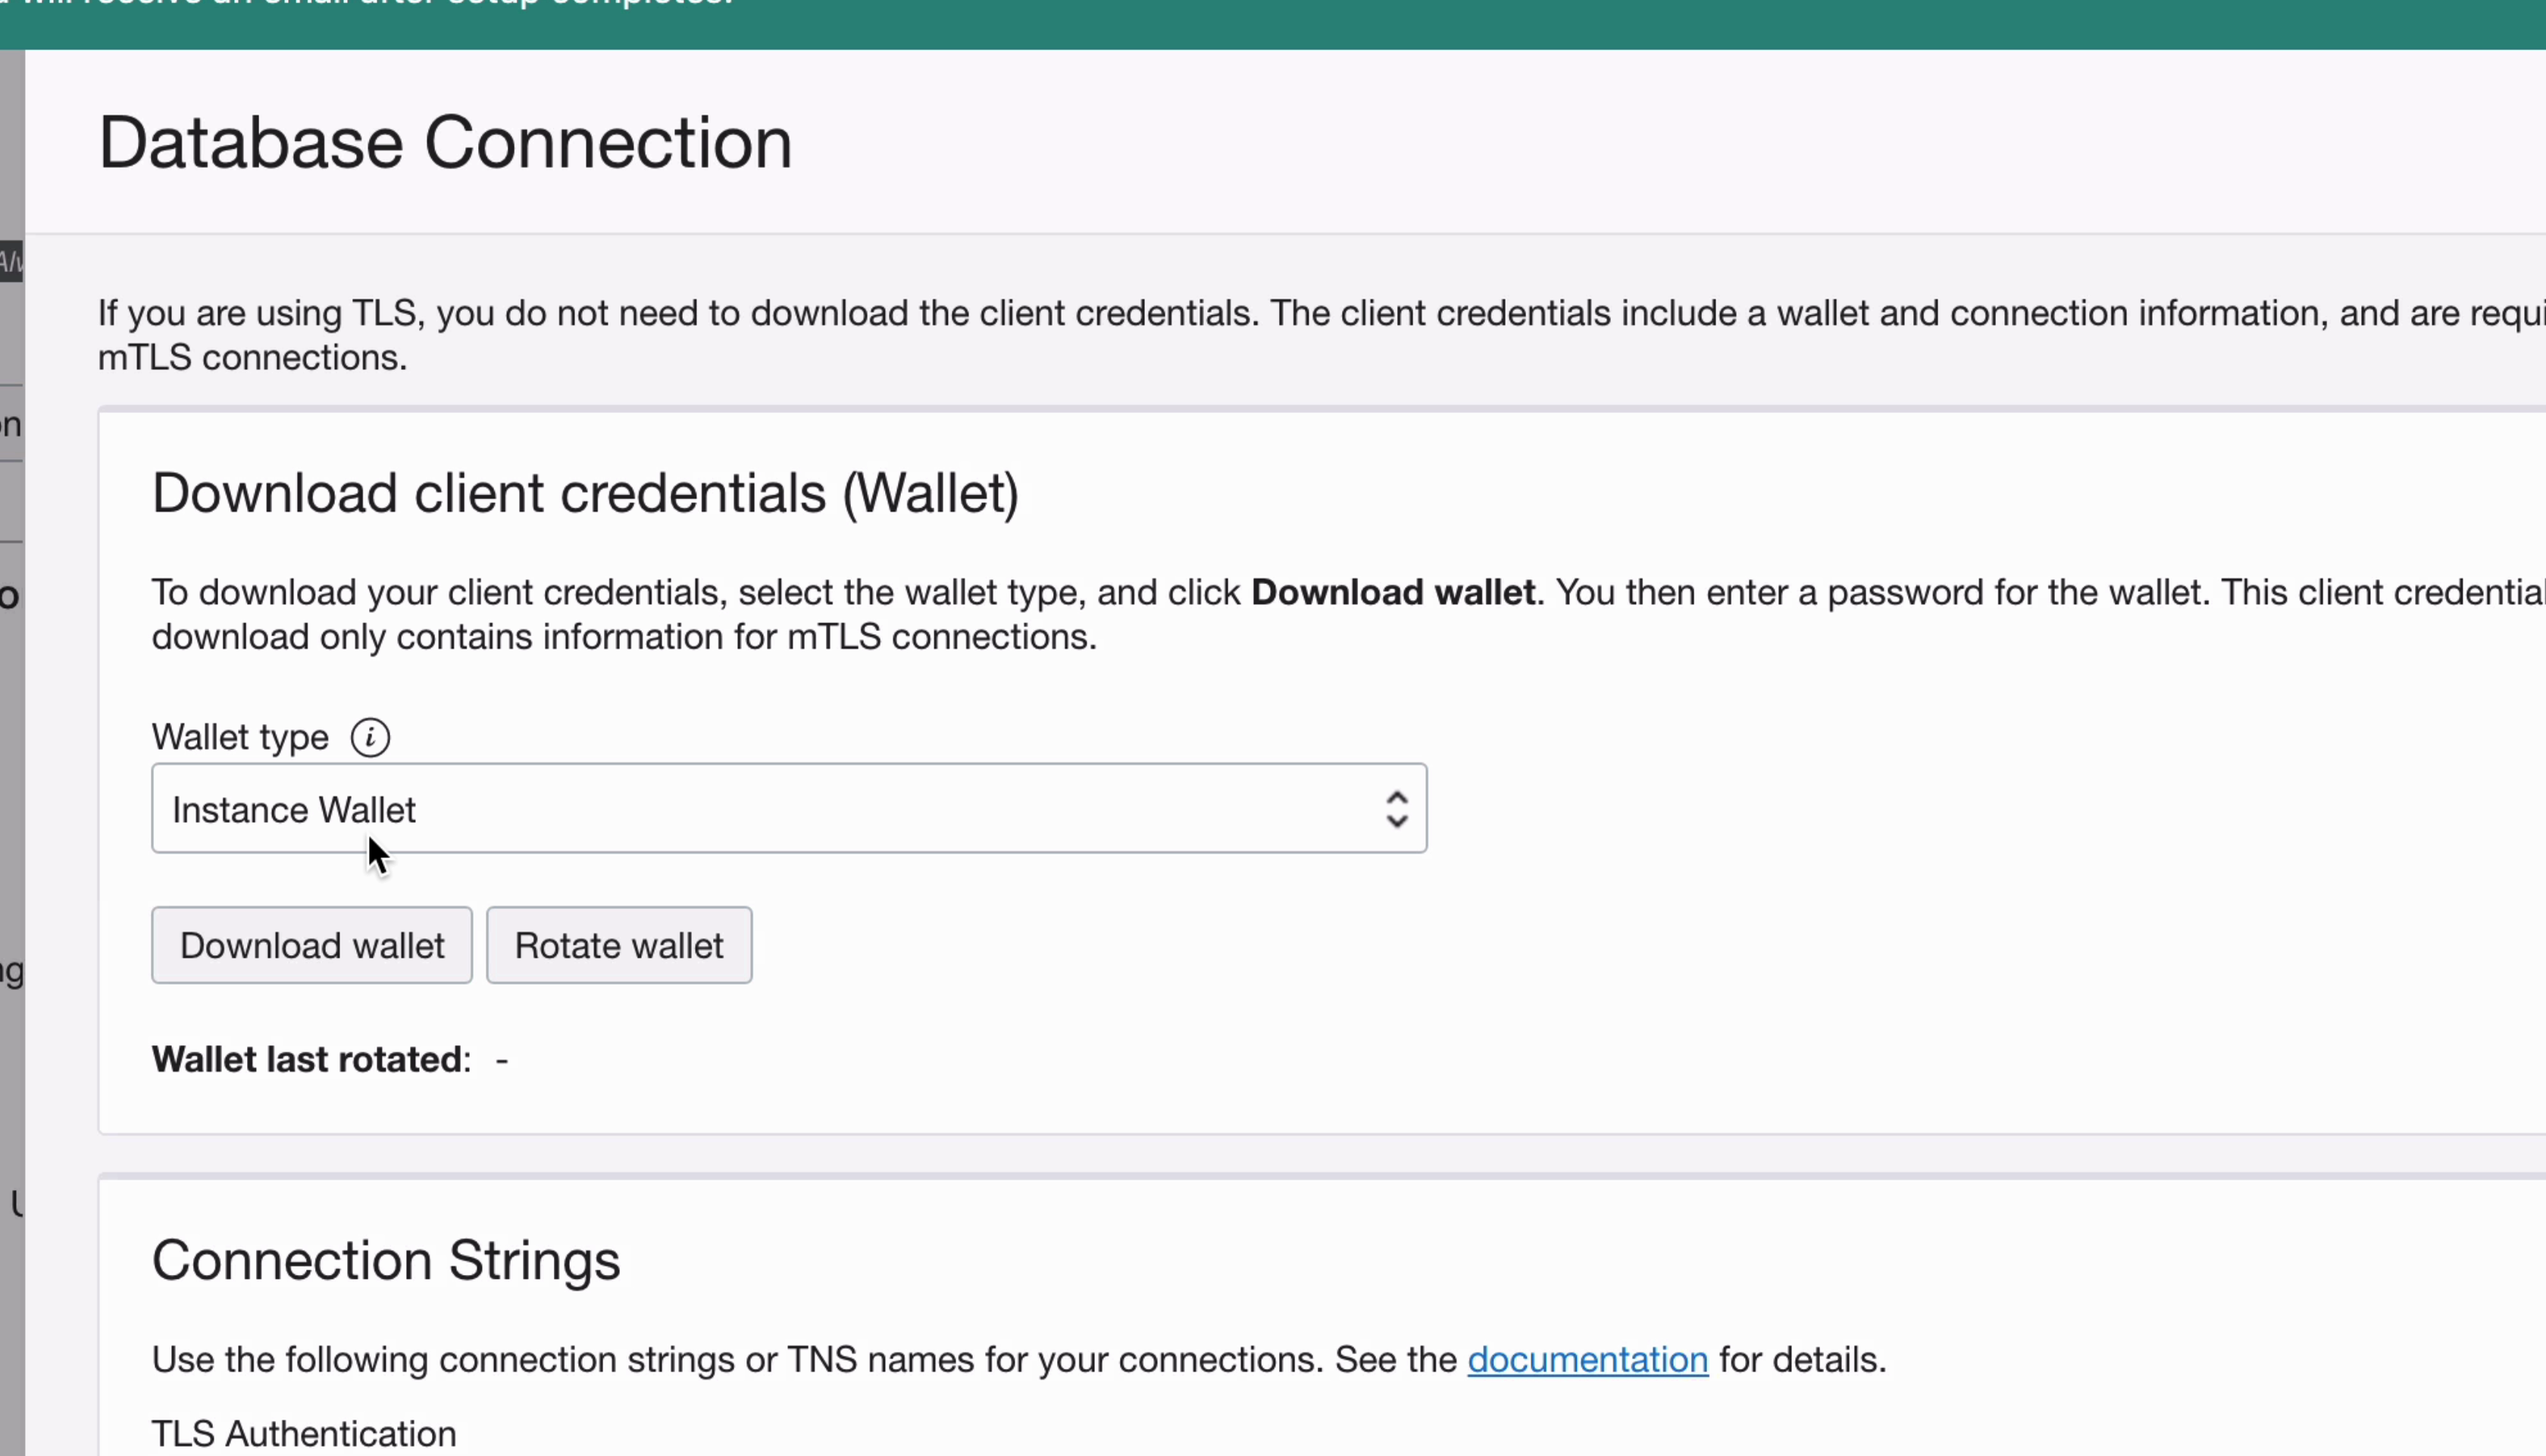
The wallet type here can be left as “instance wallet”.
Step 2: Click “Download Wallet”.
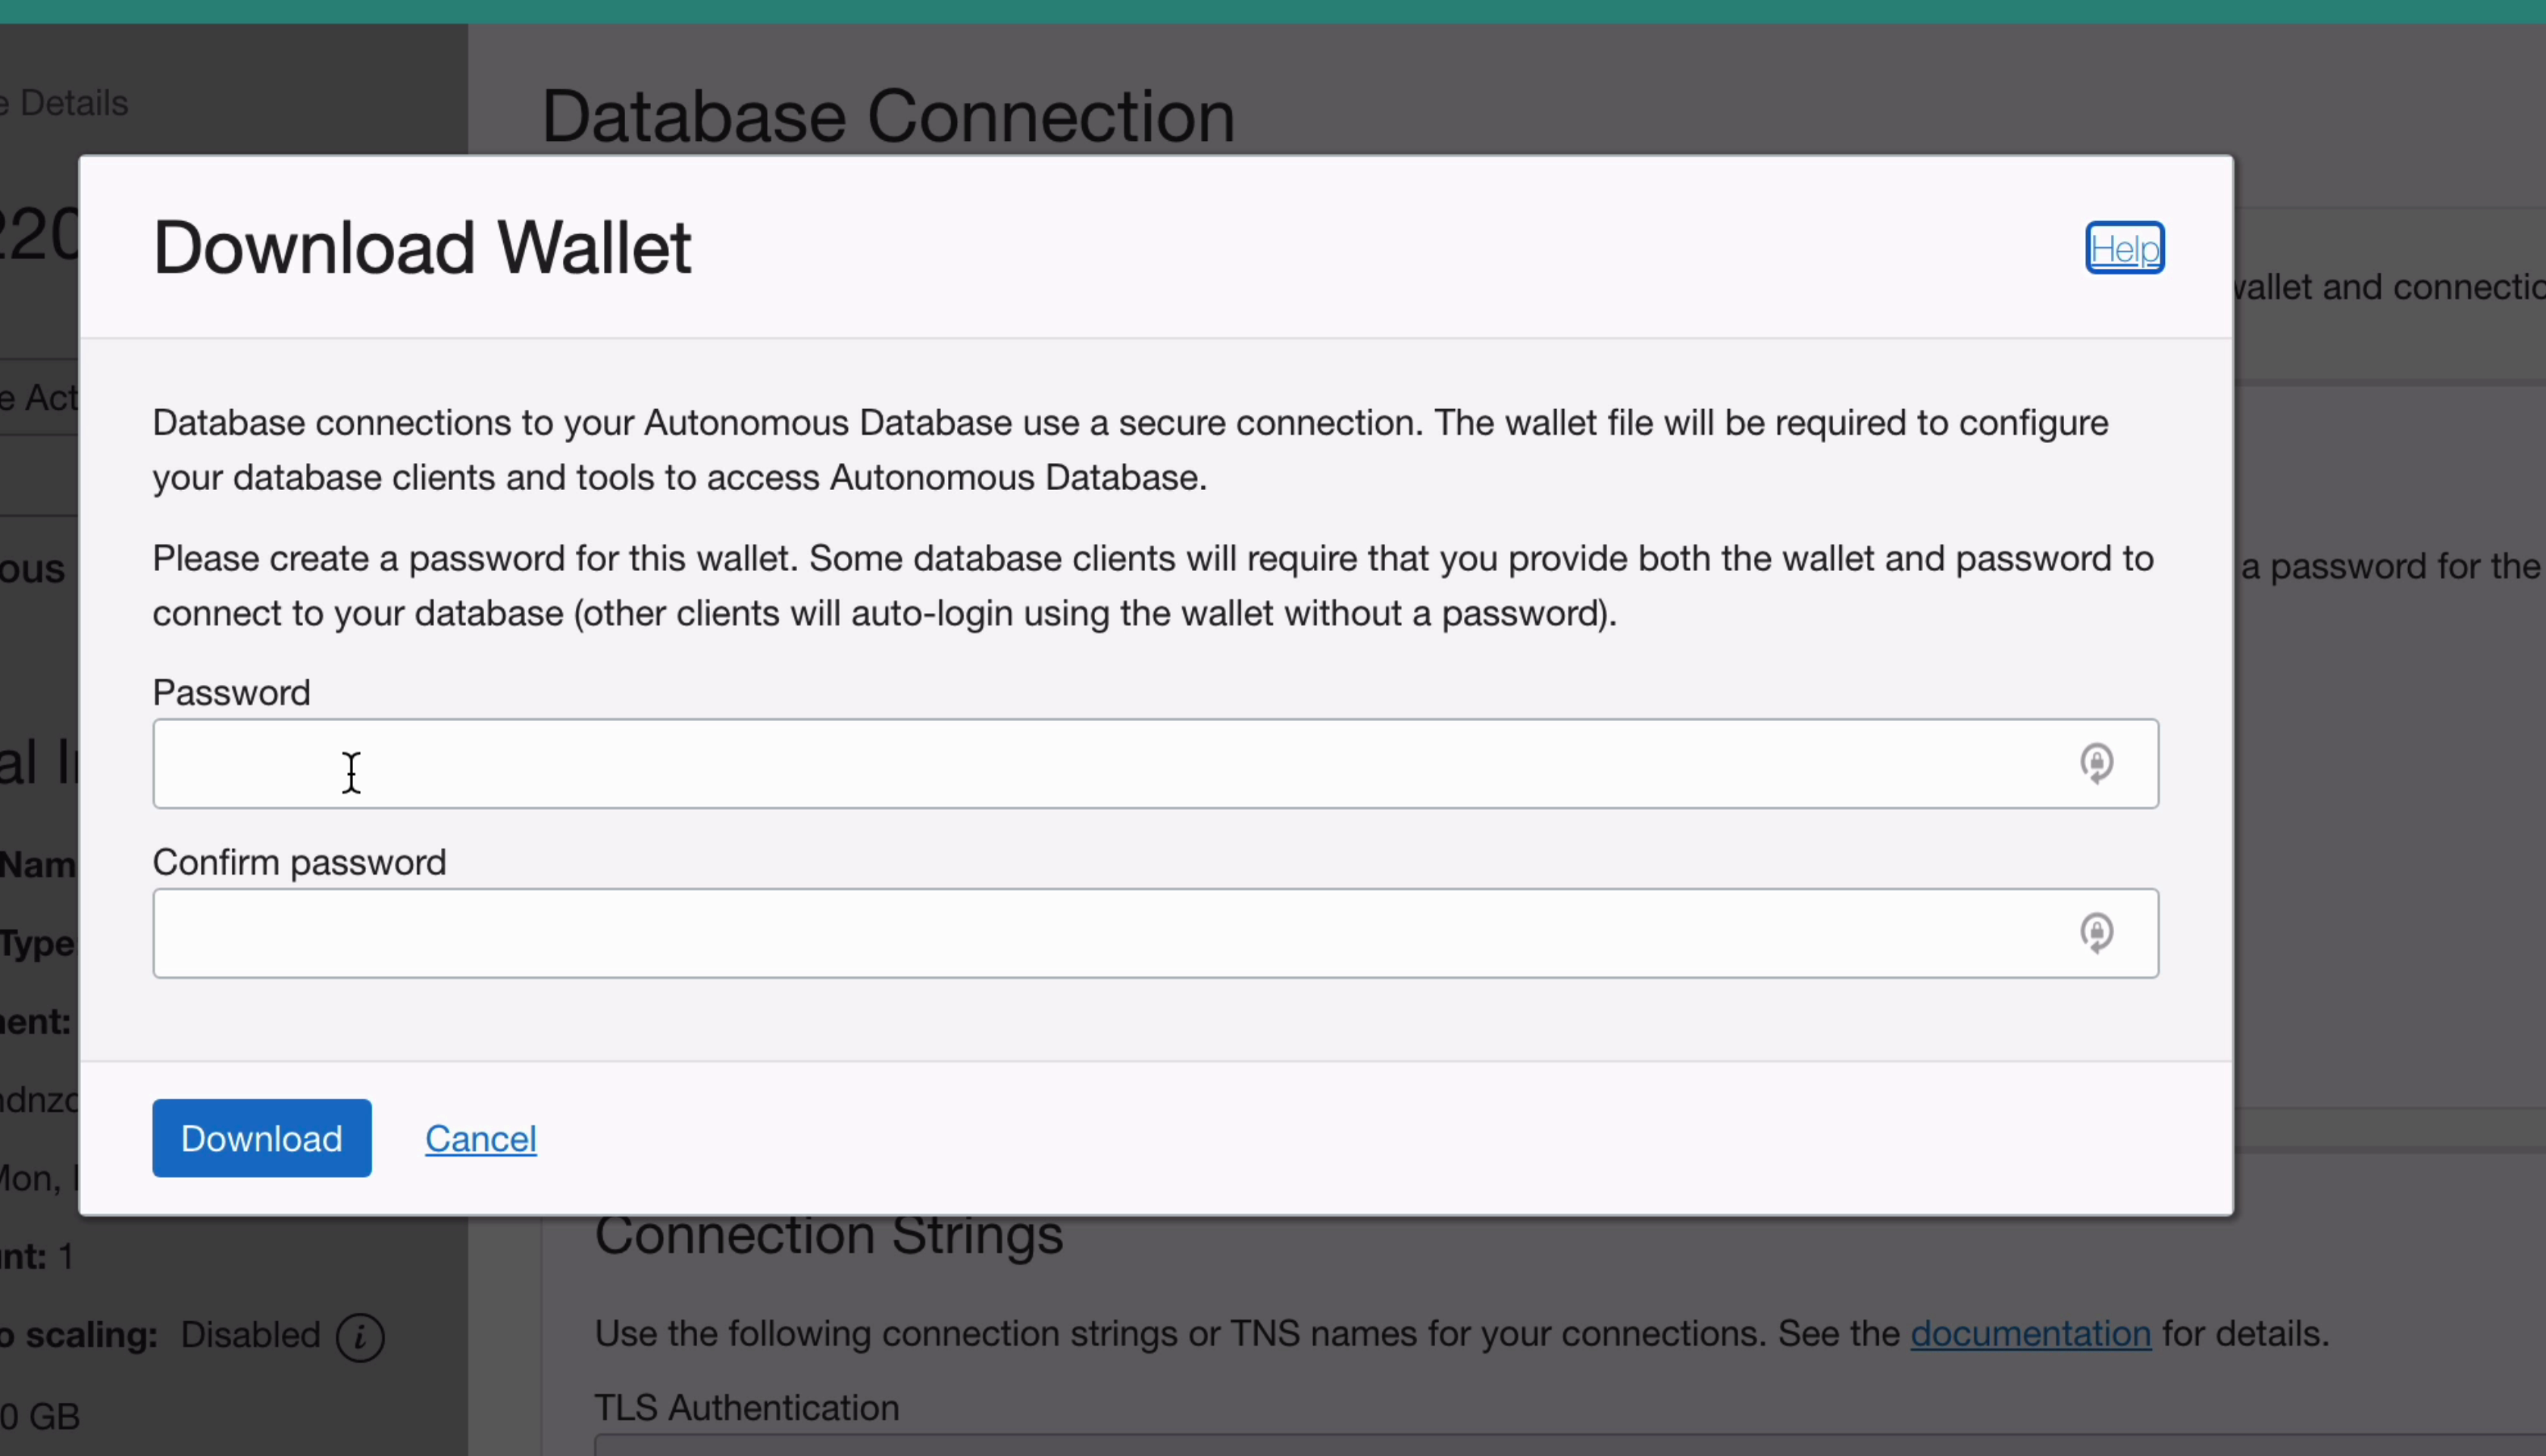
Step 3: Enter a password for this wallet. This is a new password, different from your Oracle Cloud account password and your database admin account password. It's used in some IDEs to be able to log in and use the connection.
Step 4: Once the password is entered, click Download. A ZIP file is generated and you're prompted to download it. Save it somewhere on your computer.
Connect to the Database
Now that our Oracle Cloud Free Tier database is created and we've created the wallet, we can connect to the database using SQL Developer.
Step 1: Open SQL Developer on your computer. If you don't have it installed, you can download it pretty easily from the Oracle website. I've written how to install it here: SQL Developer Resources
Step 2: Click on the green plus icon to create a new connection, or click the arrow next to it and select “New database connection”. We don't want to select “New cloud connection” because that's for a different service.
The new connection window will appear.

Step 3: Enter a name for your new connection. I've entered Oracle Free Cloud.
Step 4: Enter a username of admin, and leave the role as default.
Step 5: Enter the admin password that you provided on the database creation page. This is not the wallet password you just created.
Step 6: Select Save Password if you want the password to be saved on the connection.
Step 7: For the connection type, select Cloud Wallet.
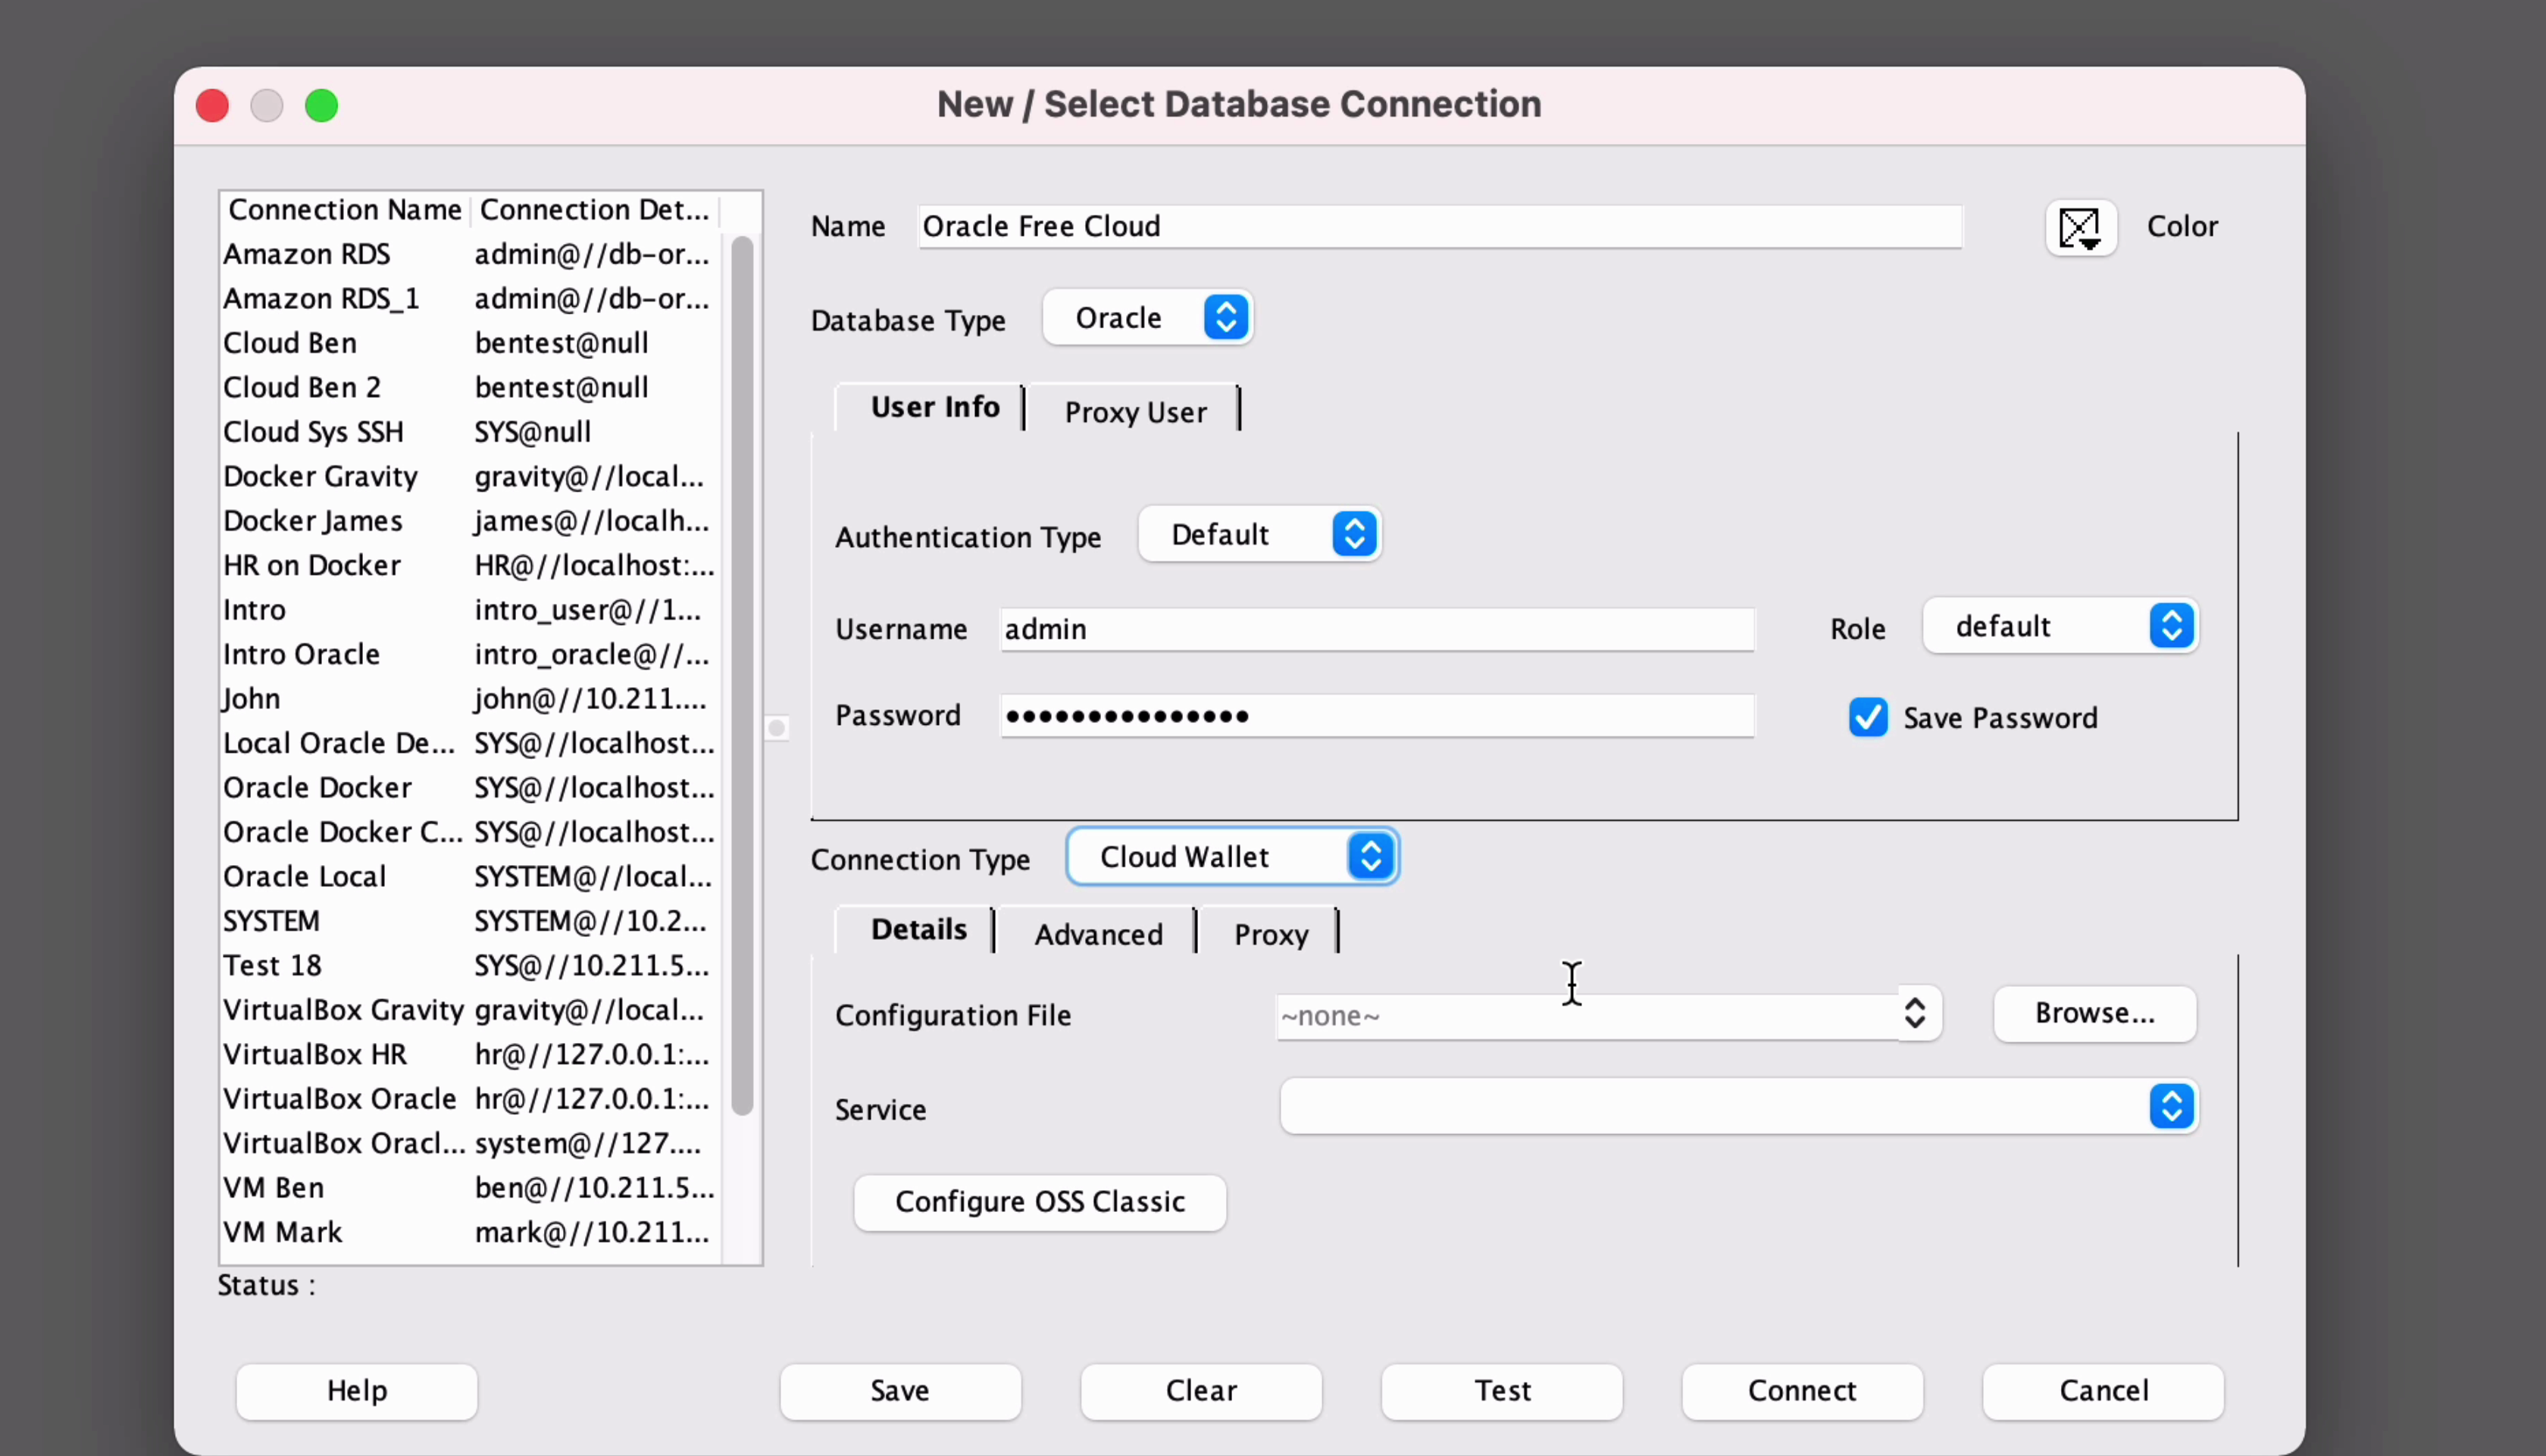
Step 8: Then, click on Browse, and select the ZIP file that was downloaded from the Oracle website when you created the wallet.

Step 9: Now, click on Test.
If all goes to plan, this should say Success after a couple of seconds. Your connection has worked!
Step 10: Click Save to save the connection, then click Connect.
If you get any error messages, ask about them in the comments below, or check out this post on connection errors.
Write Some SQL
A few seconds after you click Connect you'll see a new SQL editor connected to your database. We'll create a sample table and run a few queries to test it.
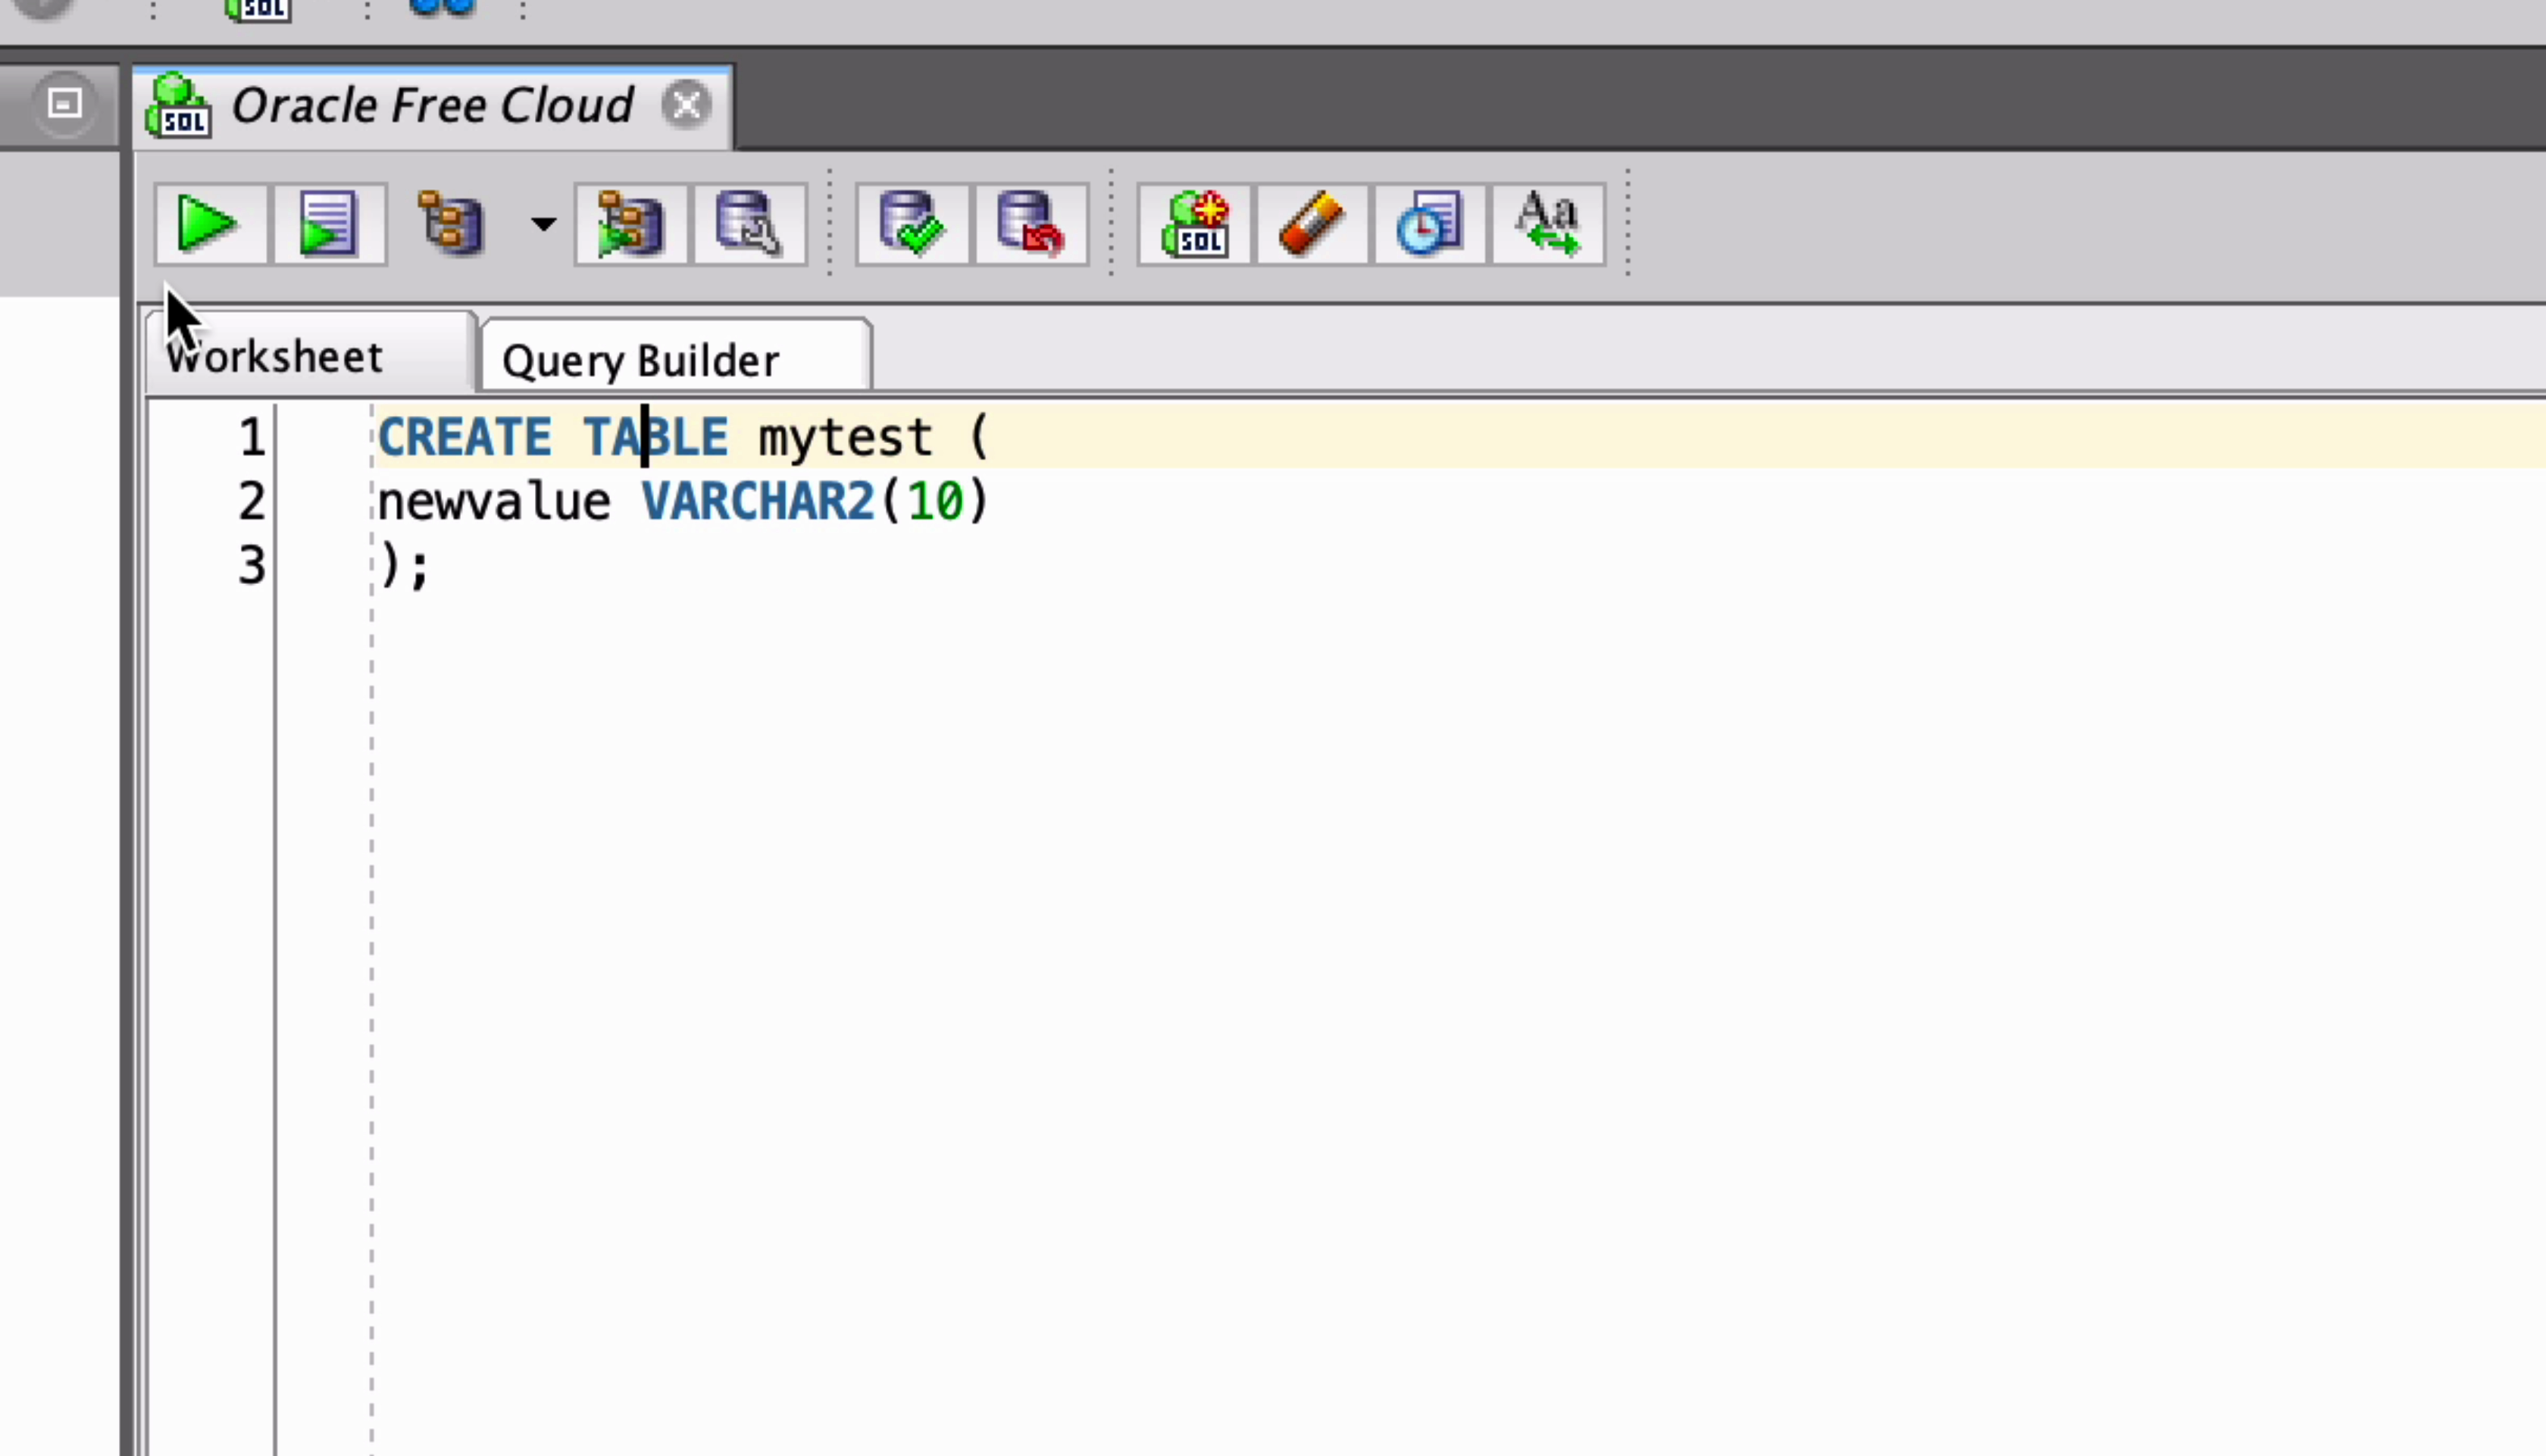
Step 1: We'll create a table called “mytest” with a single column called “newvalue”.
1CREATE TABLE mytest (
2  newvalue VARCHAR2(10)
3);
Step 2: Once you've written this statement, click Run. The table is created.
Step 3: Next, we'll insert a value into this mytest table of “Hello”.
1INSERT INTO mytest (newvalue)
2VALUES ('Hello');
Step 4: Run this statement and you should see “1 row inserted”.
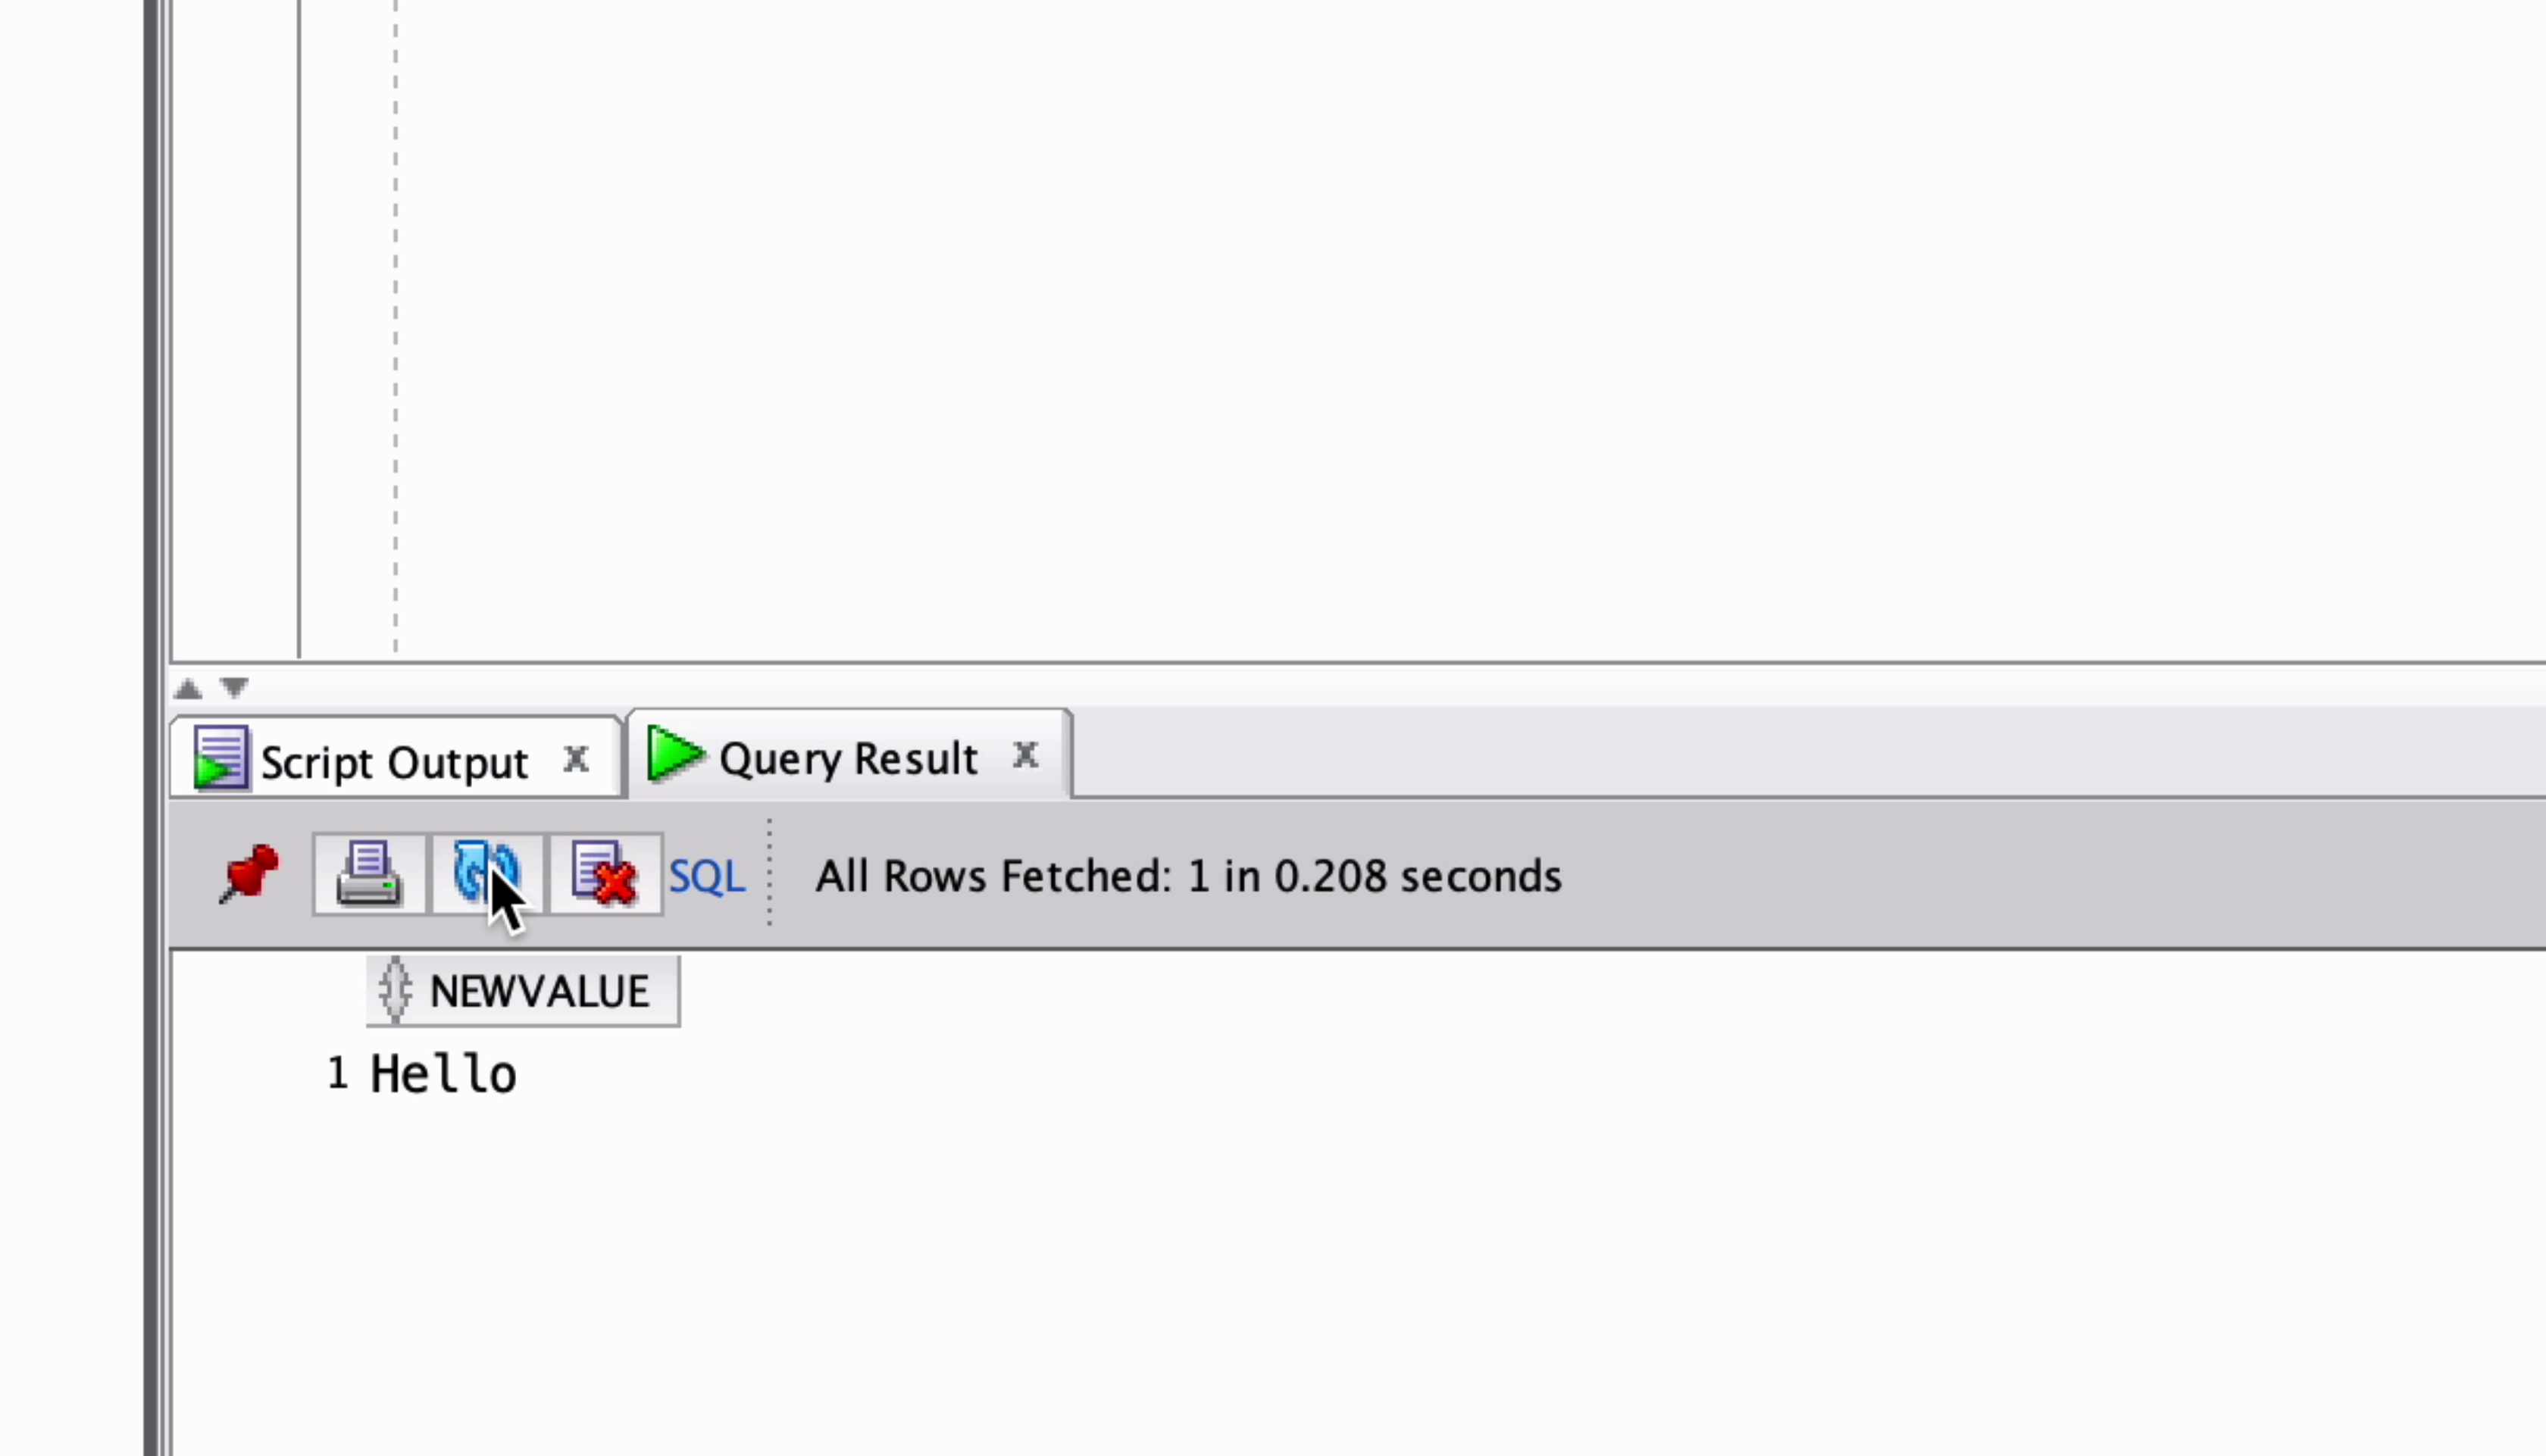
Step 5: Now, run a select statement on this table.
1SELECT newvalue
2FROM mytest;
You should see the output of “Hello” in the results section.
And that's the end of the tutorial!
You've successfully created a database on the Oracle Free Cloud service and connected to it using SQL Developer. You can then use this database to practice your SQL and create more tables and data.
Let me know in the comments what other articles you'd like to see on this Oracle Cloud Free Tier database.