How to Install MySQL on Mac using a DMG File
In this article, you'll learn how to install MySQL on a Mac using an installation package, otherwise known as a DMG file.
There are two ways you can install MySQL on a Mac. The first is using an installation file, or DMG file, which we will cover in this guide. The second is using a tool called Homebrew, which I've explained in another guide here.
(If you're using Windows, you can follow the process here to install MySQL on Windows.)
Let’s get started with downloading and installing it.

Step 1: Download the Installation Package
First, go to mysql.com in your favourite browser. This will open the MySQL website, which should look something like this:
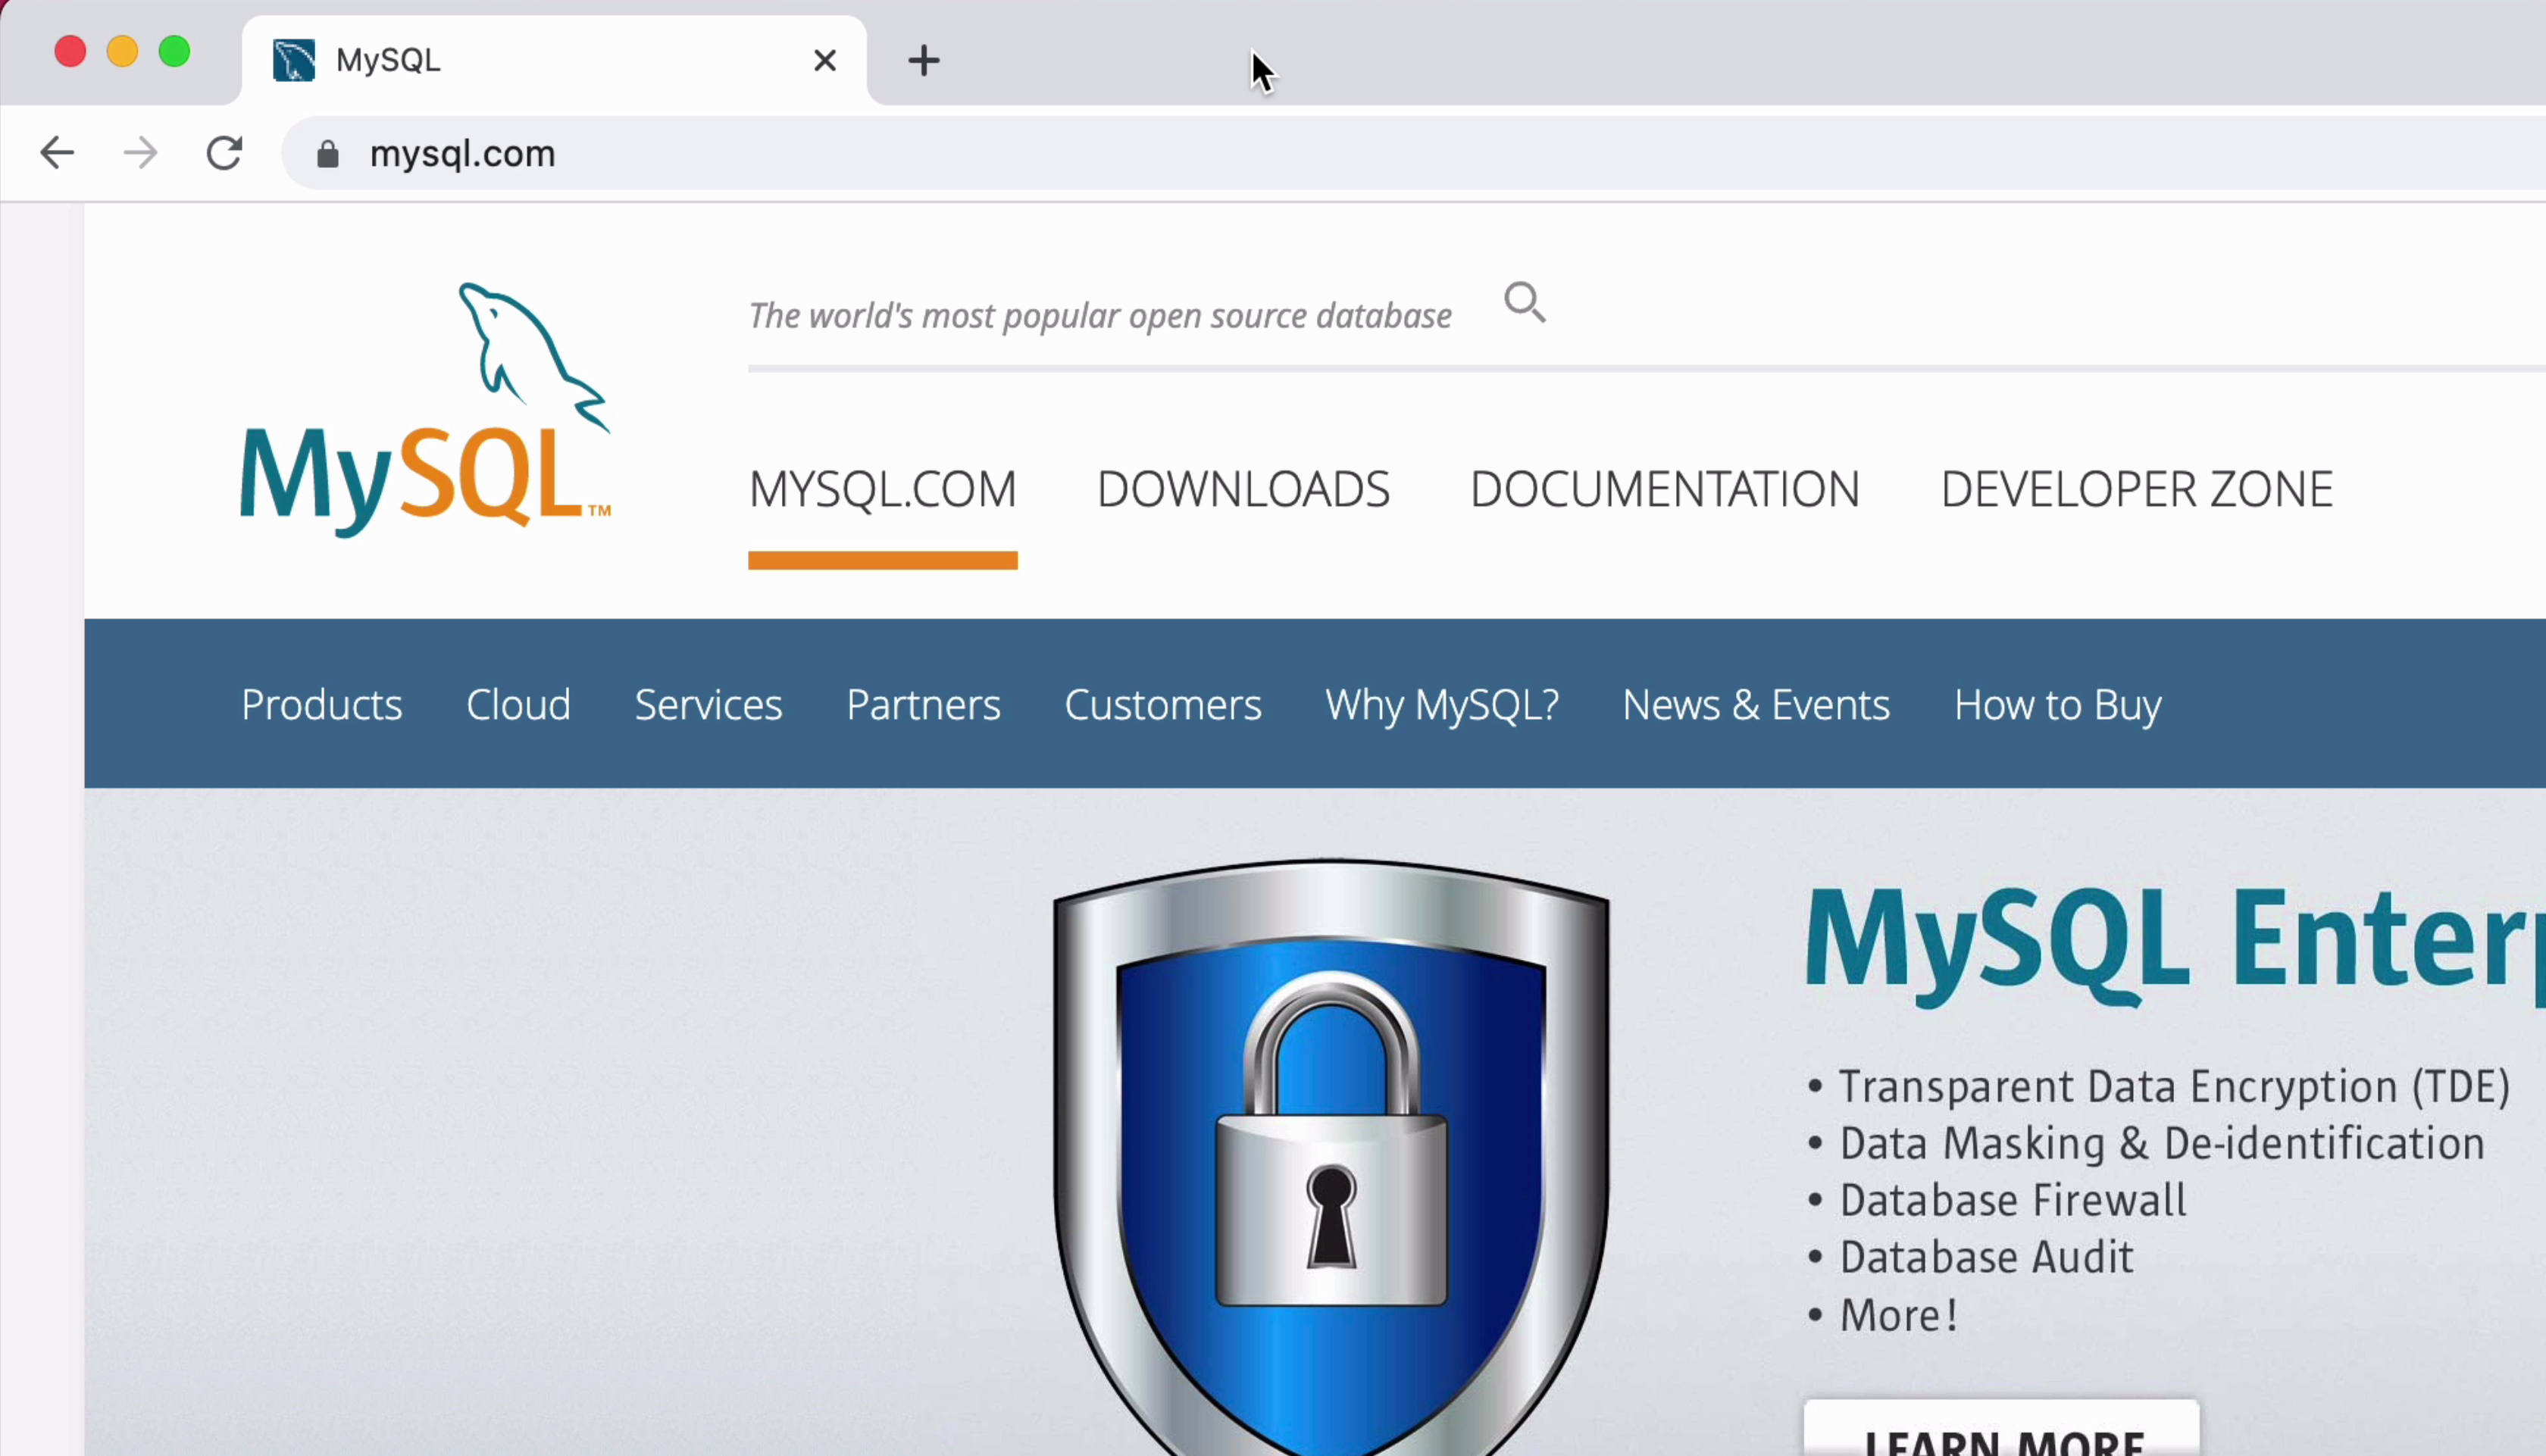
Once the page loads, click on the Downloads link at the top.
The downloads page will be shown.
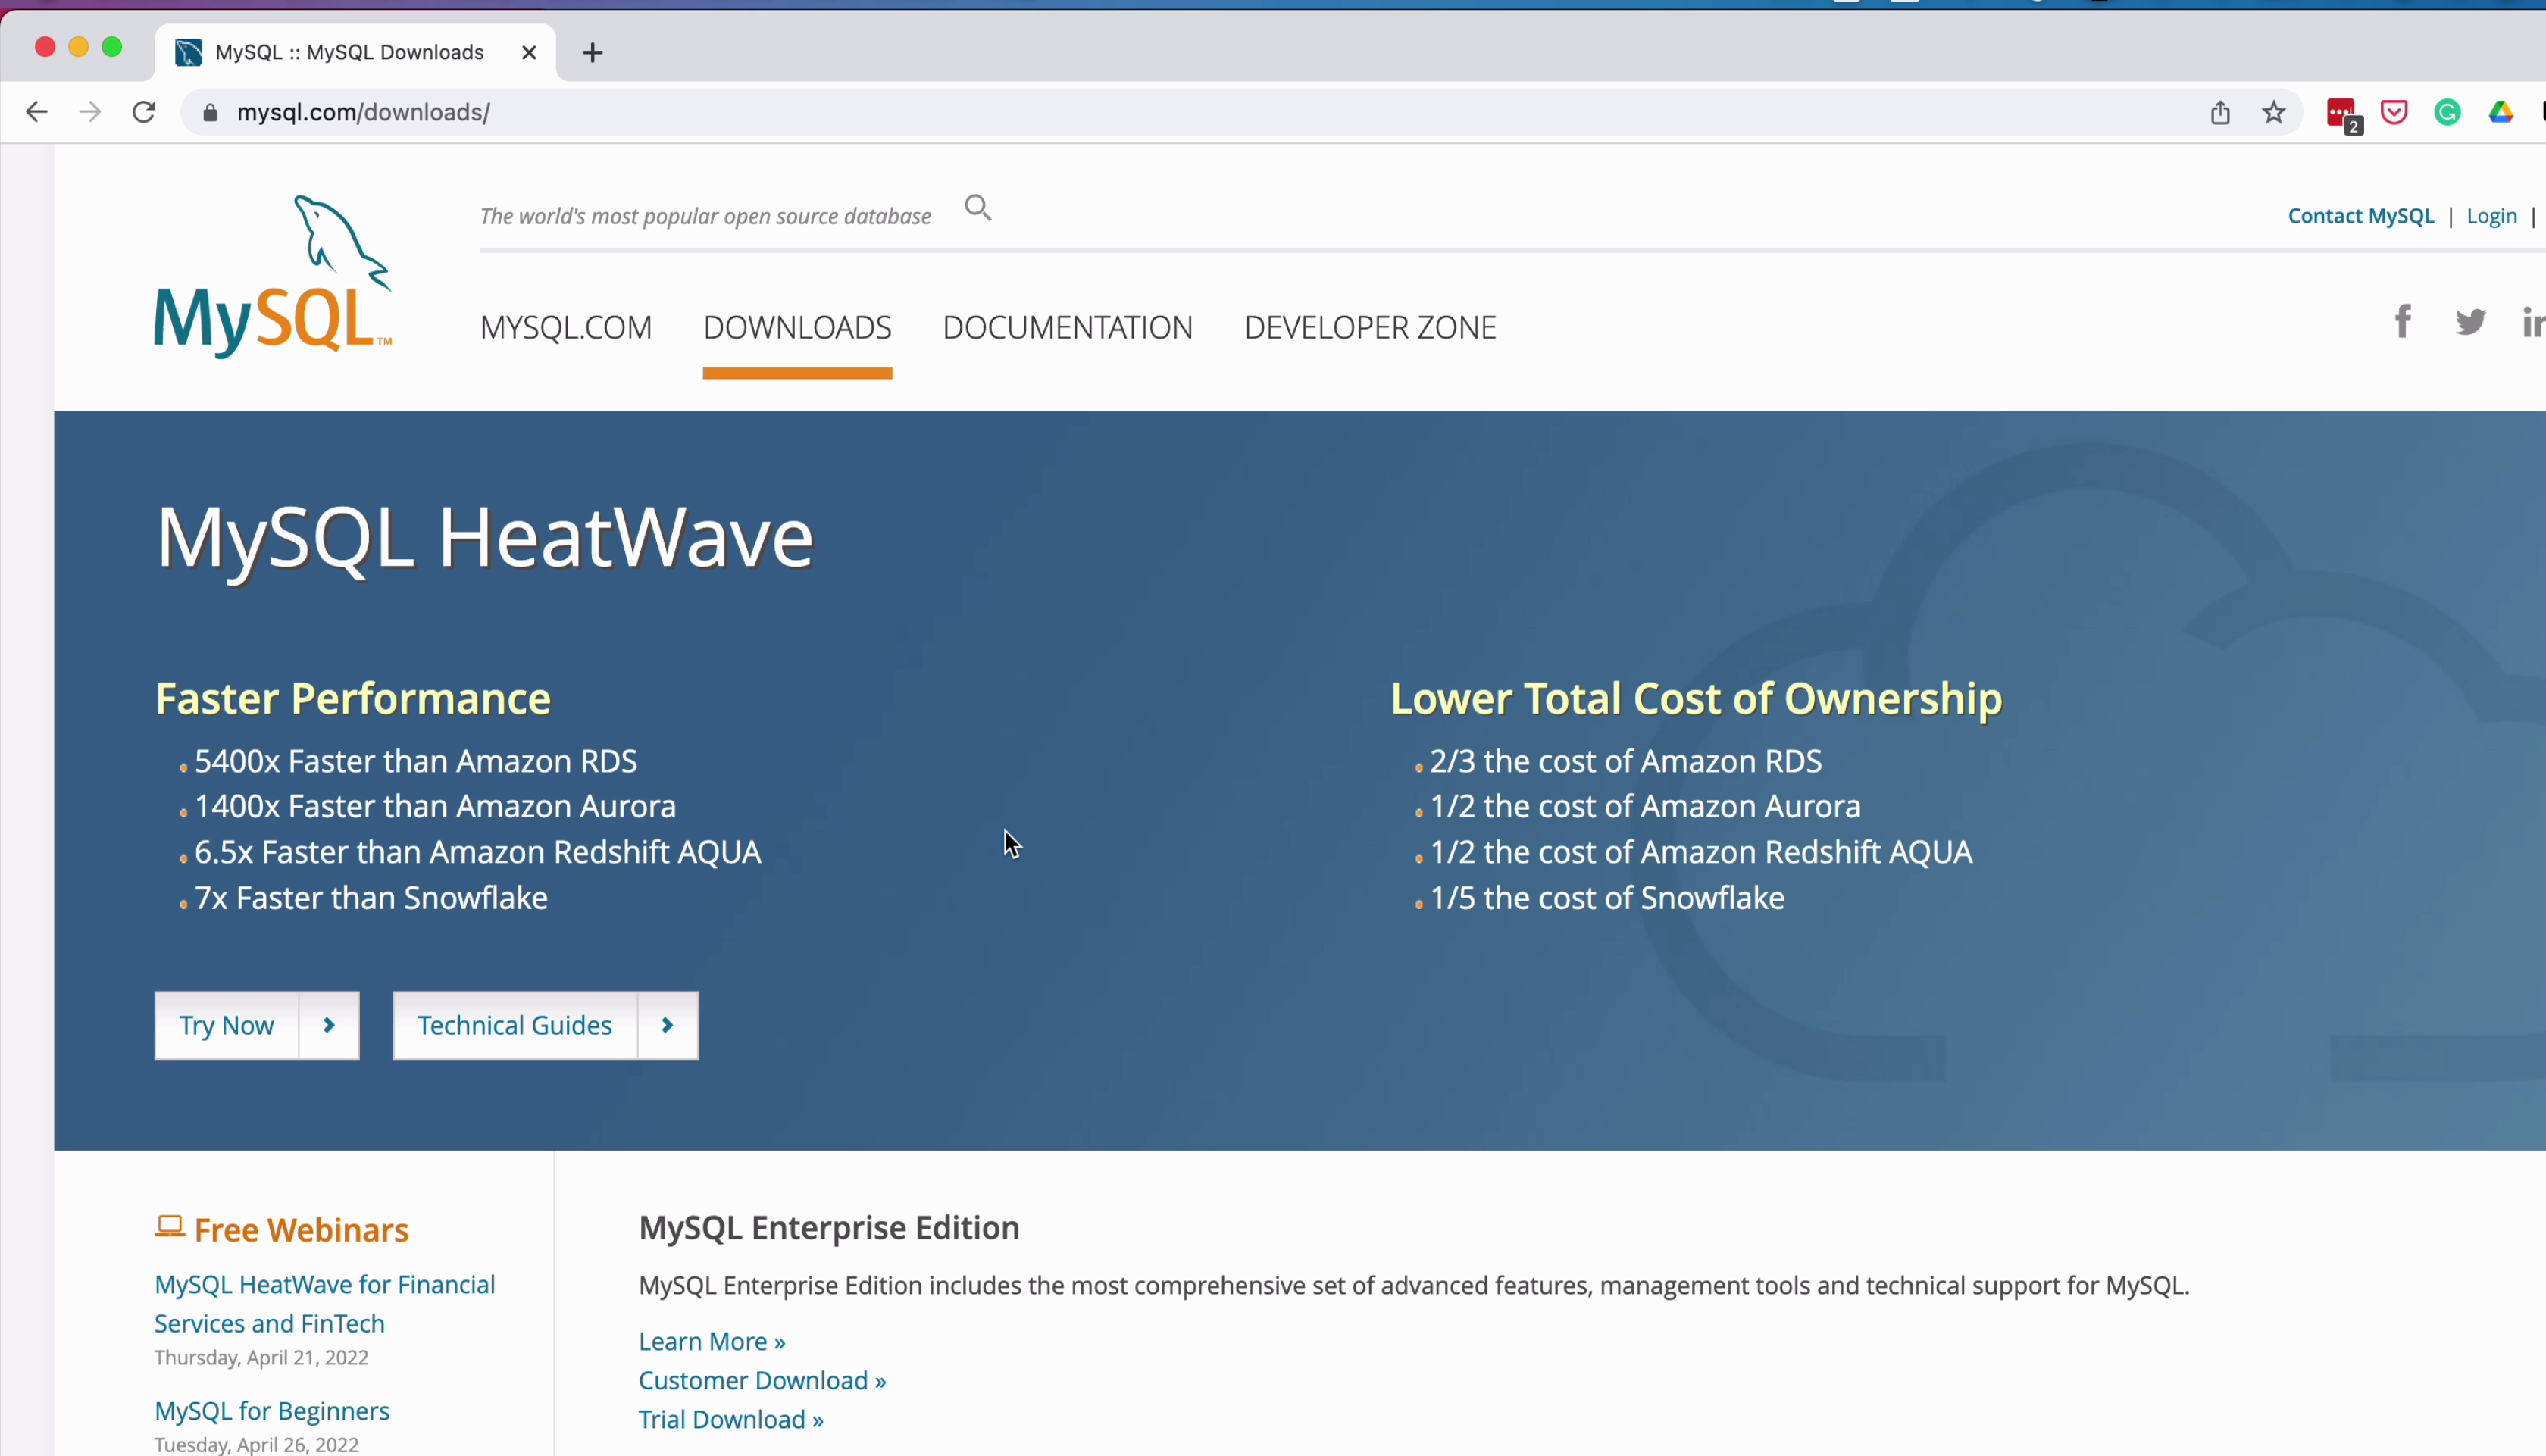
There are several different versions of MySQL. The one we want to download is the Community edition, which is free to use in many situations.
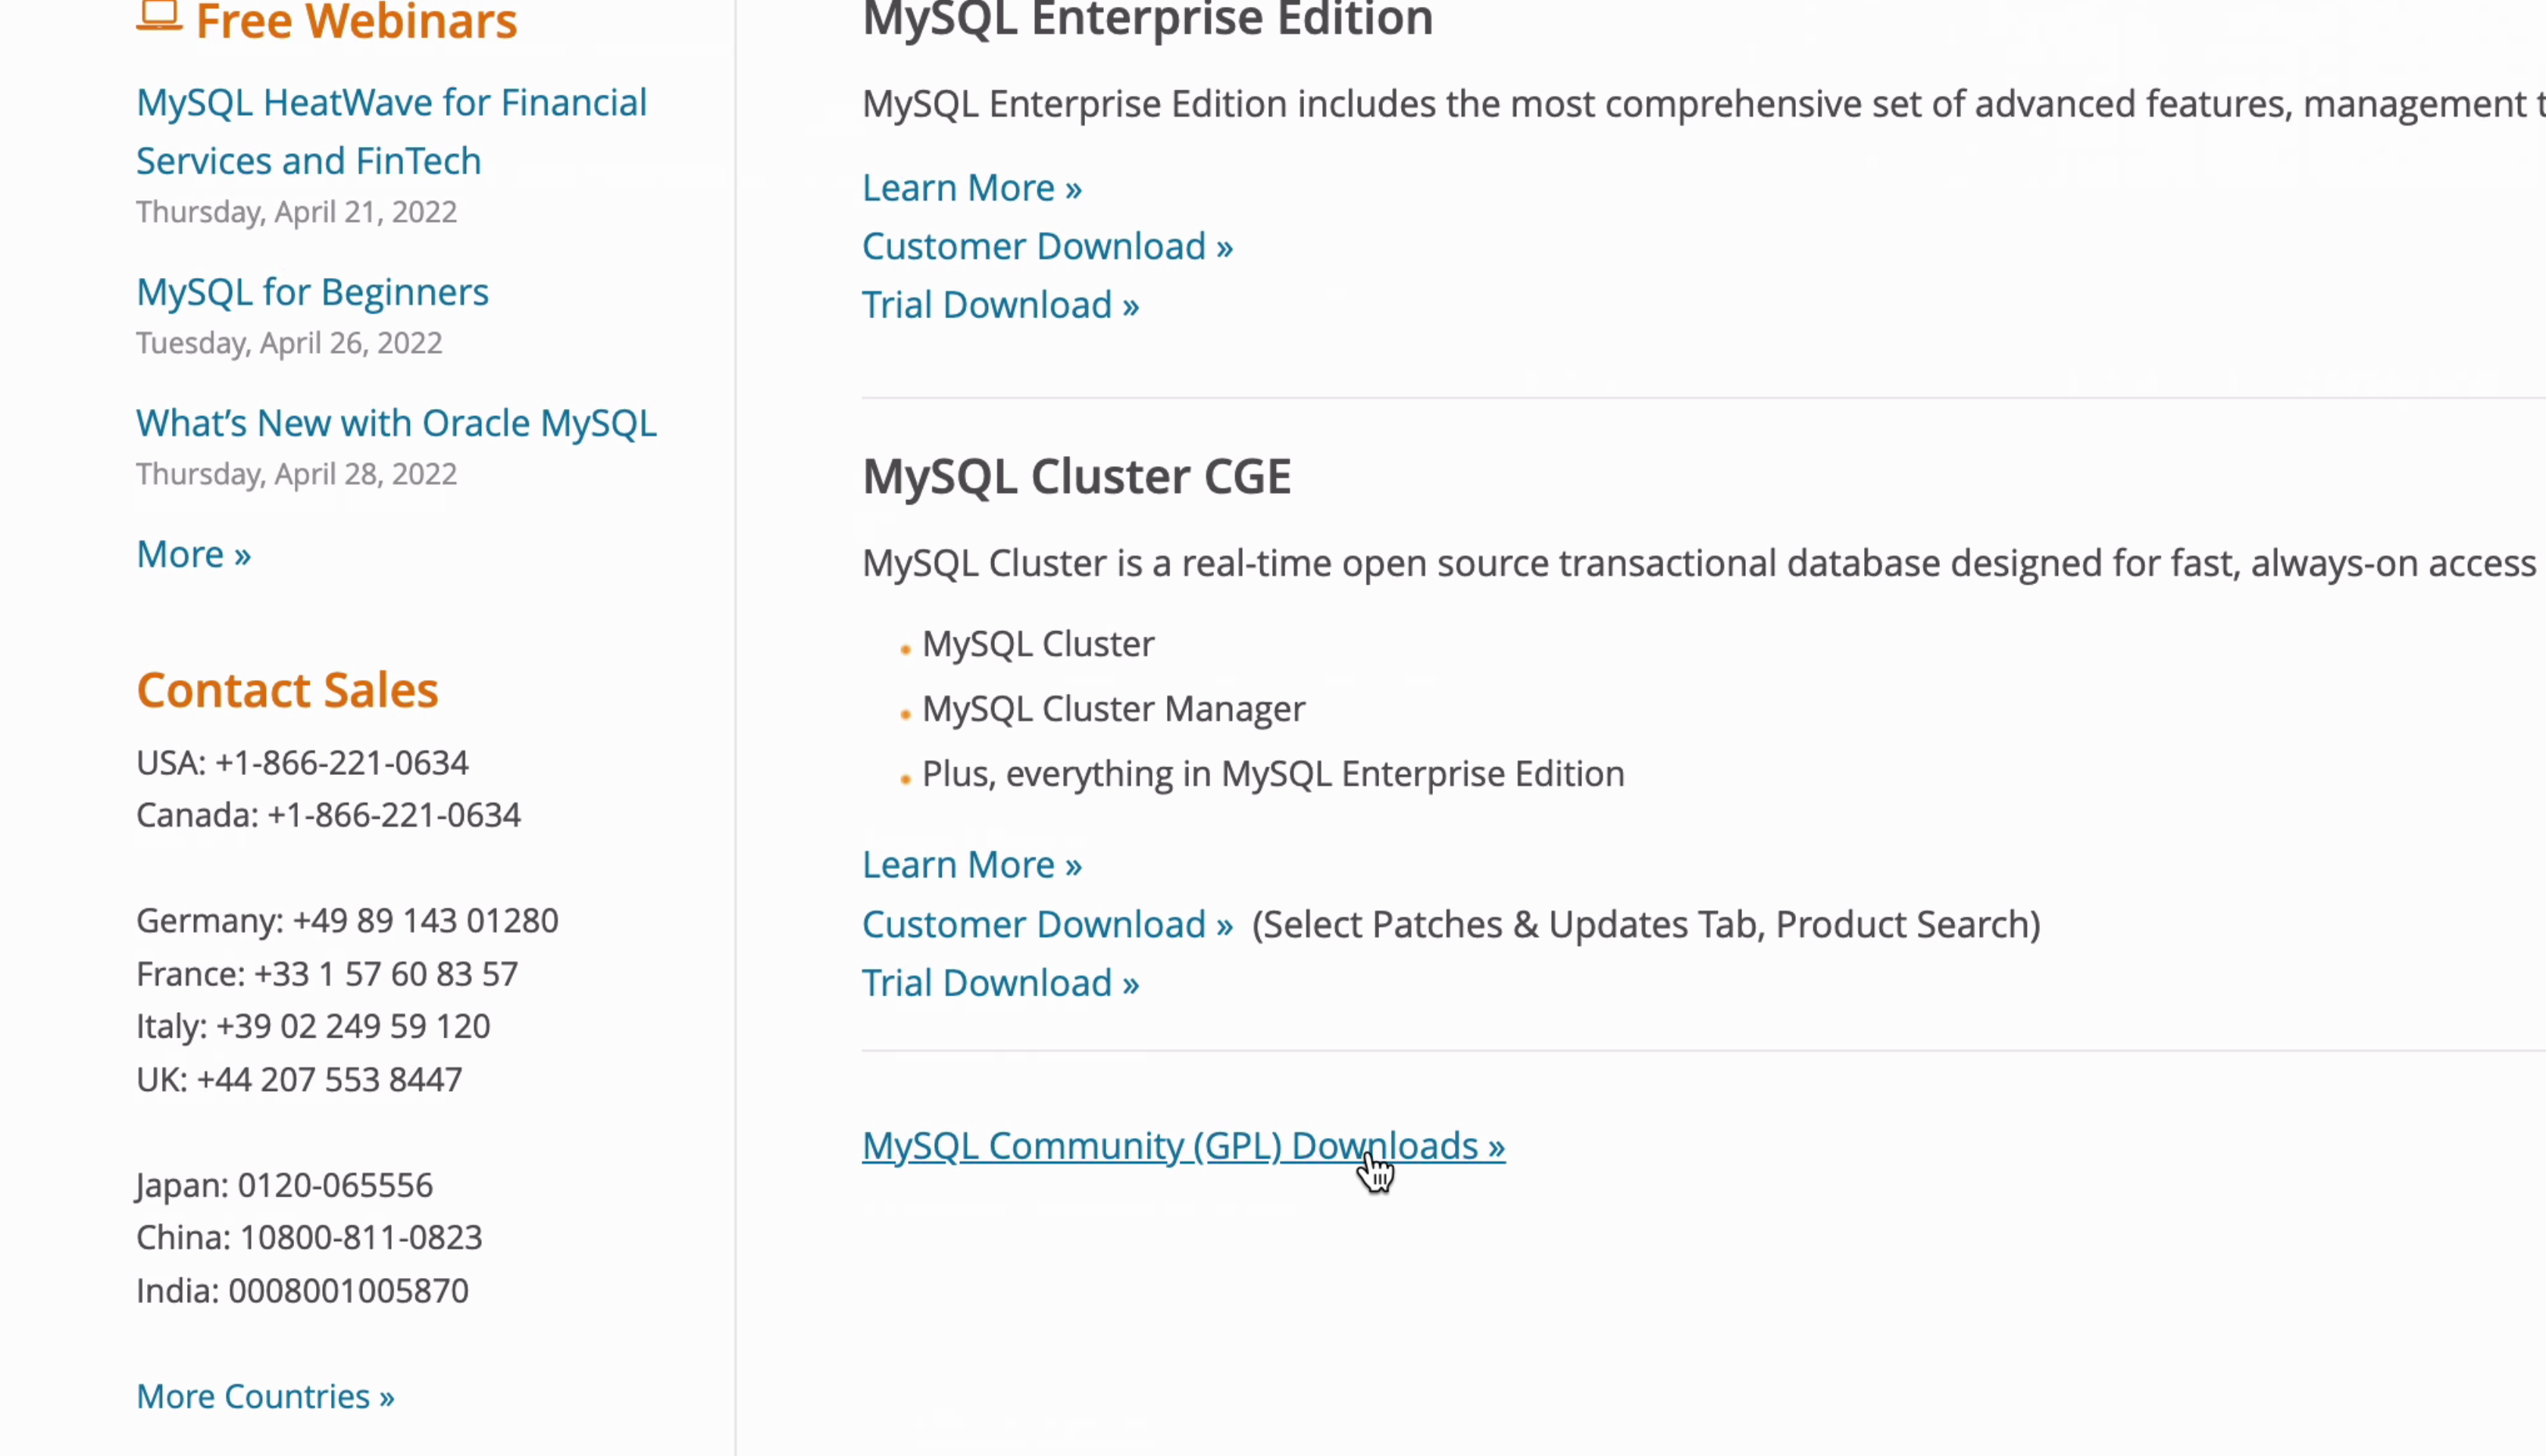
Scroll to the bottom and click on the link here that says “MySQL Community GPL Downloads”.
The Community Downloads page is shown.
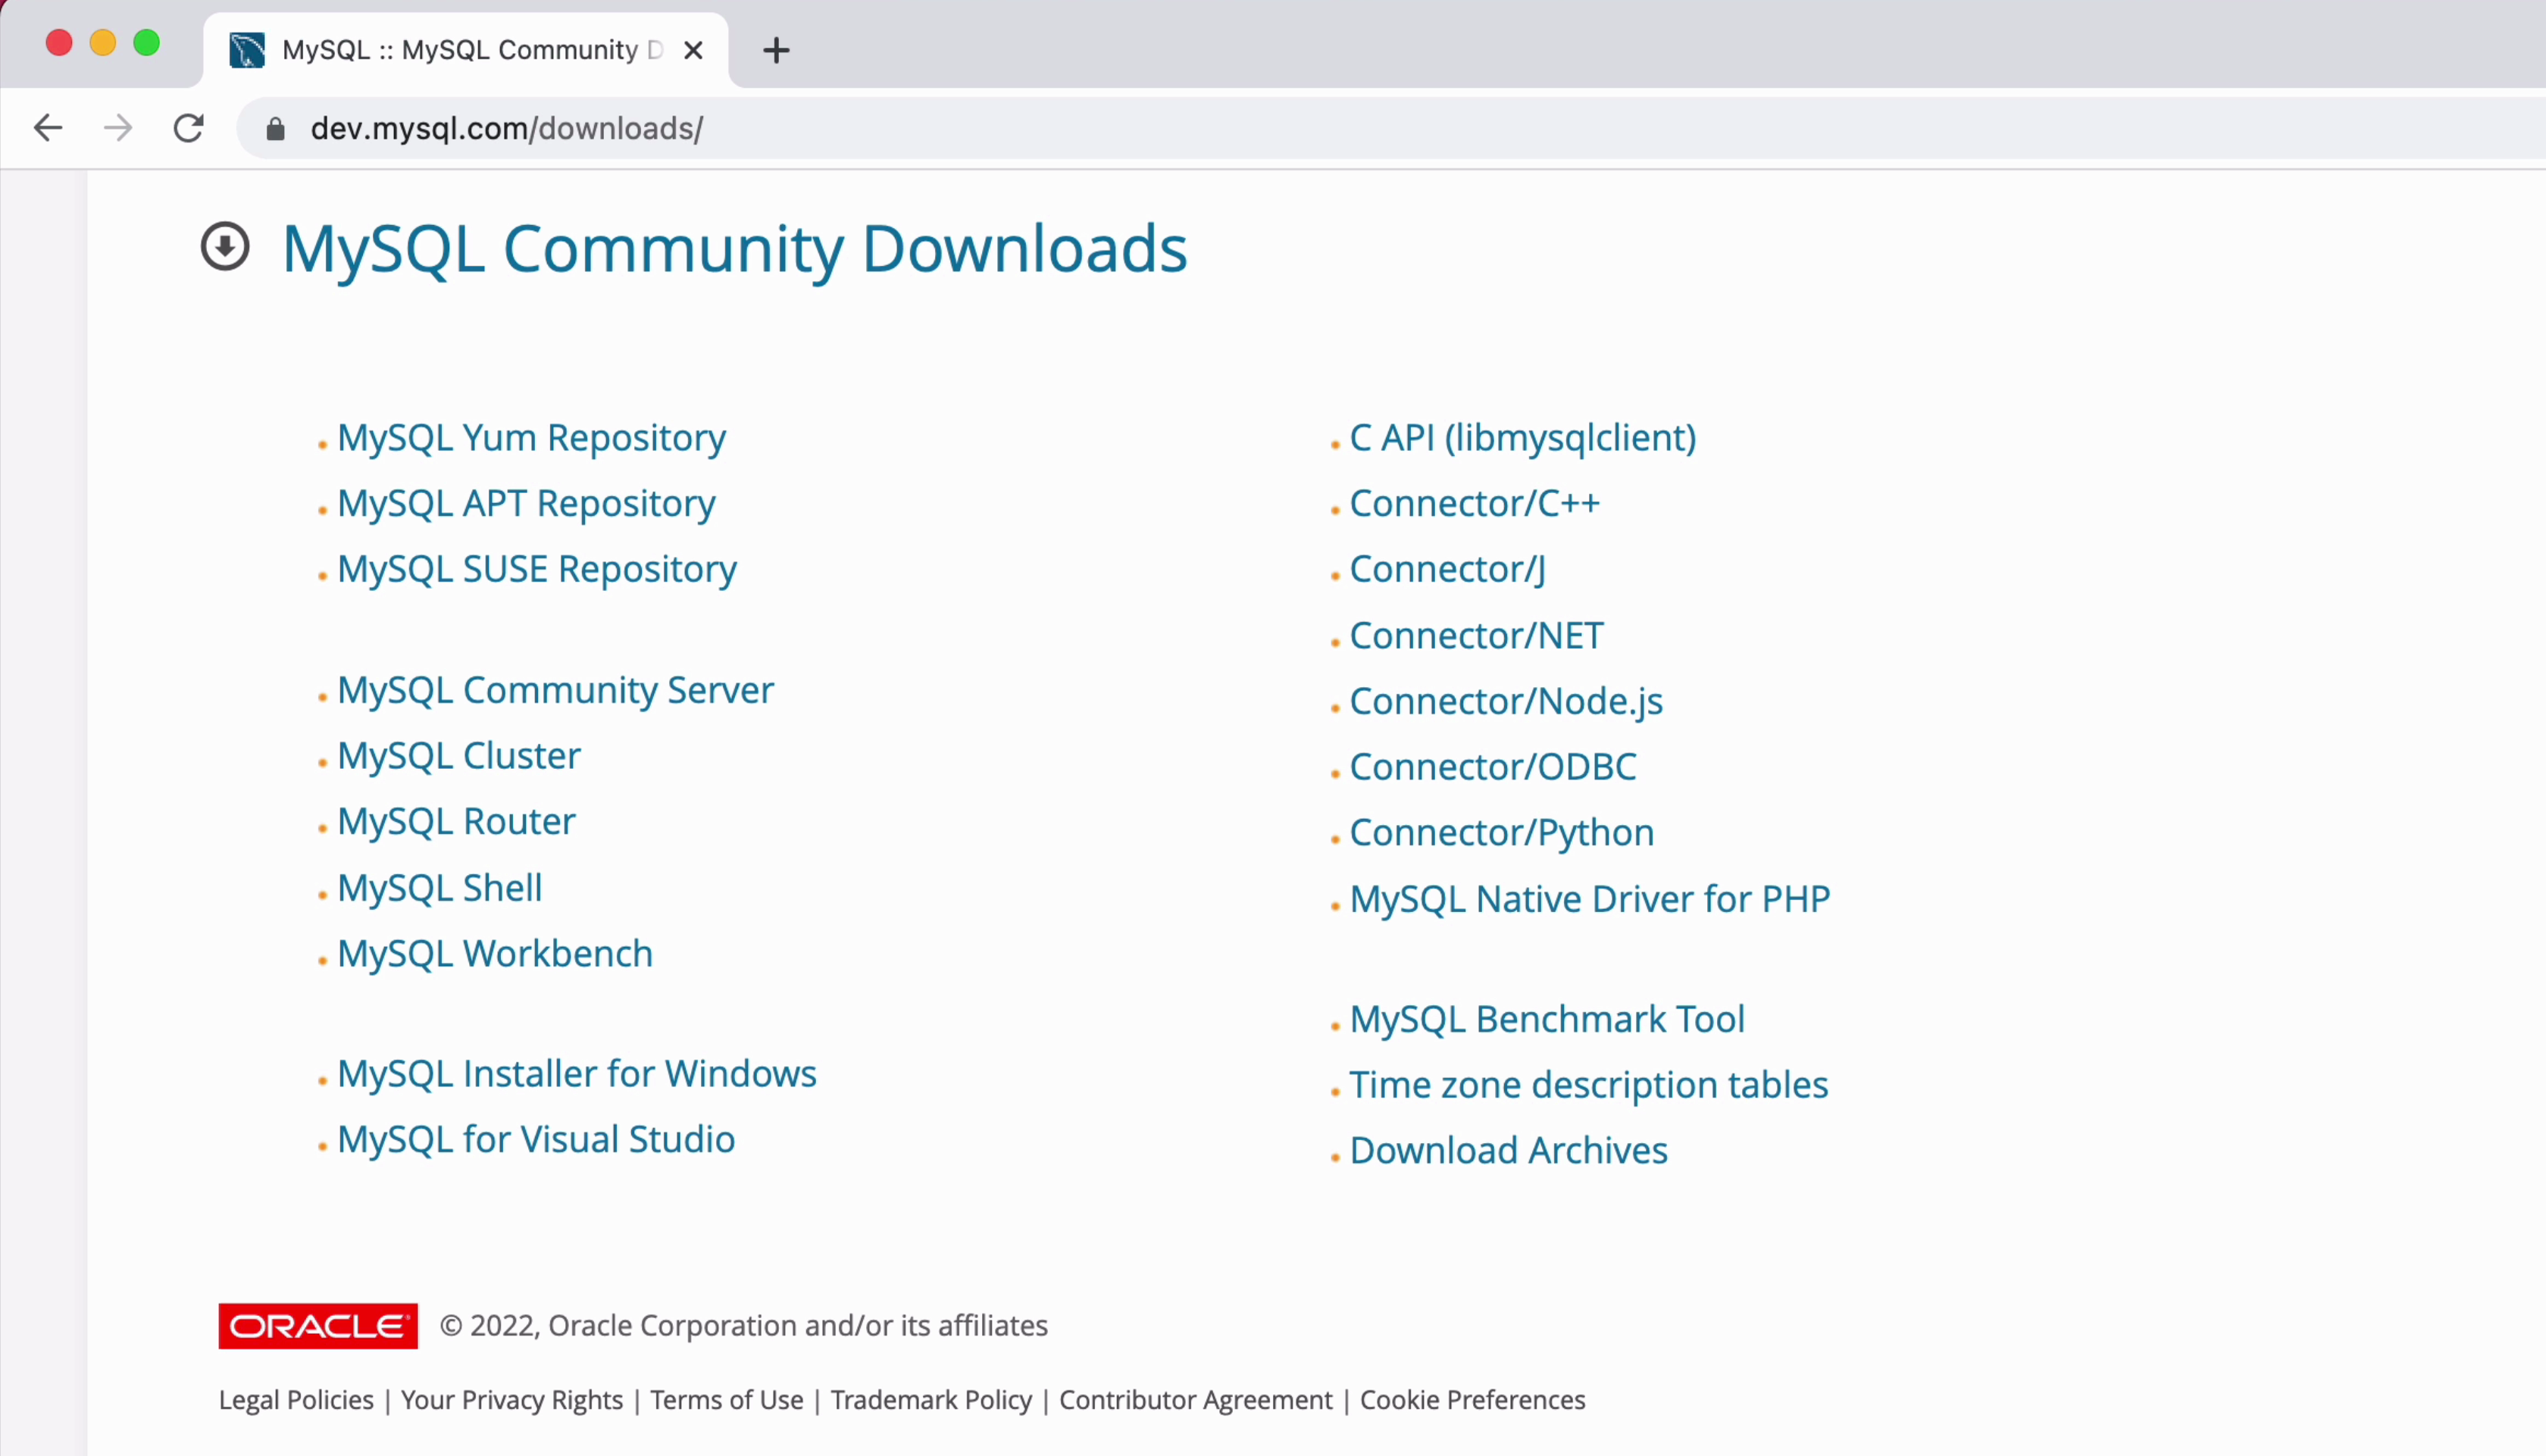
On the Community Downloads page, there are many links. We want to click on the one on the left that says “MySQL Community Server”.
Another tool that will be helpful for working with SQL is MySQL Workbench, so you may want to download that too. I won’t cover that in this guide, but will be in a separate guide.
So, click on “MySQL Community Server".
You’re taken to the download page.
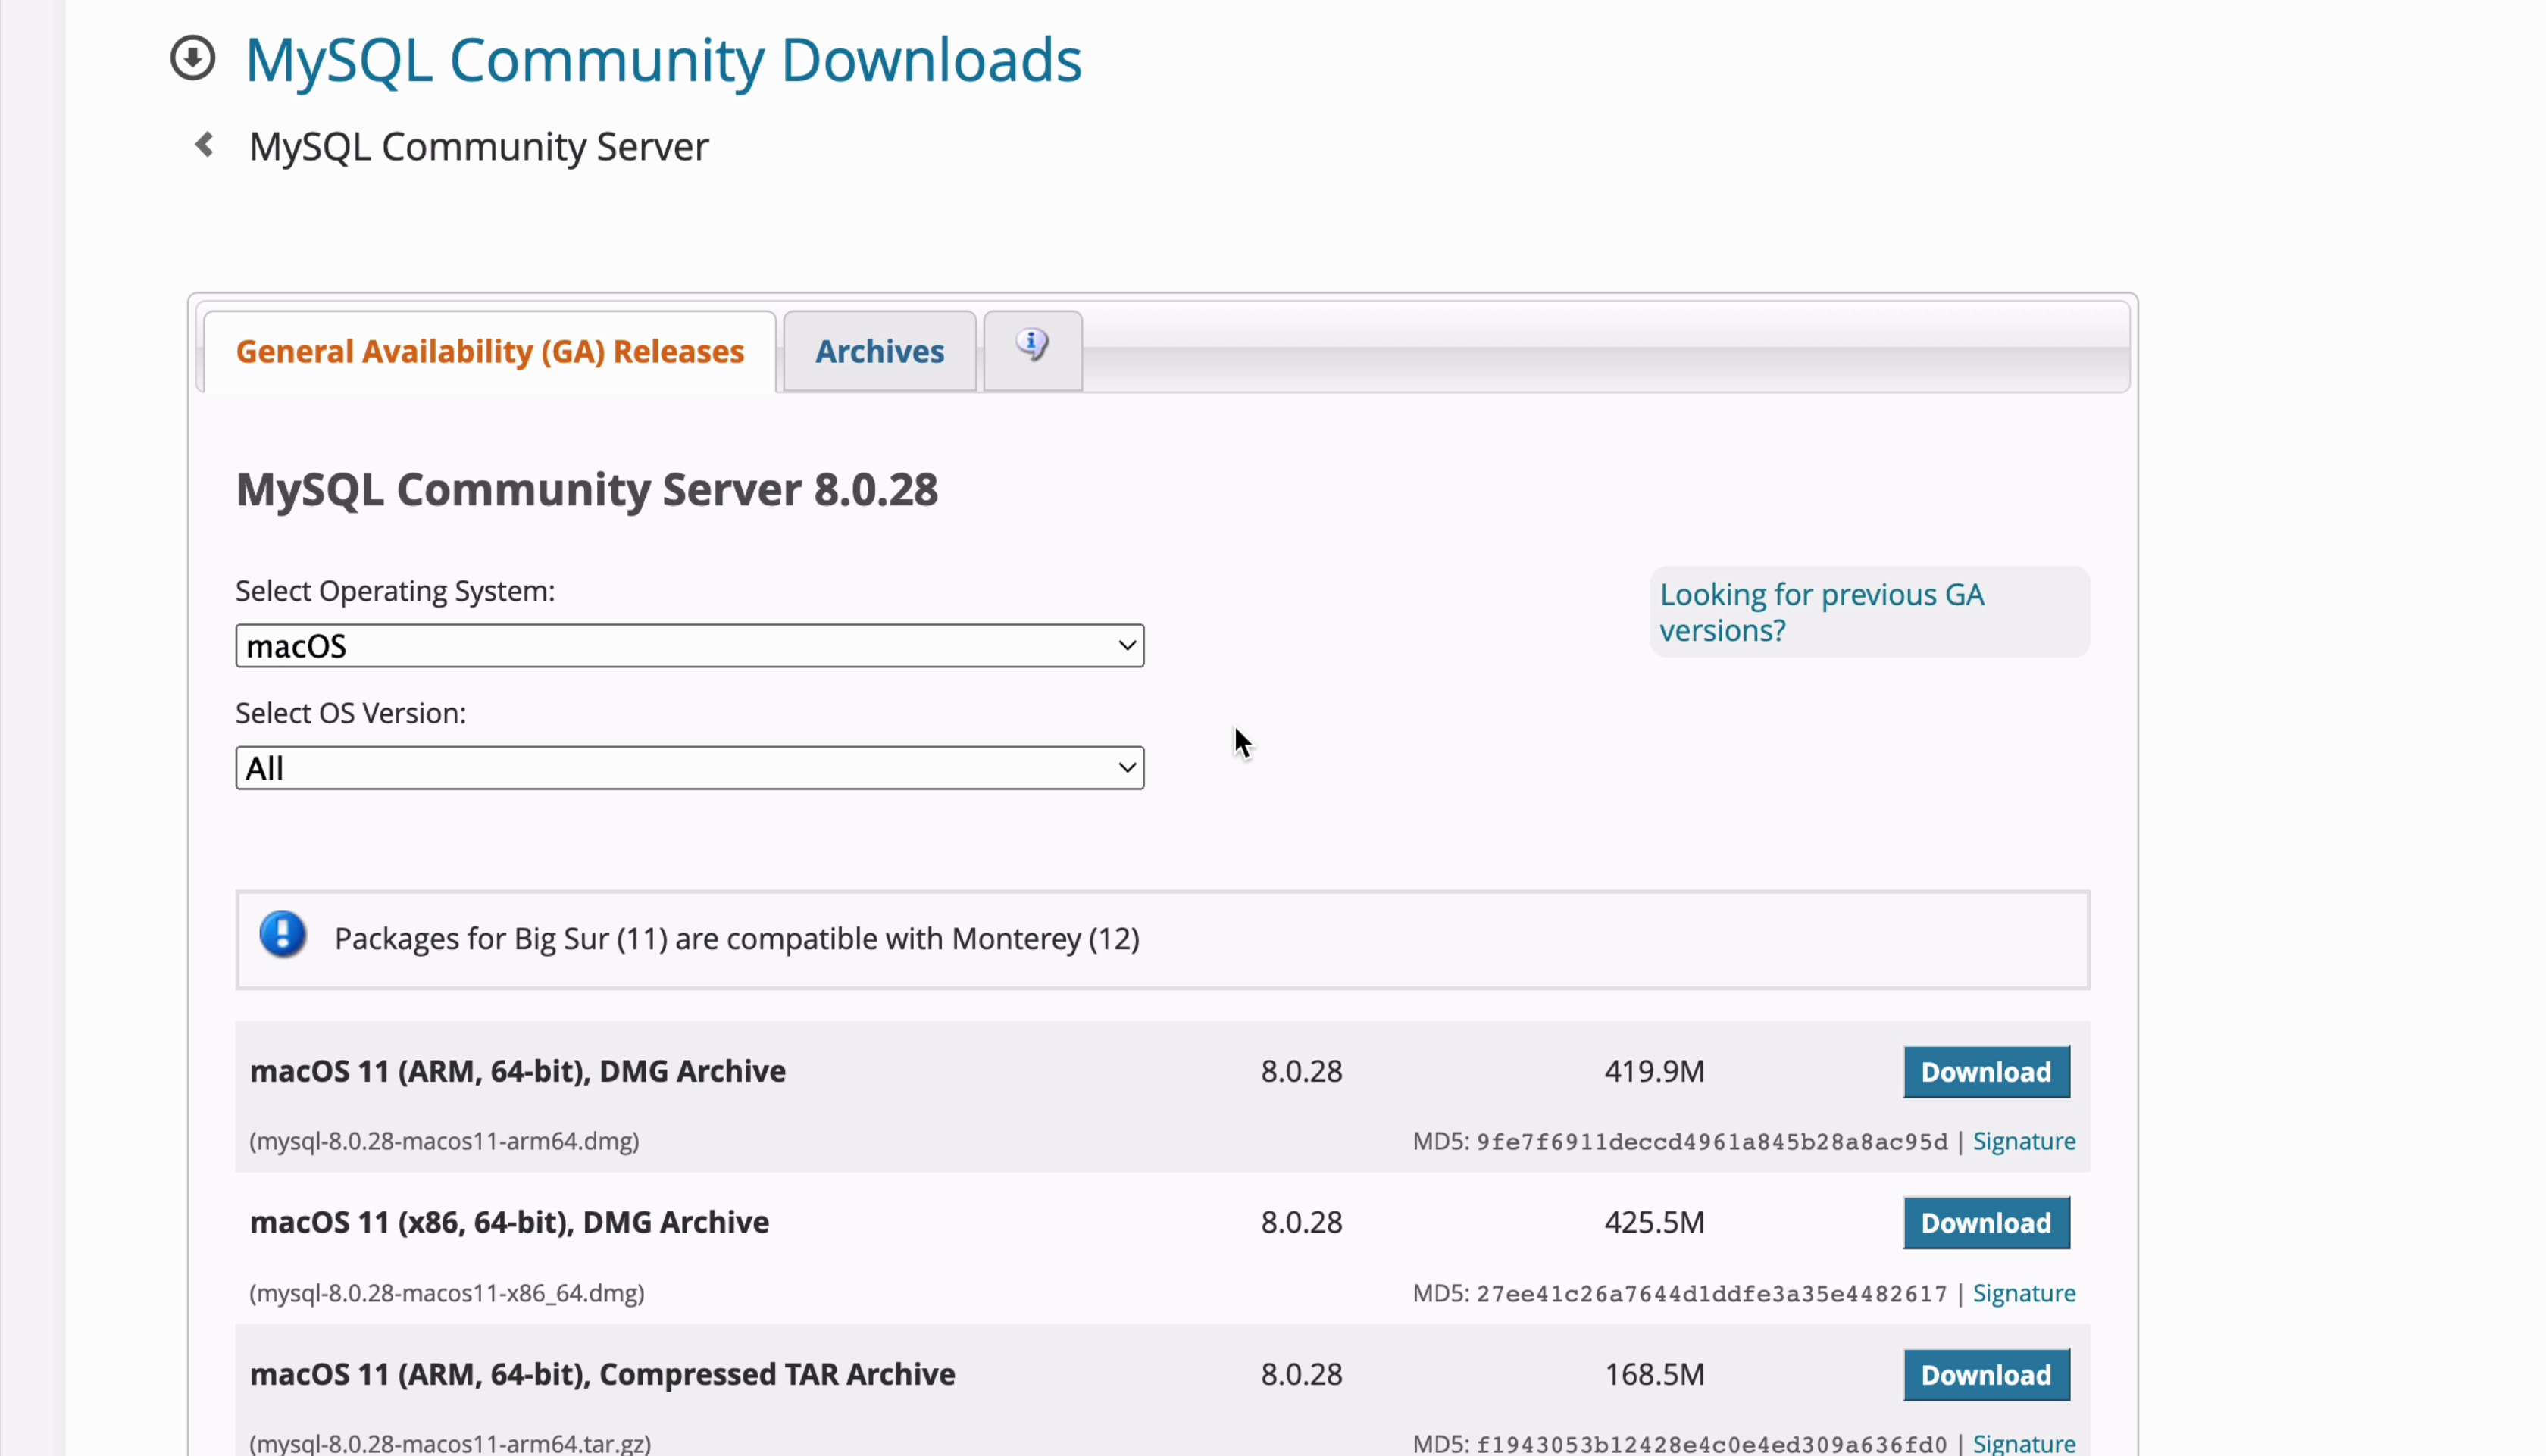
We can see the version that we’re about to download, which at the time of recording is 8.0.28.
You can select your operating system here if you want to change it, but it defaults to macOS if you’re on a Mac. In the OS Version selection, you can select MySQL for either one of the two CPUs that are available: the ARM or the x86.
You’ll also see a notice saying that packages for Big Sur, which is macOS 11, are compatible with Monterey or macOS 12.
There are many download links on this page, but the one we want to select is either the ARM or the x86 version at the top. If you’re on the newer Macs with the newer CPUs, select the ARM option. Otherwise, select the x86 option, which is what I’ll do.
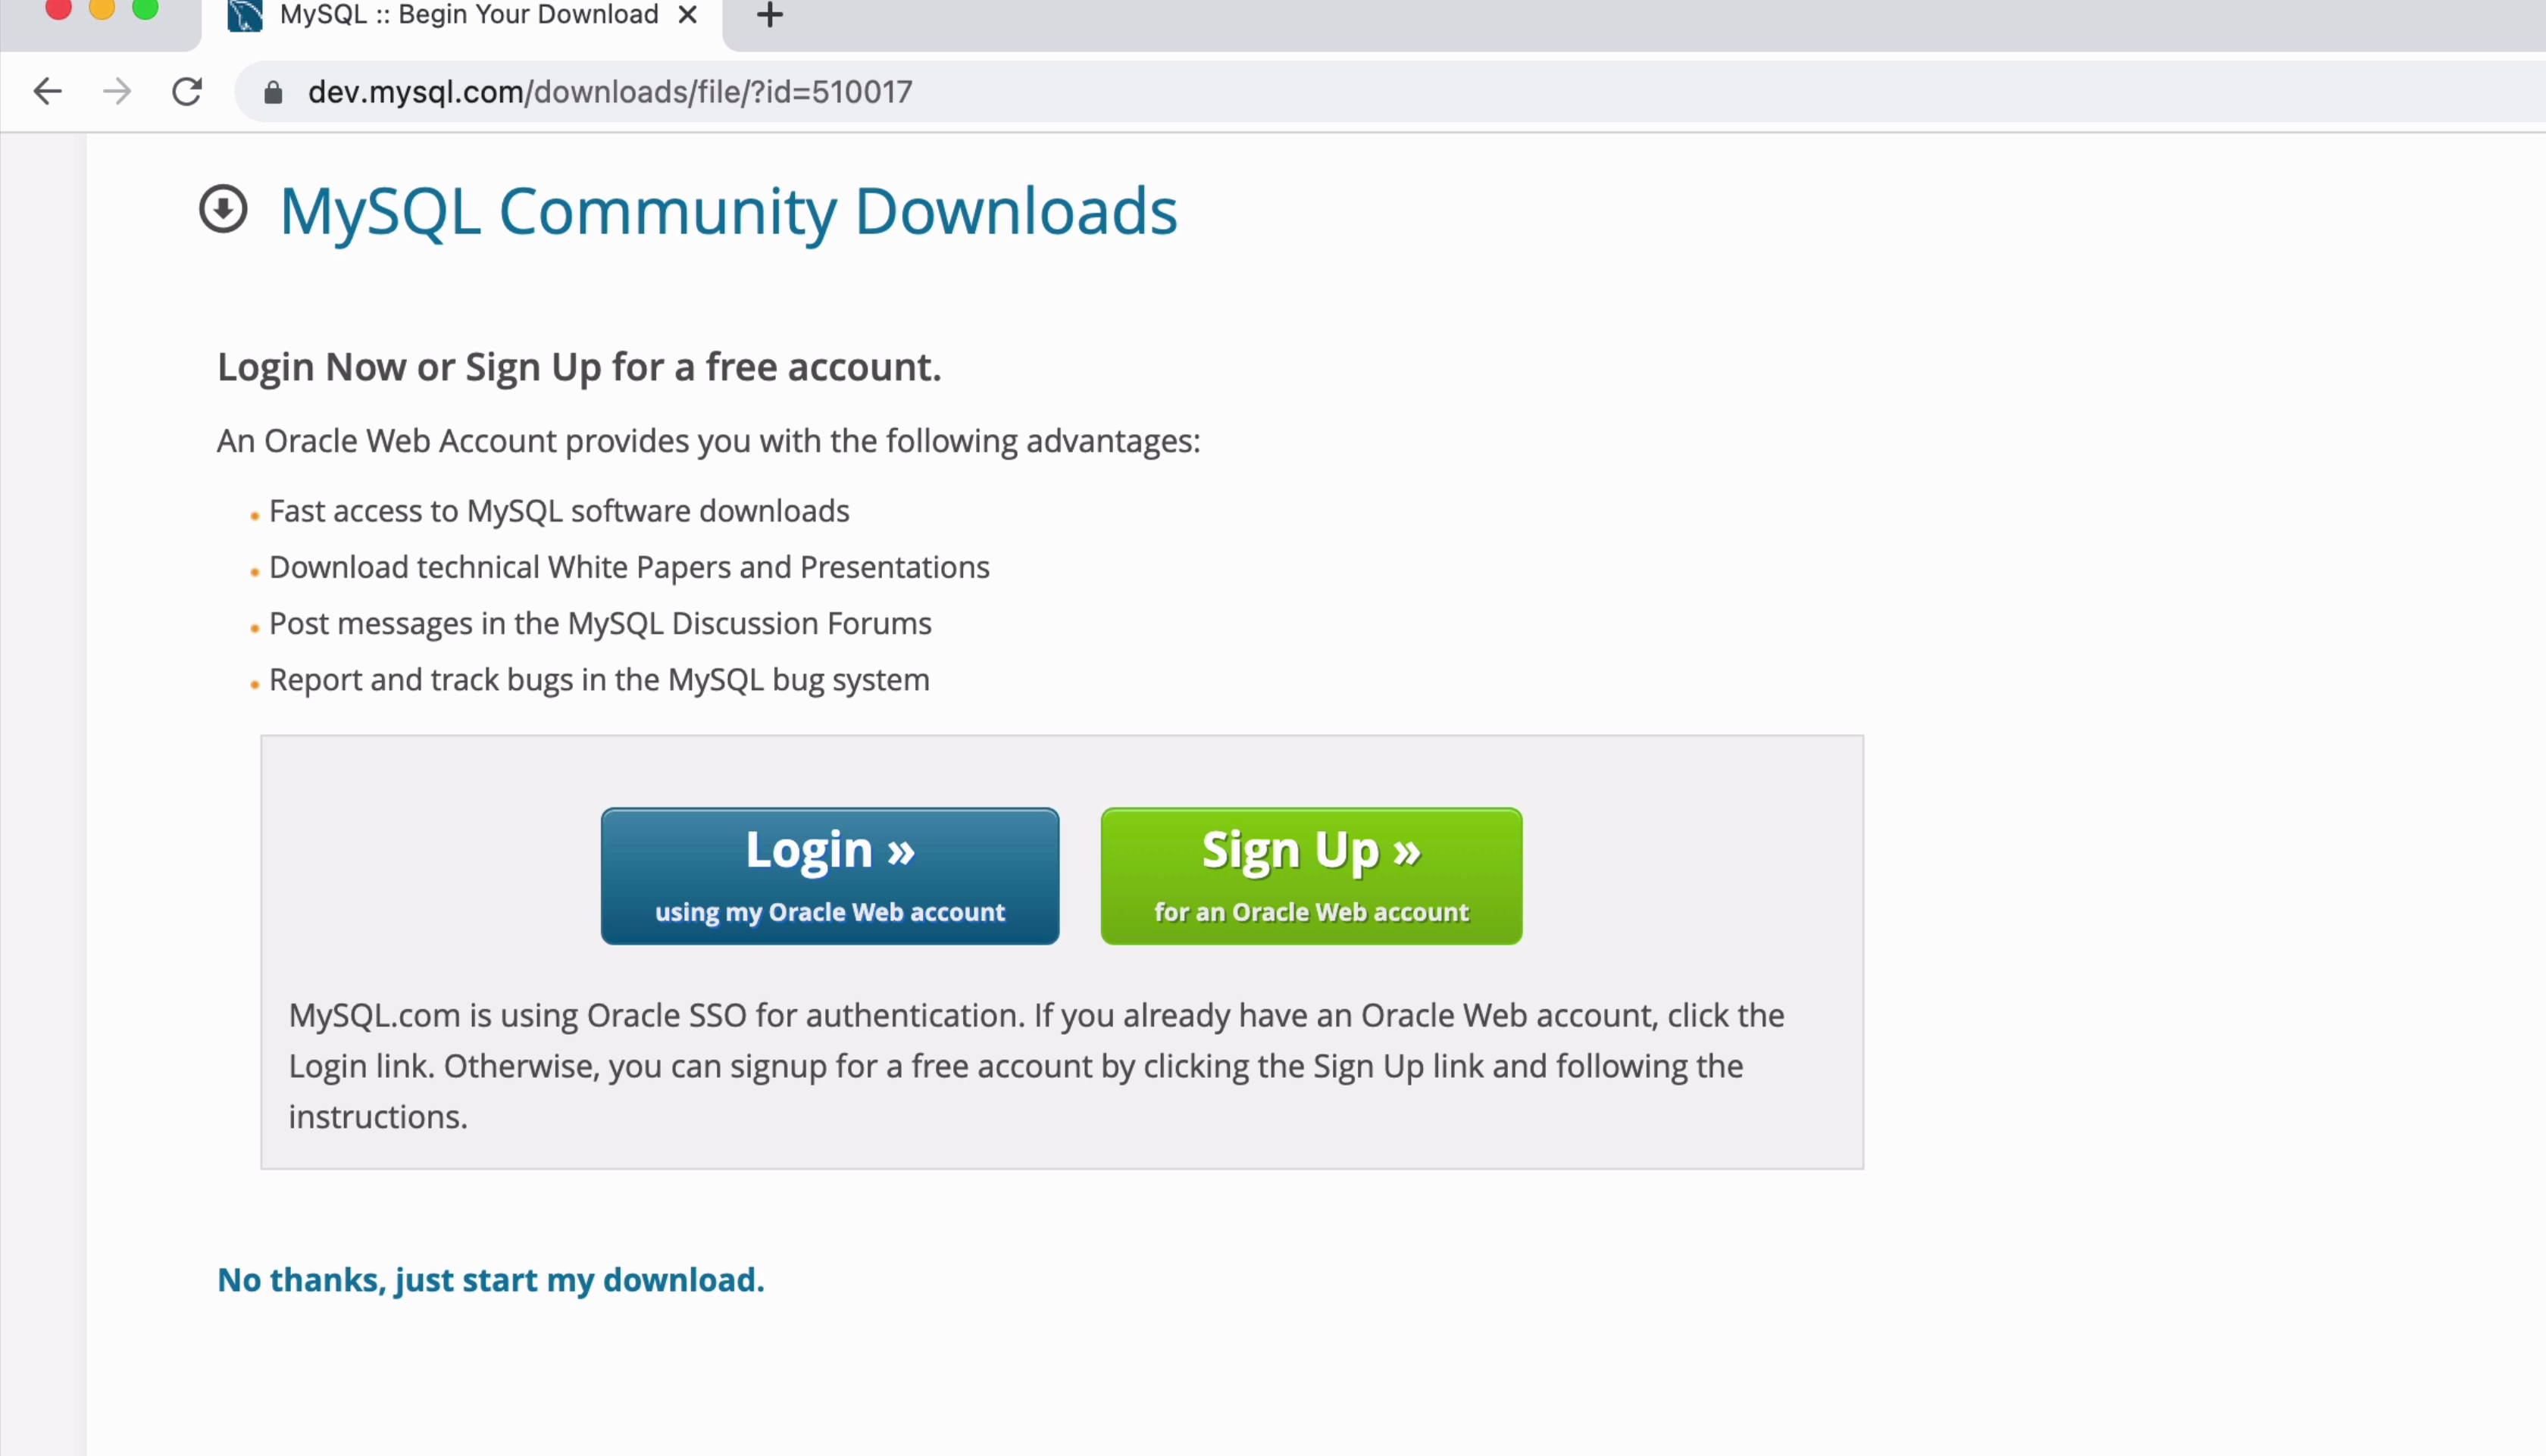
You’ll then be asked to create or sign in to a free account. You can do this if you want, or you can click the “No thanks” link at the bottom and download the file. We’ll click there in this video.
Once you do, the file will start downloading. It’s just over 400 MB so will take a little bit to download depending on your connection.
Step 2: Install MySQL
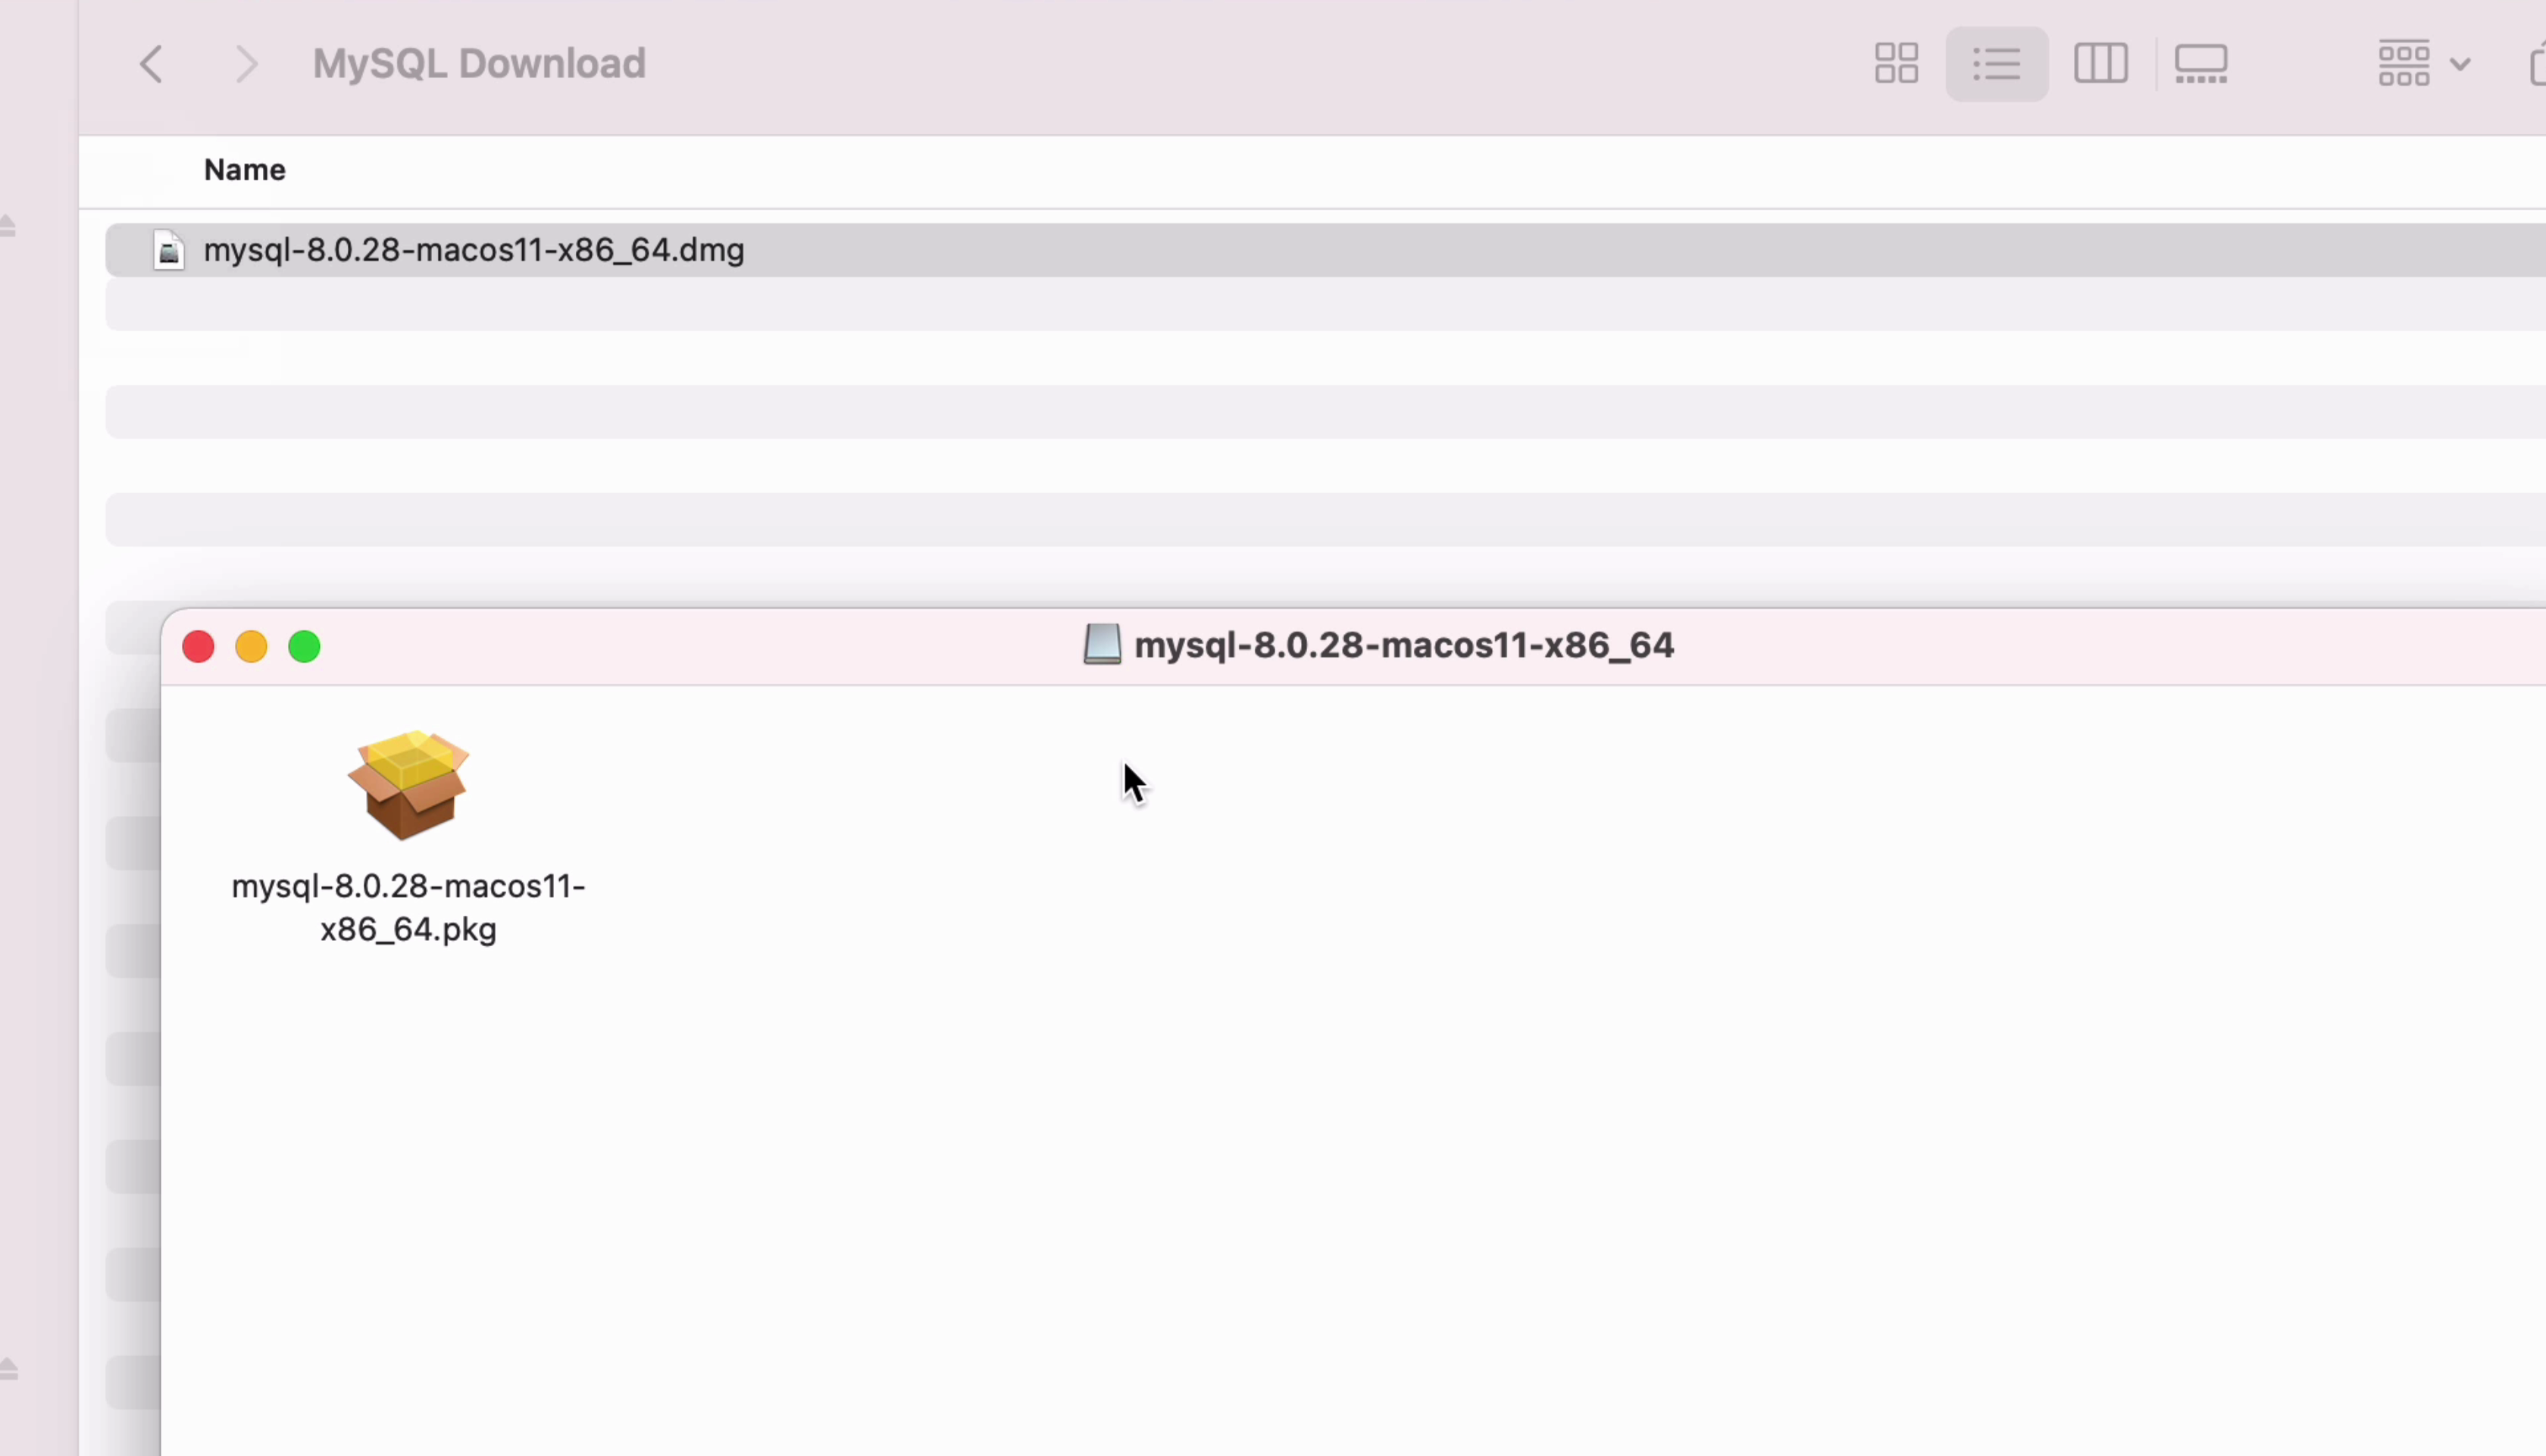
Once the file is downloaded, locate it on your computer and open it, or open it directly from the downloads section of your browser.
You’ll see a new window opening with the DMG file. Double-click on this file to open it.
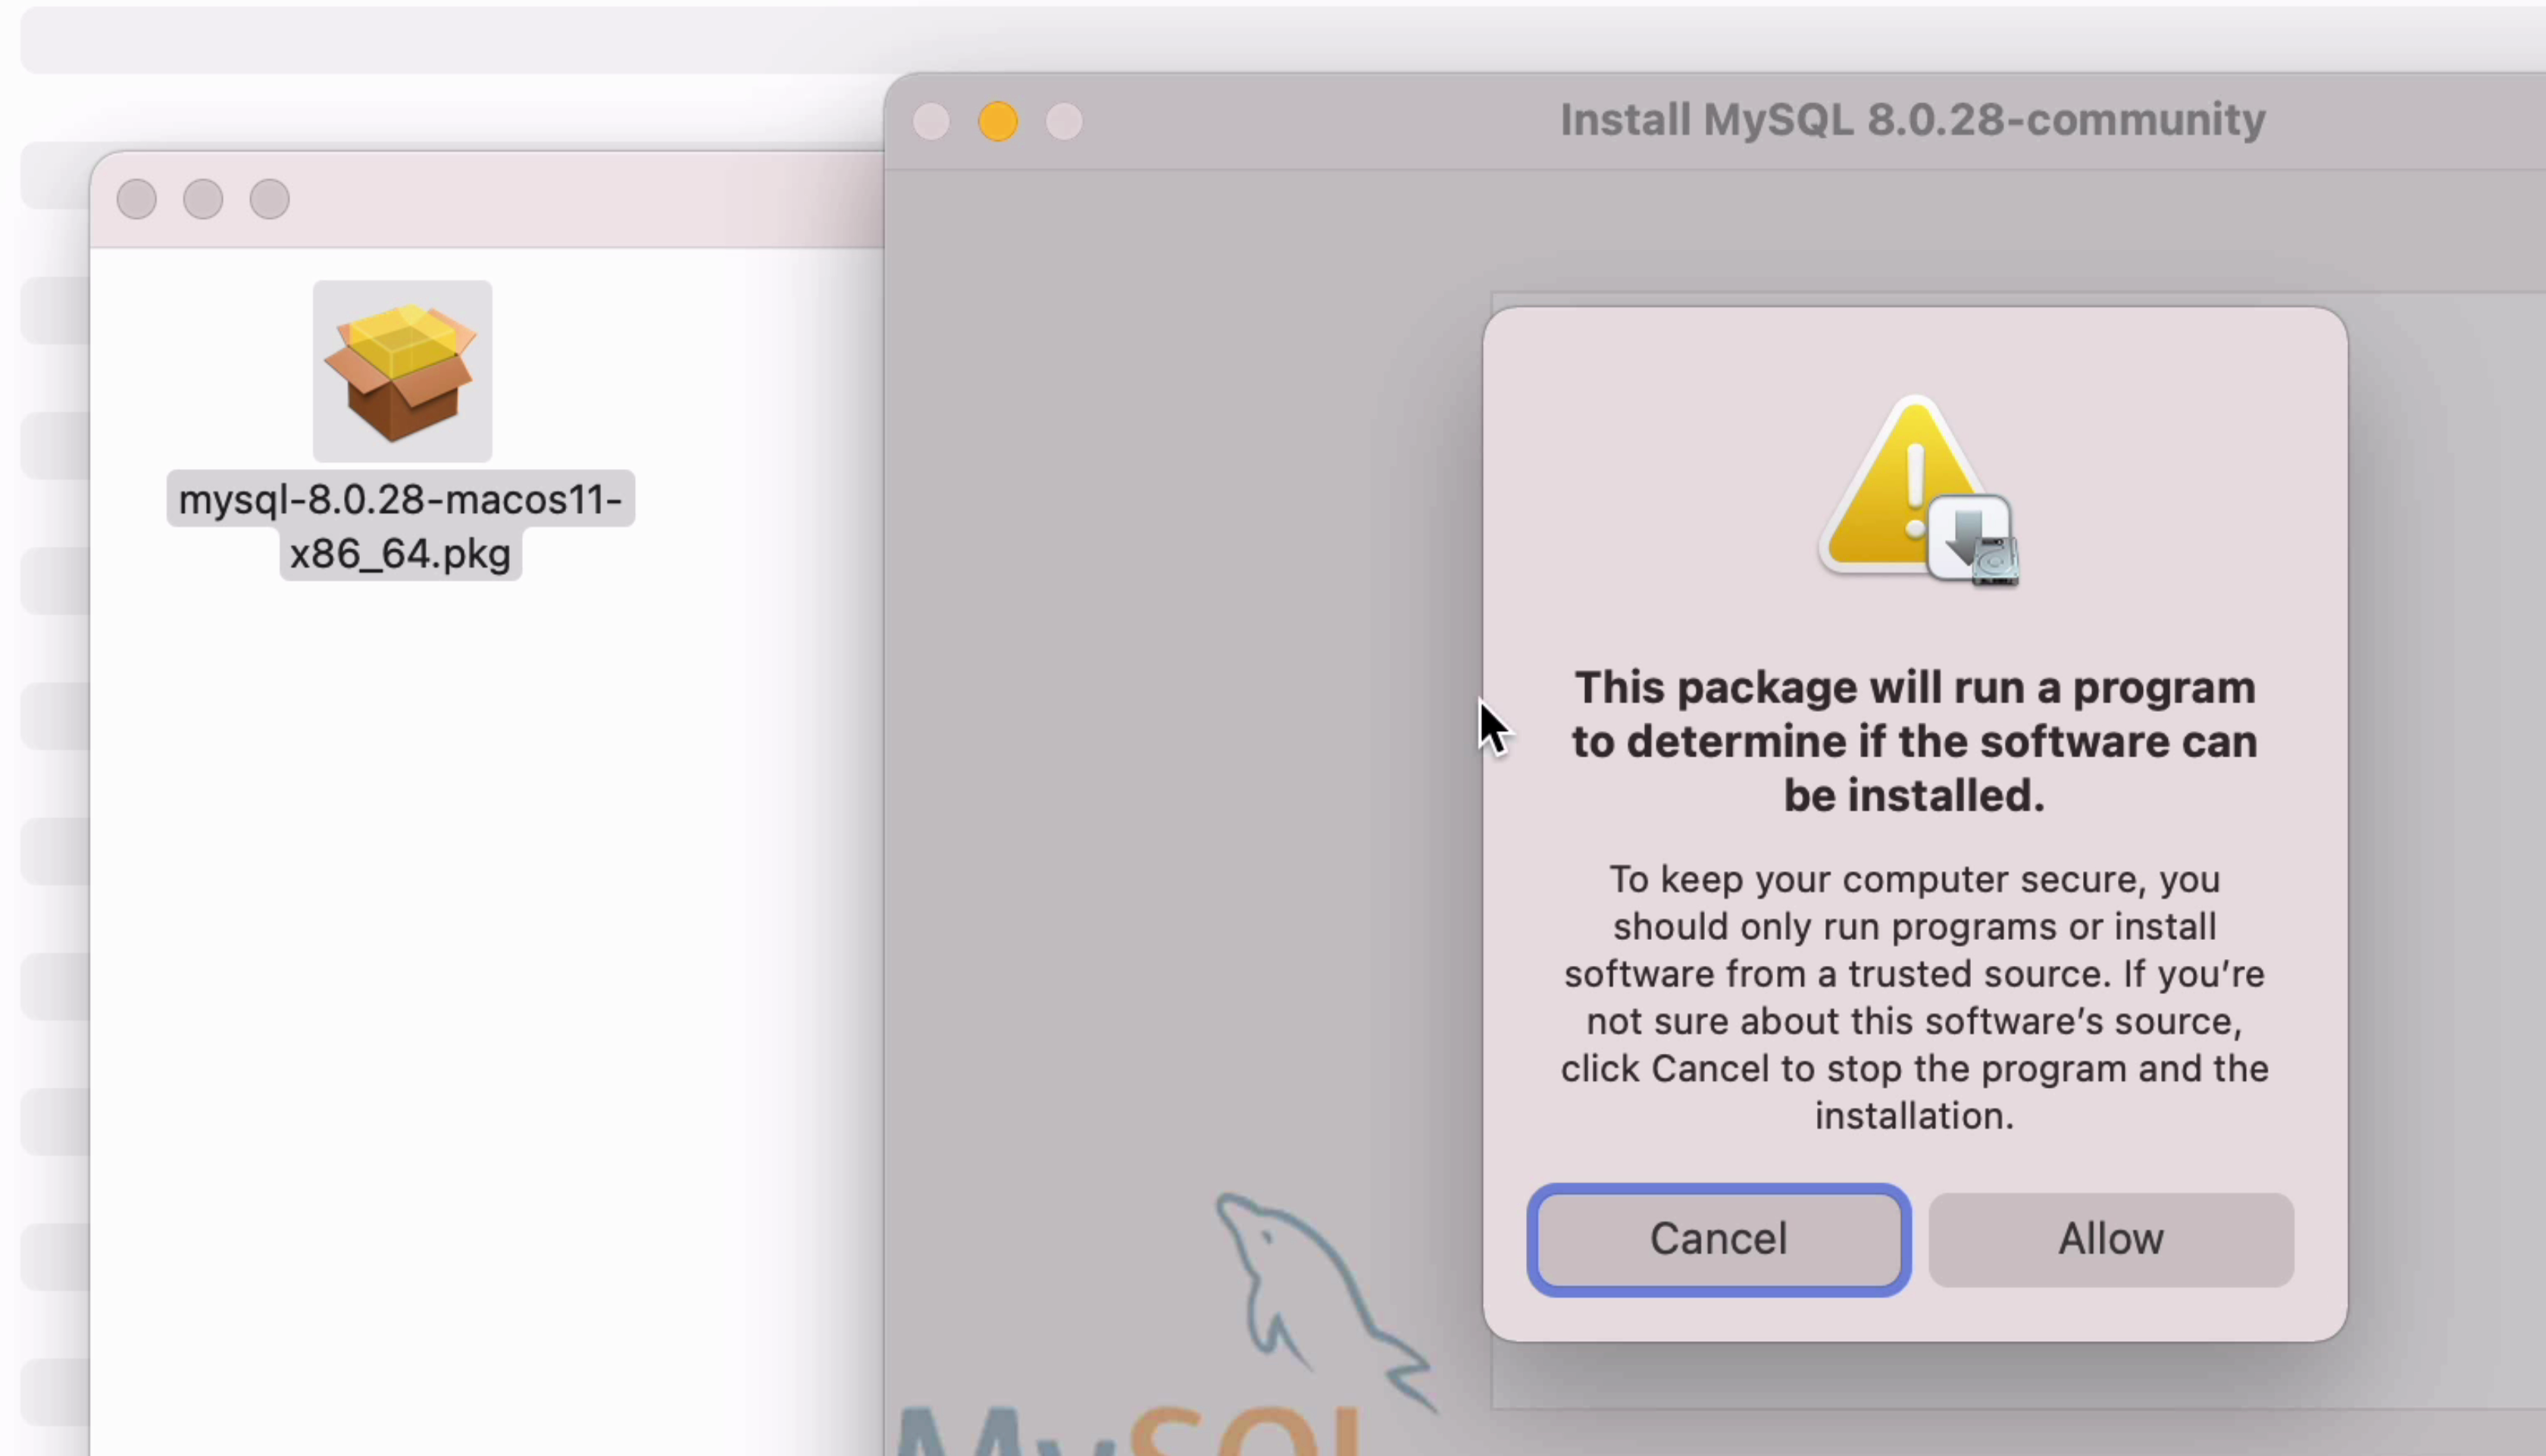
You may get a warning about running the program. Click Allow to proceed.
The Introduction screen of the installer is shown.
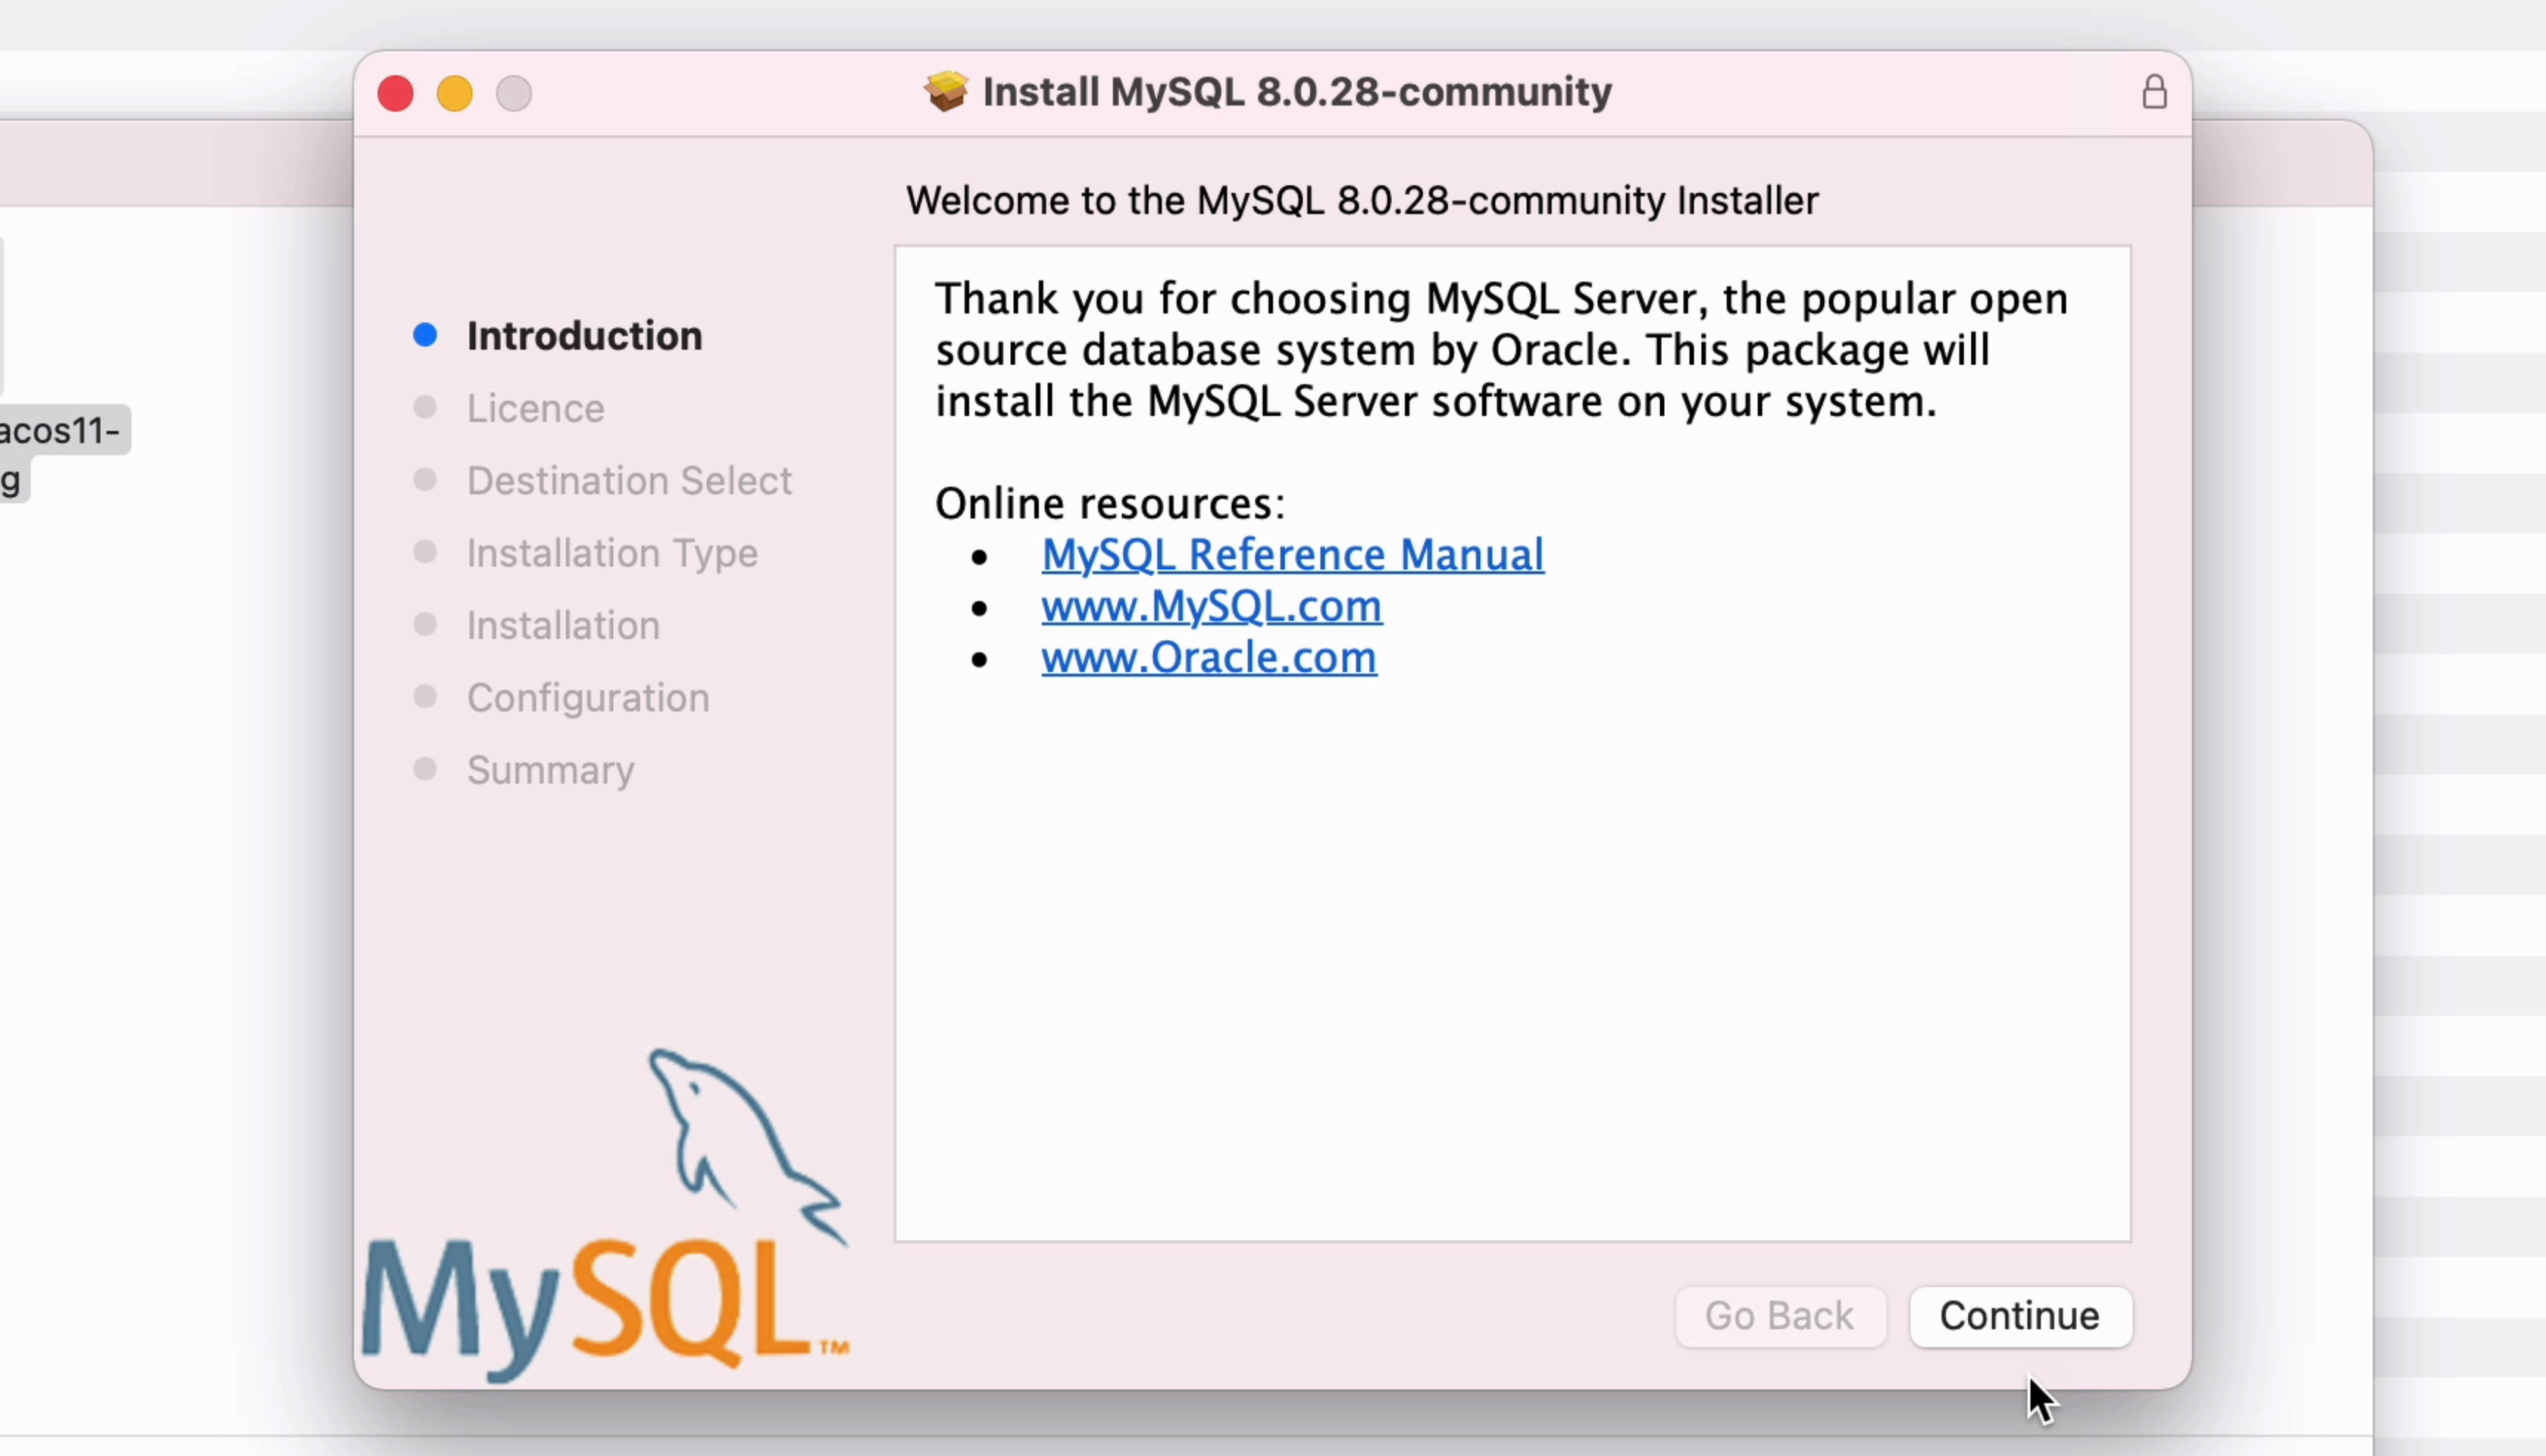
Click Continue.
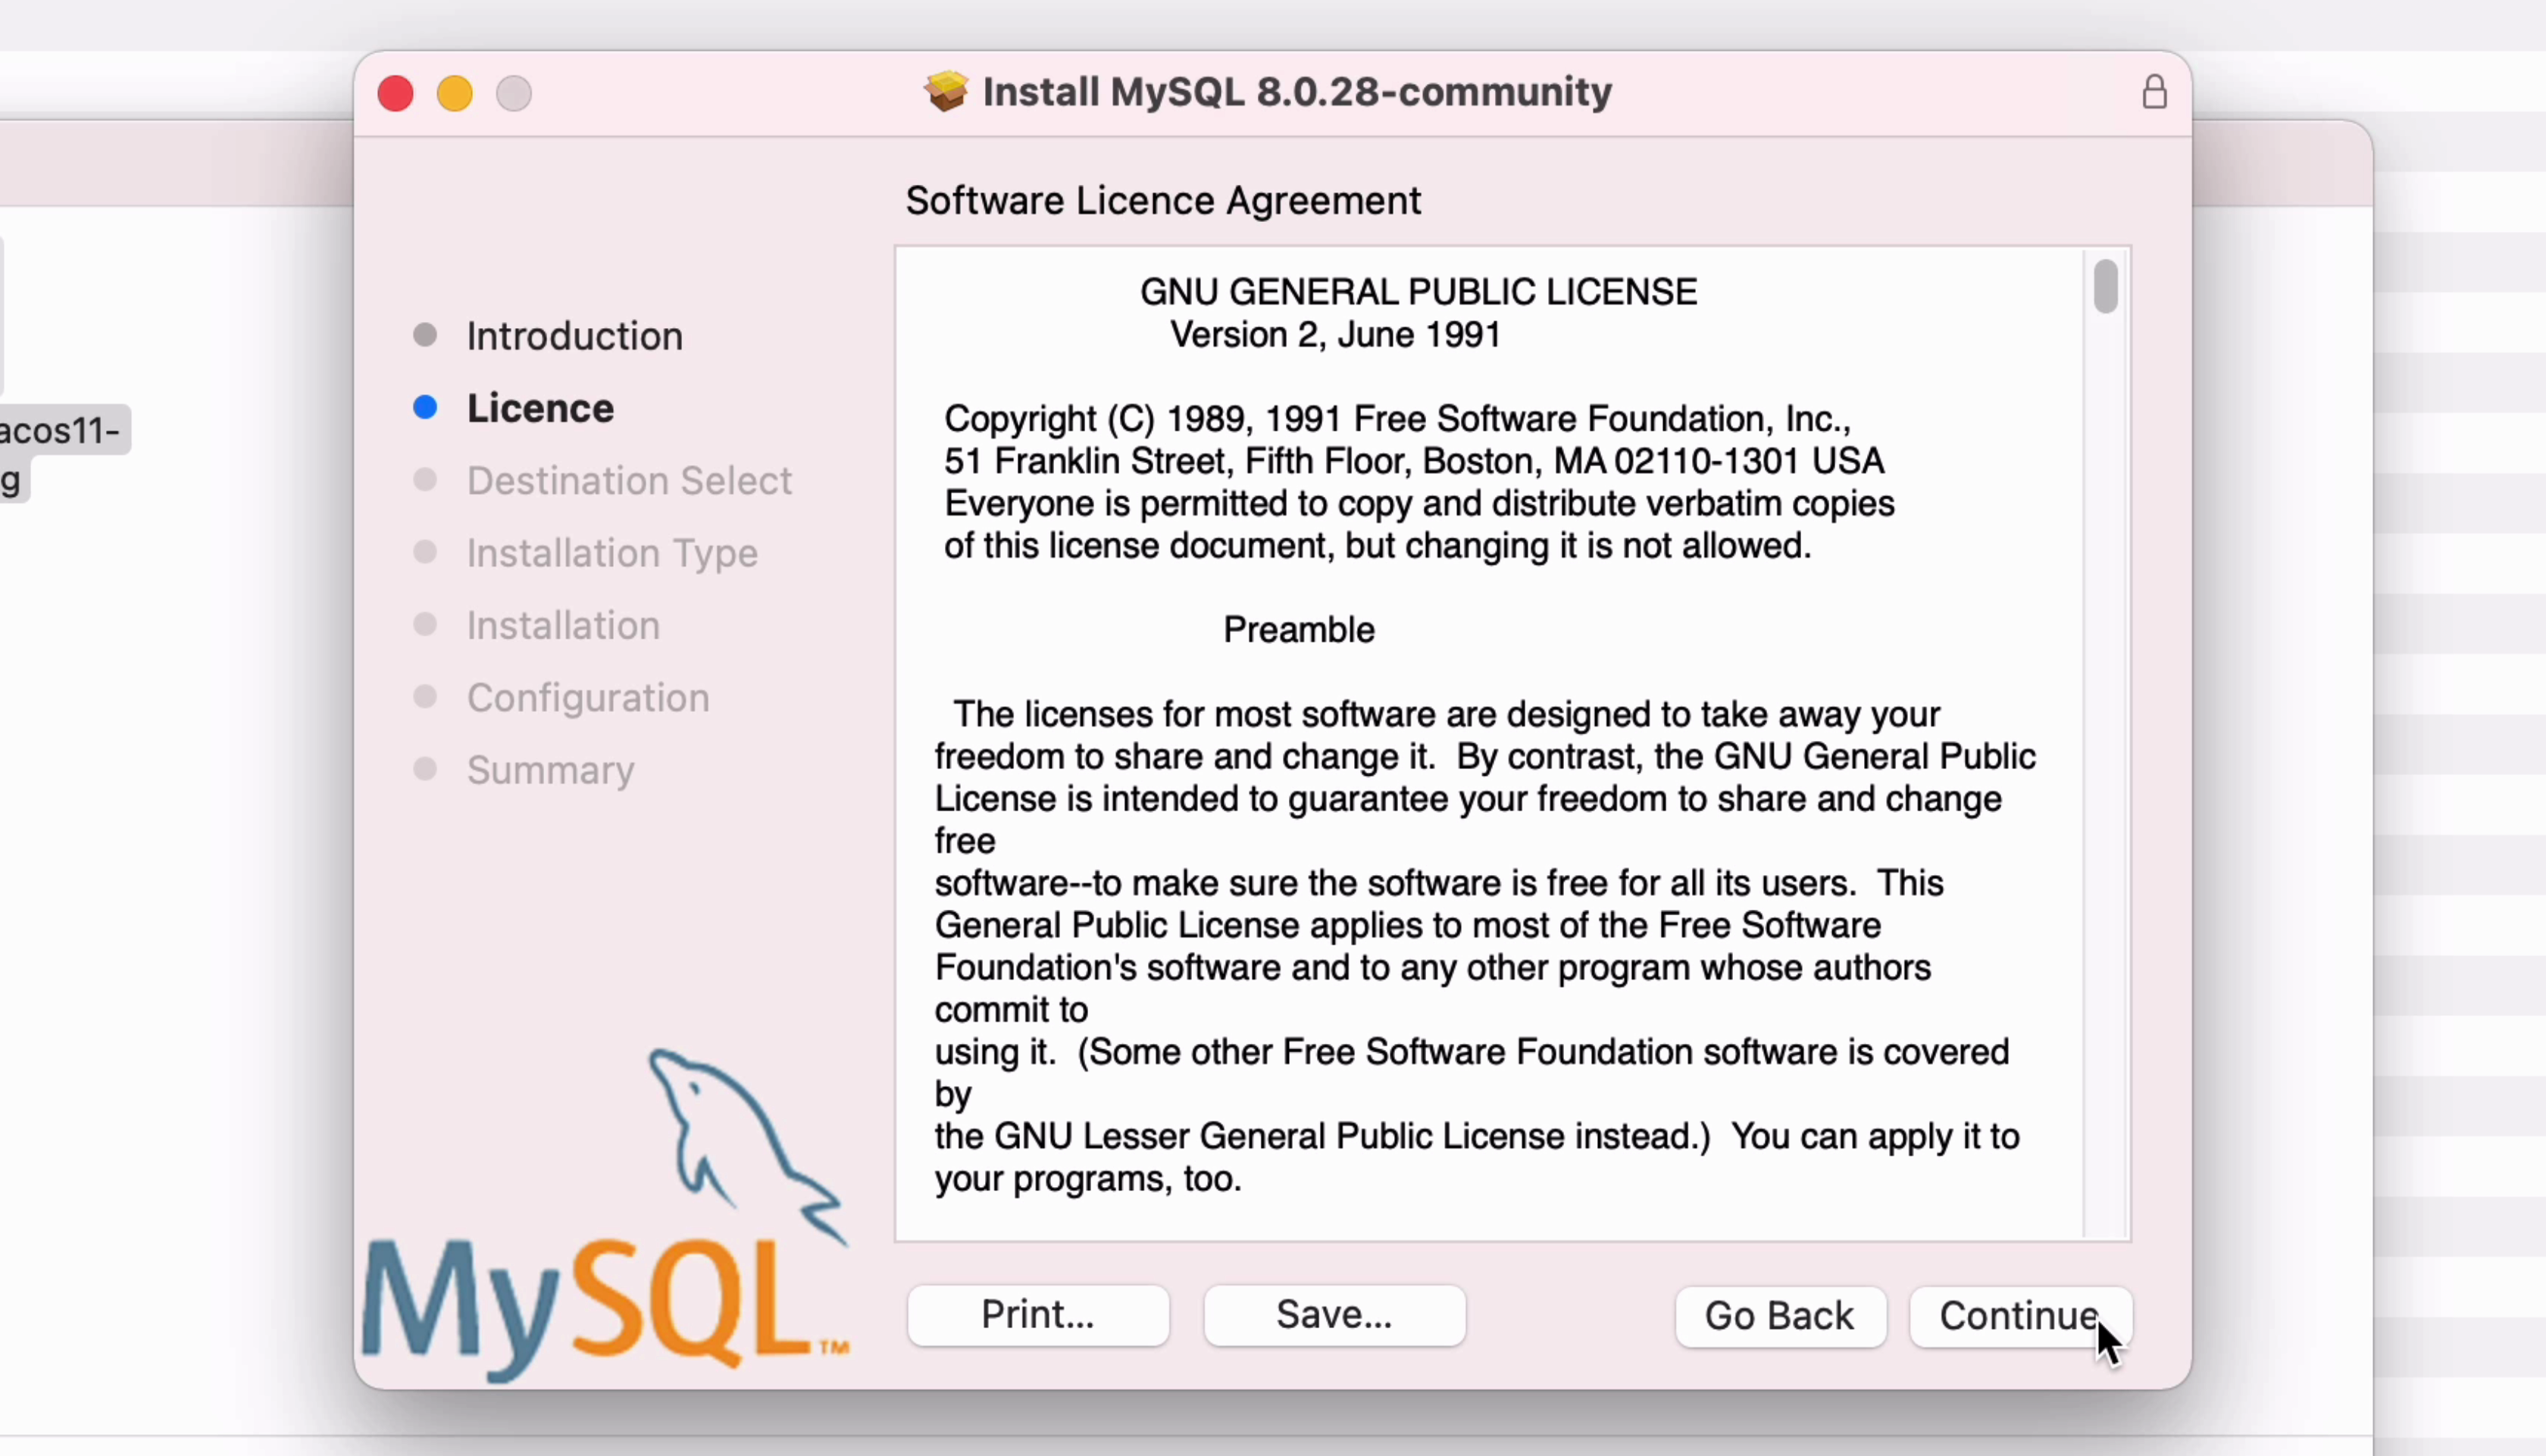
Next, read and accept the Software License Agreement and click Continue.
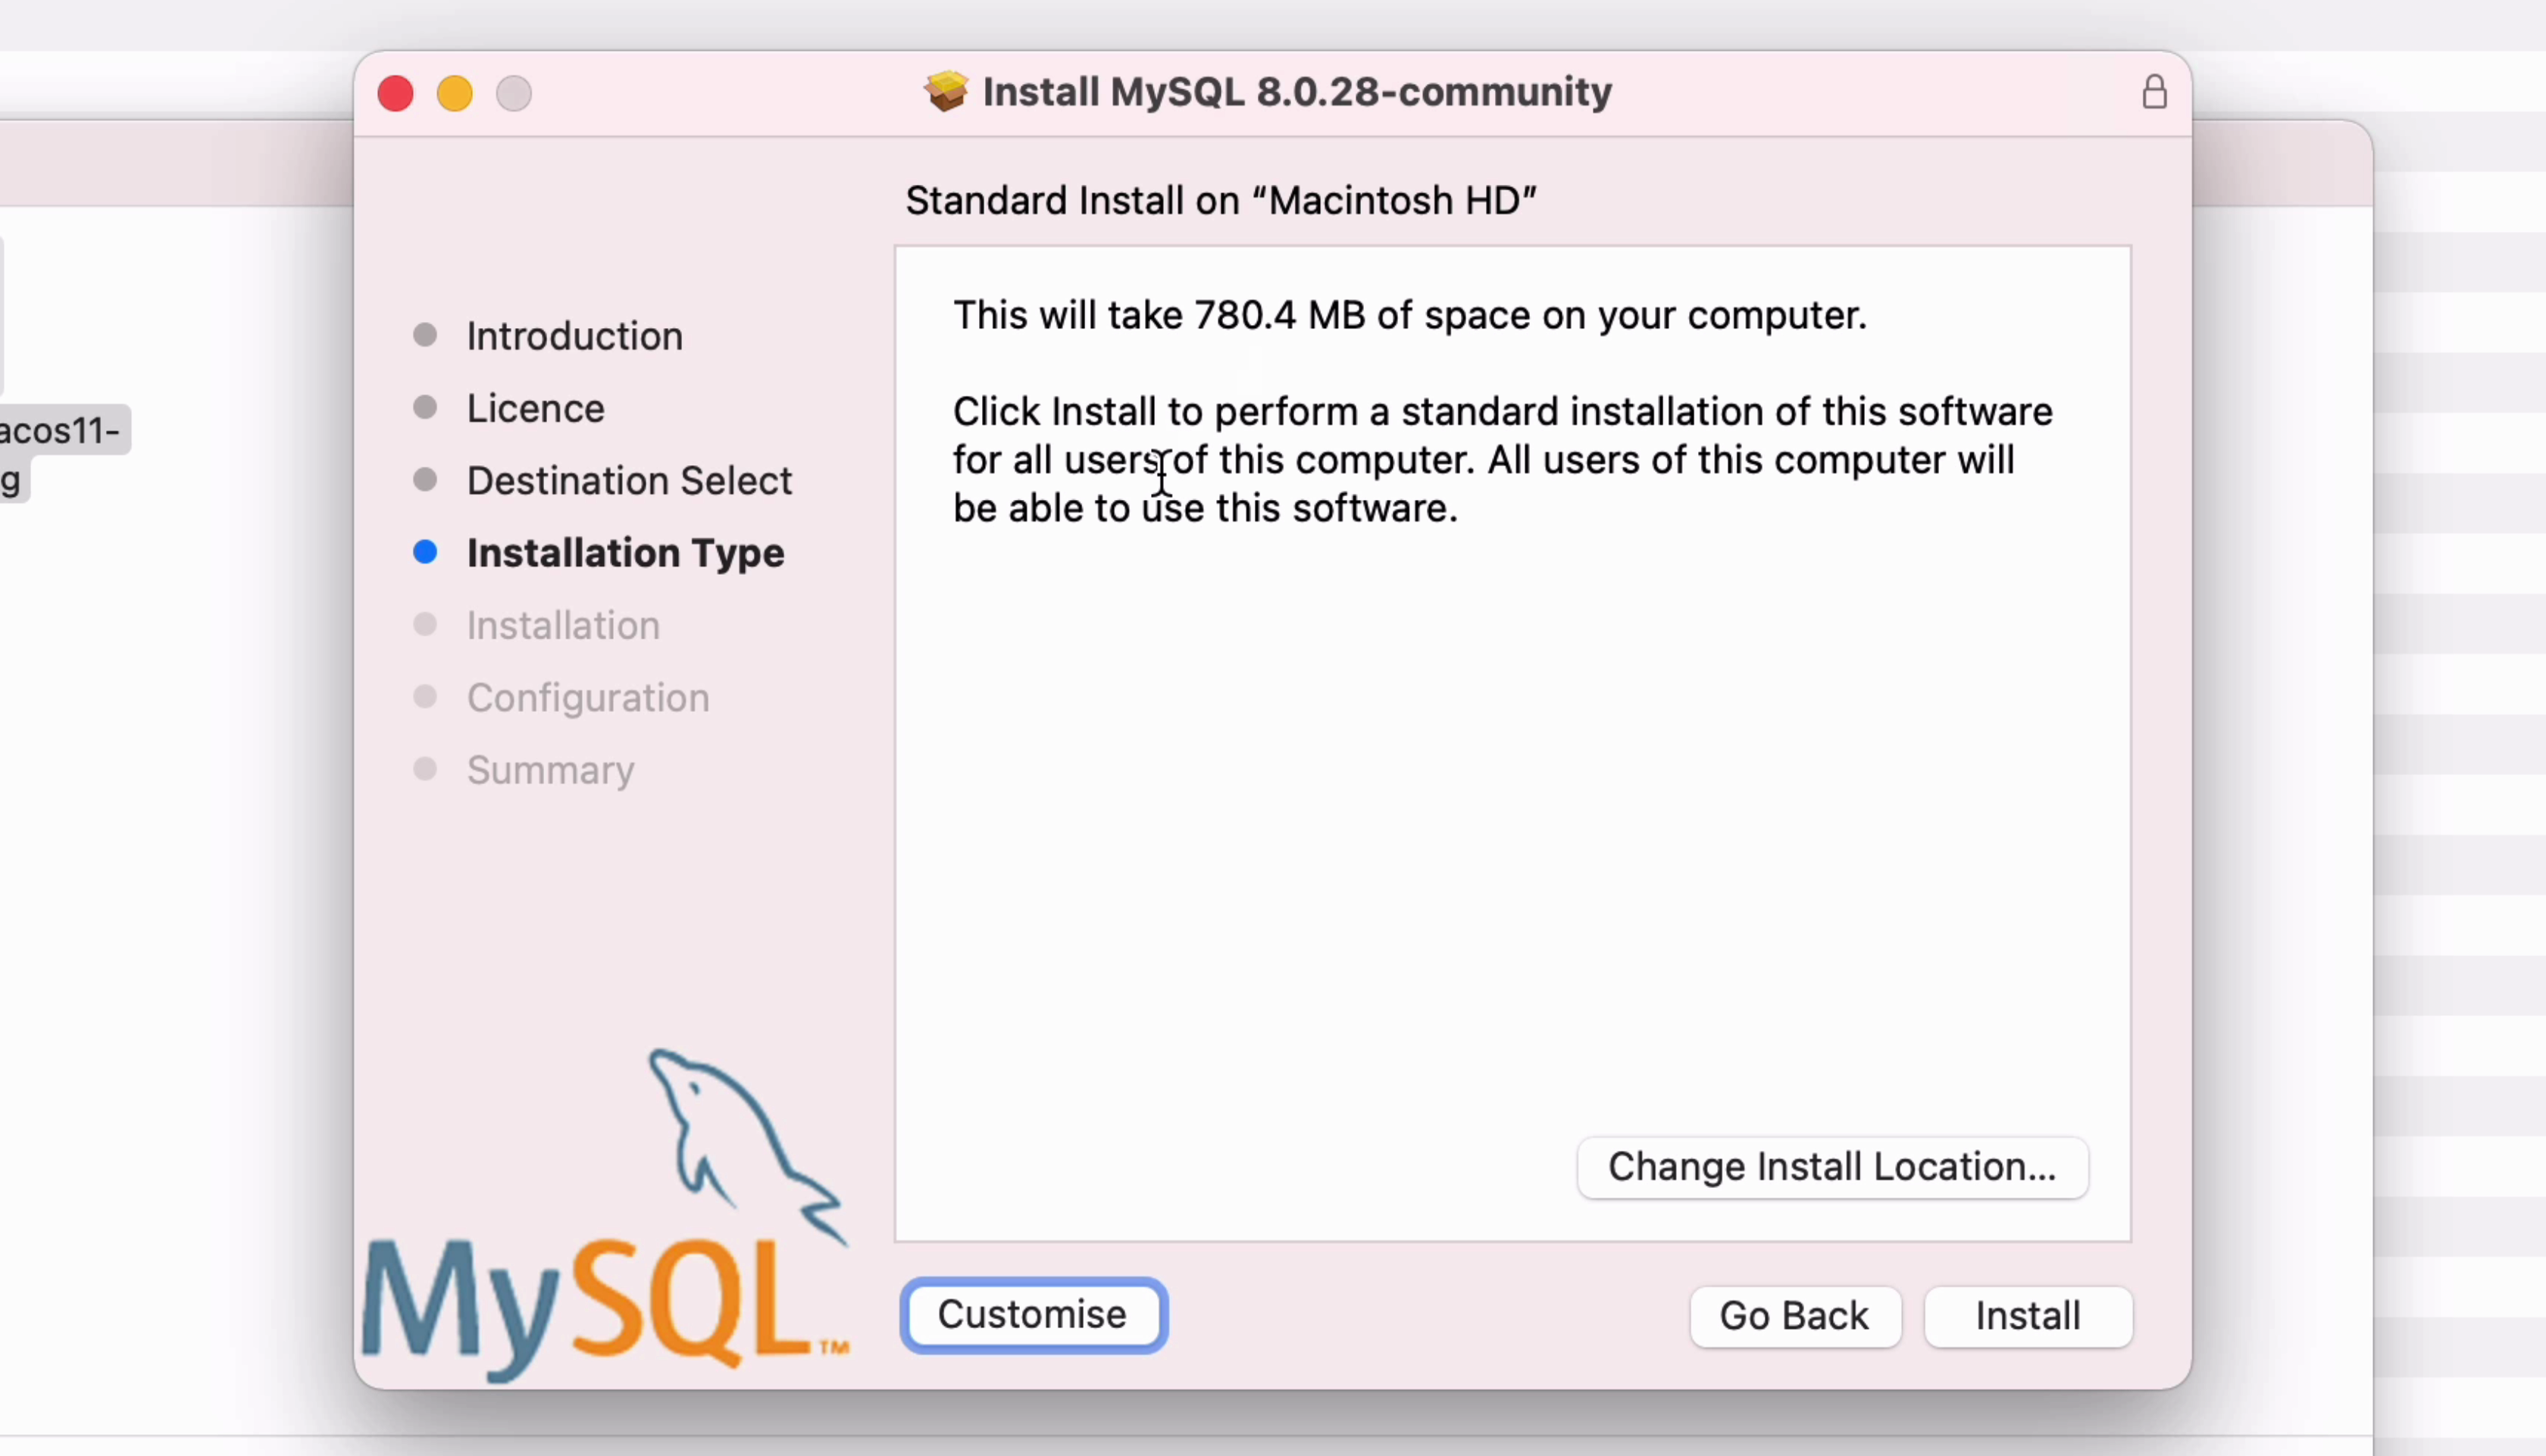
The installer will then advise how much space MySQL will take up. We can see it’s 780 MB in this version.
Click Install.
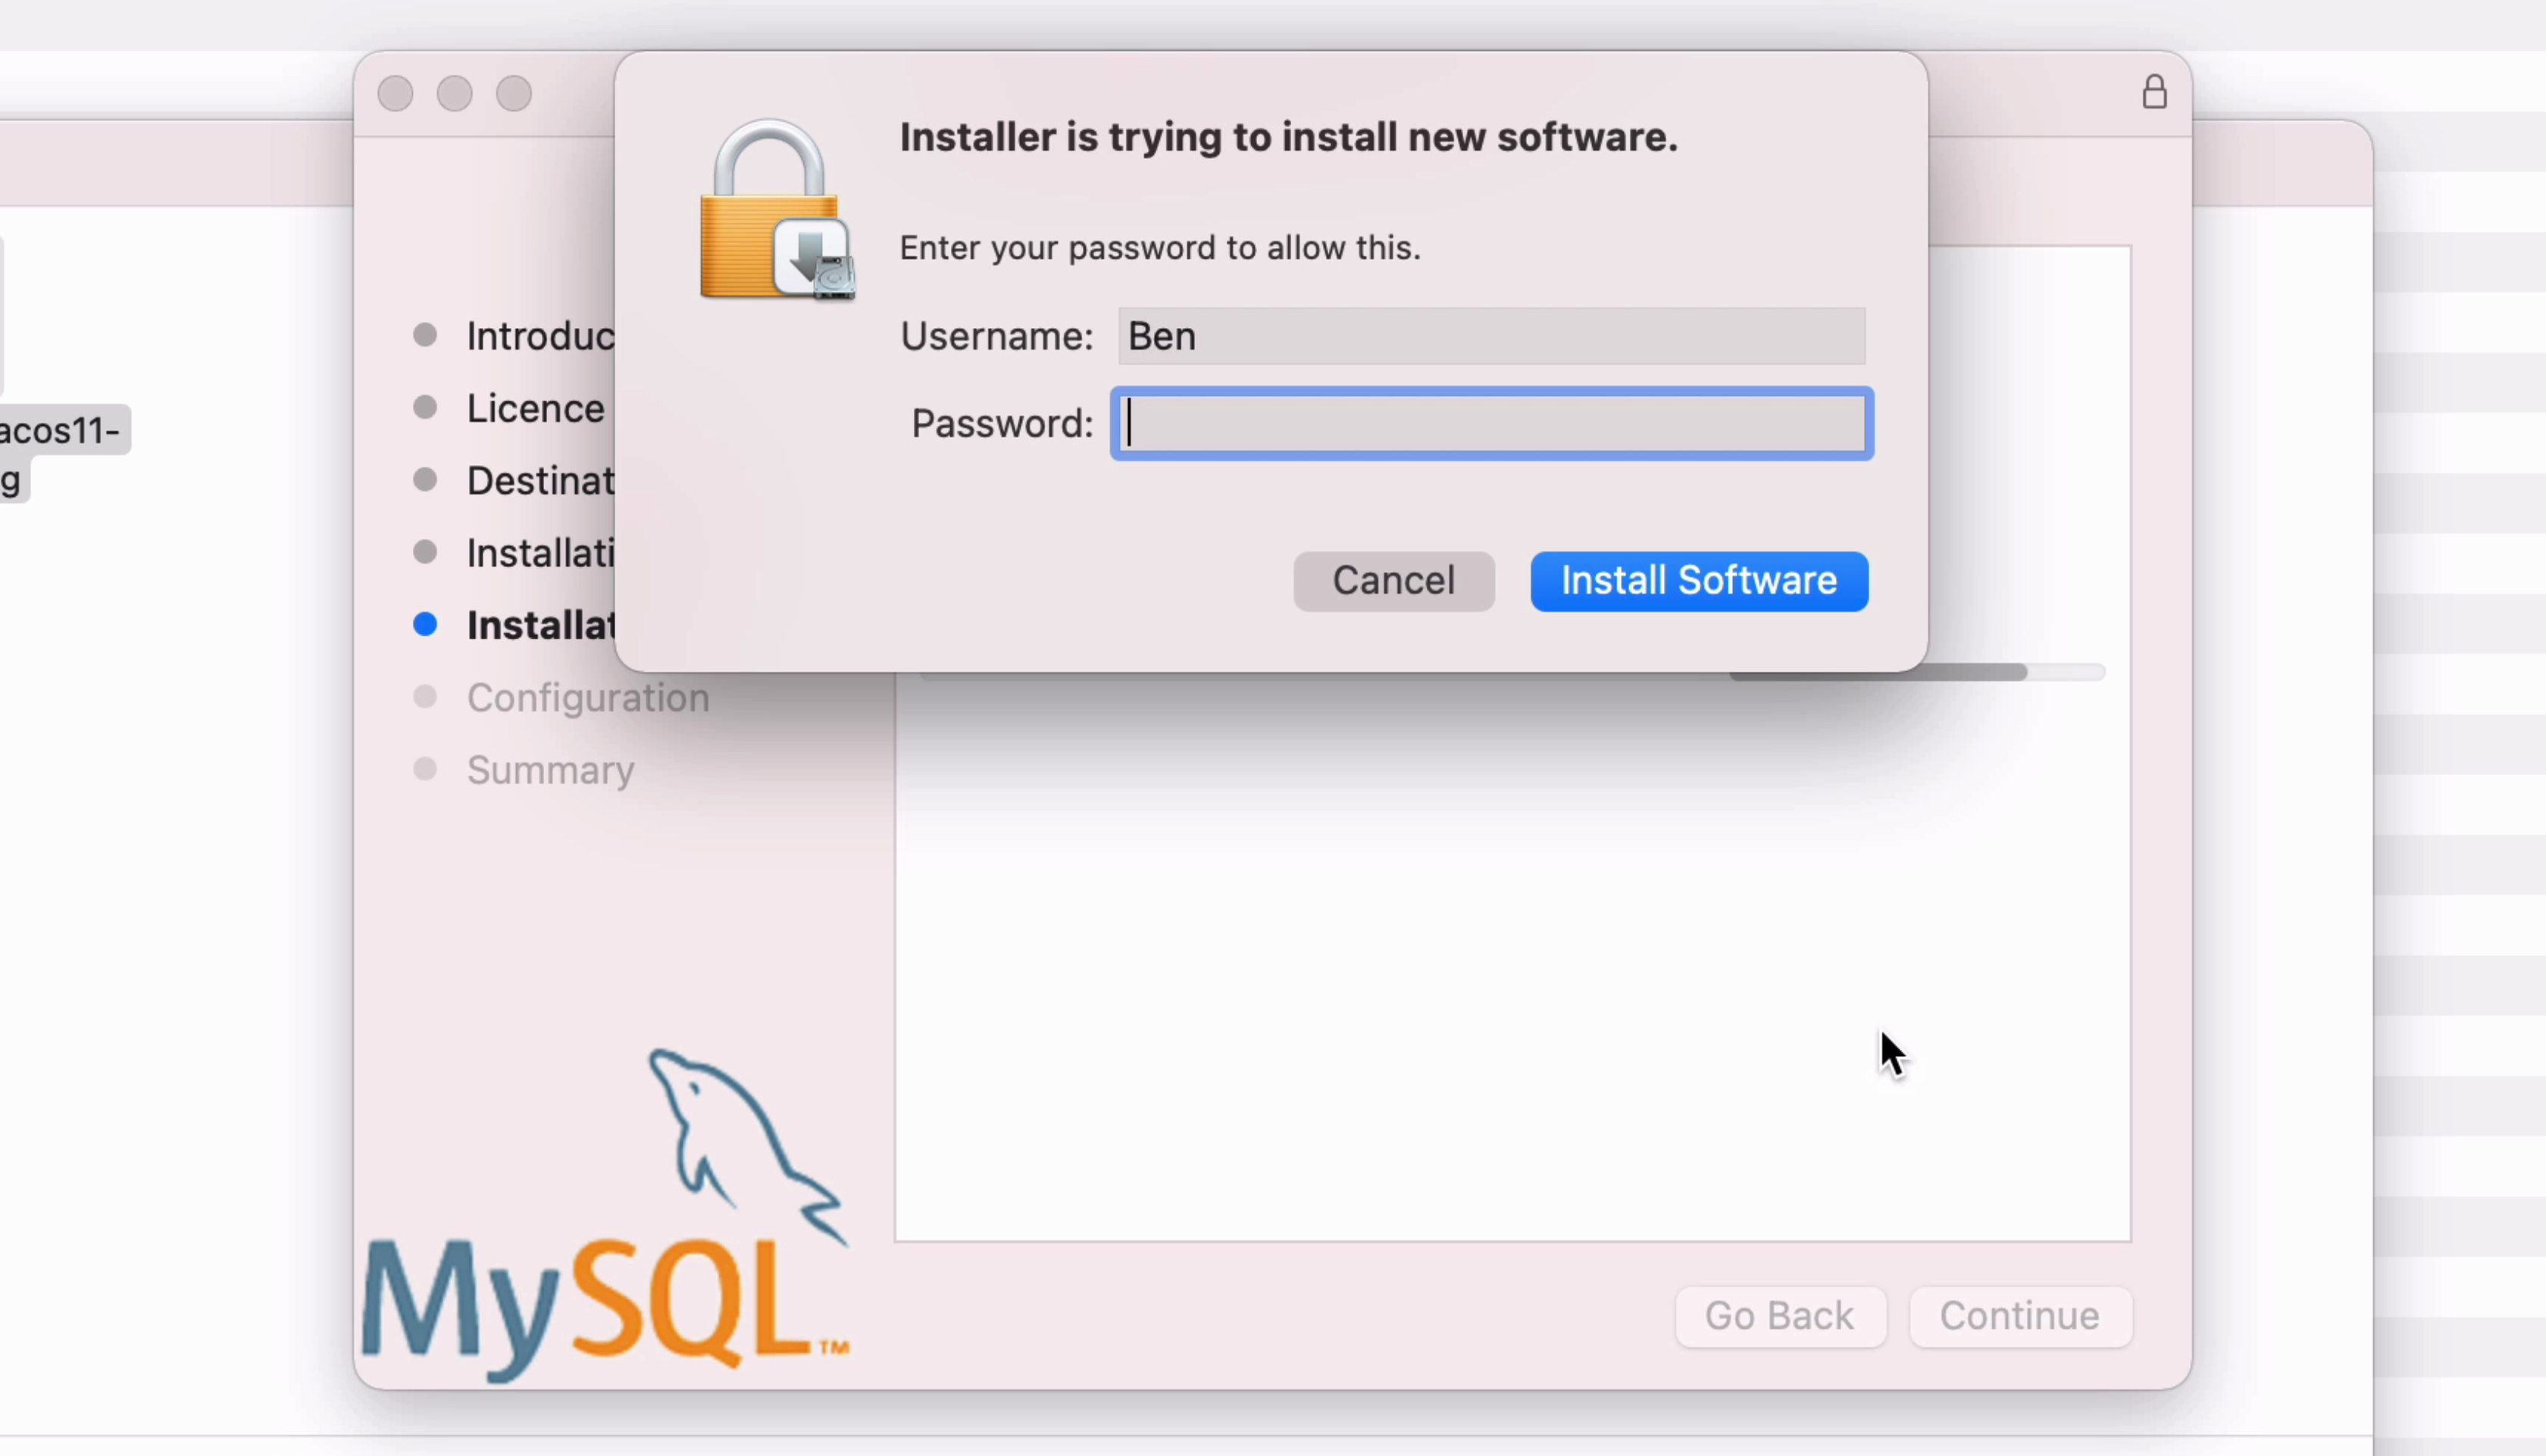
You’ll then be prompted to enter your password for your Mac.
Enter the password and click Install Software. MySQL will then begin installing.
After a few moments, the installer will finish.
You’ll be asked to select your password encryption method.
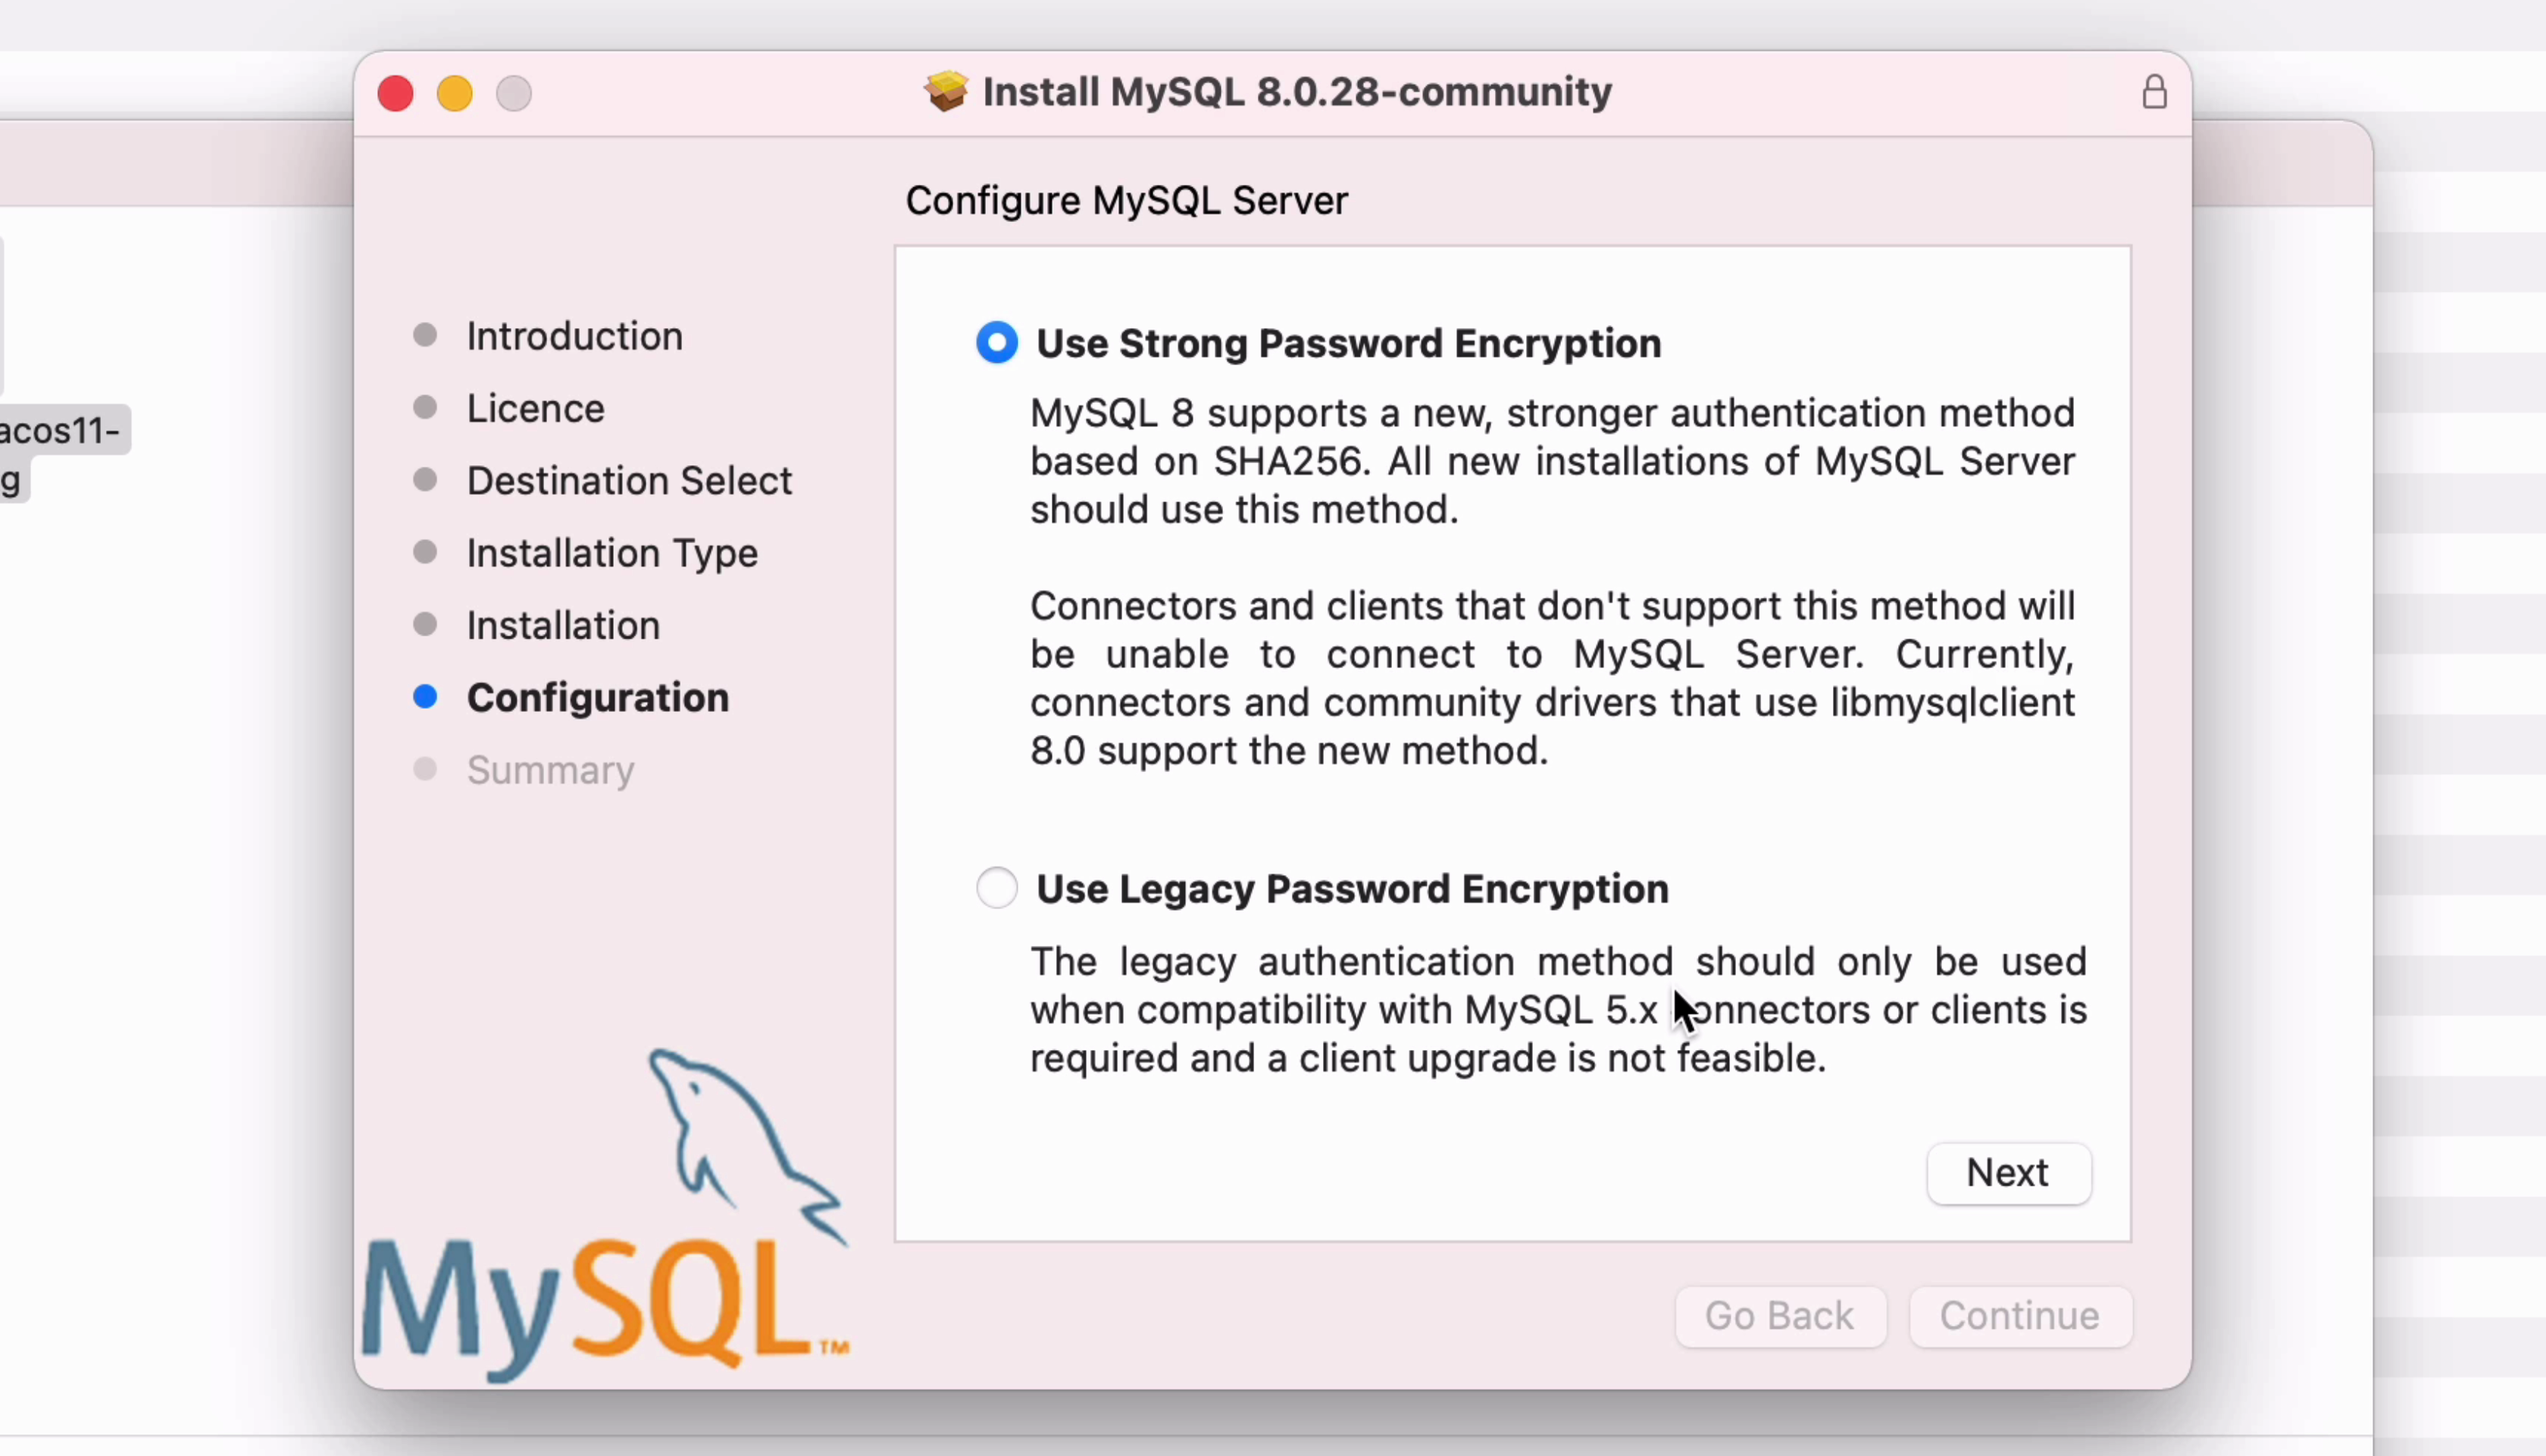
Leave the default selection of Strong Password Encryption and click Next.
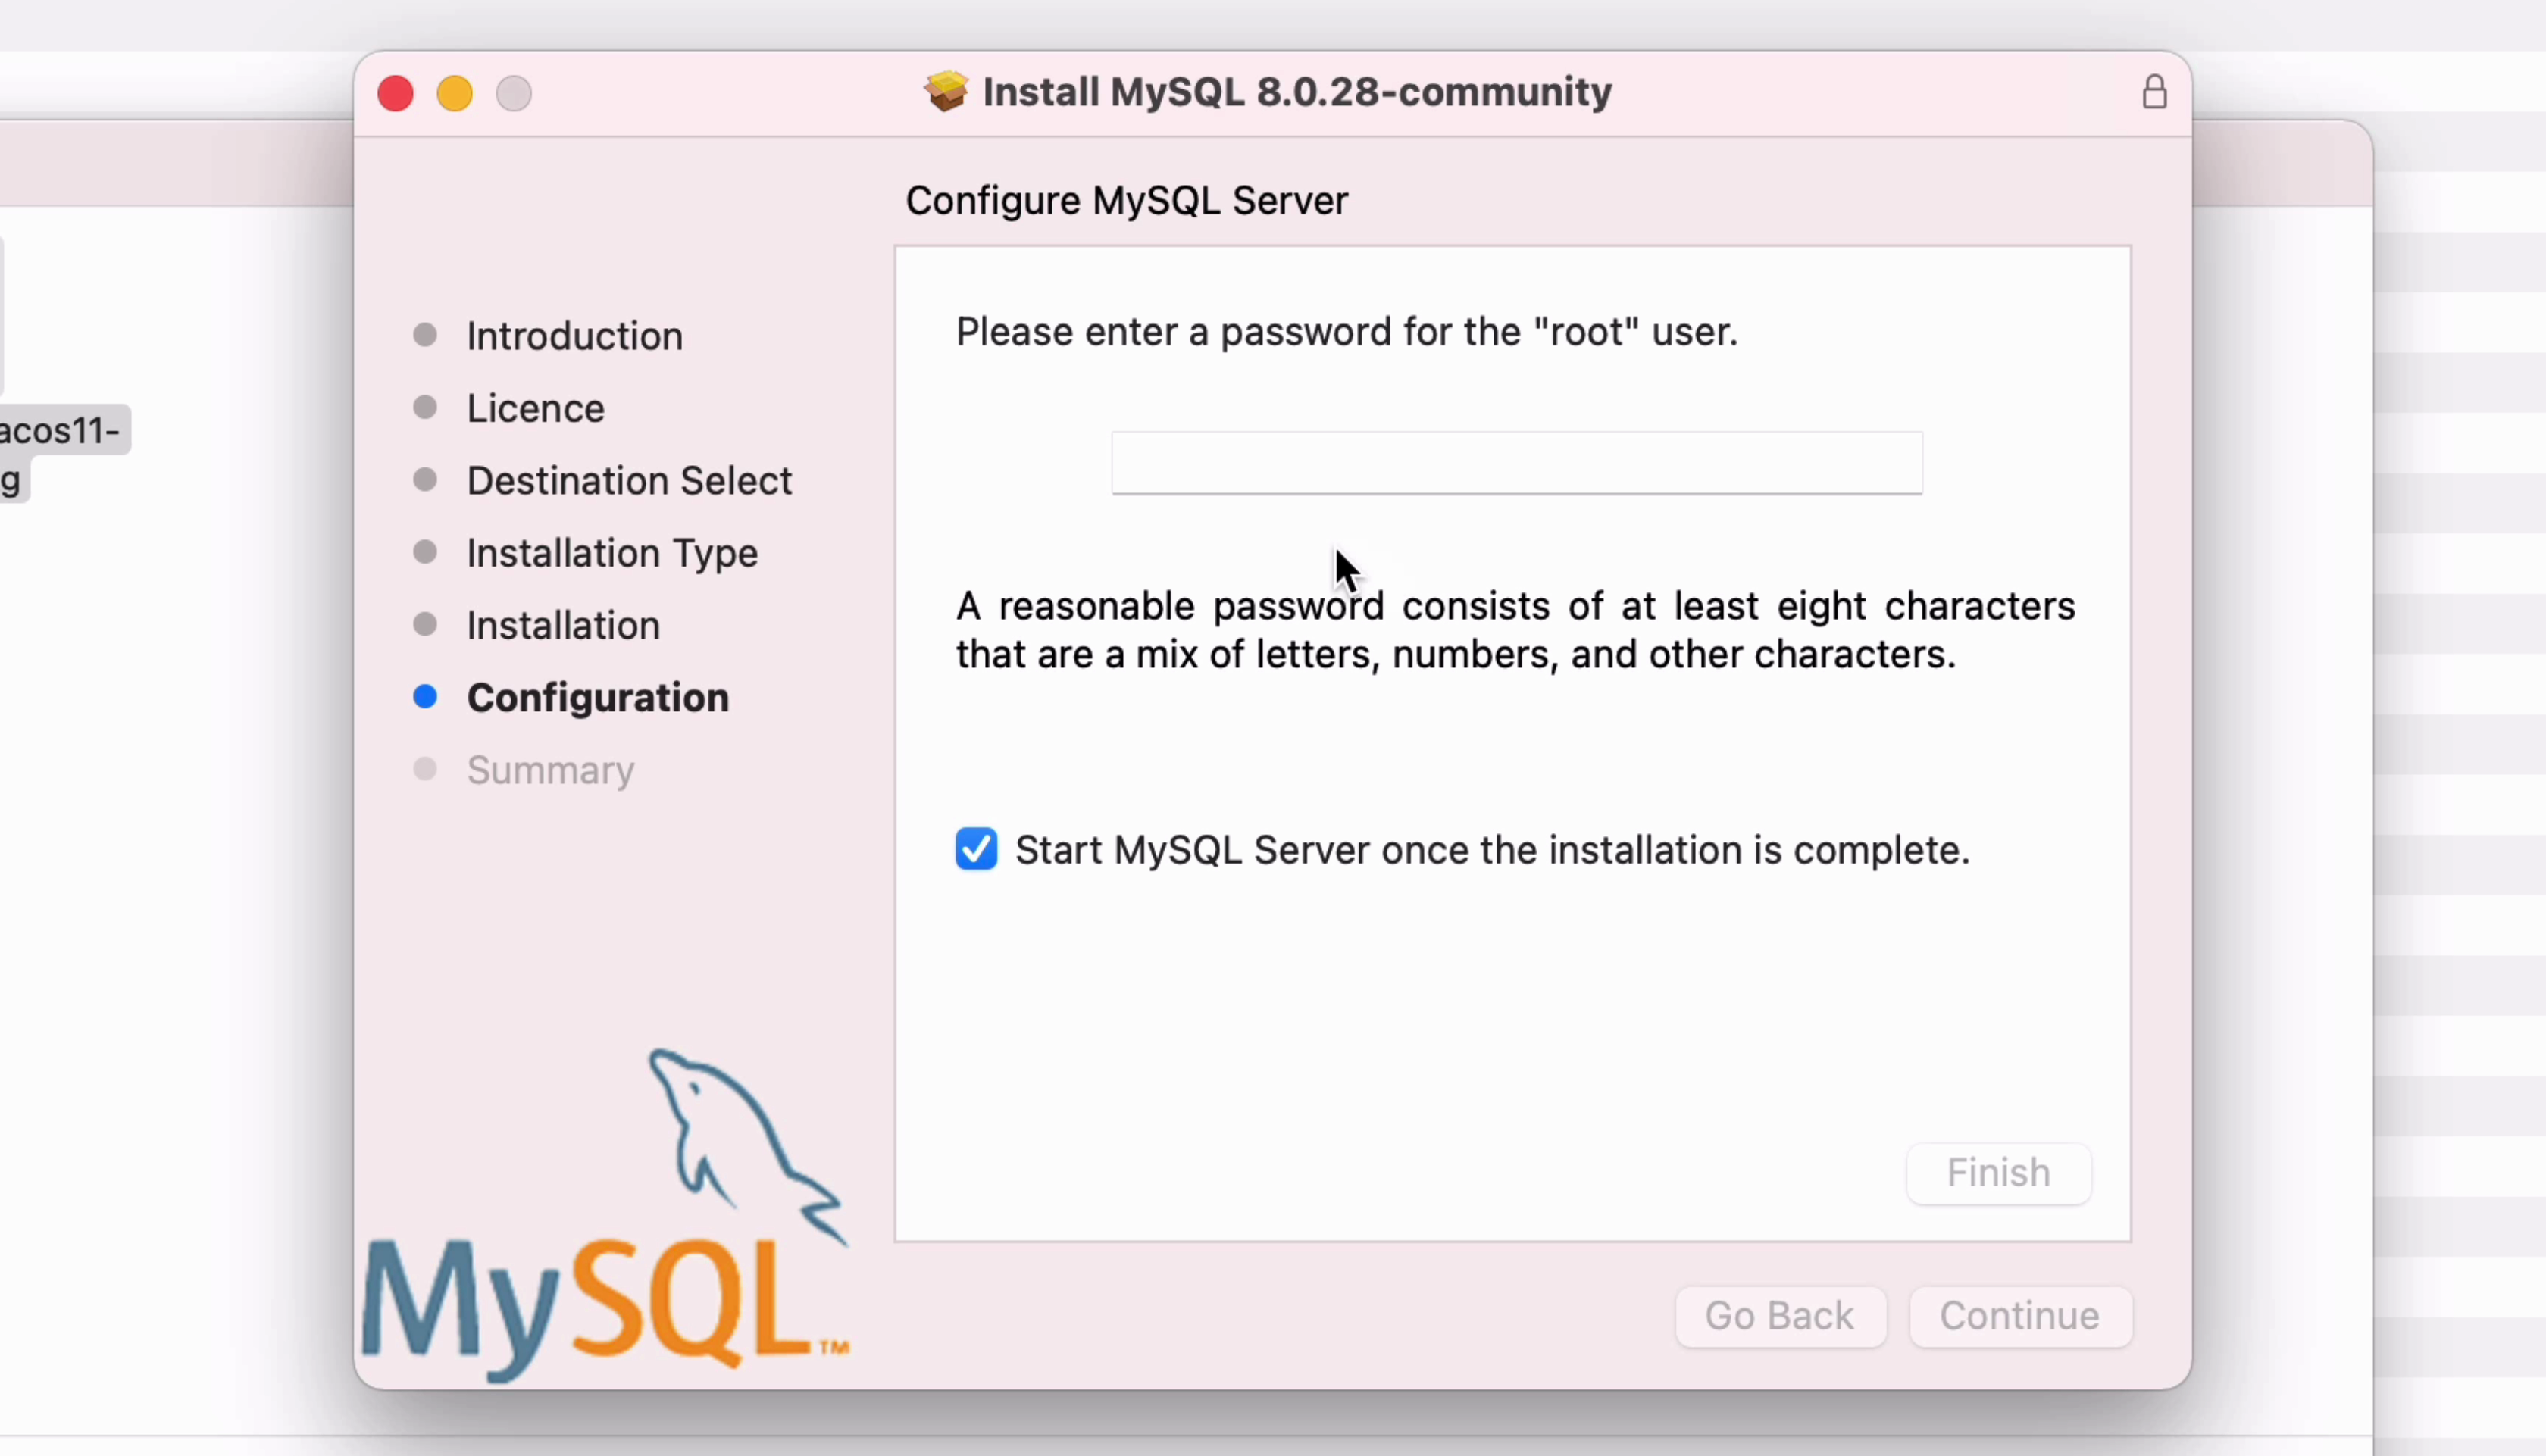
Enter a password to use for the root account. You will use this when you login to MySQL and start running SQL, so choose something you can remember for later.
Also, there’s a checkbox for “Start MySQL Server once the installation is complete”. You can leave this checked, as we will login to the database after it is installed, and this will save some time.
Click Finish when you are done.
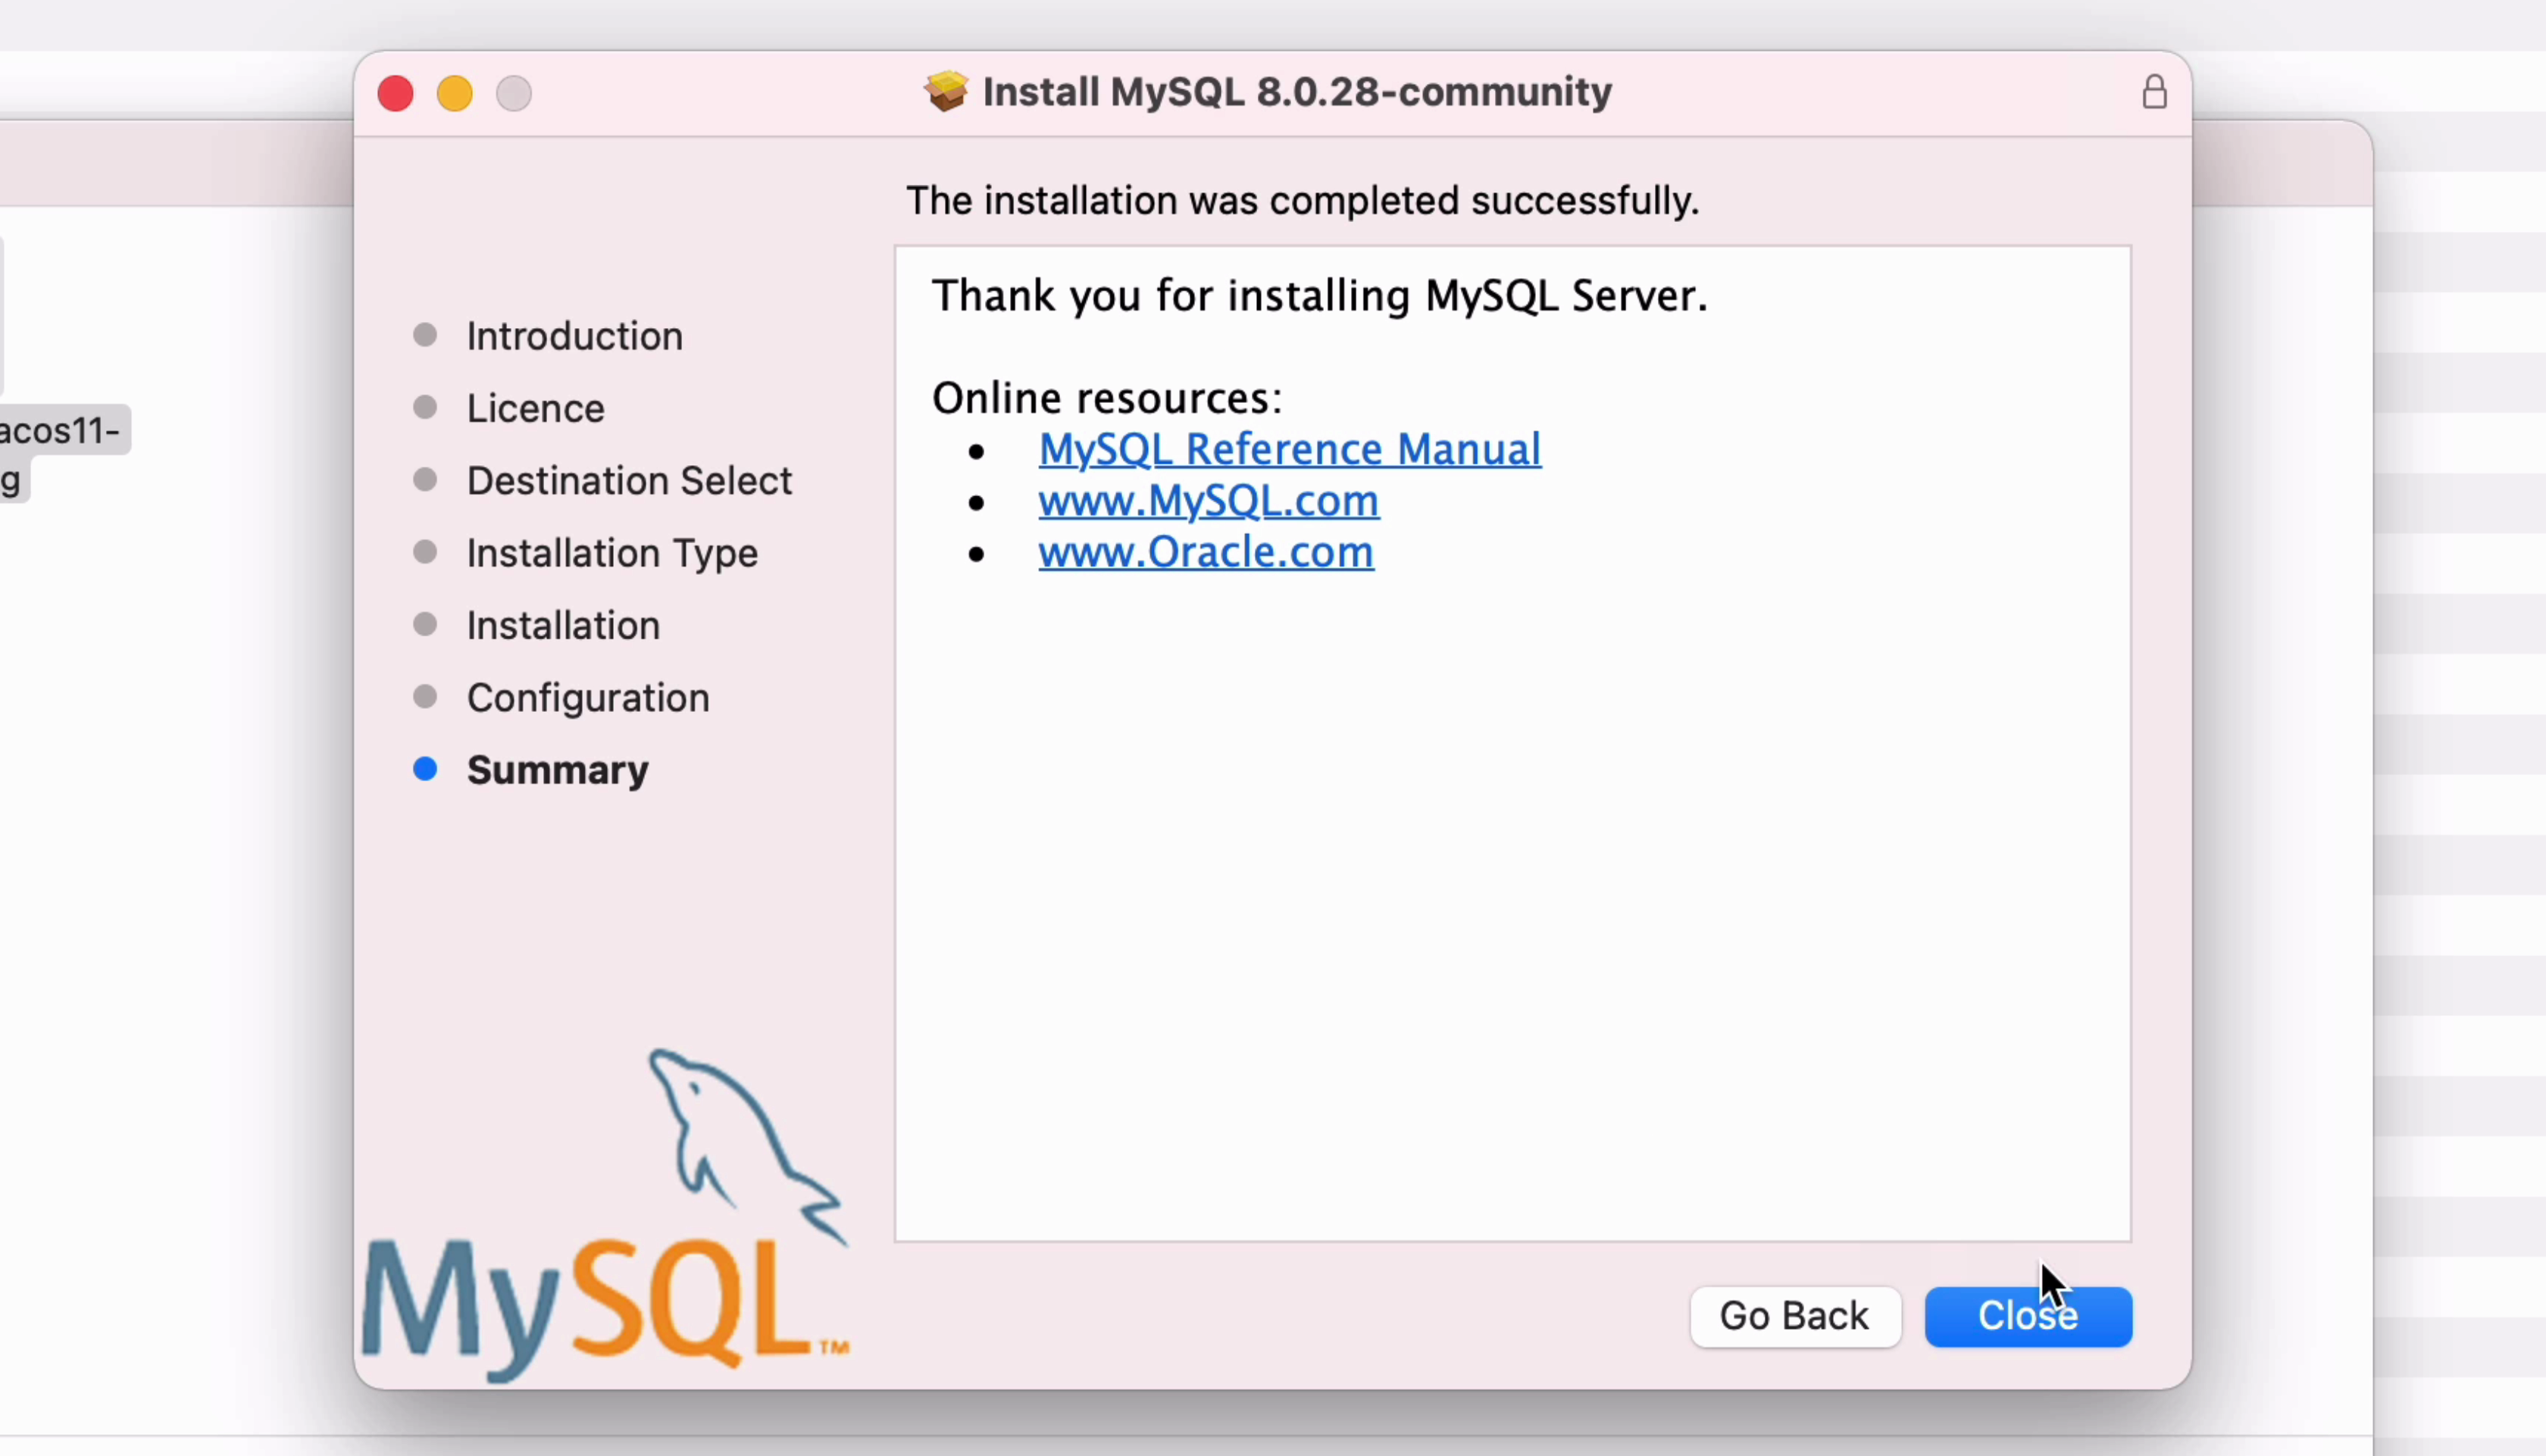
Enter your Mac password again, which is the password for your Mac computer, not the root password you just entered.
The database setup will take a moment, and then the installer is finished. Click Close.
Step 3: Check MySQL is Running
Now that MySQL is installed, we should check that it is running.
To do this, go to the Apple menu in the top left, and click System Preferences.
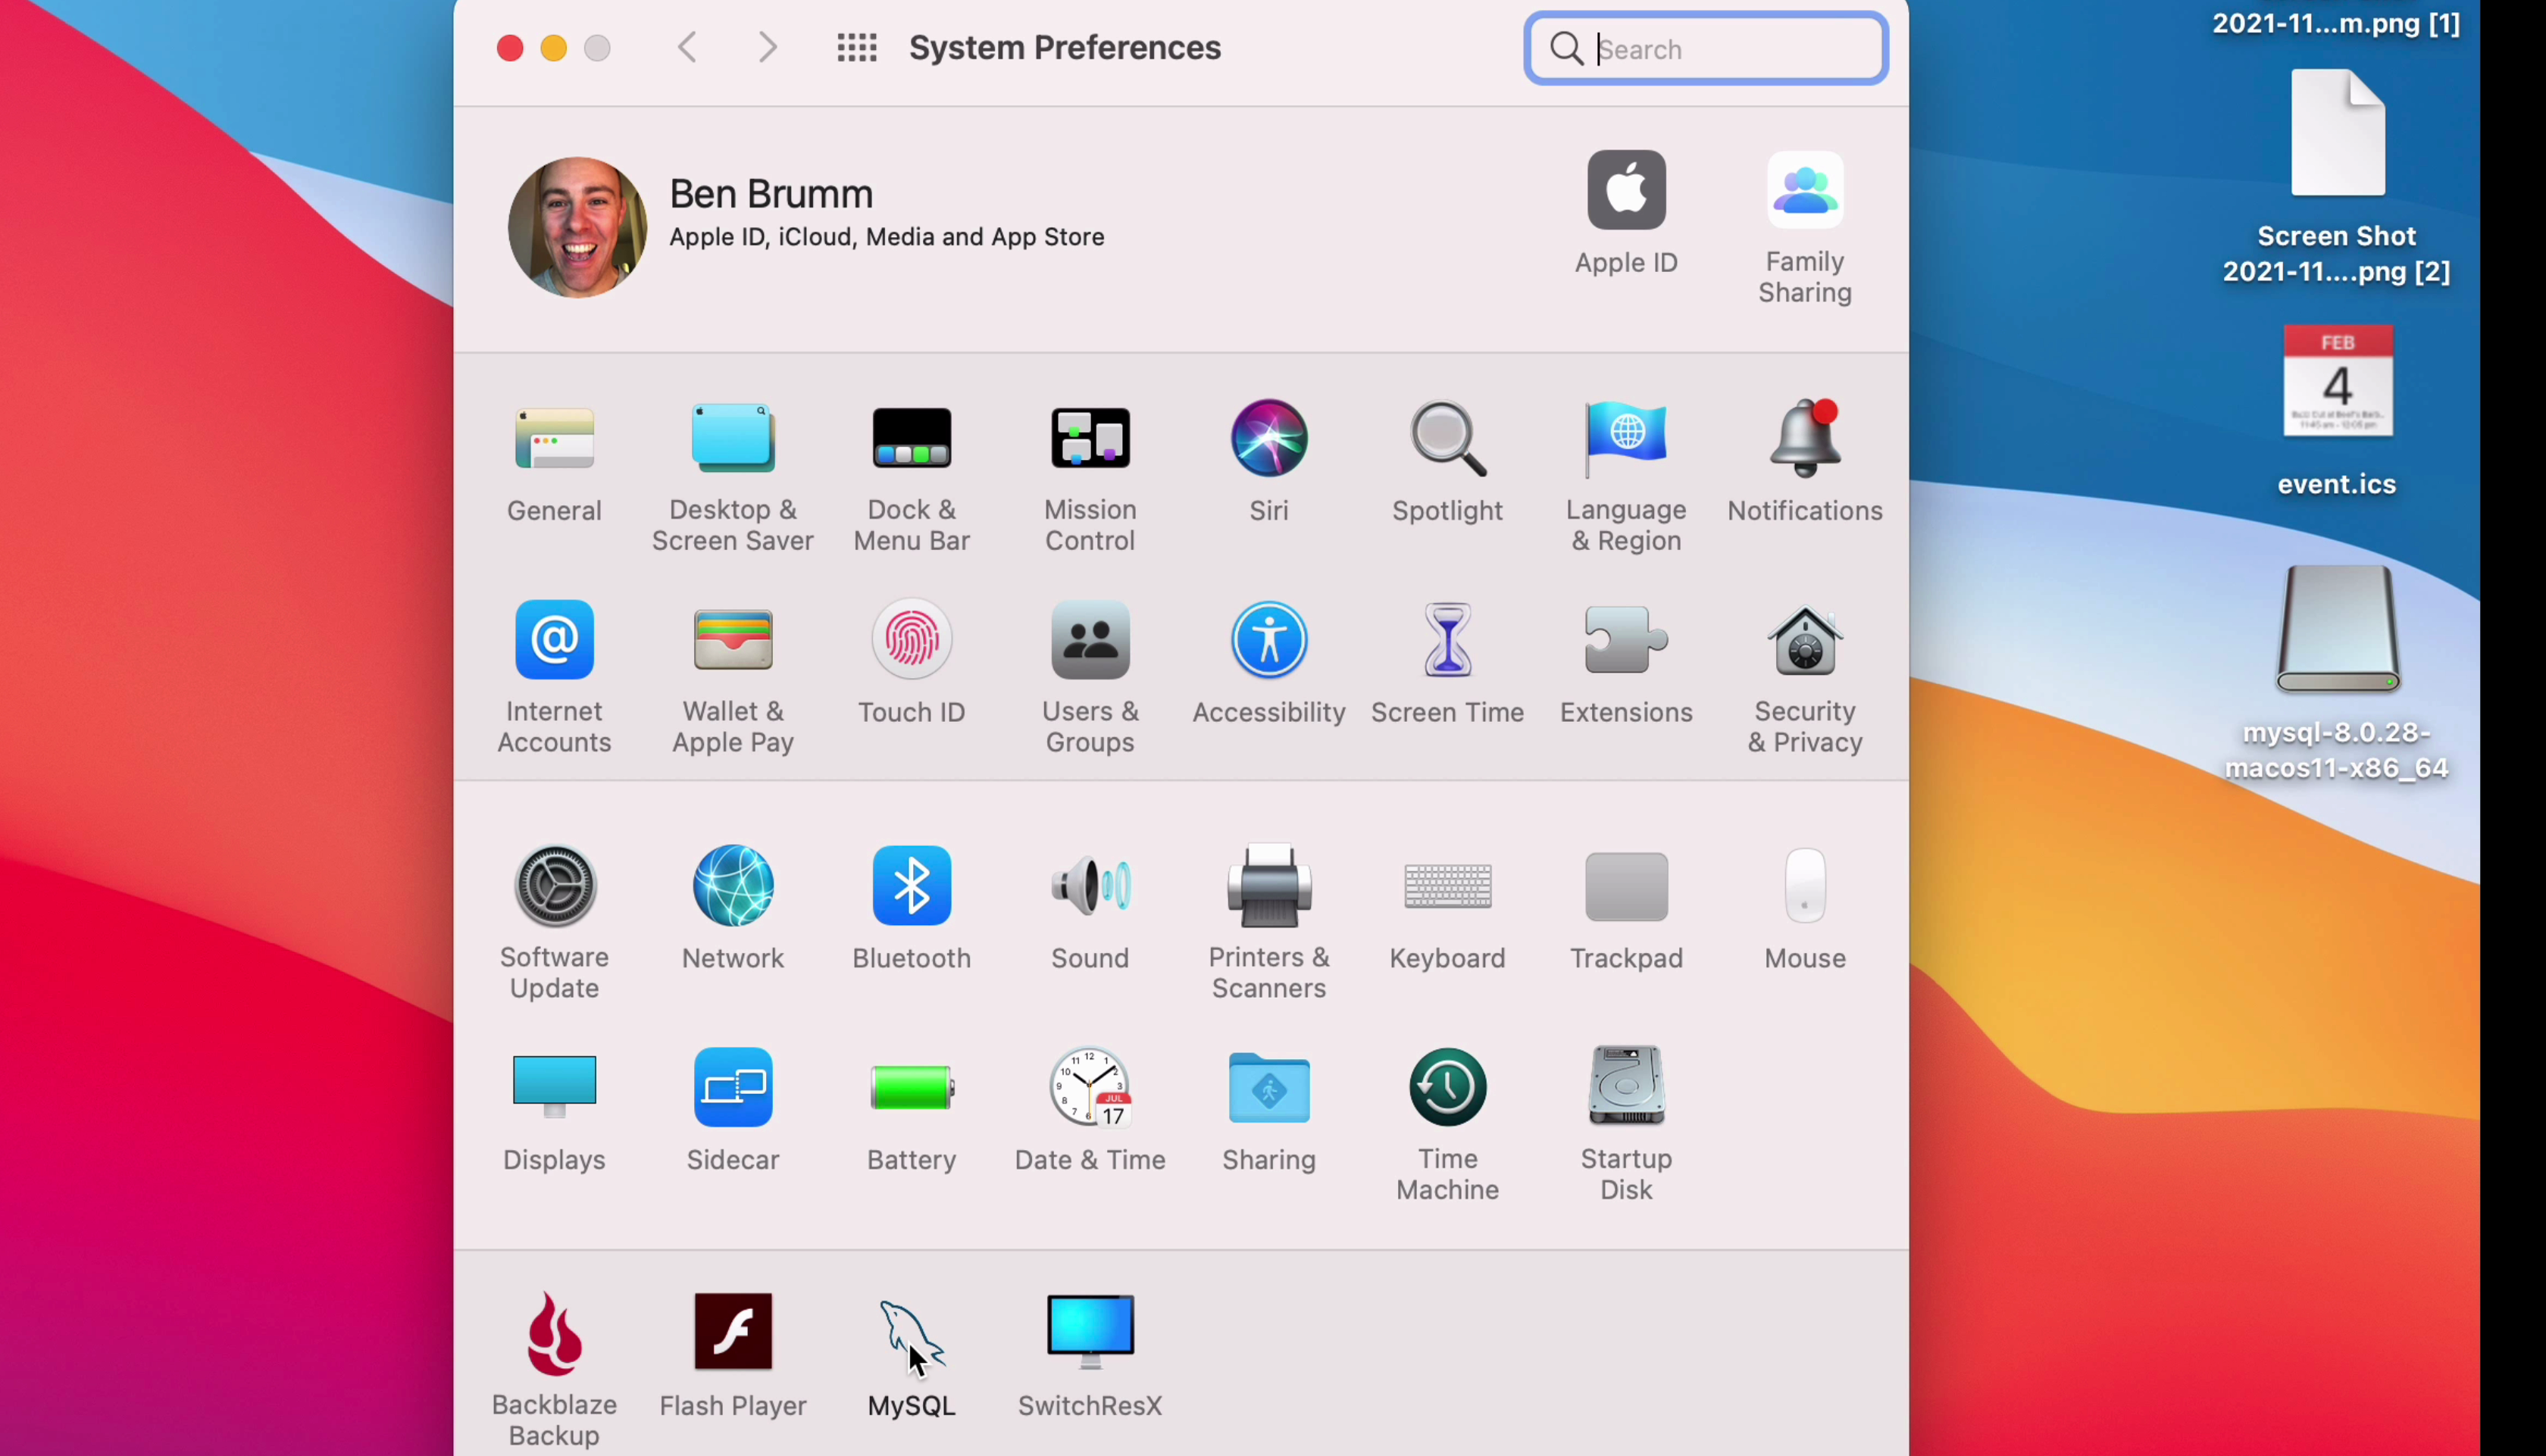
Click once on the MySQL icon in this preferences window.
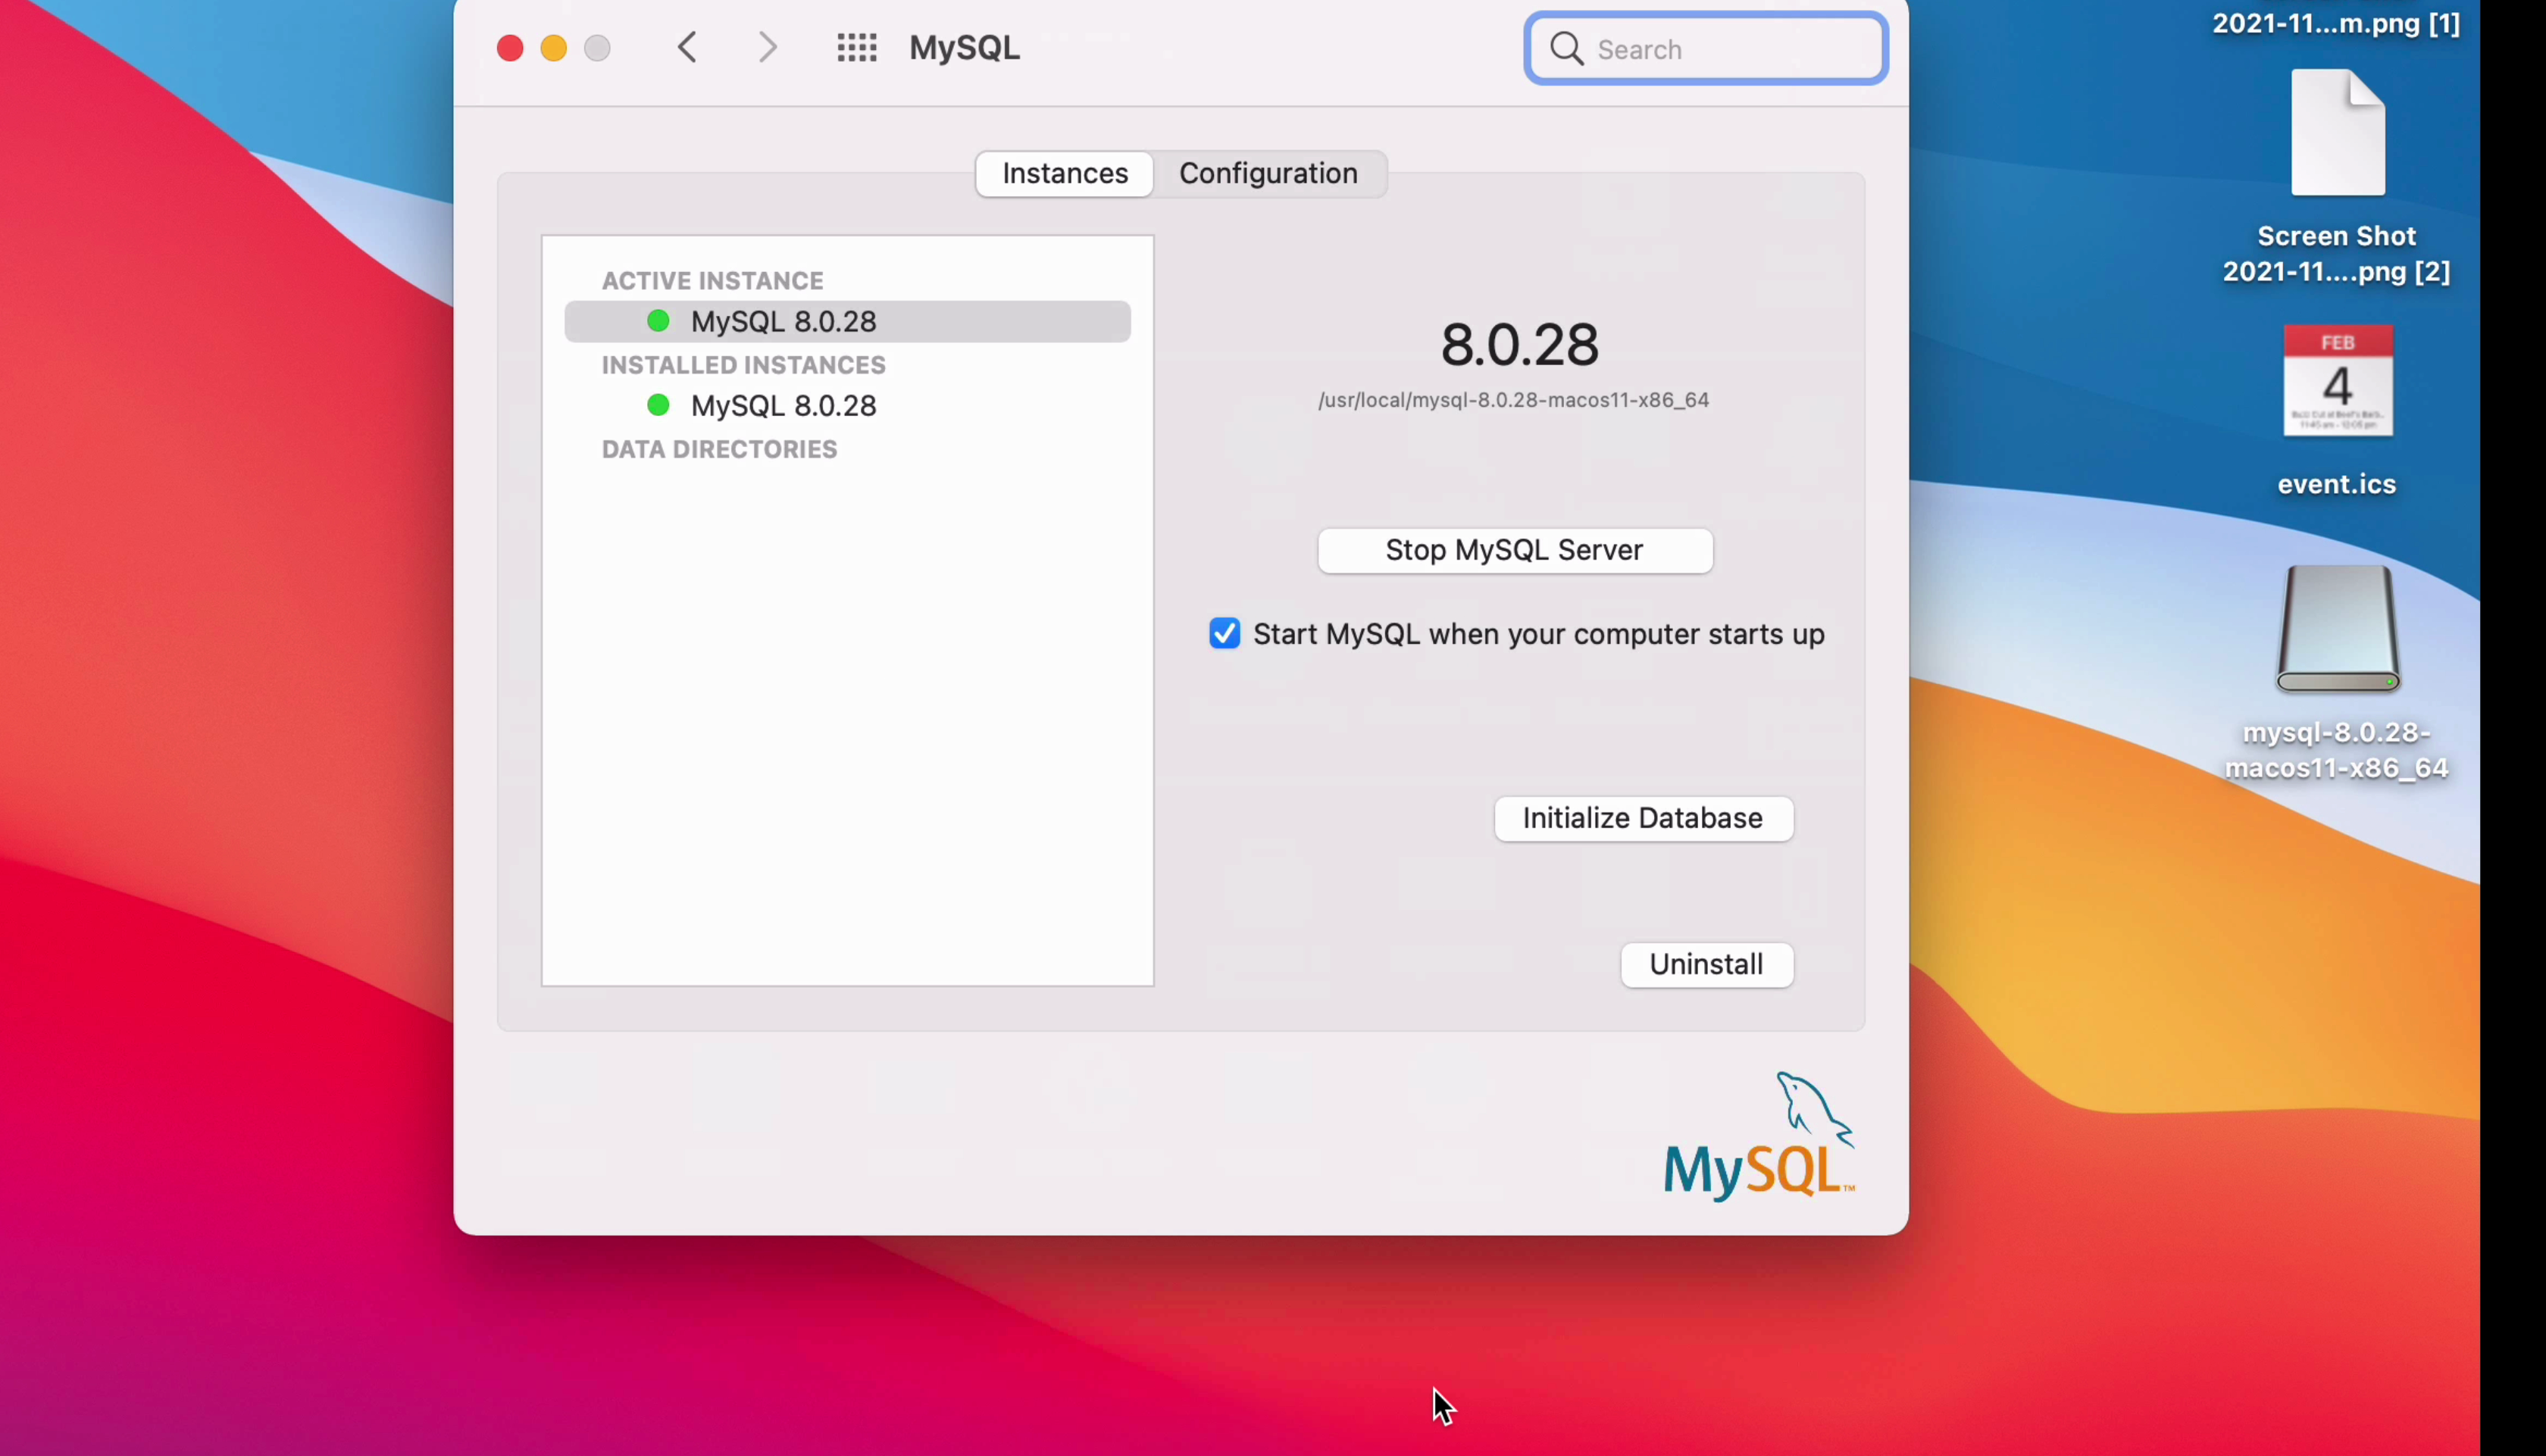
You’ll then see the MySQL settings. The things to notice here are the version number, in large numbers on the right. This is 8.0.28, which is the version we just installed.
Also, on the left, we see the Active Instance of MySQL 8.0.28, which has a green dot next to it to indicate it is running.
Step 4: Connect to MySQL
Now that the server is running, it’s time to connect to it.
We could use an IDE such as MySQL Workbench, so if you have that installed, you can use it. However, in this guide, we’ll assume it isn’t installed. We can connect using the command line, and run a simple query to see that it is OK.
To do this, open the Terminal app.
At the prompt, type the MySQL command to login:
1mysql -u root -p
This will run the mysql client, with the username of root, and then prompt for the password.
However, when you run this, you may get an error that says “bash mysql command not found”.
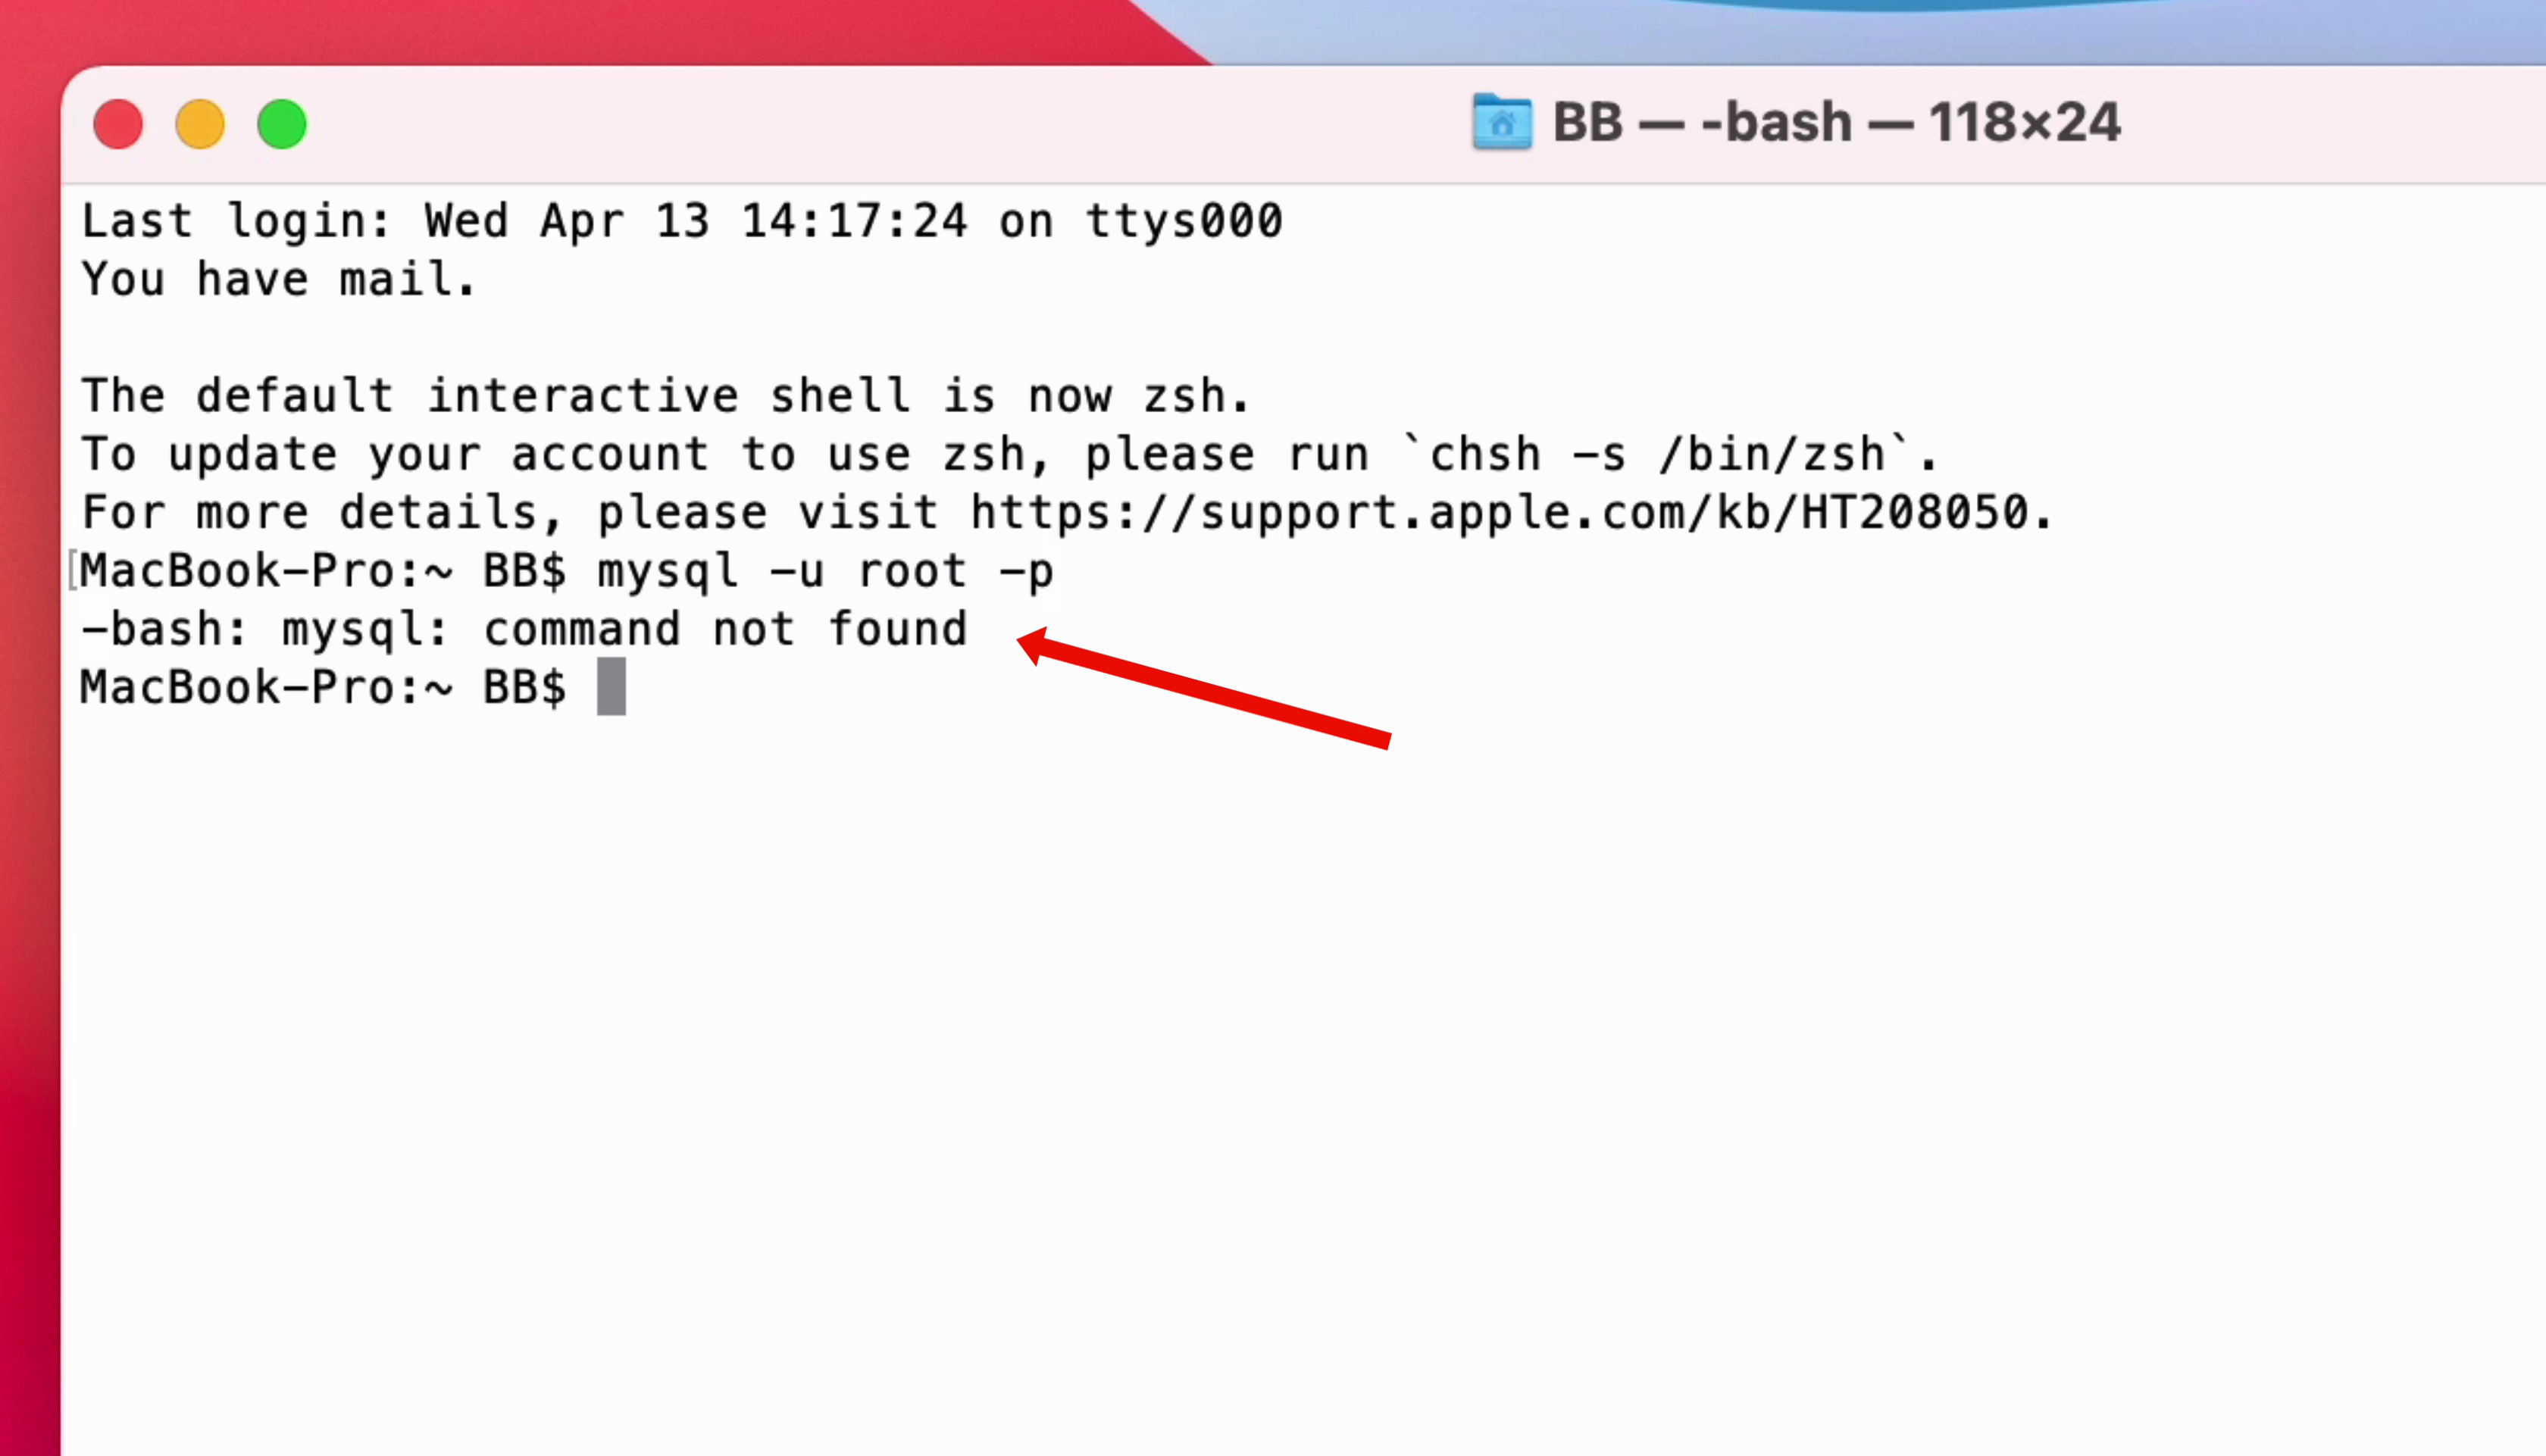
This means that the Terminal does not know anything about the mysql command. To fix this, we need to change some configuration on our Mac.
We could browse to the directory that mysql is installed in, but we would need to do that every time we wanted to connect. It’s easier to make a configuration change once, and have it work every time.
So, let’s do that.
Create a Bash Profile
To get this MySQL command to work, we could do a few things.
We could simply specify the full name of the MySQL tool in the command here and run it, which would work. In this case, we can run this command in the terminal:
1/usr/local/mysql/bin/mysql -u root -p
You can do this, and log in to MySQL, and not worry about the next step.
Another method is updating the Path variable. This is where need to get the location where the MySQL tool is installed, and add that location to our PATH variable in the operating system.
This will mean that whenever we use a command, the Path variable is checked, and the location of the tool is found. In this case, we will be able to run MySQL.
So, to do this, we open the bash profile file in Terminal by running this command:
1open -t .bash\_profile
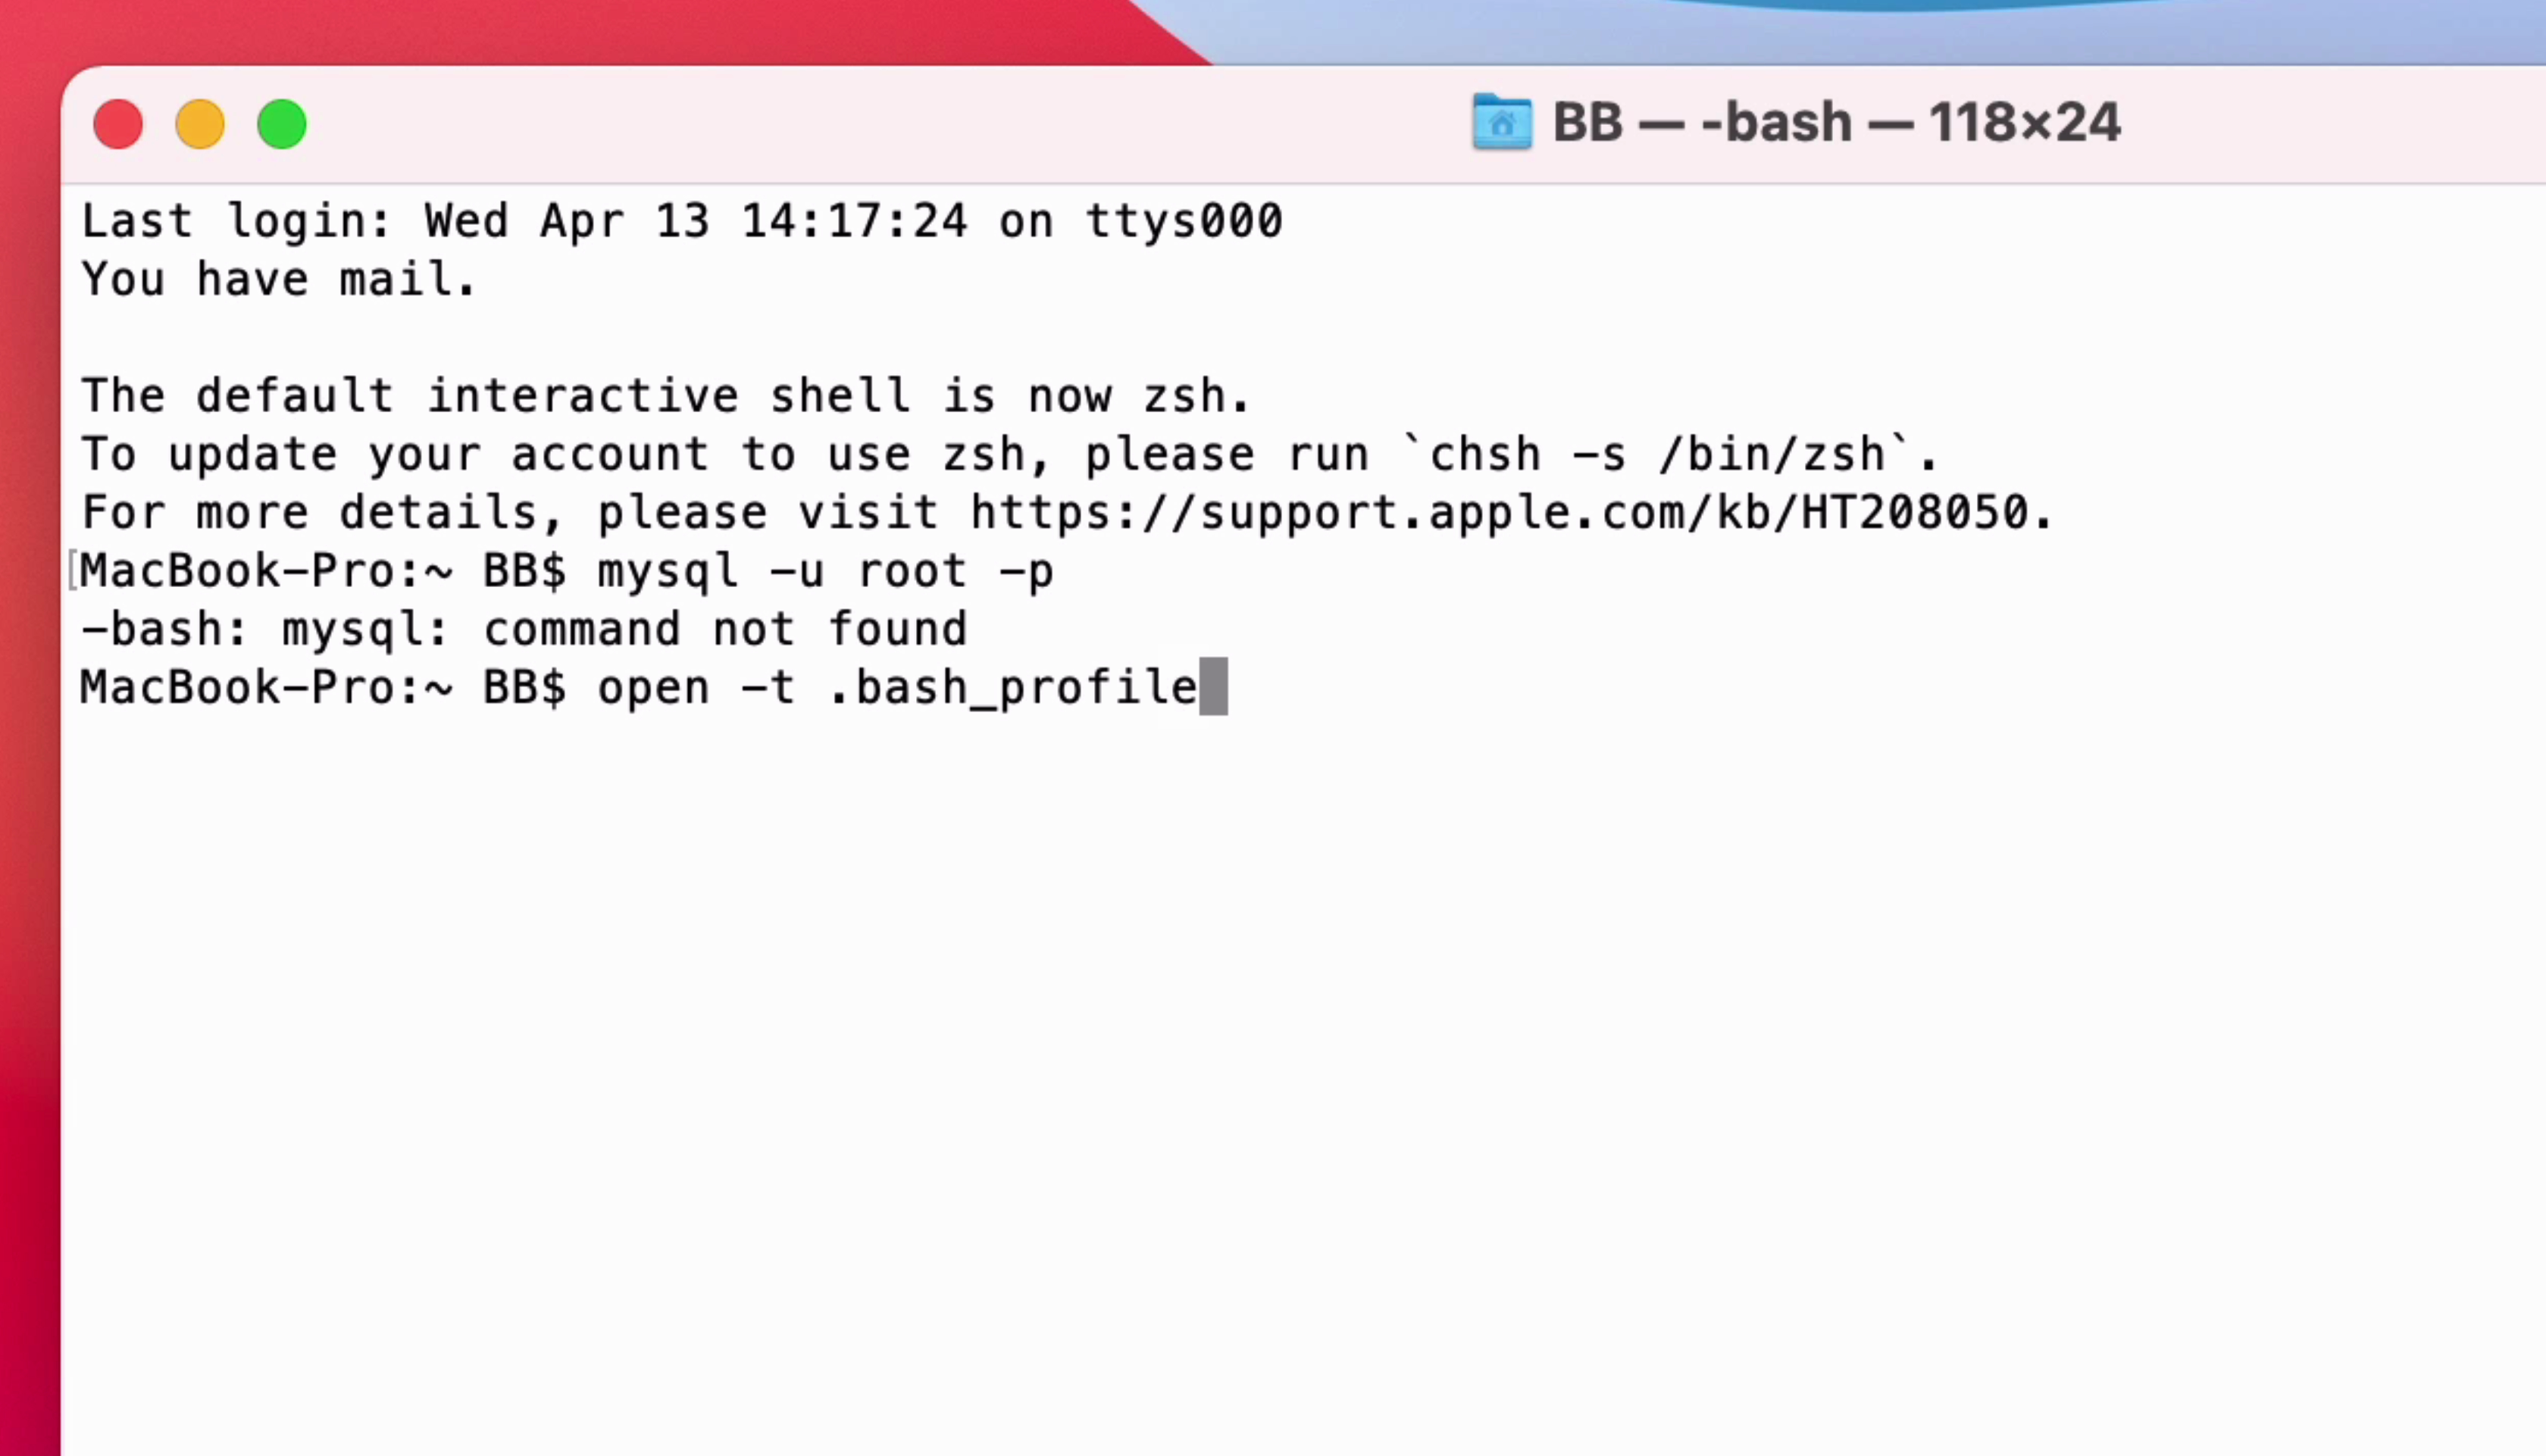
This will open a text file that may have some text in it already.
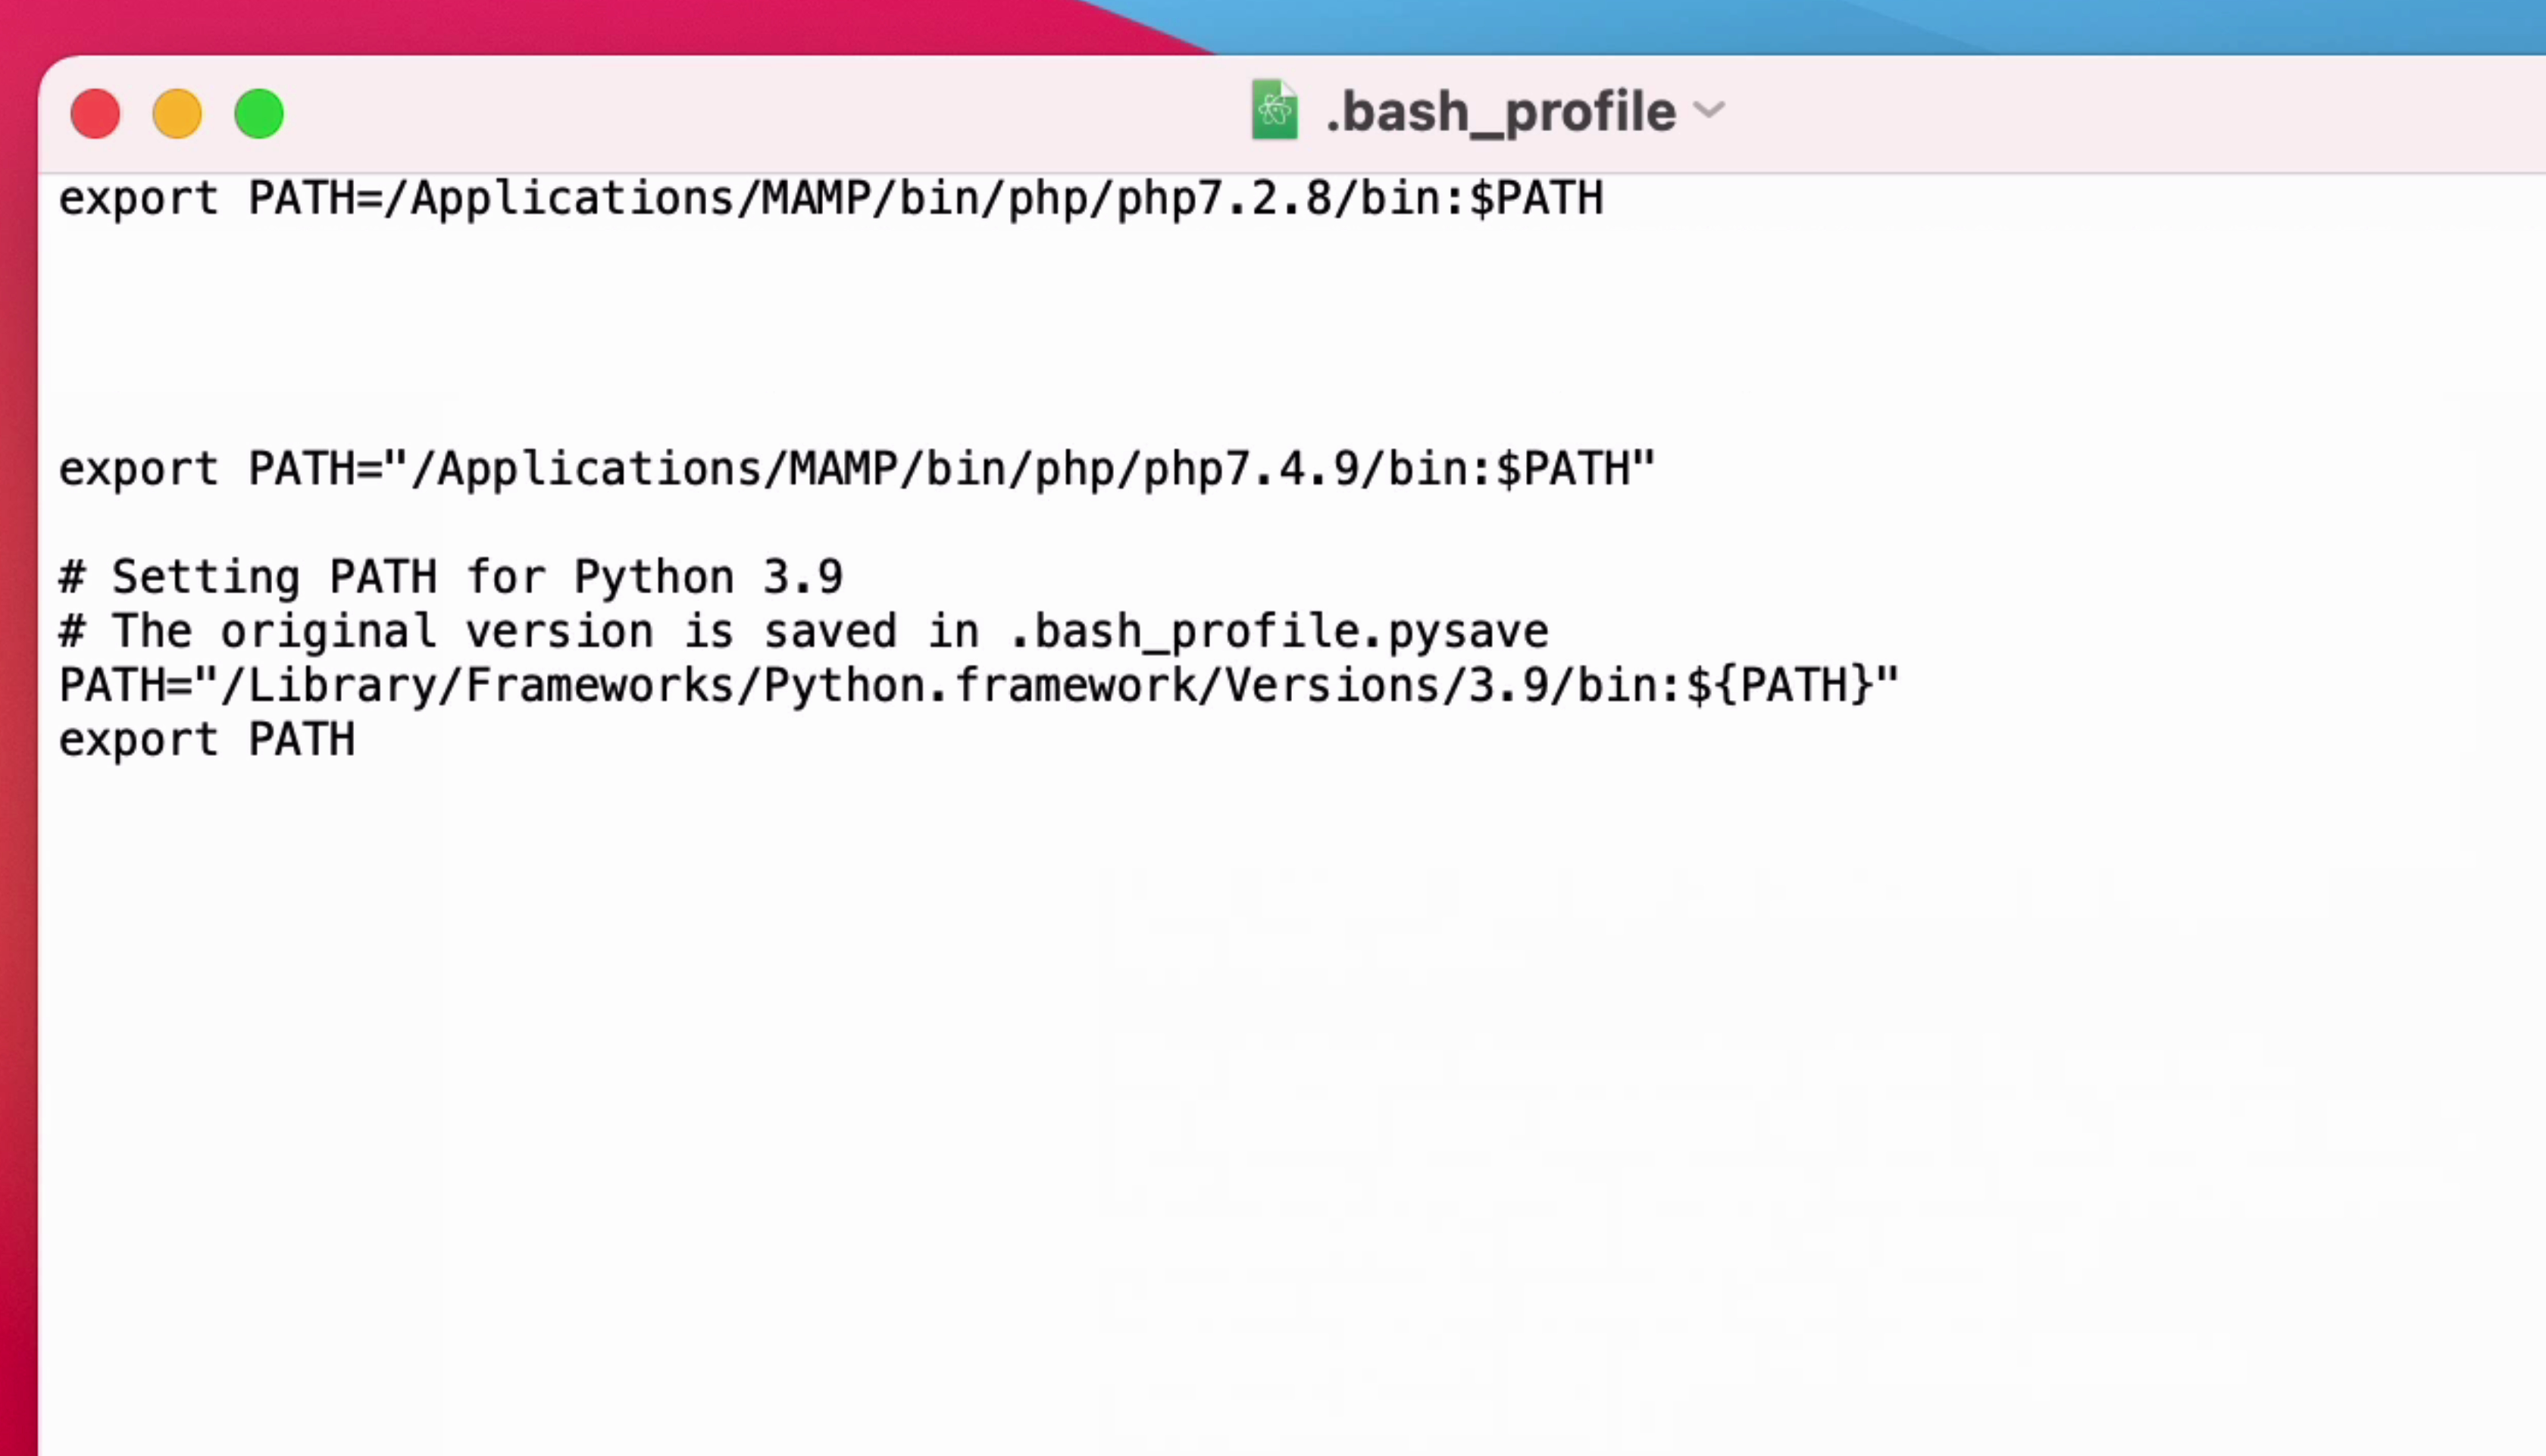
Now we need to add a line to it for our MySQL tool. Add this line:
export PATH=${PATH}:/usr/local/mysql/bin/
This means that the MySQL bin folder is added to the path variable.
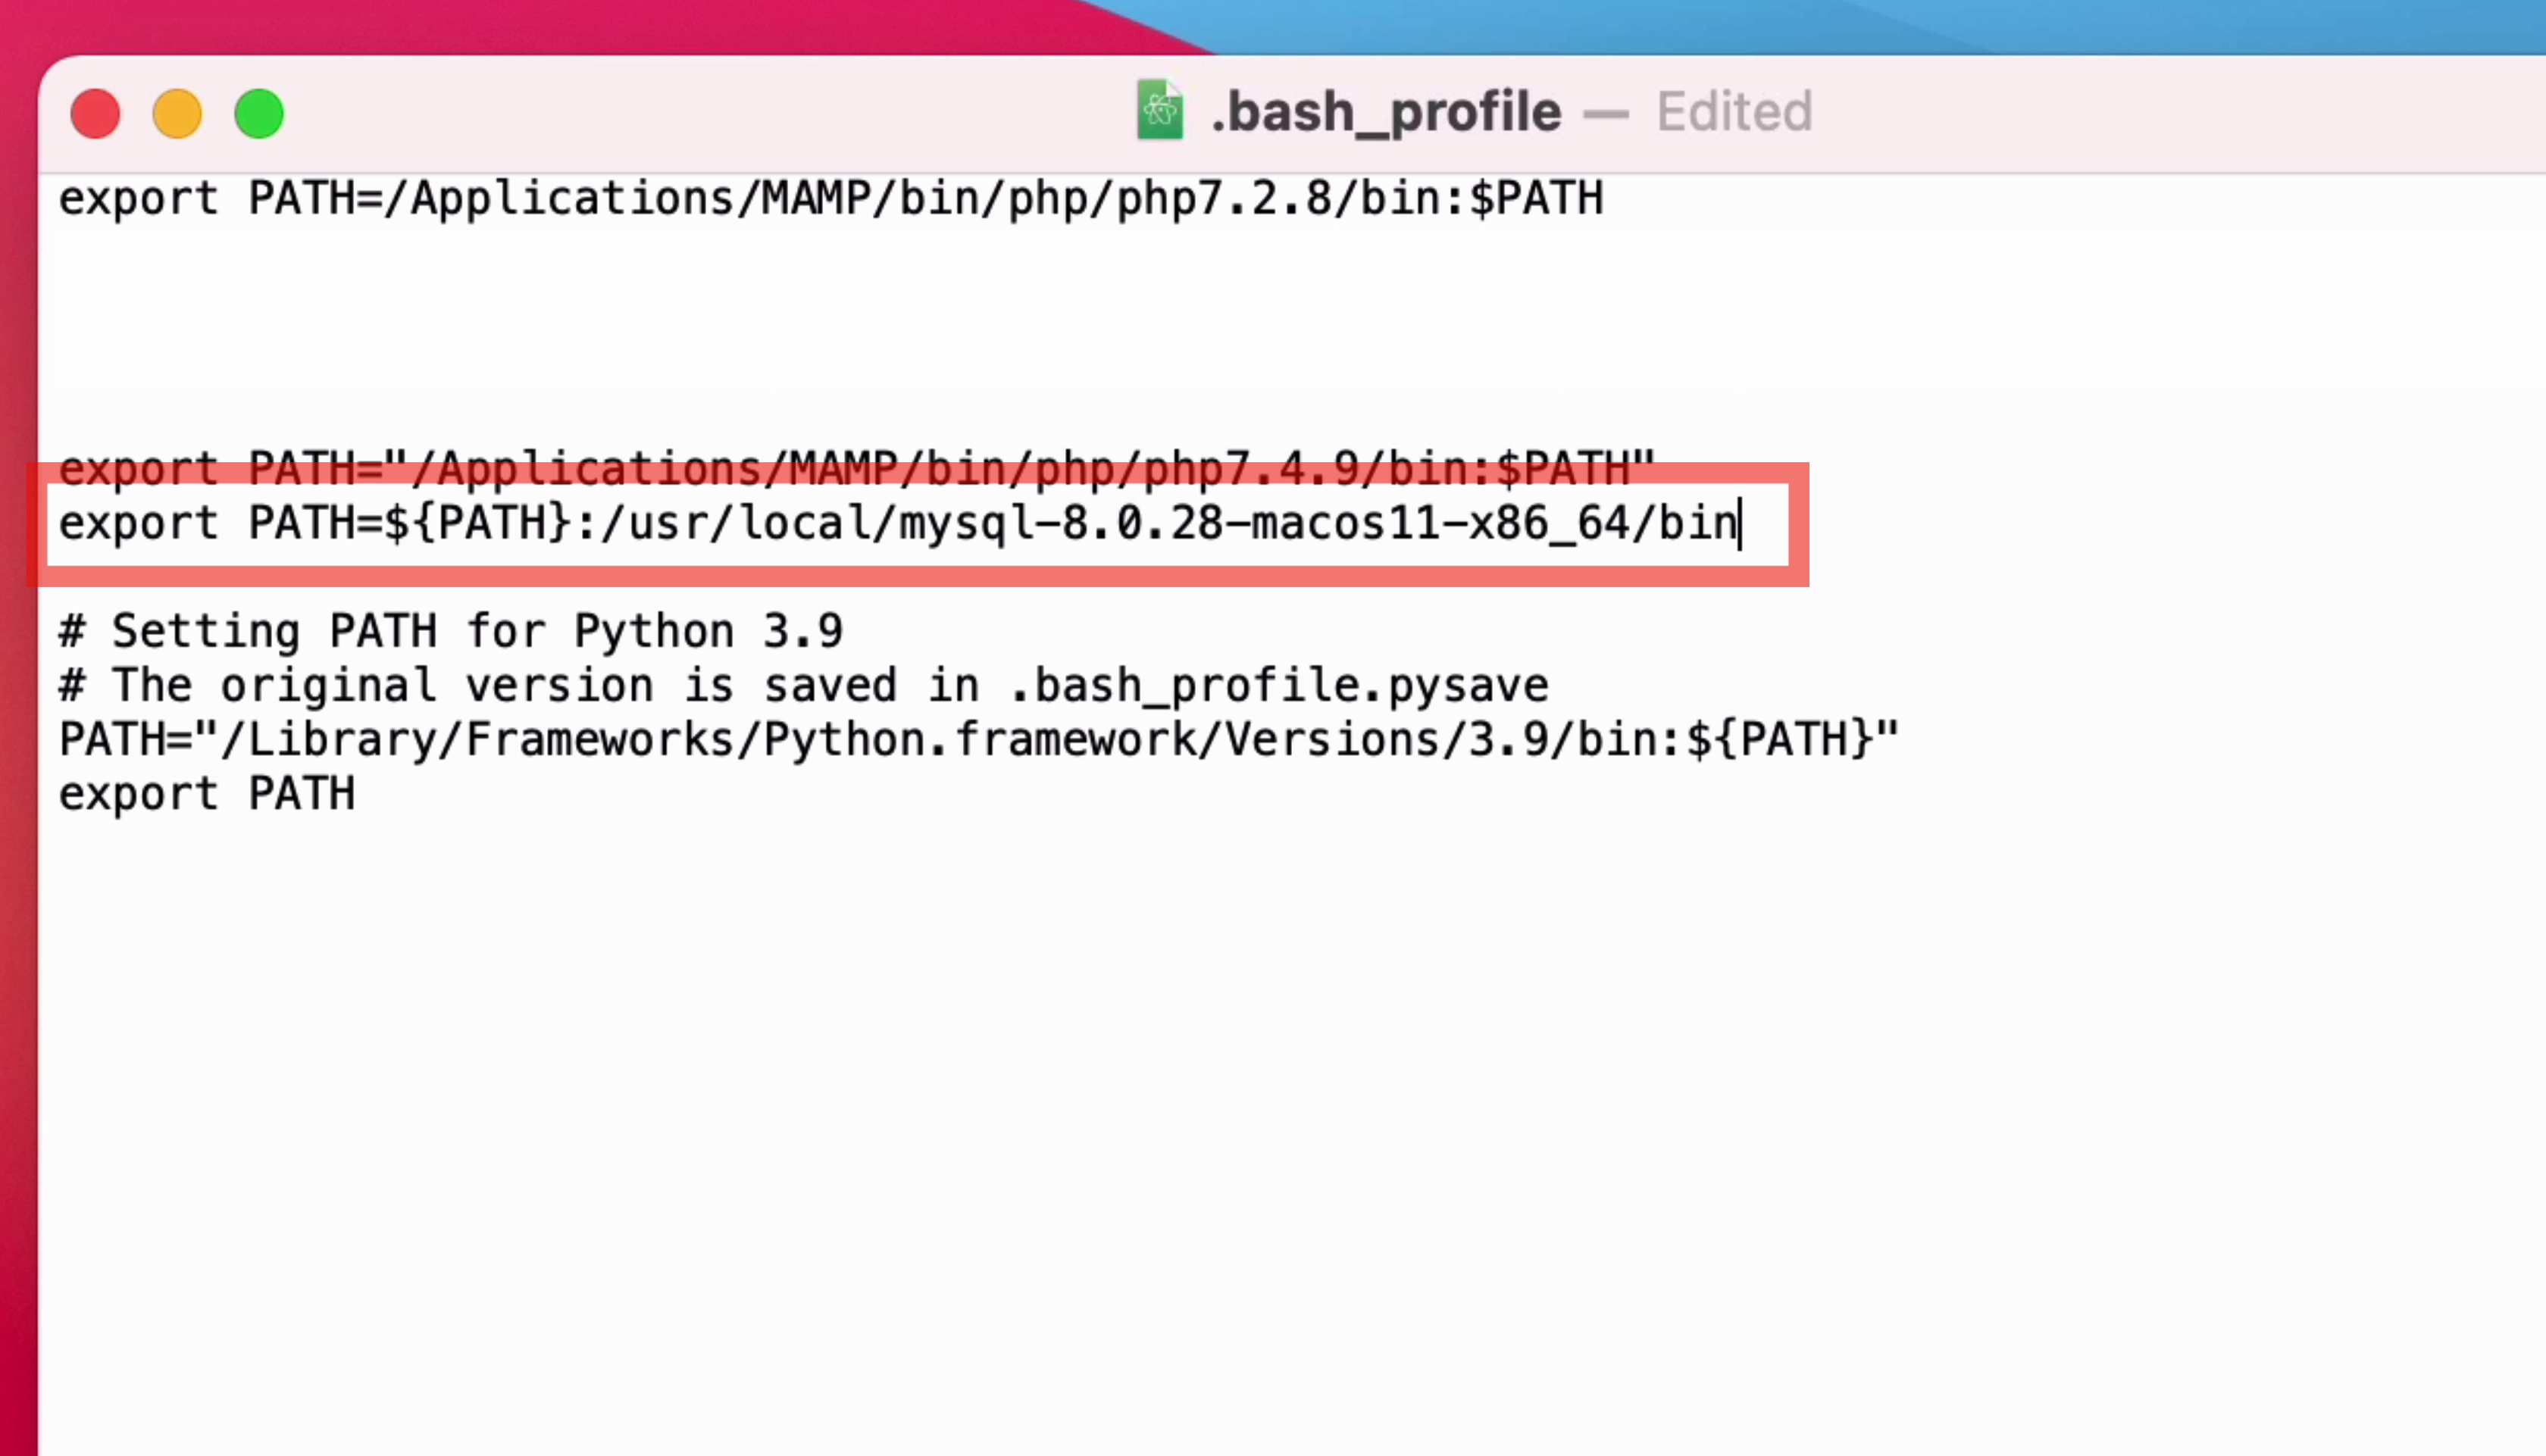
Now, save the file, and close it.
Then, exit and restart the Terminal.
Connect to MySQL Again
You should now be able to try the same MySQL command as before:
1mysql -u root -p
Once you run this, you’ll be asked to enter the password. This is the password for the root account which we entered when installing MySQL.
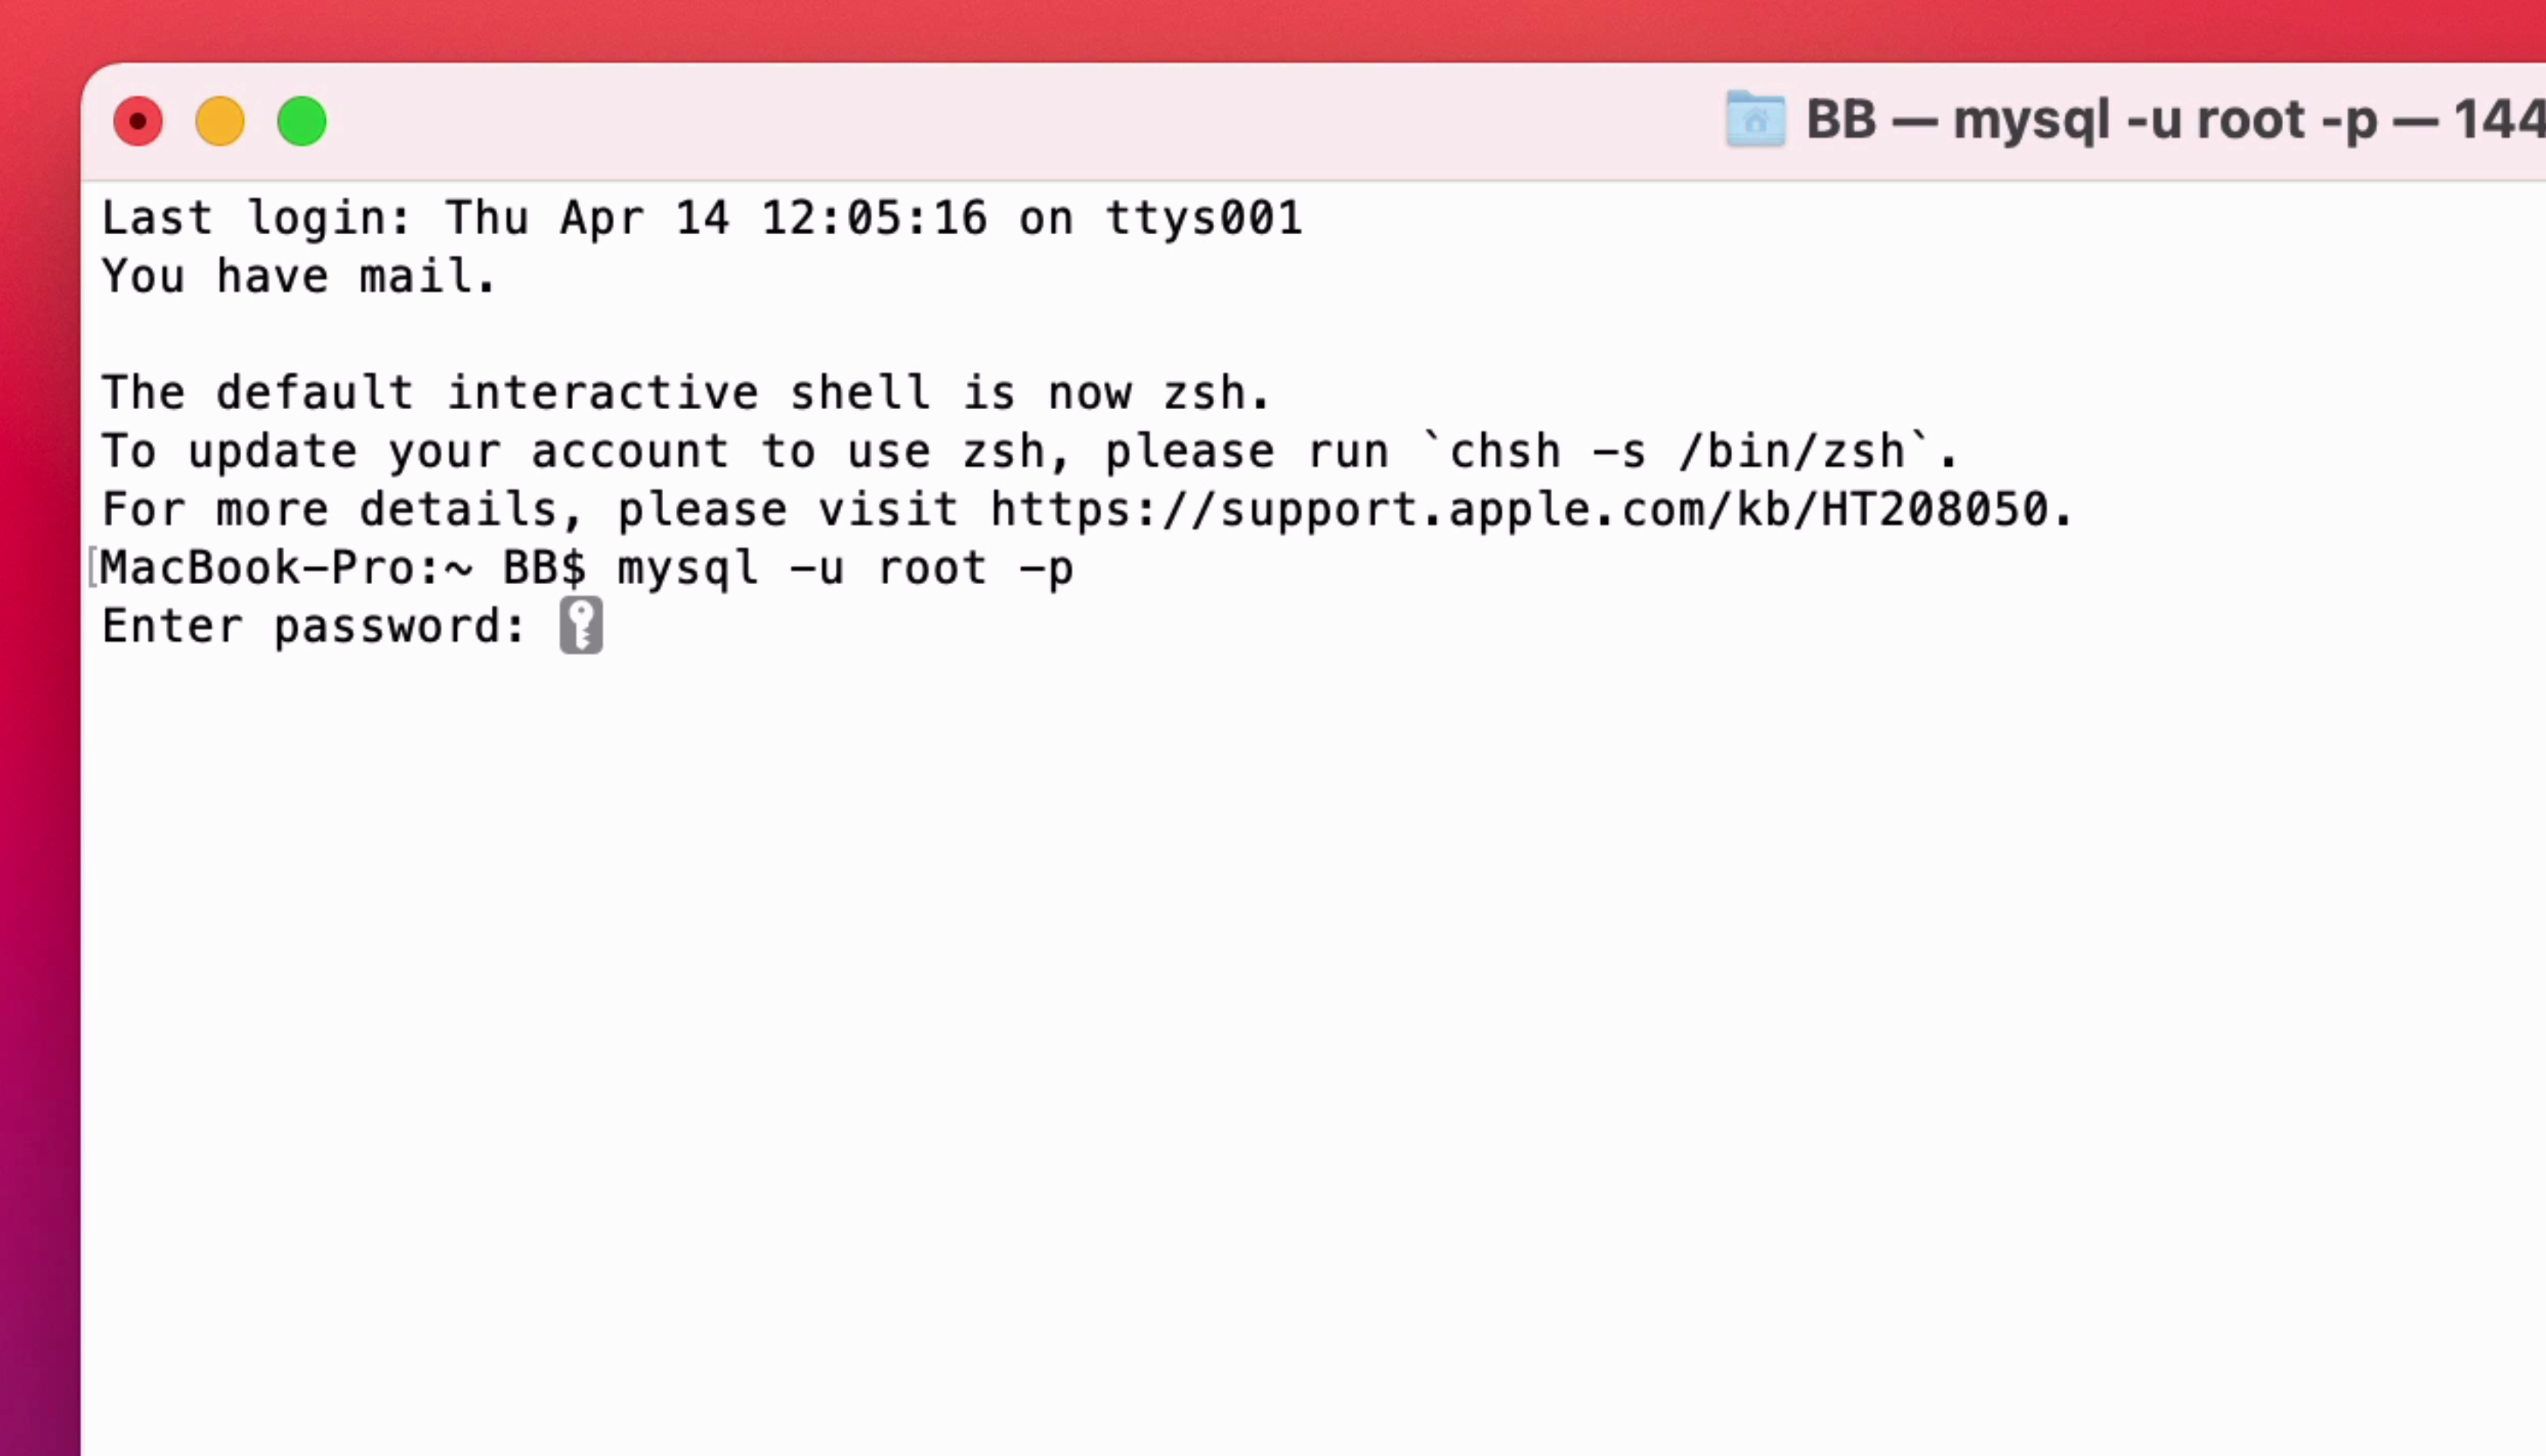
So, enter the password and press enter.
You’ll then see the welcome message. The prompt will change to a MySQL prompt.
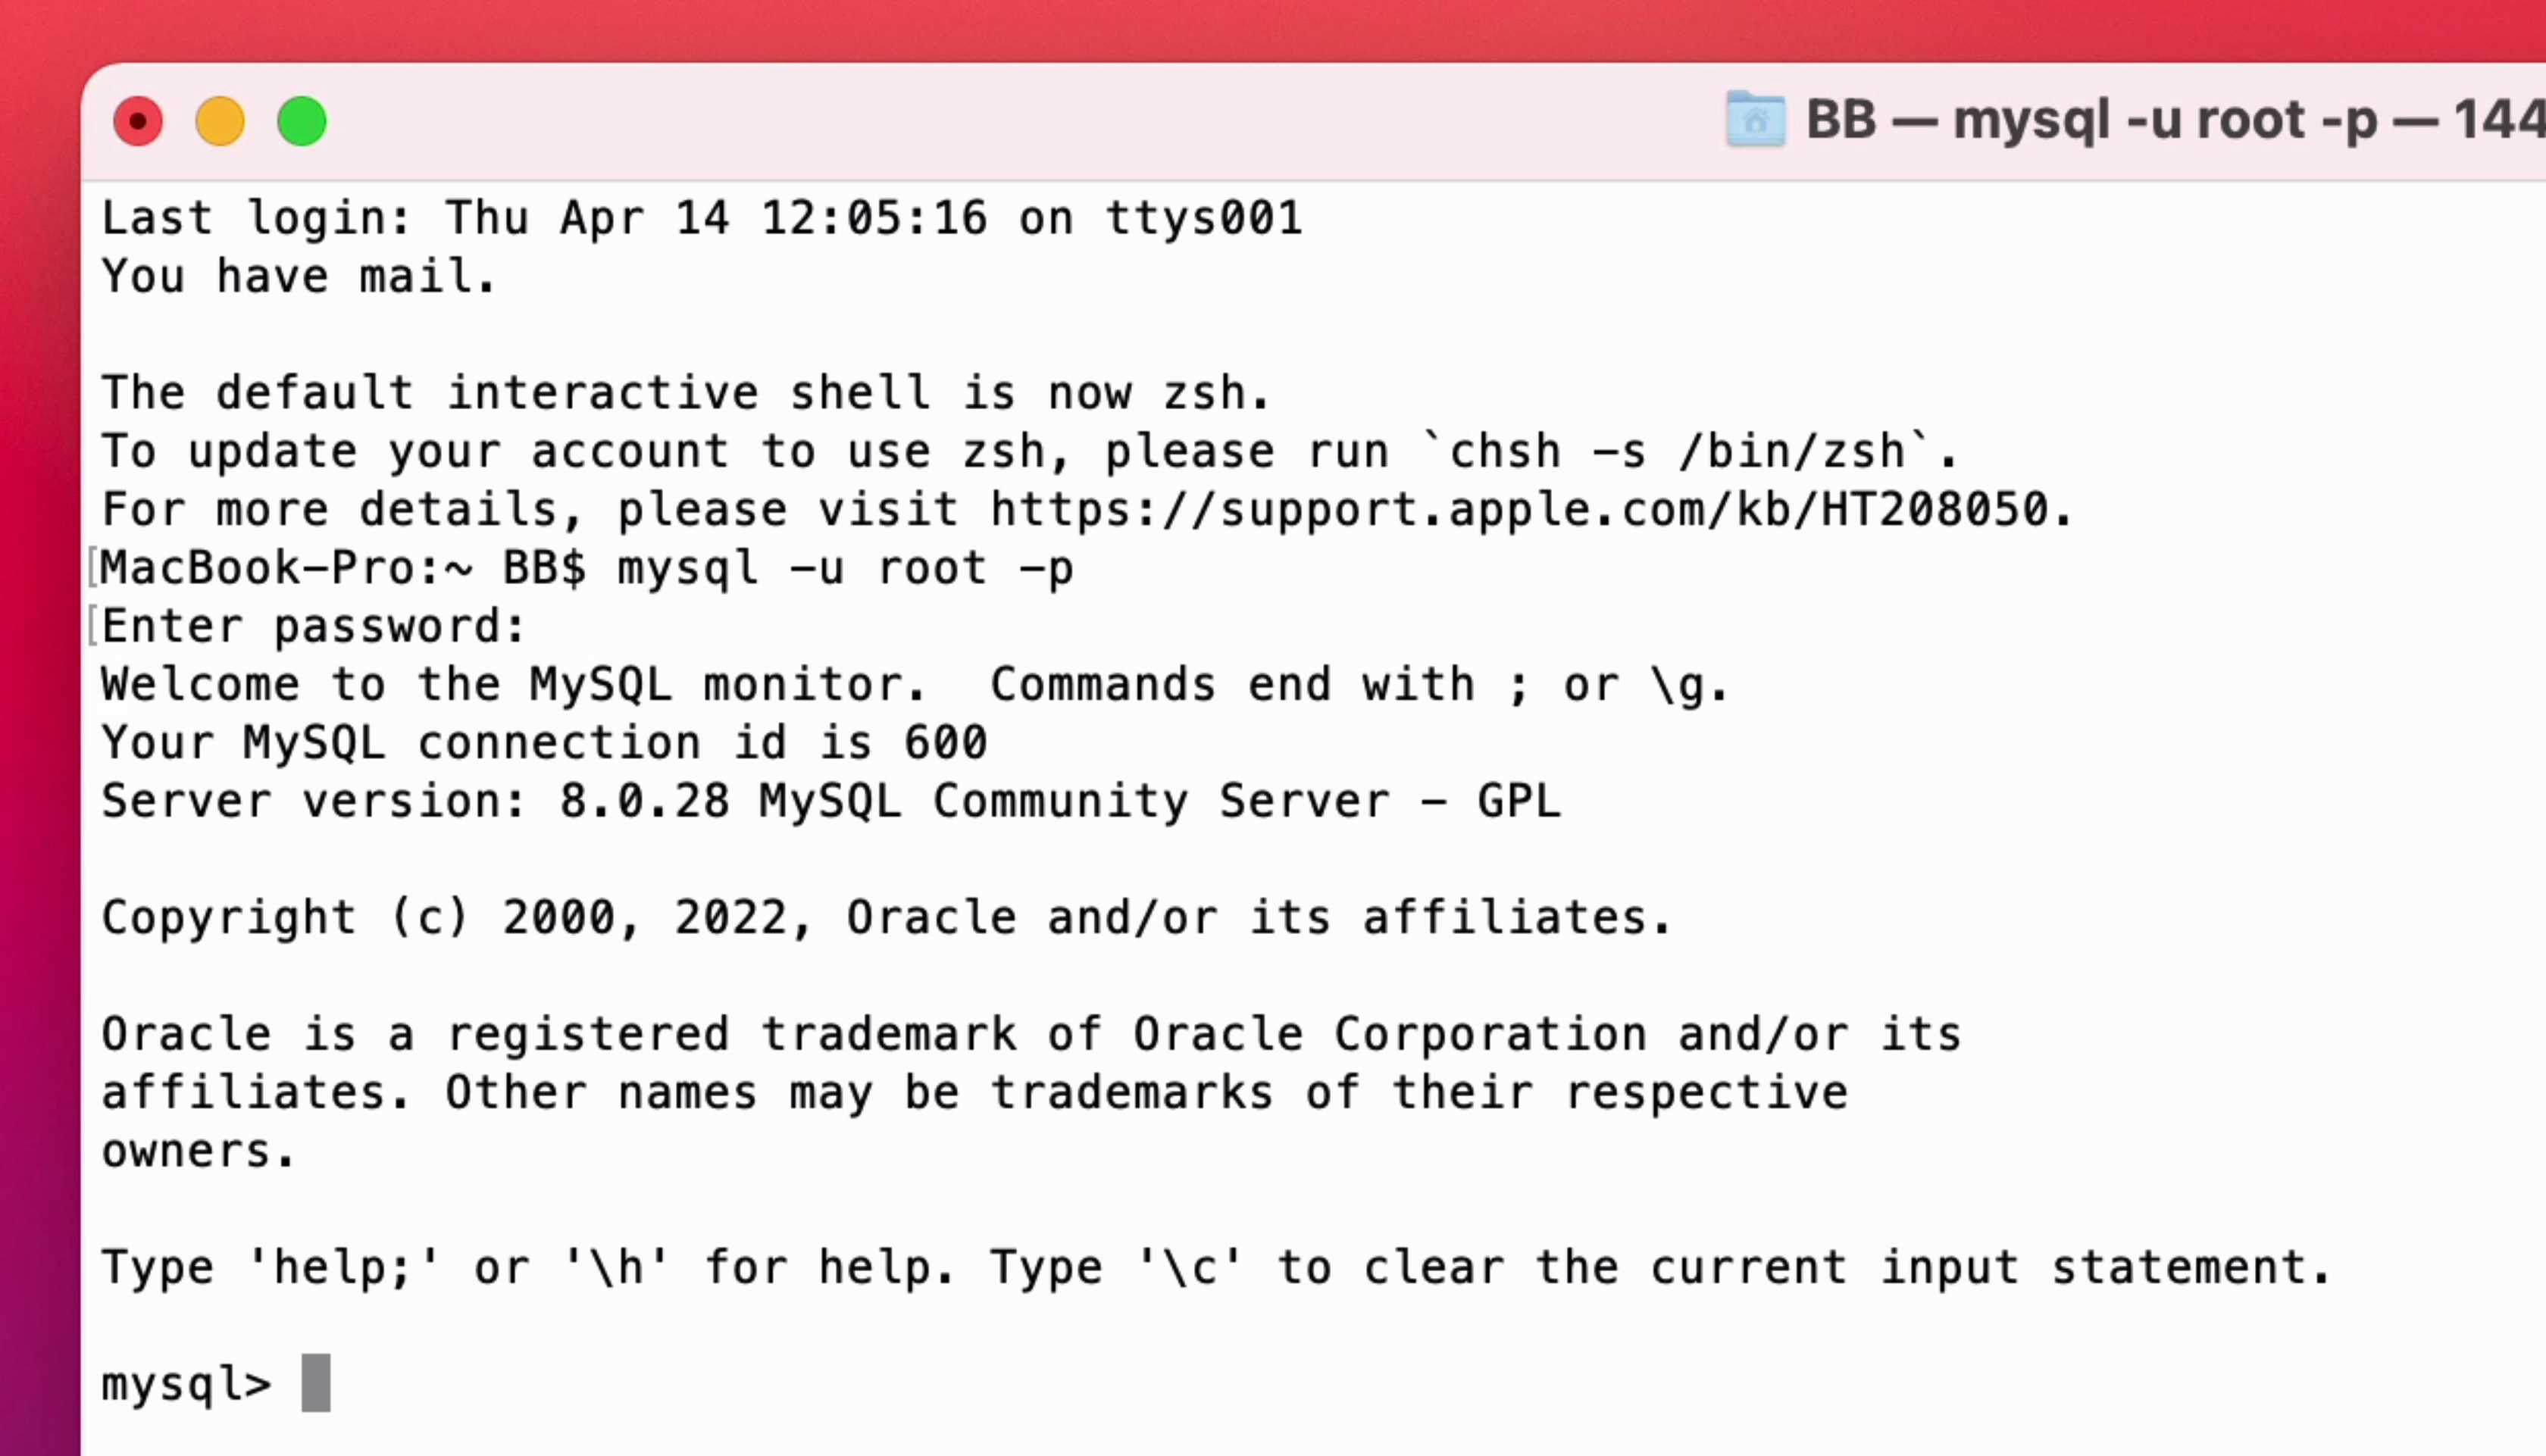
You can now run SQL on the MySQL server. We’ll just run a simple statement to see that it’s OK. We’ll run the command “show databases;” with a semicolon at the end, to see what databases exist.
When we press enter to run it, we’ll see a list of a few databases that come with MySQL.
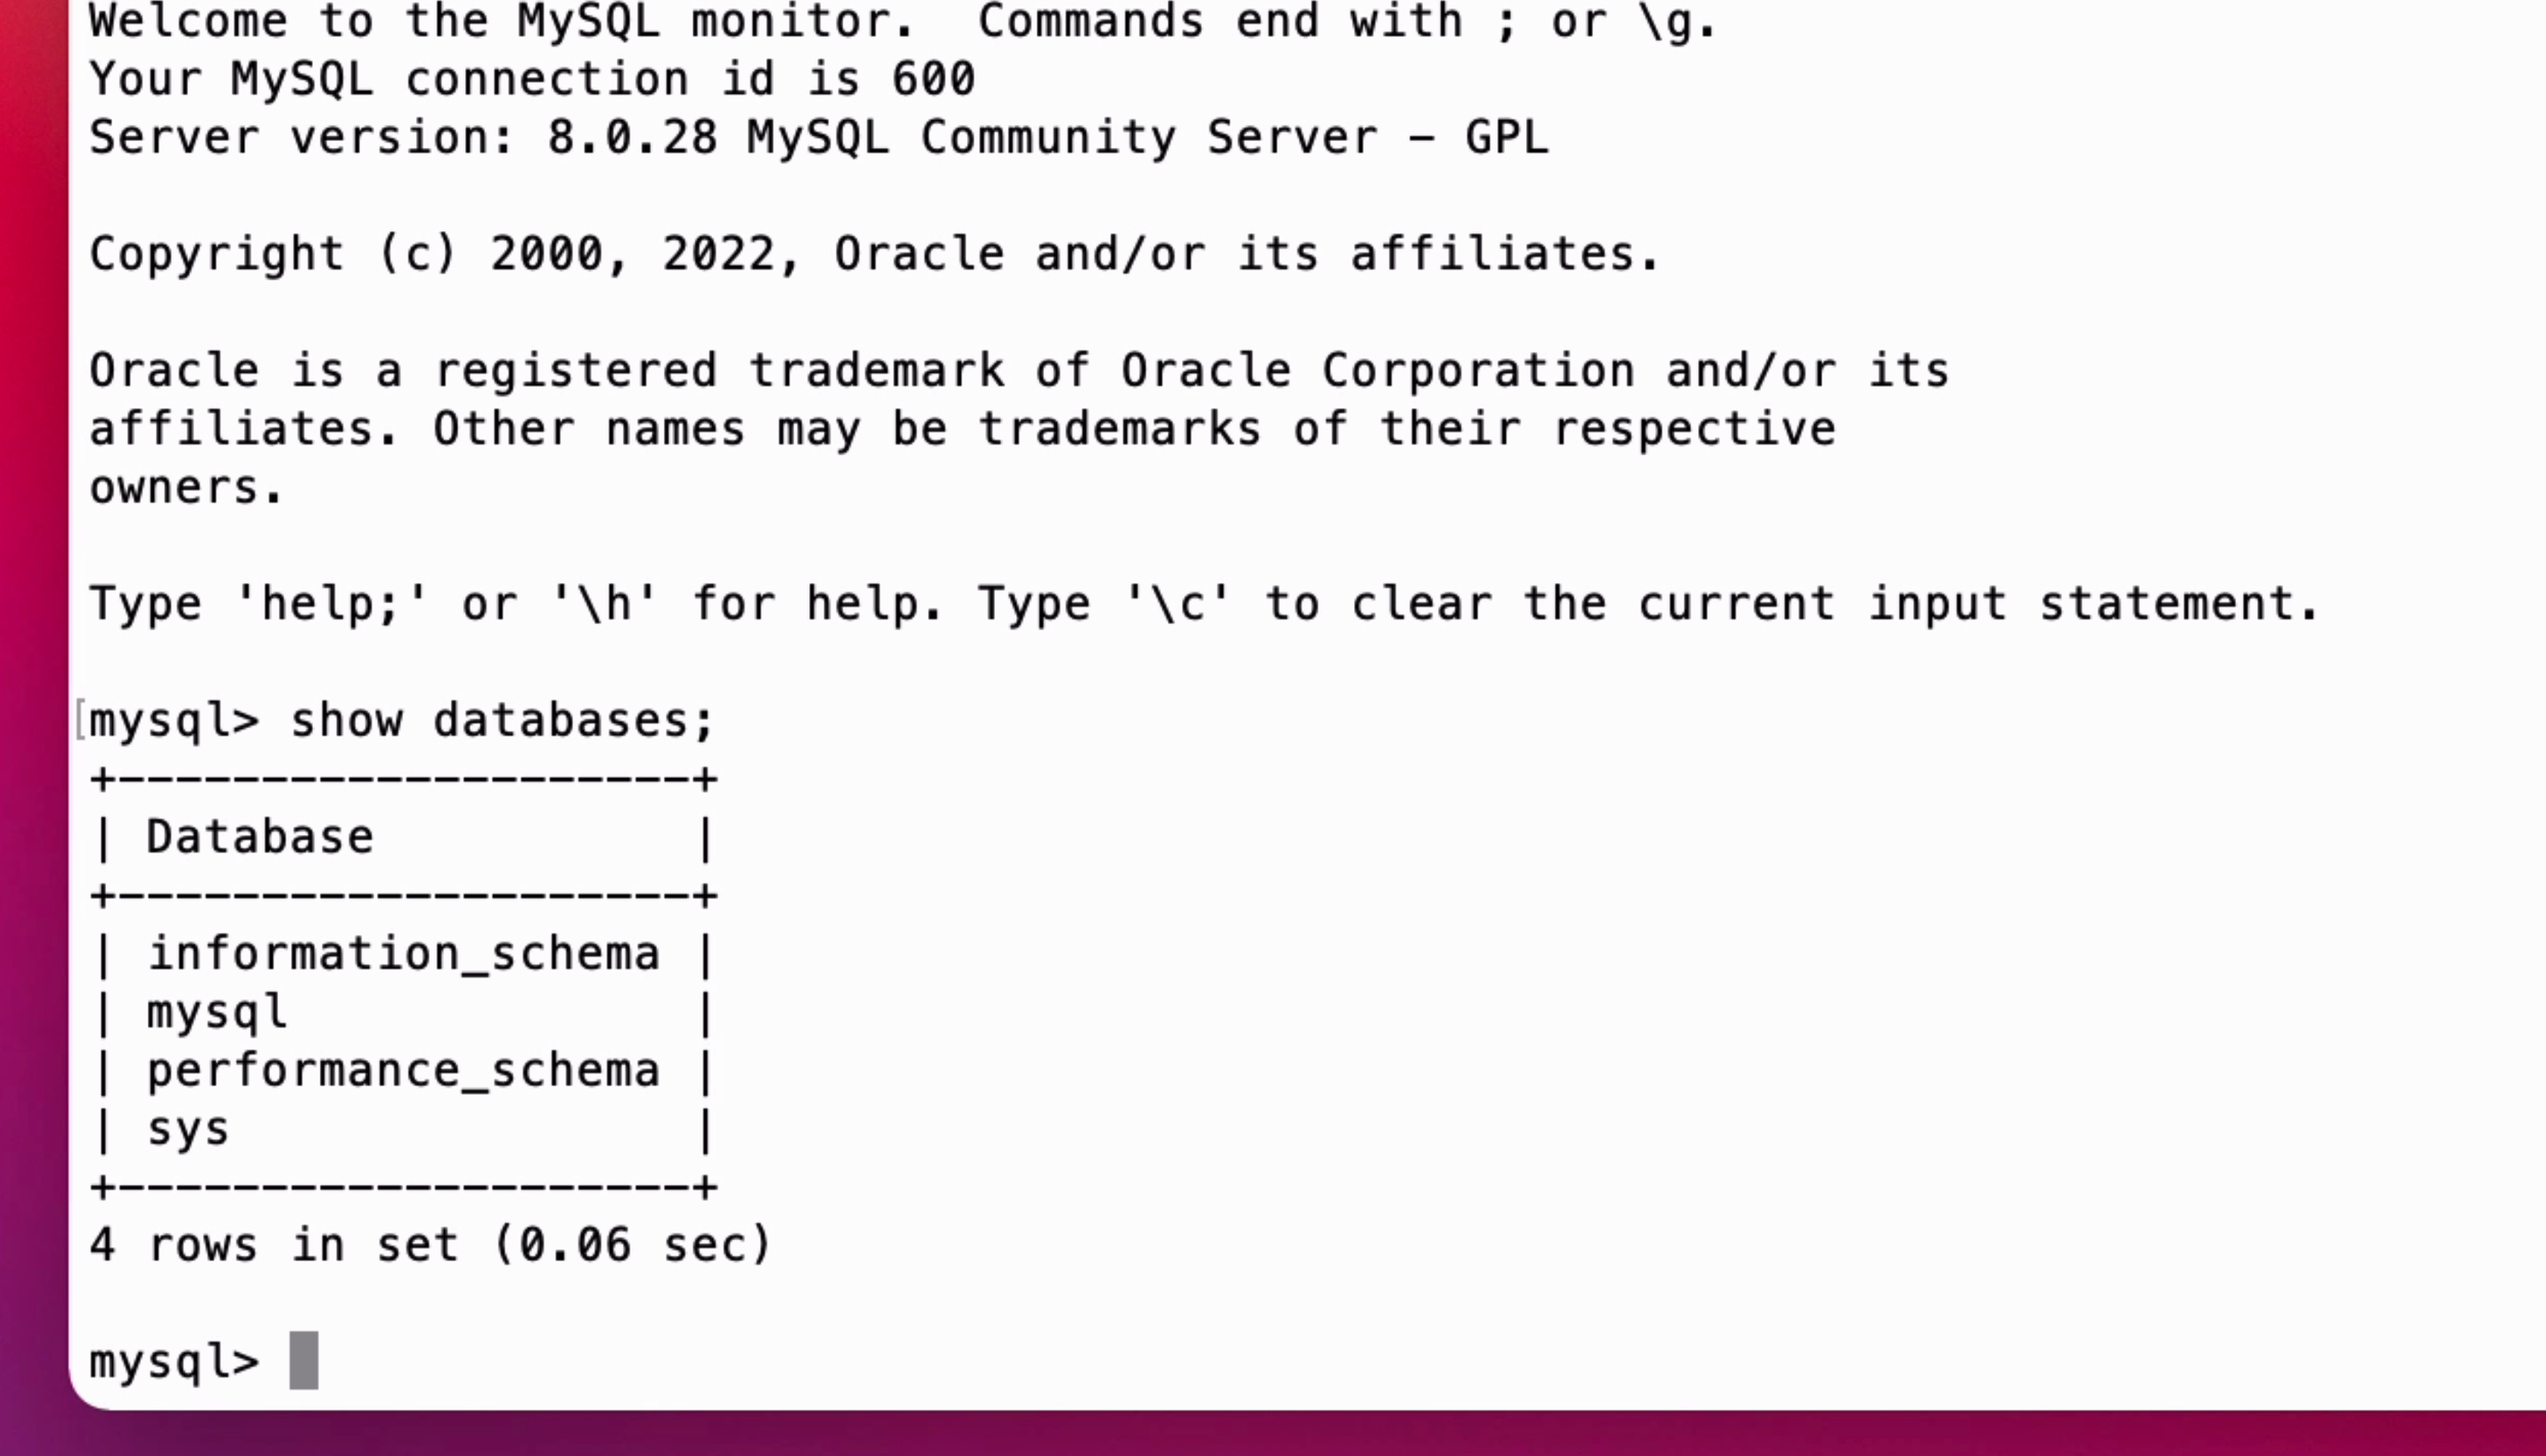
So we can see it all looks OK.
Type exit and press enter to exit the MySQL prompt and return to the Terminal.
So that’s how we can install MySQL on our Mac computer using the DMG file.
Now that you have MySQL installed, you can start writing SQL on the database.
To help remember all of the SQL commands you can use for MySQL, get the MySQL Cheat Sheet here: